
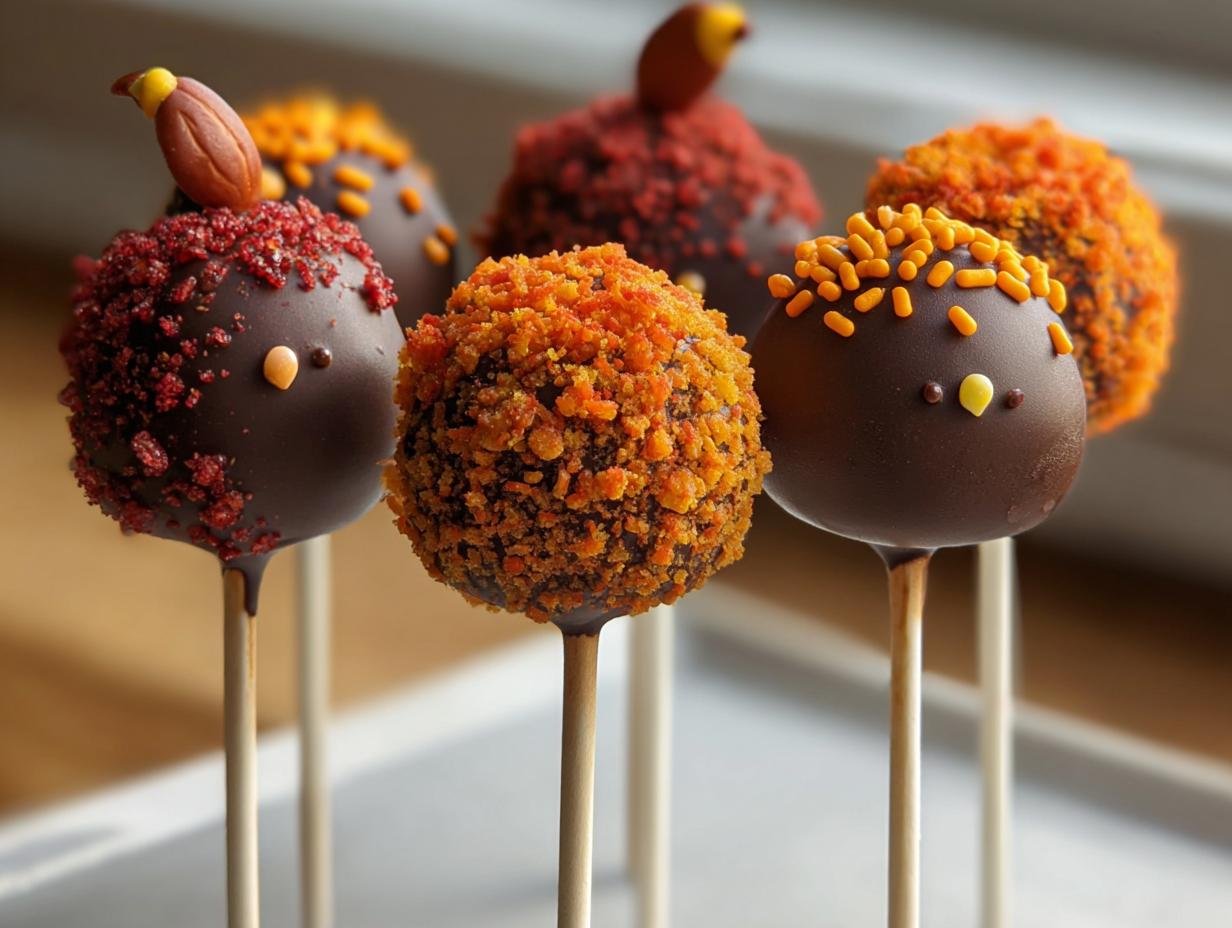
When it comes to Thanksgiving, my favorite part is always the dessert table, but honestly, who has time for four different pies after all that turkey? That’s why I make sure these easy, festive Thanksgiving Cake Pops are on the menu every year. Forget fussy layers or complicated assembly!
These little bites are pure holiday magic wrapped in chocolate. They are the perfect grab-and-go treat for a crowd—whether you’re sending leftovers home with guests or need something cute for the kids’ table. They look so wonderfully autumnal, but the secret is they start with a simple box mix. Trust me, simplifying the holiday baking means more time enjoying the day, and these cake pops deliver maximum festive flavor with minimum fuss.
Why You Will Love These Thanksgiving Cake Pops
Honestly, these are my secret weapon for a stress-free holiday dessert table. They look super fancy, but they are so simple to put together. You should absolutely try them!
- They use a shortcut base, so you save tons of time over baking a full cake.
- You can make the cake balls completely ahead of time and store them chillingly until you’re ready to dip.
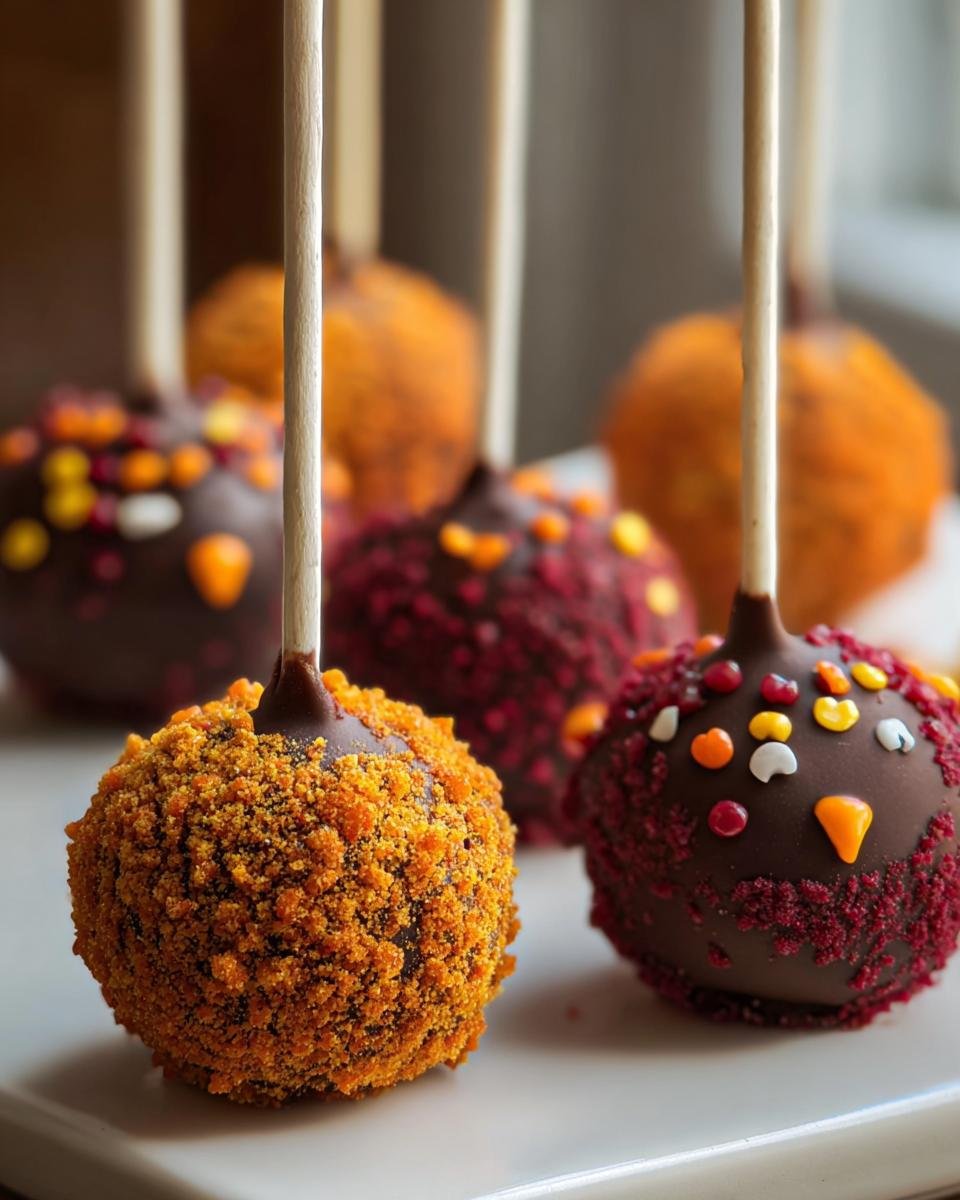
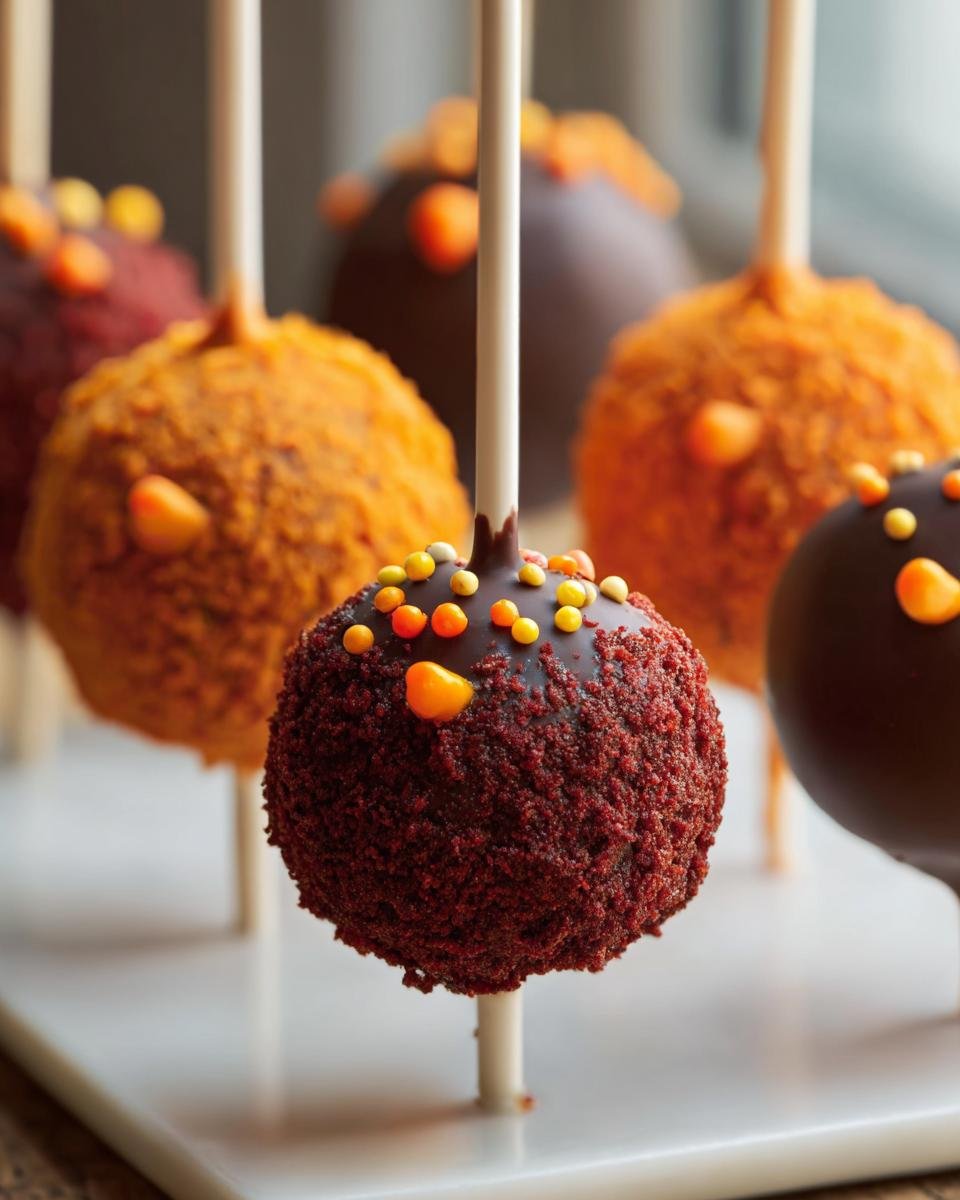
- The decorations are perfectly seasonal—think orange, yellow, and brown sprinkles that scream autumn!
- They’re portion-controlled, which is great for people grazing throughout the long afternoon. If you need more make-ahead ideas, you should check out my recipe for no-bake pumpkin bites too!
Essential Ingredients for Perfect Thanksgiving Cake Pops
Getting the flavor right in your cake pops means starting with great foundations. We aren’t making everything from scratch here—that’s the beauty of this recipe—but we need the right components to build that perfect little ball. And listen, when it comes to the coating, don’t skimp! The chocolate you choose makes or breaks the final texture. You want something that melts smooth and sets firm, so quality matters here.
When you’re looking to add more autumnal flavor, I sometimes swap the base cake mix for pumpkin spice if I can find a good one, but the classic yellow cake works beautifully as a blank canvas for all those fall decorations you plan on adding. If you’re looking for other great baked goods for your table, you have to try my pumpkin bread with maple glaze!
For the Cake Base
This part is ridiculously easy. We just need the main dry ingredients handled, and then we mix in the frosting to turn it into that dough consistency we need.
- One box of Yellow cake mix—and remember, you still need to add whatever else the box tells you to use (eggs, oil, water, etc.).
- One 16 oz can of Chocolate frosting. Seriously, use the whole can!
For Dipping and Decorating Your Thanksgiving Cake Pops
This is where we get festive! The chocolate wafers are key because they set up harder than standard melting chocolate chips, which is what we need to keep those pops from melting in your hand.
- Twelve ounces of White chocolate melting wafers or candy melts. Make sure they are melts—they are designed for this!
- About one teaspoon of Vegetable oil; this is only optional, but it’s a secret weapon if your chocolate seems too thick to work with.
- Assorted fall colored sprinkles or maybe some edible markers if you want to draw tiny turkeys!
Equipment Needed for Making Thanksgiving Cake Pops
You don’t need a ton of fancy gear for these treats, which is another bonus! Most of this stuff is probably already lurking in your kitchen cabinets right now. For the cake mixing, a standard mixing bowl is perfect. You’ll need a baking sheet lined with parchment paper to hold the little balls while they chill out in the fridge.
The absolute must-haves? Cake pop sticks, obviously, and make sure you grab a Styrofoam block or a dedicated cake pop stand. Seriously, that Styrofoam block is crucial—it holds those freshly dipped pops vertical while the chocolate sets up hard. Otherwise, you end up with chocolate puddles instead of cute little spheres of joy! If you make lots of snacks, you might also like checking out my no-bake protein balls recipe using similar chilling techniques.
Step-by-Step Guide to Amazing Thanksgiving Cake Pops
Okay, this is the fun part where everything comes together! Don’t rush these steps, especially the cooling parts. Nobody likes warm cake dough trying to seep out the sides of their chocolate coating. We are aiming for perfection here, so take your time! If you are looking for other great recipes to make ahead, be sure to check out my fantastic low-sugar applesauce oatmeal cookies.
Baking and Crumbing the Cake
First up, let’s get that cake baked. Just follow the directions on your yellow cake mix box for preparing and baking it in a 9×13 inch pan. Once it’s out of the oven, you absolutely have to let it cool completely—I mean totally cool, maybe even pop it in the fridge for 20 minutes to speed things up if you’re impatient like me. Once it’s cool, take your clean hands and just crumble the entire thing right into a big mixing bowl. We want fine crumbs, so really work through any bigger clumps left over.
Forming and Chilling the Cake Balls
Now for the magic merger! Dump that whole can of chocolate frosting right on top of your crumbs. You have to mix this part. Sometimes I use a sturdy spoon, but usually, my hands work best to really incorporate everything evenly. You’ll know you’ve hit the sweet spot when the mixture comes together into a dough that feels just like playdough—firm enough that you can squeeze a piece and it holds its shape perfectly without crumbling or smearing everywhere. That’s the texture we need so they don’t fall apart when dipped!
Roll those balls gently into about 1 to 1.5 inches wide and place them on that parchment-lined sheet we talked about. Now, do not skip this next step: pop that tray into the refrigerator for at least 30 minutes. Chilling the cake balls is non-negotiable; it ensures they stay firm while you melt your chocolate.
Dipping and Decorating Your Thanksgiving Cake Pops
While the balls chill, melt your white chocolate wafers according to the package directions. If it looks super thick once melted—too chunky for dipping—stir in that optional vegetable oil, just a drop or two at a time, until it flows nicely.
Time to dip! Take a cake pop stick and dip the very tip just into the melted chocolate. Then, carefully insert that chocolate-dipped little bit about halfway into one of those chilled cake balls. This glues the stick in so your pop doesn’t slide off later! Now, dip the whole ball into the chocolate, spinning it around. Once it’s fully coated, gently tap the stick against the side of the bowl to let all that excess chocolate drip off. You don’t want chocolate puddles on the bottom of your pops! Immediately stick the pop into your Styrofoam block so it stands straight up. While the coating is still wet, shower it with your fall sprinkles or use those edible markers to draw a tiny little cornucopia—whatever makes you happy!

Let them sit completely undisturbed until that chocolate shell is rock hard. Then they’re ready to serve up!
Tips for Success When Making Thanksgiving Cake Pops
It’s all about the technique once you get those balls chilled and the chocolate ready. Don’t get discouraged if your first one looks a little messy; that’s why we have the Styrofoam block! The biggest mistake people make is rushing the chill time. If the cake ball is even slightly warm, the chocolate coating will immediately crack as it tries to set, or worse, the ball will just melt right into the chocolate.
Don’t stick the cake pop stick in dry, though! That little dip of chocolate first acts like glue—it anchors the stick firmly so you won’t have pops falling off halfway through the party. If your chocolate is getting too thick while you’re working, just pop it back into the microwave for 10 seconds, not more. Think about adding a bit of pumpkin spice to the cake crumbs instead of plain yellow cake for an extra kick of fall flavor; it works beautifully with the chocolate coating!
Storage and Reheating Instructions for Your Thanksgiving Cake Pops
These little holiday treats are surprisingly resilient, but storage is important so they look great when it’s time to serve them. Generally, cake pops do really well at room temperature, which is fantastic news when you’re trying to keep your fridge space clear for all that leftover turkey!
You can keep finished, dipped cake pops stored in an airtight container at room temperature for up to three days. They should be kept somewhere cool, away from any direct sunlight or heat—remember, that chocolate shell is our main defense!
If you need them to last a little longer—maybe you’re prepping for holiday parties happening all week—you can certainly refrigerate them. Just make sure they are in a truly airtight container before they go in. When you bring them out of the cold, let them sit on the counter for about 15 to 20 minutes before anyone eats them. This lets the chocolate soften just enough so it melts in your mouth instead of cracking when you bite into it. If you’re looking for more make-ahead recipes, my recipe for cookie dough fat bombs is another great option for prepping ahead of time!
And trust me, you won’t have any leftovers next week, but if you do, they don’t need reheating—just bringing them back up to room temp is all they need!
Frequently Asked Questions About These Thanksgiving Cake Pops
FAQ time! I get tons of questions when people first try making cake pops, especially around the holidays when everyone is busy. It’s totally normal to have a few questions!
Can I make the cake balls ahead of time for my Thanksgiving Cake Pops?
Oh yes, absolutely! Making the cake balls ahead of time is honestly the best way to break up the work, especially when you’re busy preparing a big Thanksgiving meal. Once you mix the cake crumbs and frosting into that firm dough, roll them into balls, and place them on the parchment paper, they are ready for the fridge. Store those little un-dipped balls airtight for up to three days before you plan on dipping them. They firm up nicely, which actually makes dipping them later even easier!
What is the best way to get a smooth coating on my holiday treat?
Smoothness is all about temperature control. You need that chocolate melted thoroughly but not scorching hot. If it’s too hot, it melts the chilled cake ball instantly and you get cracks when it sets. Melt it low and slow!
If you see it thickening up on you while you’re working through the batch, don’t panic. Just microwave it for 10 seconds at a time to bring the temperature back up just slightly. That tiny bit of oil I mentioned in the recipe is fantastic for getting a lovely, liquid texture that gives you that perfectly glossy finish on your fall dessert. A smooth dip makes for a beautiful final presentation for your holiday treat!

Estimated Nutritional Breakdown of Thanksgiving Cake Pops
Okay, so while these are definitely a treat and not an everyday snack—we’re using cake mix and frosting, after all!—it’s good to have a general idea of what you’re serving. Since this recipe is made from a mix and store-bought frosting, these numbers are certainly an estimate based on standard ingredient assumptions. But wow, for about 250 calories, you get a beautiful, portion-controlled holiday bite!
Here’s a quick look at what each of these delightful Thanksgiving Cake Pops might pack in:
- Calories: Roughly 250
- Fat: About 14g
- Carbohydrates: Around 30g
- Protein: A small boost at 3g
- Sugar: Approximately 20g
Enjoy them knowing you saved yourself hours of baking time while still serving something perfectly festive!
Share Your Festive Thanksgiving Cake Pops Creations
I would absolutely love to see how your Thanksgiving Cake Pops turned out! Seriously, the decorating is half the fun, and I get such a kick out of seeing everyone’s creative takes on fall colors and designs. Did you use tiny edible acorns? Did you manage perfect little swirls? Tell me everything!
If you made these for your holiday table, please jump down below and leave a star rating for the recipe. It helps other busy holiday chefs find this simple treat when they need it most. And if something went a little sideways with the chocolate—hey, it happens to the best of us!—share that too so we can troubleshoot for next year.
If you snapped any photos of your finished pops alongside your pies and turkey, tag me on social media! Seeing my recipes pop up at everyone’s family gatherings is truly the best part of doing this. Knowing these simple Thanksgiving Cake Pops helped make somebody’s holiday a little sweeter and a lot less stressful? That’s why I bake!

Thanksgiving Cake Pops
Ingredients
Equipment
Method
- Prepare the cake according to the box directions, using the ingredients listed on the box. Bake in a 9×13 inch pan.
- Let the cake cool completely. Once cool, crumble the entire cake into fine crumbs in a large mixing bowl.
- Add the entire can of frosting to the cake crumbs. Mix well with your hands or a sturdy spoon until a dough forms that holds its shape when squeezed.
- Roll the mixture into small balls, about 1 to 1.5 inches in diameter. Place the balls on a baking sheet lined with parchment paper.
- Chill the cake balls in the refrigerator for at least 30 minutes. This helps them hold their shape when dipping.
- Melt the white chocolate wafers according to package directions. If the chocolate is too thick, stir in the vegetable oil one drop at a time until it reaches a smooth, dipping consistency.
- Dip the tip of a cake pop stick into the melted chocolate, then insert the stick about halfway into a chilled cake ball. Dip the entire ball into the melted chocolate, rotating to coat completely. Tap the stick gently against the side of the bowl to remove excess chocolate.
- Immediately insert the stick into a Styrofoam block or stand to hold the pop upright while the chocolate sets. Apply sprinkles or use edible markers for decoration before the chocolate hardens.
- Allow the chocolate coating to set completely before serving or storing.