

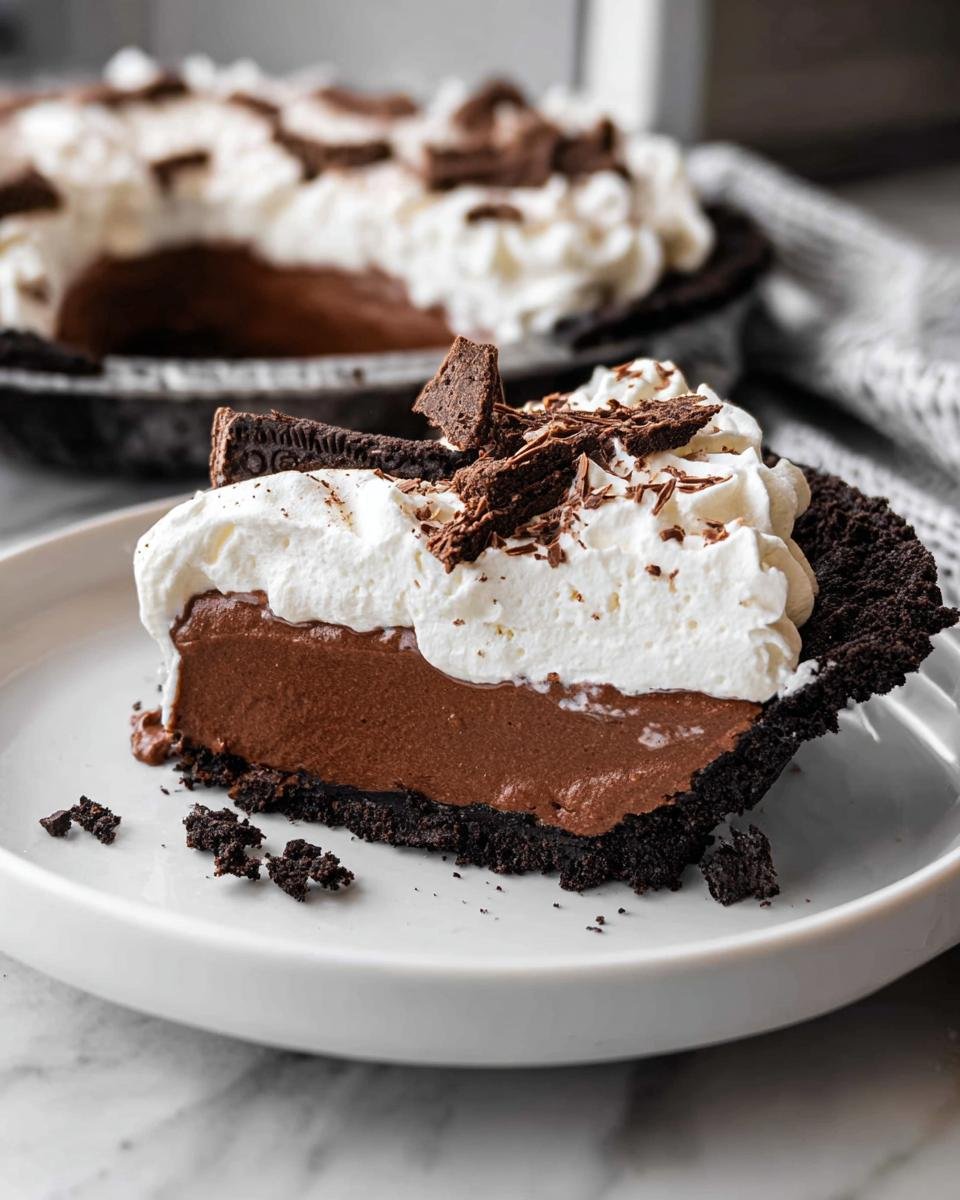
If you are seriously craving that deep, decadent chocolate flavor without wanting to spend all day in the kitchen, then I have the perfect solution for you! We are talking about the ultimate, dependable Chocolate Cream Pie. Forget those flimsy boxed mixes; this recipe delivers a lush, rich filling nestled in a crisp, homemade Oreo cookie crust, all topped with dreamy, billowy cream. I first perfected this pie for a Sunday potluck after my mixer quit mid-whip; I chilled the bowl, whisked everything by hand—and trust me, the cream bloomed into the most gorgeous soft peaks! That little catastrophe taught me two things: patience totally transforms the texture, and simple techniques can absolutely deliver bakery-level results at home. Busy host? This is your new secret weapon because it’s incredibly reliable.
Why This Chocolate Cream Pie Recipe Works for Everyone
We all love a showstopper dessert, but honestly, who has the time for complicated steps? That’s what I love most about this Chocolate Cream Pie—it tastes like it took hours, but it uses ingredients you probably already have on hand. It truly is foolproof!
This recipe is designed for real life. Check out why it flies off the party table every single time:
- It’s practically no-bake (the crust gets a quick nap in the oven, that’s it!).
- You can make the entire filling a day ahead, which is a lifesaver for busy hosts. Seriously, prep ahead!
- The ingredients are simple supermarket staples—no fancy specialty shops needed for this crowd-pleaser.
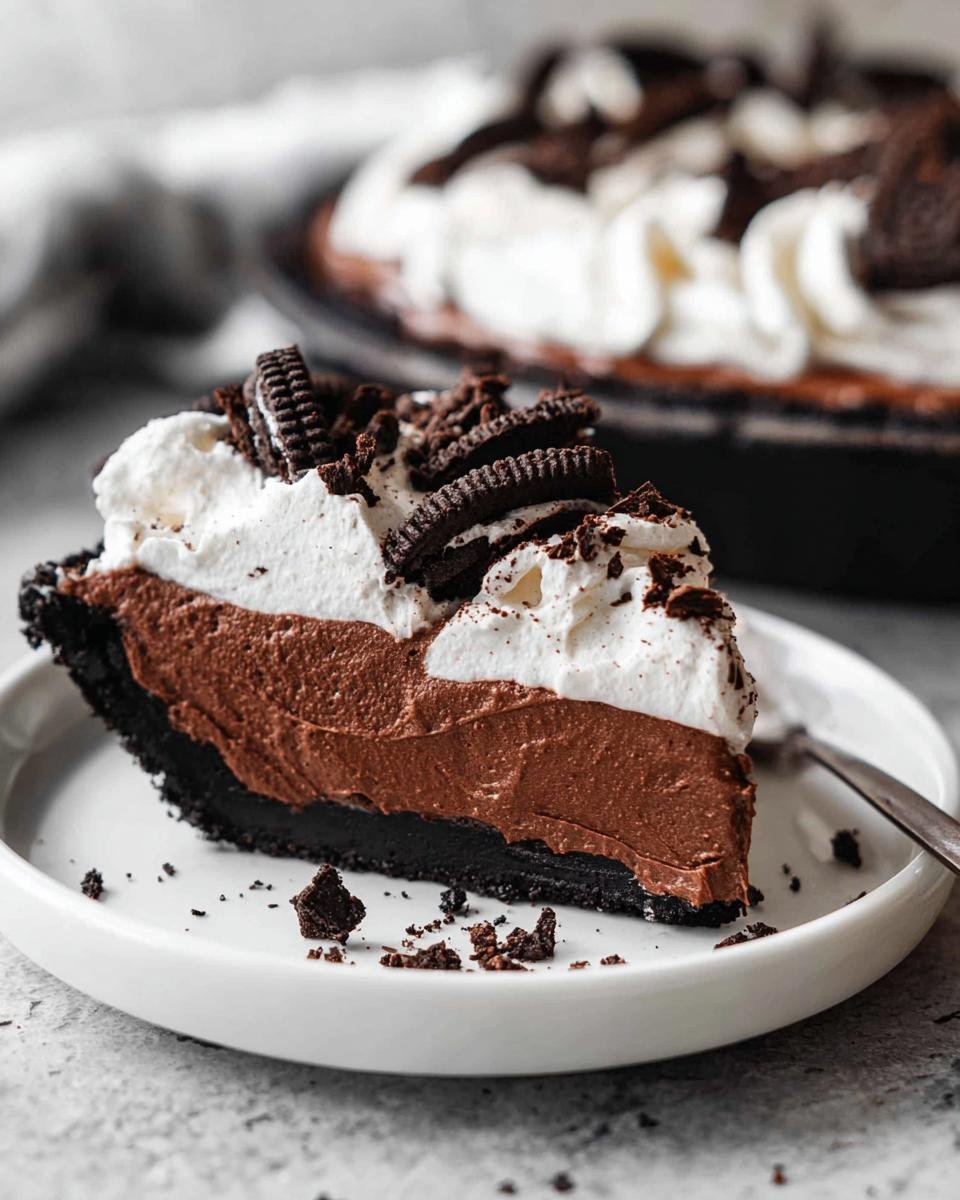
- The combination of crunchy Oreo with silky pudding is an undeniable winner.
Gathering Your Ingredients for the Perfect Chocolate Cream Pie
Okay, listen up! You cannot rush quality, especially when it comes to something as important as a truly great Chocolate Cream Pie. The secret to that deep, satisfying chocolate flavor isn’t some expensive gimmick; it’s about making sure the few core ingredients we use are in their best state. We need a crisp base, a rich, velvety pudding, and a cloud-like topping. Keep your heavy cream *very* cold until you’re ready to whip—that makes all the difference! You’ll want to check out some of my other great tips for keeping things streamlined in the kitchen.
You’ll notice that the quality of the chunky stuff really shines through. If you can spring for good quality semi-sweet chocolate instead of chips, go for it! It melts cleaner and gives the final Chocolate Cream Pie filling that professional silkiness we are aiming for. I always grab my ingredients and set them out before I start heating anything up, just like getting ready for a science experiment!
For the Oreo Pie Crust
This is the easiest part, which is why I love it. You only need two things here, and make sure that butter is good and melted:
- 24 Oreo cookies
- 5 Tablespoons butter, melted
For the Silky Chocolate Pudding Filling
These proportions are tricky, so pay close attention to the yolks and the cornstarch. It’s what builds that structure!
- 1/3 cup granulated sugar
- 2 1/2 cups whole milk
- 6 large egg yolks
- 2 Tablespoons cornstarch
- 6 Tablespoons salted butter, chopped into pieces
- 8 ounces semi-sweet chocolate, chopped
- 1 1/2 teaspoons vanilla extract
For the Homemade Whipped Topping
If you’re planning to make this topping right before serving, make sure your bowl and whisk attachment have been hanging out in the freezer for about 15 minutes. That super cold base is key for getting fantastic peaks!
- 1 cup heavy whipping cream
- 2 Tablespoons powdered sugar (or granulated sugar)
- 1 1/2 teaspoons vanilla extract
Step-by-Step Guide to Making Your Chocolate Cream Pie
This is where the magic truly happens! Don’t let the idea of making custard from scratch scare you off. Seriously, it’s mostly just whisking and watching. We need to make sure every layer sets up perfectly so your final Chocolate Cream Pie is sliceable and gorgeous. I’ve broken down the steps so you won’t miss a beat. If you are worried about time, remember the chilling time is basically hands-off!
Preparing and Baking the Oreo Crust
First things first, we get that crust ready. Crank your oven up to 350°F. Toss those Oreo crumbs and melted butter together until it looks like wet sand—you want to be able to squeeze a bit and have it hold its shape. After you press that mixture into your 9-inch pie dish, really pack it in firmly on the bottom and up the sides. Don’t be shy here; a packed crust holds up better to the moist filling!
Pop that into the oven and let it bake for about 10 to 12 minutes. You just want it smelling toasty and set. Once it comes out, let it cool completely before we add the pudding. If you pour hot filling into a warm crust, it gets soggy instantly, and we definitely don’t want that!
Cooking the Rich Chocolate Pudding Filling
Time for the silky custard! In your saucepan, whisk the sugar and milk together and set it on medium heat until you see just a hint of simmer—tiny bubbles kissing the edge. Meanwhile, in a separate bowl, whisk your egg yolks and cornstarch together until they are totally smooth; this mixture is called our slurry.
Now for the crucial part: tempering! You have to introduce the hot milk slowly to the yolks so they don’t scramble. Ladle in a few spoonfuls of the hot milk mixture into your yolks while whisking the yolks constantly. That step is non-negotiable! Once they are warmed up, slowly pour that tempered yolk mixture back into the saucepan while whisking everything constantly. Keep whisking! You must keep it moving until the mixture thickens significantly and you see those big, lazy bubbles start breaking the surface. That means it’s done boiling gently. Take it off the heat immediately.
Now whisk in your chopped chocolate pieces, the salted butter, and the vanilla until everything melts into a beautiful, uniform shine. Oh, the smell alone!
Assembling and Setting the Chocolate Cream Pie
Pour that lovely, smooth filling into your now-cool Oreo crust. Use a spatula to get every last bit! Here’s a trick my mom taught me: lay a piece of plastic wrap directly onto the surface of the pudding. This stops that dreaded skin from forming while it chills. Don’t worry about pressing it down on the sides, just cover the top smooth layer.
Slide it into the fridge. You need at least 4 to 6 hours for the filling to firm up enough to slice cleanly, but honestly, overnight is when this Chocolate Cream Pie tastes the absolute best. Don’t rush this setting time!
Finishing with Billowy Whipped Topping
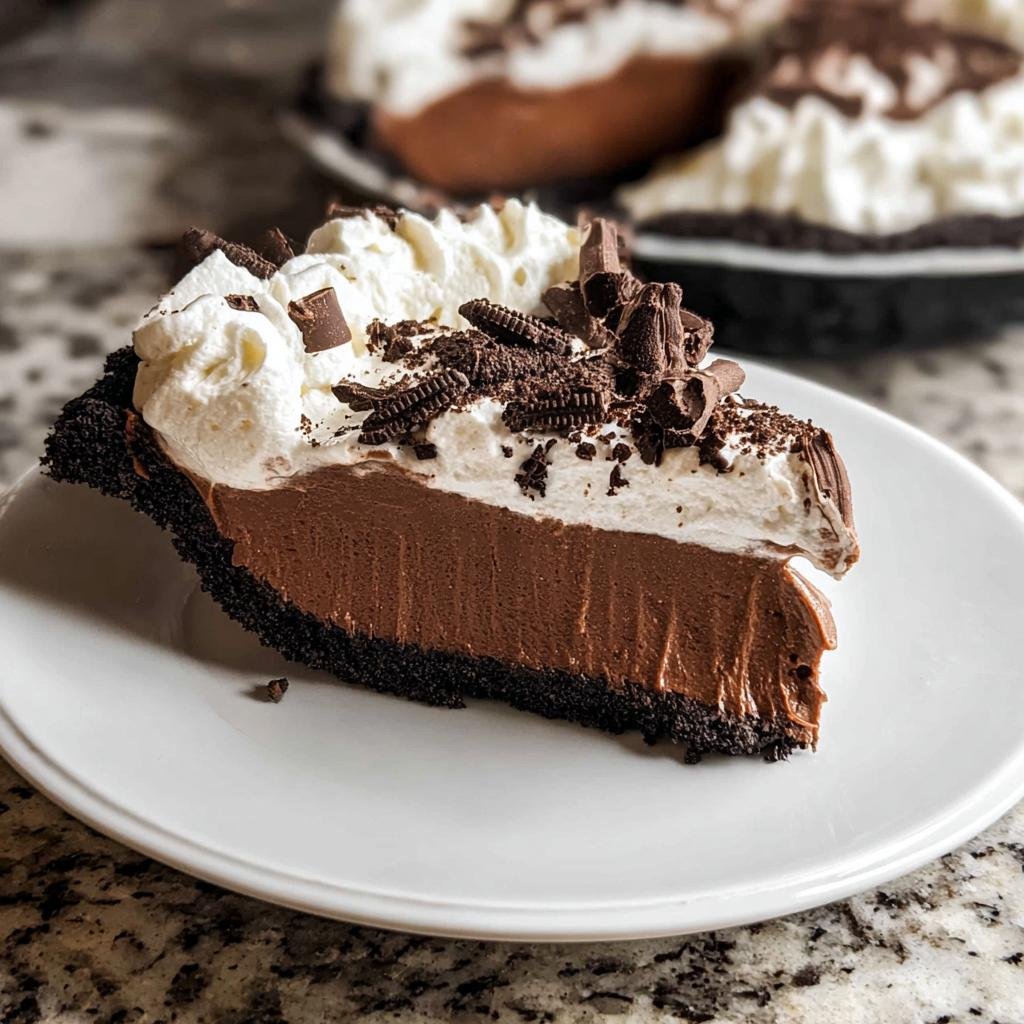
When the pie is chilled and ready to serve, it’s time for the crowning glory! Use your electric mixer (the one that was chilling in the freezer, hopefully!) and whip that heavy cream on high speed for about a minute or two. Once it starts looking thick, add your powdered sugar and vanilla. Keep mixing until you see soft peaks. You want it billowy, not stiff—if you pull the beater up and the little tip flops over gently, you’re perfect!
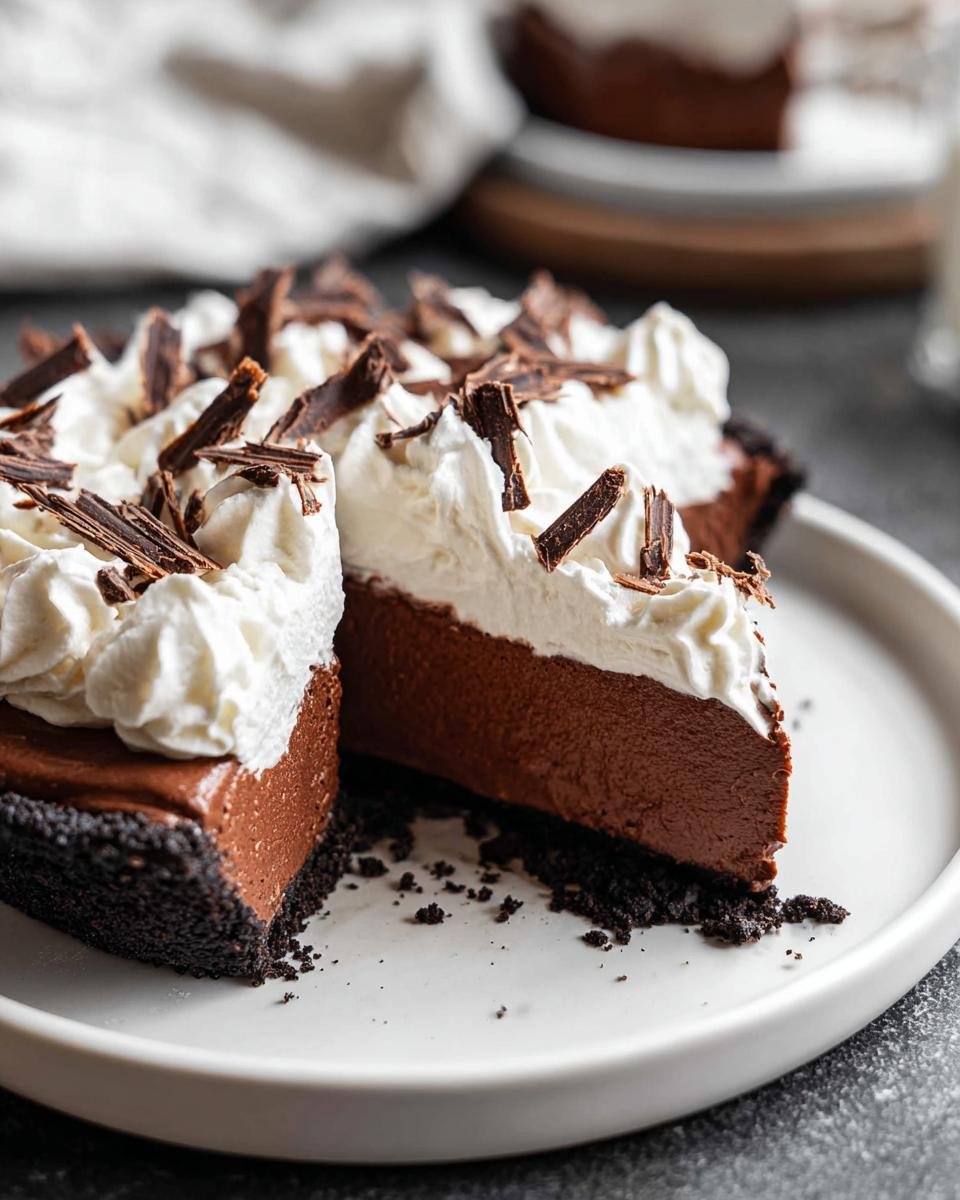
Spread that gorgeous cream over the pie mound. If you want to get fancy, toss some chocolate curls on top, or maybe use some of those quick dessert ideas I shared earlier for a fresh twist!
Expert Tips for the Best Ever Chocolate Cream Pie
I’ve learned a few things over the years, especially after that panic-whisking incident! Since this Chocolate Cream Pie is so simple, the execution becomes everything. If you want that filling to be impossibly smooth, make sure your heavy cream is *ice* cold when you whip it—it traps air better that way!
Another thing I insist on: when you’re tempering those yolks—adding hot milk to the eggs—the milk shouldn’t be actively boiling; it should just be simmering sweetly. If it’s too hot, you shock the yolks, and you end up scrambling them, which means starting over! Also, when you incorporate the final chocolate and butter, take the pan completely off the burner first. The residual heat is enough to melt everything beautifully without scorching the chocolate. Trust me, these little adjustments make your pie look like it skipped the home kitchen entirely and went straight to the bakery case. Check out some of my other favorite homemade goodness recipes for other simple wins!
Ingredient Notes and Simple Substitutions for Your Chocolate Cream Pie
One of the best things about this pie is how adaptable it is! I get so many questions about swapping things out, and I totally get it—sometimes you’re out of Oreos or maybe your favorite 9-inch dish is hiding in the back of the cupboard. Don’t panic! This recipe is surprisingly forgiving, but there are a few swaps that work way better than others.
If you’re looking to make a deeper, richer version, the source notes mentioned using a bit more chocolate. You can absolutely go for a deep dish pie pan! Just remember you’ll need more filling, so double up on the crust cookies (say, 30 of them) and bump your melted butter up to 6 tablespoons. If you use a deeper pan, you’ll need to add a little extra baking time for the crust, maybe 14 minutes instead of 12.

When it comes to the base, if Oreos just won’t work for you, you can totally pivot to a different cookie. A classic graham cracker crust is a lovely substitute, or even a shortbread cookie crust works beautifully if you want to lean into a buttery flavor profile instead of that dark chocolate cookie crunch. Just remember the ratio: the crumbs need to be coated in melted butter so they hold together. When you’re working on lightening up comfort food, sometimes the crust is the easiest place to swap ingredients!
Also, remember when I talked about the chocolate? If you’re using chocolate chips instead of chopped baking chocolate, you might need an extra splash of milk or cream in the pudding step, because chips contain stabilizers that keep them from melting quite as smoothly as solid bars. Just err on the side of caution and add liquid slowly when you take the mixture off the heat.
Make-Ahead and Storage for Your Chocolate Cream Pie
I always tell people that my favorite part about this delicious Chocolate Cream Pie is that it’s actually better when you make it ahead of time! Seriously, letting that vanilla-laced chocolate pudding firm up overnight lets those flavors really deepen and marry perfectly. If you’re hosting a big dinner or family gathering, you can completely finish assembling the pie—filling, crust, and topping—up to two days ahead of time.
Once it’s topped with that beautiful whipped cream, you need to store it covered tightly in the refrigerator. The plastic wrap touching the cream is fine if you’re serving it the next day, but if you wait 48 hours, you might notice the cream relaxing just a tiny bit around the edges, so maybe don’t top it until the day before serving if you are aiming for maximum puff.
Now, I know sometimes leftovers are a struggle, and you might think about freezing this for snacking later. You *can* freeze this pie! I’ve done it when I just couldn’t let any of that chocolate goodness go to waste. The important thing to know is that the texture won’t be *as* good when it thaws. You need to wrap the whole shebang tight—plastic wrap first, then aluminum foil—and tuck it into the freezer for up to three months. When you are ready, move it to the fridge and let it thaw overnight. The crust and filling are usually fine, but that lovely homemade whipped topping might weep a little, becoming slightly softer or watery. If that happens, just scrape off the old topping and whip up a fresh batch to put on top before serving. Check out these meal prep tips for handling big batches of food easily!
Serving Suggestions for This Classic Chocolate Cream Pie
You’ve done the hard work—the crust is baked, the filling is set, and it’s topped with that beautiful, fresh whipped cream. Now, how do we make this Chocolate Cream Pie look absolutely stunning before you serve it? Garnishes are your best friend here! They add that final pop of color and texture that makes people think you spent hours sourcing specialty items, when really, you just had a few perfect pantry items waiting.
Since this pie is so rich and deeply chocolatey, I love adding something bright or contrasting just before bringing it to the table. It’s all about that visual appeal right before that first epic bite!
- Chocolate Curls or Shavings: This is my go-to, as mentioned in the notes. You can buy these pre-made, or trust me, they are super easy to make yourself! Just take a vegetable peeler and carefully run it down the edge of a room-temperature block of semi-sweet chocolate. The peels curl right up! Toss a few lightly over the top of the whipped cream.
- Fresh Raspberries: If you want a little zing to cut through the richness, fresh raspberries are fantastic. Their tartness pairs beautifully with the deep cocoa flavor. Just dot a few around the edge of the topping.
- A Simple Crumble: If you used a different crust, like graham cracker, you can simply reserve a few extra crumbs and sprinkle them lightly over the center of the whipped cream for texture contrast.
- A Dusting of Cocoa: Sometimes less is more. If you want the cream to be the star, just take a fine-mesh sieve and dust the entire top very lightly with unsweetened cocoa powder. It looks sophisticated, and it’s fast!
No matter how you decorate it, remember to pause for a second and admire your work before you slice it! That moment of satisfaction before everyone digs in is what cooking is all about. If you need more inspiration for making everyday meals feel like a celebration, check out my thoughts on joyful eating!
Frequently Asked Questions About Making Chocolate Cream Pie
It’s totally normal to have questions when you’re attempting a from-scratch recipe, especially with custard fillings that need to set just right! Don’t sweat it if you’re unsure about timing or consistency—I’ve made every mistake in the book perfecting this for you. Here are the things folks ask me most often about getting that dreamy Chocolate Cream Pie just right.
Why is my Chocolate Cream Pie filling runny?
If your pudding didn’t set up, it usually boils down to two things, so don’t worry; you didn’t ruin it, you just didn’t cook it quite long enough! First, sometimes we get scared to boil custard, but that gentle boil—where big bubbles break the surface—is essential because that’s when the cornstarch activates fully and starts setting up. If you pull it off the heat before that happens, it will stay completely soft.
Second, double-check your measurements! Those 6 egg yolks and 2 tablespoons of cornstarch are precisely what provides the structure. If you accidentally measured a tablespoon wrong, it can absolutely lead to a looser filling. Remember, even after you turn the heat off, keep stirring in the chocolate and butter, and then make sure you give it that minimum 4 to 6 hours (or better yet, overnight!) in the fridge to firm up completely before slicing. A loose filling just needed more time to chill or a little more heat!
Can I use pre-made pudding mix instead?
Oh, you certainly *can*, and for maximum speed, sure! But I have to be honest with you: using the boxed mix just won’t give you that incredible, deep chocolate flavor or the true silkiness that makes this recipe so special. The from-scratch recipe uses real sugar, real egg yolks, and high-quality chocolate, which results in a much richer, denser custard. The boxed stuff is often lighter and sweeter, and frankly, it doesn’t stand up to the Oreo crust quite as well.
If you’re going the instant route, you’ll skip the whole tempering and boiling process, but you’ll also skip that amazing texture and the flavor complexity. For me, the little bit of cooking time is what elevates this from a simple fridge pie into a show-stopping Chocolate Cream Pie. If you want incredible results, stick to the recipe!
How long does the pie need to chill before serving?
This is where patience pays off big time! To get clean, beautiful wedges that don’t immediately slump over when you lift a slice, you absolutely need the filling to be firm. The bare minimum chilling time is 4 hours, but truly, 6 hours is much safer. If you can manage it, I highly recommend chilling it overnight (8 hours is perfect!).
Chilling overnight lets the filling solidify completely and helps the flavors meld together beautifully. And just a reminder: make sure that plastic wrap is placed right on the surface of the pudding before it goes into the cold, that way you get a smooth top ready for your whipped cream!
For anyone looking to revamp their typical recipes without sacrificing excitement, you can find some great ideas over at my healthy recipes section for general cooking inspiration!
Nutritional Estimates for Your Homemade Chocolate Cream Pie
I know many of you are curious about the numbers behind our favorite treats! Since this pie uses rich ingredients like butter, chocolate, and egg yolks, it is definitely a decadent dessert rather than an everyday snack, but you can still enjoy a slice knowing what you’re getting. Remember, these figures are estimates per slice for 8 servings, and they can definitely change based on the brand of chocolate or the type of milk you use!
Here’s a general look at what one slice of this gorgeous Chocolate Cream Pie serves up:
- Calories: Approximately 324
- Fat: About 21 grams (Be mindful of the Saturated Fat content here!)
- Carbohydrates: Around 29 grams
- Protein: About 5 grams
It’s got some sweetness, for sure, but the added protein from the yolks and the slow-release energy from the fat content means it keeps you satisfied! If you are tracking your intake or curious about how certain substitutions affect things, you can always check out my posts on diet and nutrition for more general guidance.
Nutritional Estimates for Your Homemade Chocolate Cream Pie
I know many of you are curious about the numbers behind our favorite treats! Since this pie uses rich ingredients like butter, chocolate, and egg yolks, it is definitely a decadent dessert rather than an everyday snack, but you can still enjoy a slice knowing what you’re getting. Remember, these figures are estimates per slice for 8 servings, and they can definitely change based on the brand of chocolate or the type of milk you use! It’s important to remember that the very best Chocolate Cream Pie is the one that makes you happy, but knowing the basics helps!
Here’s a general look at what one slice of this gorgeous Chocolate Cream Pie serves up:
- Calories: Approximately 324
- Fat: About 21 grams (Be mindful of the Saturated Fat content here!)
- Carbohydrates: Around 29 grams
- Protein: About 5 grams
It’s got some sweetness, for sure, but the added protein from the yolks and the slow-release energy from the fat content means it keeps you satisfied! If you are tracking your intake or curious about how certain substitutions affect things, you can always check out my posts on diet and nutrition for more general guidance.
Chocolate Cream Pie
Ingredients
Equipment
Method
- Preheat oven to 350°F.
- Add whole Oreo cookies to a food processor and pulse into fine crumbs. Pour the crumbs into a bowl and stir in melted butter. Press mixture evenly and firmly into the bottom and up the sides of a 9in pie dish. Bake for 10-12 minutes. Set aside to cool.
- Add sugar and milk to a medium saucepan and whisk well to combine. Cook over medium heat, whisking frequently, until mixture is barely simmering.
- Meanwhile, add the egg yolks and cornstarch to a bowl and whisk until smooth. Once the saucepan mixture is simmering, add a few spoonfuls of the hot liquid into the egg yolks and whisk to temper the eggs. Add a few more spoonfuls of the hot liquid into the egg yolks.
- Slowly whisk the egg yolk mixture back into the saucepan. Whisk constantly until the mixture begins to thicken and comes to a very gently boil (big bubbles begin to break the surface).
- Remove pan from the heat and whisk in the butter, chopped chocolate, and vanilla extract. Stir until completely smooth.
- Pour filling into the cooled cookie crust and smooth into an even layer. Place a piece of plastic wrap gently on top and refrigerate until filling is set, about 4–6 hours or overnight, if desired.
- Once pudding has set, make the topping by adding the cream to a mixing bowl. Mix with electric mixers on high speed for 1-2 minutes. Add powdered sugar and vanilla extract and continue mixing until soft peaks form, about 2-3 minutes. Spread whipped cream over pie and top with chocolate curls or shavings.