

Are you facing that moment where the holiday dessert table feels overwhelming? Everyone wants something festive, but nobody wants to cut a messy slice from a giant pie—especially when you’re juggling a dozen other dishes. Trust me, I’ve been there! That’s why I developed this perfect recipe for Mini Pumpkin Pies. They bake up faster than the big guys, travel like a dream, and honestly, seeing ten little perfect pies lined up just makes me happy.
The first time I made these, it was for a massive potluck, and I was terrified my full-sized pie would slide right off the platter while I was walking. I whipped up a test batch in a standard muffin tin just to be safe. Cooling them down and adding a tiny swirl of whipped cream to each one was so therapeutic! Watching everyone happily grab their own perfectly portioned treat made me realize these little guys were going to be a permanent seasonal fixture on my table, hands down.

Why You Will Love These Mini Pumpkin Pies
Seriously, these are going to save your holiday hosting life. Forget the stress! When you’re trying to manage timing for the turkey, the stuffing, and the general chaos, these Mini Pumpkin Pies are your secret weapon for guaranteed dessert success. They bake in a flash and look so adorable!
- Speedy Baking Time: Because they are little, they are done baking way faster than a full-sized pie. We’re talking a quick jump in the oven, making them perfect for last-minute additions to your menu.
- Portion Perfection: No cutting, no clumsy serving plates, and absolutely no arguing over who gets the biggest piece! Everyone gets their own tidy, single-serving portion. It’s dessert democracy!
- Travel Like a Pro: If you’re taking a dish to someone else’s gathering, these are lifesavers. They sit perfectly snug in the muffin tin they baked in, or you can slide them into a container without any fear of smearing filling across the car seat. I often bring mine using a method similar to how I transport my mini sausage snacks—it just works.
- Always Look Good: Even if your crust edges aren’t perfectly fluted—which, who has time for that?—the individual size makes them look automatically polished and ready for a magazine cover.
- Freezer Friendly: Want to get a huge head start weeks before Thanksgiving? These freeze like a charm. Pop them in the freezer when cool, and pull them out to thaw the morning of the party. Easy peasy!
Essential Equipment for Perfect Mini Pumpkin Pies
Okay, let’s talk about what you actually need sitting on your counter to make these beauties. You don’t need fancy gadgets—that’s the beauty of this recipe! We are keeping it simple and focusing on the essentials that get the job done fast. If you look at my notes, you’ll see I kept the list short because holiday prep is busy enough as it is!
The secret weapon here, and the reason we can call these Mini Pumpkin Pies, is the trusty muffin pan. Seriously, this is what locks in that perfect individual size. If you try to make them free-form, they spread and you end up with weird little pumpkin cookies instead of perfectly molded pies. The muffin tin holds the crust walls up while the filling sets, ensuring that adorable, clean look.
Key Tools for Baking Mini Pumpkin Pies
- A medium bowl for mixing up everything—start with the crust, then transition to the filling in the same bowl if you don’t mind a little rinsing between stages!
- Your standard 12-cup muffin pan. We are only filling ten cups, so you have a little room for overflow if needed!
- A 4” round cookie cutter. This is what dictates the size of your little crusts. If you don’t have one, grab a small glass or jar top that measures about 4 inches across!
Ingredients for Your Mini Pumpkin Pies
Alright, gathering your supplies is half the battle won! You’ll see we break this down into two sections: the crust and the creamy, spicy filling. The most important thing I want you to remember for the crust, right off the bat, is that your fats—the butter and the shortening—absolutely must be ice cold. If they warm up even a little, you lose the flakiness we are aiming for here. Don’t let them get greasy!
For the filling, we are keeping it classic—all those warm spices that just scream autumn and holidays. Don’t skip the cloves; that tiny pinch really wakes up the nutmeg and cinnamon. This recipe makes exactly ten glorious servings. If you decide you need more for your party, just double everything up and grab a second muffin tin!
For the Flaky Crust
This is a classic, simple pastry that requires cold hands and patience. When you start rubbing that cold butter and shortening into your flour, use your fingertips really lightly! You are trying to create pea-sized clumps, not turning it into sticky dough yet. That pea-sized texture is what gives you those lovely layers once baked.
- 6 tablespoons cold unsalted butter, diced
- 3 tablespoons cold shortening, diced
- 1 1/4 cup all-purpose flour
- 1/2 teaspoon salt
- 1/4 cup cold water
For the Spiced Filling
This filling whips up in about two minutes flat once your spices are measured out. The measurements are precise here, especially for the pumpkin puree, so make sure you measure that out exactly as listed—it’s the key to not having a soupy center! If you ever feel like your pumpkin recipes are lacking that ‘oomph,’ definitely check out my review on this cottage cheese bake; it uses similar warm spices but pulls flavor through dairy.
- 3 tablespoons + 1 teaspoon granulated sugar
- 1 teaspoon ground cinnamon
- 1/4 teaspoon ground ginger
- 1/4 teaspoon ground nutmeg
- 1 pinch ground cloves
- 1 pinch salt
- 1/2 cup + 2 tablespoons canned pumpkin puree
- 2 tablespoons milk (I use whole milk here, but any works!)
- 2 large eggs
- As needed freshly whipped cream, for serving
Step-by-Step Baking Instructions for Mini Pumpkin Pies
This is where the magic happens! Don’t get intimidated by the two-part baking time; it’s actually a trick to get a perfectly set filling without burning the small crust edges. Honestly, if you can make a decent biscuit, you can master these Mini Pumpkin Pies. Just pay close attention to keeping that dough cold—that’s the foundation of everything flaky and delicious.
I actually find making the crust dough meditative after a long day. You know, running your fingers through the flour and fat is very grounding. It’s a technique I often use when I’m working on pastry for things like my chicken pot pie, too. The goal is texture, not warmth!
Preparing the Pie Crust Dough
First things first, we need to work that amazing cold butter and shortening into your flour and salt mixture. This is non-negotiable: use your fingertips! Don’t use a pastry blender or your whole hand; pinch and rub until the mixture looks like coarse sand with some pea-sized chunks still visible. Those chunks are pure flakiness waiting to happen, so don’t mash them all away!
Next, carefully drizzle in that 1/4 cup of cold water and stir just until the dough barely holds together. It should look a little shaggy. Press it into a disk, wrap it tight, and send it straight to the fridge for 20 minutes. Seriously, 20 minutes minimum. That rest is essential for keeping the crust tender. While that chills, you can whisk up your filling!
Assembling and Filling the Mini Pumpkin Pies
Once chilled, roll that dough out on a lightly floured surface until it’s thin enough—maybe about 1/8 inch thick. Now, grab that 4-inch cookie cutter and start stamping out your circles. You should get about 10 good ones. If you have scraps left over, just gather them gently, press them back into a disk, and roll again. No waste!
Gently fit each dough circle into the cups of your muffin pan. Don’t stretch it, just press it down softly with your fingers so it hugs the bottom and sides. Then, scoop your spiced pumpkin mixture evenly into those little crust shells. They should be filled almost right to the top because they won’t rise much.

Baking and Cooling
Time for the oven dance! Preheat it to a nice hot 400°F. Bake those pies for exactly 10 minutes at that heat. This sets the crust structure quickly. After those initial 10 minutes, you must lower the temperature drastically—drop it down to 325°F—and bake for another 10 minutes. This slow bake prevents the filling from cracking!
When they look set around the edges but you can still see a *slight, gentle jiggle* right in the very center if you nudge the pan—that means they are done! They’ll firm up as they cool. Let them chill completely in the pan before you even think about running a knife around the edge to pop them out. Seriously, cooling is part of the cooking process here!
Tips for Success with Your Mini Pumpkin Pies
Listen, even the best recipes can go sideways if you’re rushing, especially with custard-style fillings like pumpkin. The biggest fear everyone has is that cracked top, right? It usually happens because the edges cook much faster than the center. That two-stage baking temperature I mentioned? That’s the anti-crack strategy working in your favor!
Another thing to obsess over, which I bring up often when talking about recipes like my Cranberry Almond Orange Bundt Cake, is ingredient temperature for the crust. If your butter melts before it hits the flour, you get a tough, cracker-like base instead of that beautiful flake. Keep everything cold, even during the roll-out phase if your kitchen runs hot.
If you are dairy-free or trying to cut back, the crust is wonderfully forgiving. You can substitute the cold milk in the filling with unsweetened soy or almond milk with absolutely zero change in texture. The flavor profile of the spices will totally mask any subtle differences. If you want a really rich crust swap, some people have had success substituting vegetable oil for the shortening, but honestly, those two fats mixed together give the best payoff for minimal effort!
Make-Ahead and Storage for Mini Pumpkin Pies
The holidays are all about strategy, and these Mini Pumpkin Pies are fantastic make-ahead stars. You can bake them completely, let them cool fully, and store them covered tightly in the refrigerator for up to three days. They are honestly just as good on Day Two as they are fresh!
If you need longer storage, freezing is your friend. Once they are completely cool—and I mean fridge-cold—place them inside a freezer-safe container separated by parchment paper. They freeze beautifully for about a month. When you want to serve them, just pull out as many as you need and let them thaw in the fridge overnight. No need to reheat; they are perfect served chilled or at room temperature, just like I love my pumpkin bread.
If you are in a true pinch and need them thawed faster, you can let them sit on the counter for about an hour, but keep them out of direct sun or heat!
Serving Suggestions for Your Mini Pumpkin Pies
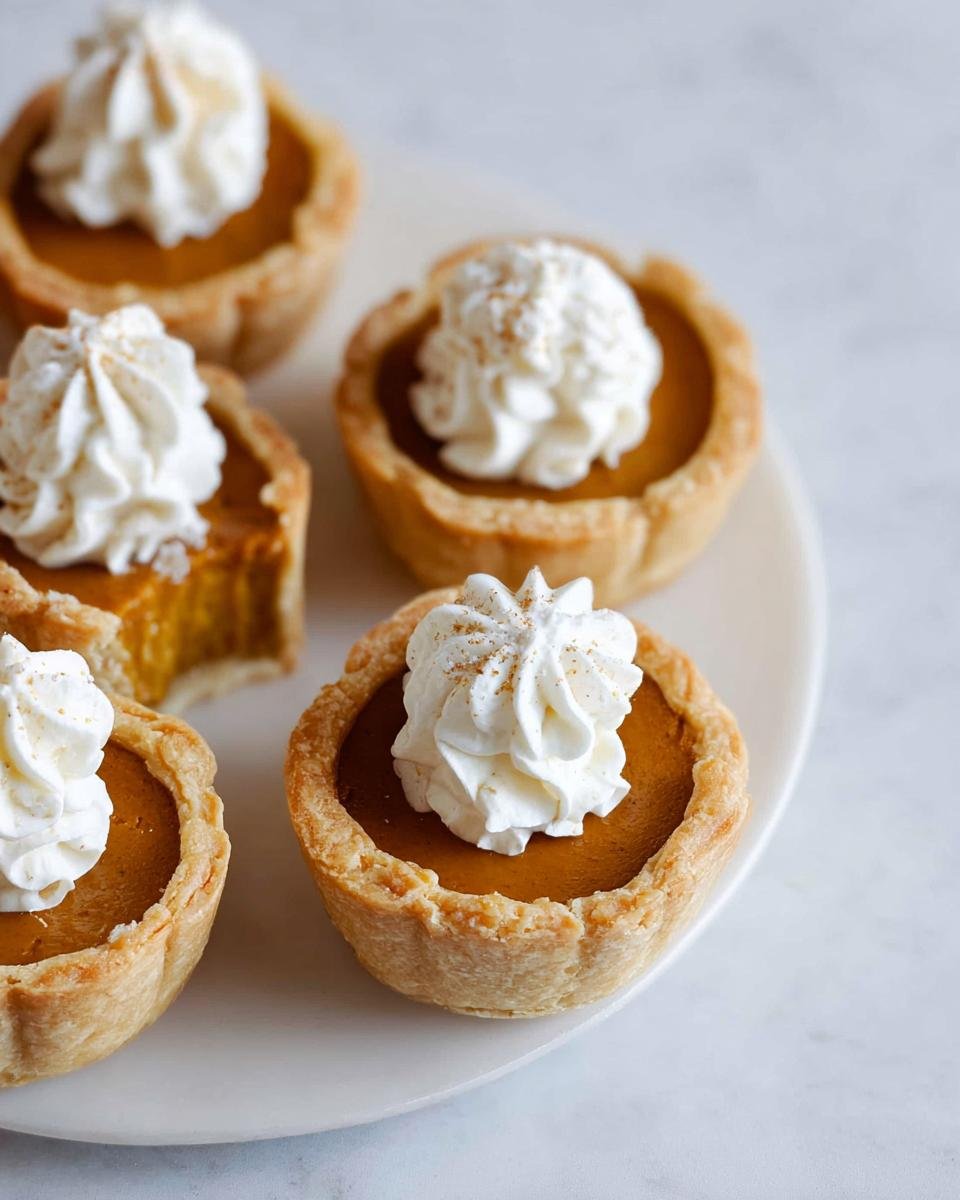
These cuties deserve a beautiful presentation! The recipe calls for freshly whipped cream, and please, if you have the time, make it fresh. The flavor difference is staggering. Take a piping bag with a star tip—or just use a small spoon for a rustic dollop—and place a swirl right on top of each mini pie just before serving. They look so festive!
For a real wow factor at your party, pair these with the perfect beverage. Since they deliver that classic, warm autumn flavor, they go amazingly well with a hot, spiced drink or a bright punch. If you’re serving something like my Cosmo Punch, the tartness cuts through the richness of the pumpkin nicely. If you prefer something warmer, a good strong black coffee or a spiced apple cider works wonders alongside these little desserts.

Frequently Asked Questions About Mini Pumpkin Pies
Can I use store-bought or refrigerated pie dough instead of making the crust from scratch?
Absolutely! If time is your true enemy, using a store-bought pie crust dough is a huge time saver and still lets you enjoy these fast Mini Pumpkin Pies. Just make sure you buy the kind that rolls out rather than the pre-formed pie shells, since we need that flat dough circle to cut into 4-inch rounds for the muffin tin. It makes the total prep time drop significantly!
My filling cracked after baking. What went wrong?
Don’t stress, this is a common baking hiccup! Nine times out of ten, a slightly cracked filling means it baked too long or at too high a temperature immediately. Remember that two-stage bake? The initial 10 minutes at 400°F is crucial to set the edges, but that slow bake at 325°F is what keeps the center silky smooth. Watch for that gentle jiggle!
Is this recipe good for a large Holiday Dessert spread?
Yes, these are amazing for any big gathering! Because they are single-serving, they manage traffic beautifully. Since this recipe yields exactly 10 pies, figure out how many people you are hosting and scale up proportionally. They are sturdy enough that you can bake them a day ahead, which helps immensely with holiday logistics.
What if I don’t have a 4-inch round cutter?
No problem at all! You are using a standard muffin tin, which usually holds about 3.5 inches across the top. You want your cutter to be slightly larger than the opening so that the dough overlaps the edge just a tiny bit when you press it in. Any small drinking glass or jar lid that measures about 4 inches in diameter will work perfectly to trace and cut your circles.
What can I serve alongside these besides whipped cream?
If you’re looking for a delicious beverage pairing that complements the warm spices perfectly, skip the sugary sodas. We are aiming for something either tart or very warm. I adore serving these with my Non-Alcoholic Thanksgiving Punch; the slight tartness keeps your palate clean between bites of rich pie. It’s a fantastic pairing for this kind of hearty Holiday Dessert!
Share Your Experience Making Mini Pumpkin Pies
I truly hope these quick and cozy Mini Pumpkin Pies become as much of a tradition for you as they have for me! They are little packages of holiday comfort, and every baker deserves a simple win during the busy season. I’d love to know how they turned out for you. Did they make it to your party unscathed? Did your family love the single-serving sizes?
Please come back and leave a rating out of 5 stars below! And if you tried a fun variation—maybe sneaking some pecans into the bottom of the crust or trying a different spice addition—tell me all about it in the comments section. I always love seeing creative twists on classics. You can check out more of my kitchen adventures over on my personal page!
Tips for Success with Your Mini Pumpkin Pies
Listen, even the best recipes can go sideways if you’re rushing, especially with custard-style fillings like pumpkin. The biggest fear everyone has is that cracked top, right? It usually happens because the edges cook much faster than the center. That two-stage baking temperature I mentioned? That’s the anti-crack strategy working in your favor!
Another thing to obsess over, which I bring up often when talking about recipes like my Cranberry Almond Orange Bundt Cake, is ingredient temperature for the crust. If your butter melts before it hits the flour, you get a tough, cracker-like base instead of that beautiful flake. Keep everything cold, even during the roll-out phase if your kitchen runs hot.
If you are dairy-free or trying to cut back, the crust is wonderfully forgiving. You can substitute the cold milk in the filling with unsweetened soy or almond milk with absolutely zero change in texture. The flavor profile of the spices will totally mask any subtle differences. If you want a really rich crust swap, some people have had success substituting vegetable oil for the shortening, but honestly, those two fats mixed together give the best payoff for minimal effort!
Make-Ahead and Storage for Mini Pumpkin Pies
The holidays are all about strategy, and these Mini Pumpkin Pies are fantastic make-ahead stars. You can bake them completely, let them cool fully, and store them covered tightly in the refrigerator for up to three days. They are honestly just as good on Day Two as they are fresh!
If you need longer storage, freezing is your friend. Once they are completely cool—and I mean fridge-cold—place them inside a freezer-safe container separated by parchment paper. They freeze beautifully for about a month. When you want to serve them, just pull out as many as you need and let them thaw in the fridge overnight. No need to reheat; they are perfect served chilled or at room temperature, just like I love my pumpkin bread.
If you are in a true pinch and need them thawed faster, you can let them sit on the counter for about an hour, but keep them out of direct sun or heat!
Serving Suggestions for Your Mini Pumpkin Pies
These cuties deserve a beautiful presentation! The recipe calls for freshly whipped cream, and please, if you have the time, make it fresh. The flavor difference is staggering. Take a piping bag with a star tip—or just use a small spoon for a rustic dollop—and place a swirl right on top of each mini pie just before serving. They look so festive!
For a real wow factor at your party, pair these with the perfect beverage. Since they deliver that classic, warm autumn flavor, they go amazingly well with a hot, spiced drink or a bright punch. If you’re serving something like my Cosmo Punch, the tartness cuts through the richness of the pumpkin nicely. If you prefer something warmer, a good strong black coffee or a spiced apple cider works wonders alongside these little desserts.
Frequently Asked Questions About Mini Pumpkin Pies
Can I use store-bought or refrigerated pie dough instead of making the crust from scratch?
Absolutely! If time is your true enemy, using a store-bought pie crust dough is a huge time saver and still lets you enjoy these fast Mini Pumpkin Pies. Just make sure you buy the kind that rolls out rather than the pre-formed pie shells, since we need that flat dough circle to cut into 4-inch rounds for the muffin tin. It makes the total prep time drop significantly!
My filling cracked after baking. What went wrong?
Don’t stress, this is a common baking hiccup! Nine times out of ten, a slightly cracked filling means it baked too long or at too high a temperature immediately. Remember that two-stage bake? The initial 10 minutes at 400°F is crucial to set the edges, but that slow bake at 325°F is what keeps the center silky smooth. Watch for that gentle jiggle!
Is this recipe good for a large Holiday Dessert spread?
Yes, these are amazing for any big gathering! Because they are single-serving, they manage traffic beautifully. Since this recipe yields exactly 10 pies, figure out how many people you are hosting and scale up proportionally. They are sturdy enough that you can bake them a day ahead, which helps immensely with holiday logistics.
What if I don’t have a 4-inch round cutter?
No problem at all! You are using a standard muffin tin, which usually holds about 3.5 inches across the top. You want your cutter to be slightly larger than the opening so that the dough overlaps the edge just a tiny bit when you press it in. Any small drinking glass or jar lid that measures about 4 inches in diameter will work perfectly to trace and cut your circles.
What can I serve alongside these besides whipped cream?
If you’re looking for a delicious beverage pairing that complements the warm spices perfectly, skip the sugary sodas. We are aiming for something either tart or very warm. I adore serving these with my Non-Alcoholic Thanksgiving Punch; the slight tartness keeps your palate clean between bites of rich pie. It’s a fantastic pairing for this kind of hearty Holiday Dessert!
Share Your Experience Making Mini Pumpkin Pies
I truly hope these quick and cozy Mini Pumpkin Pies become as much of a tradition for you as they have for me! They are little packages of holiday comfort, and every baker deserves a simple win during the busy season. I’d love to know how they turned out for you. Did they make it to your party unscathed? Did your family love the single-serving sizes?
Please come back and leave a rating out of 5 stars below! And if you tried a fun variation—maybe sneaking some pecans into the bottom of the crust or trying a different spice addition—tell me all about it in the comments section. I always love seeing creative twists on classics. You can check out more of my kitchen adventures over on my personal page!

Mini Pumpkin Pies
Ingredients
Equipment
Method
- In a medium bowl, combine the butter, shortening, flour, and salt. Blend the butter and shortening into the flour using your fingertips. Pinch the dough through your fingertips for the flakiest results.
- When the fats are evenly distributed, sprinkle the cold water on top. Stir the dough together with a fork. Add more water if needed, but avoid making the dough too wet.
- Bring the dough together into a ball, press it into a disk, then wrap and refrigerate it for 20 minutes.
- Preheat the oven to 400°F.
- Whisk together all filling ingredients. Set the mixture aside.
- Remove the dough from the fridge and flour a work surface. Roll the dough out to a rough 9" circle, using more flour as needed to prevent sticking.
- Use a 4" round cookie cutter to cut out 10 round pieces of dough. Gather scraps and re-roll to get 10 circles.
- Fit one dough circle into each cup in the muffin pan. Use your fingers to gently push the dough into the cup. You can flute the edges or leave them plain.
- Divide the pumpkin filling mixture evenly between the cups.
- Bake for 10 minutes, then reduce the oven temperature to 325°F and bake for another 10 minutes.
- Let the mini pies cool completely in the pan before removing them. You may need to run a knife around the edges to release them from the muffin pan. Serve with whipped cream.