
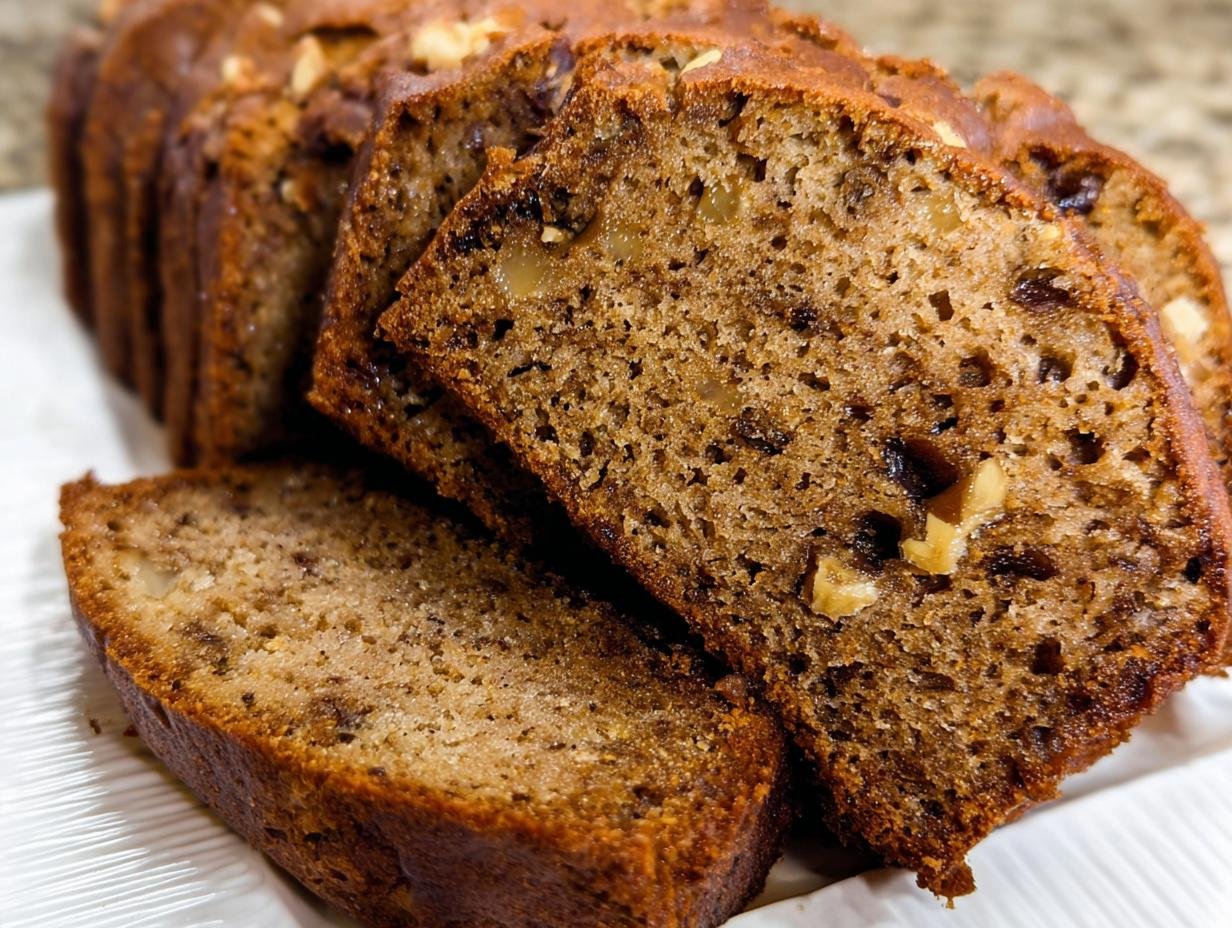
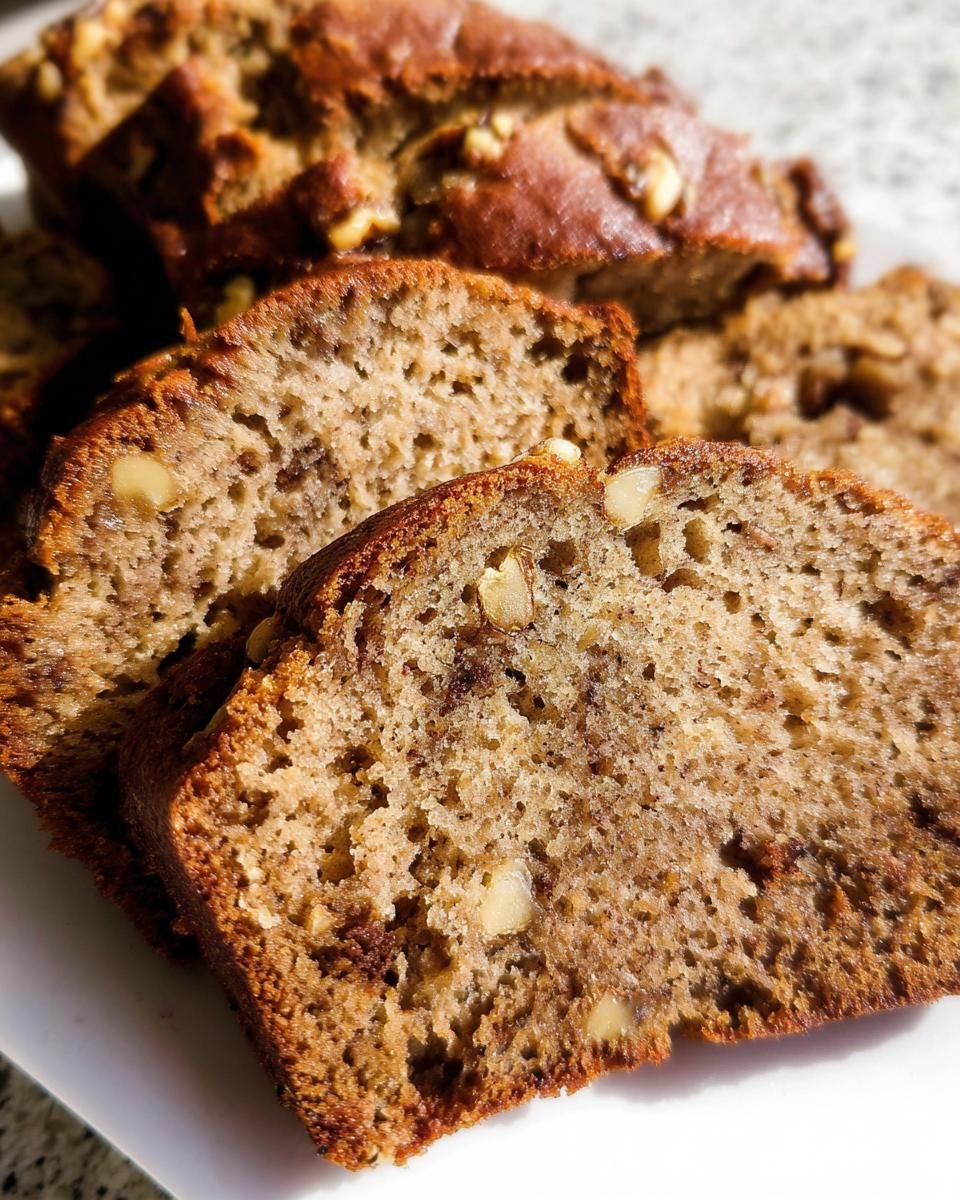
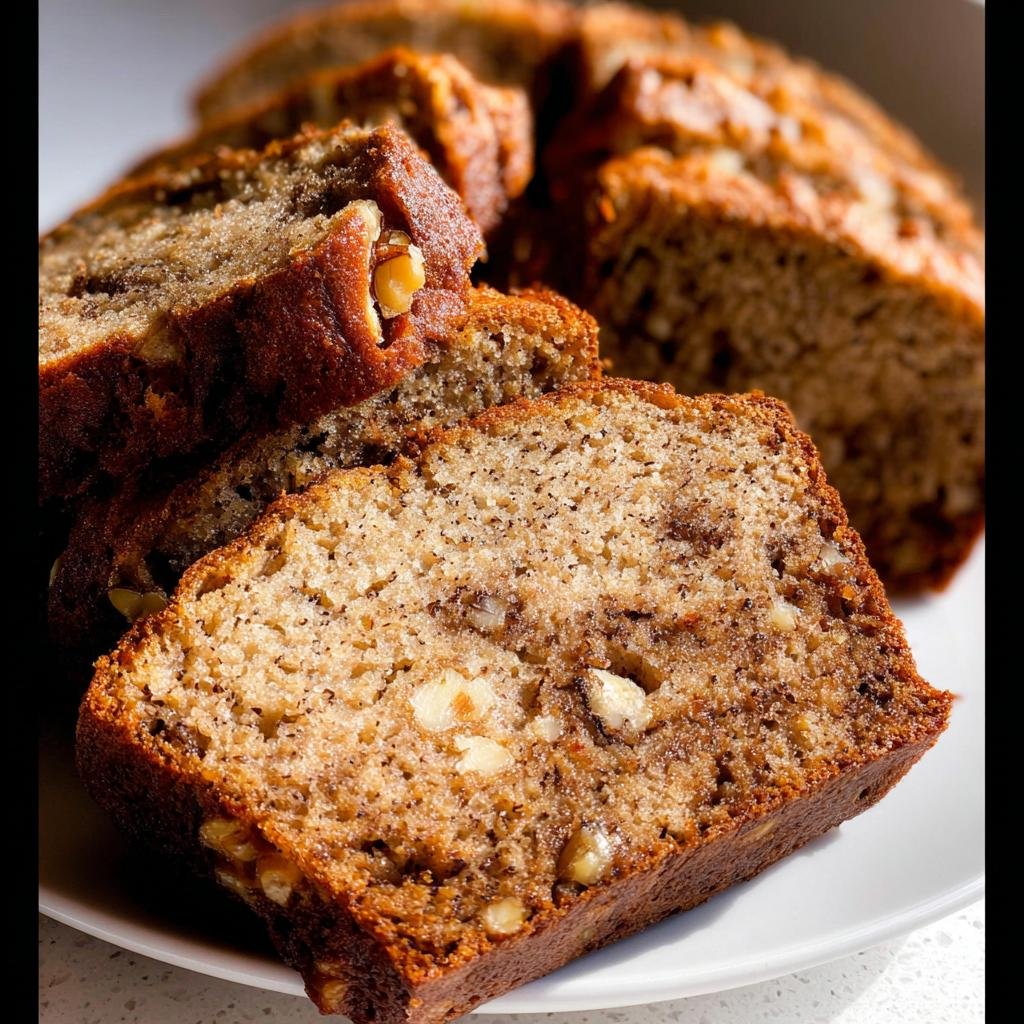
Oh, who doesn’t obsess over the perfect loaf of banana bread? That unmistakable, cozy aroma that just smells like home? I spent ages trying to get it right, trying to chase that bakery-style texture without the dry, crumbly disappointment so many recipes deliver. I’m so excited to finally share my absolute winning formula because, trust me, this is the Best Banana Bread Ever Moist and Tender. I still remember the first time I tried to perfect what I hoped would be the Best Banana Bread Ever Moist and Tender. I had three overripe bananas on my counter, a rainy afternoon, and a strong craving for something comforting. The aroma that filled my kitchen brought me right back to childhood weekends, and every test batch since has reminded me why I love creating recipes that feel like home.
Why This is the Best Banana Bread Ever Moist and Tender
You need a banana bread that whispers nostalgia but performs like a professional baker made it. That’s what we’ve achieved here! This recipe guarantees you get the Best Banana Bread Ever Moist and Tender every single time, no guesswork involved. It’s reliable, quick, and frankly, far better than anything you grab at the coffee shop. People always ask me what the trick is; it’s all in these small details we build into the batter.
Key Features of Our Best Banana Bread Ever Moist and Tender
- It stays incredibly moist for days, thanks to liquids working hard behind the scenes.
- The texture is tender, never tough, because we absolutely do not over-mix the flour.
- It relies on simple pantry staples, making it an easy quick bread to whip up before work.
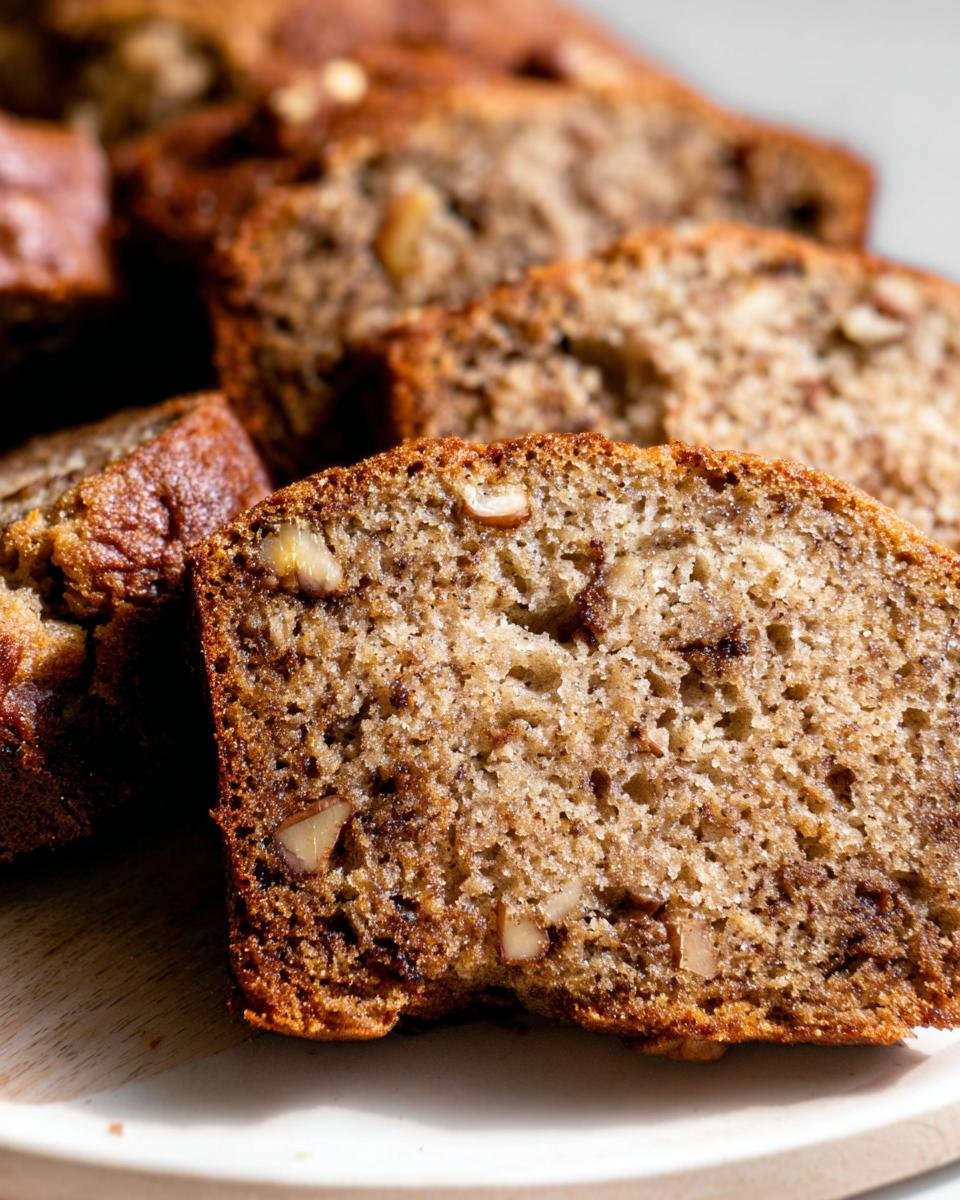
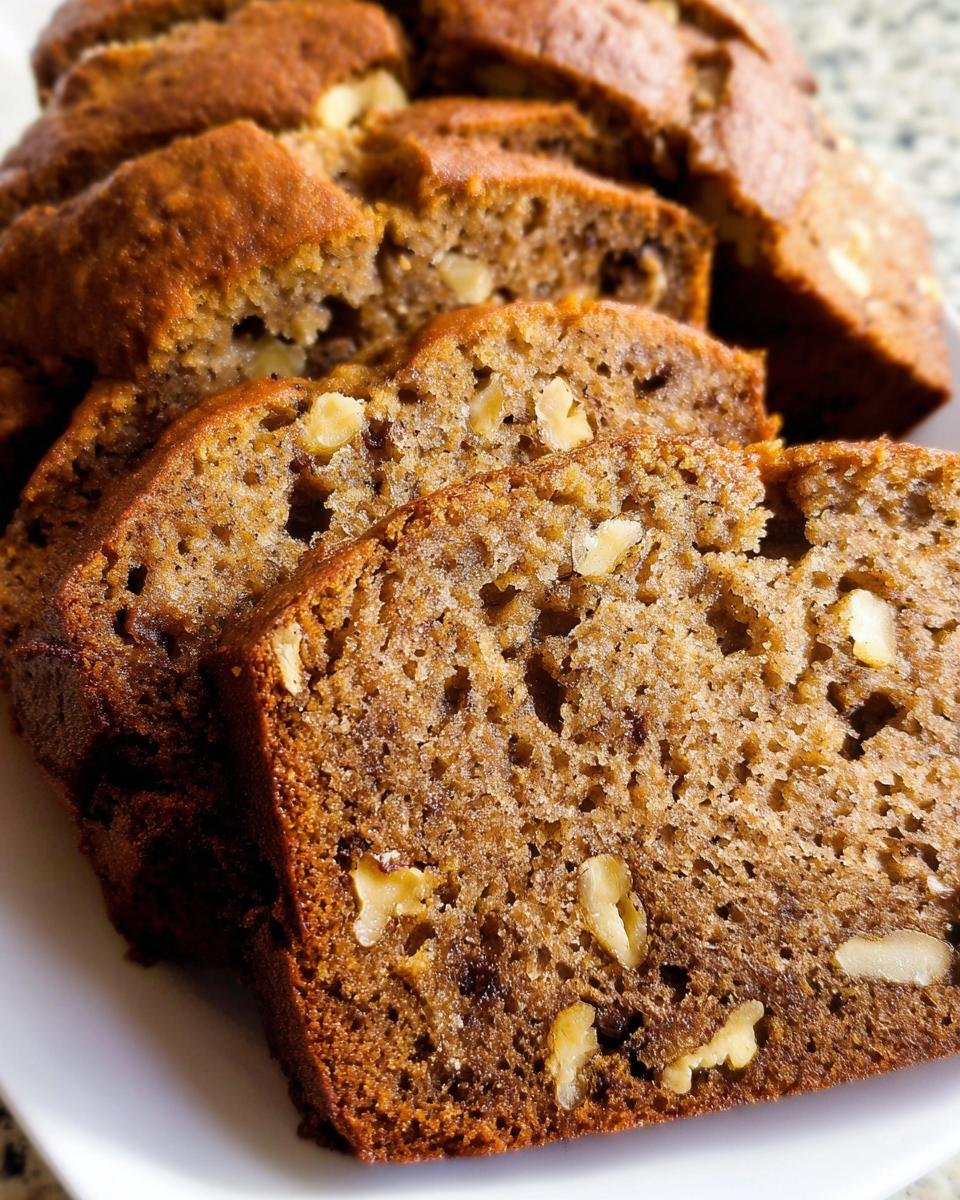
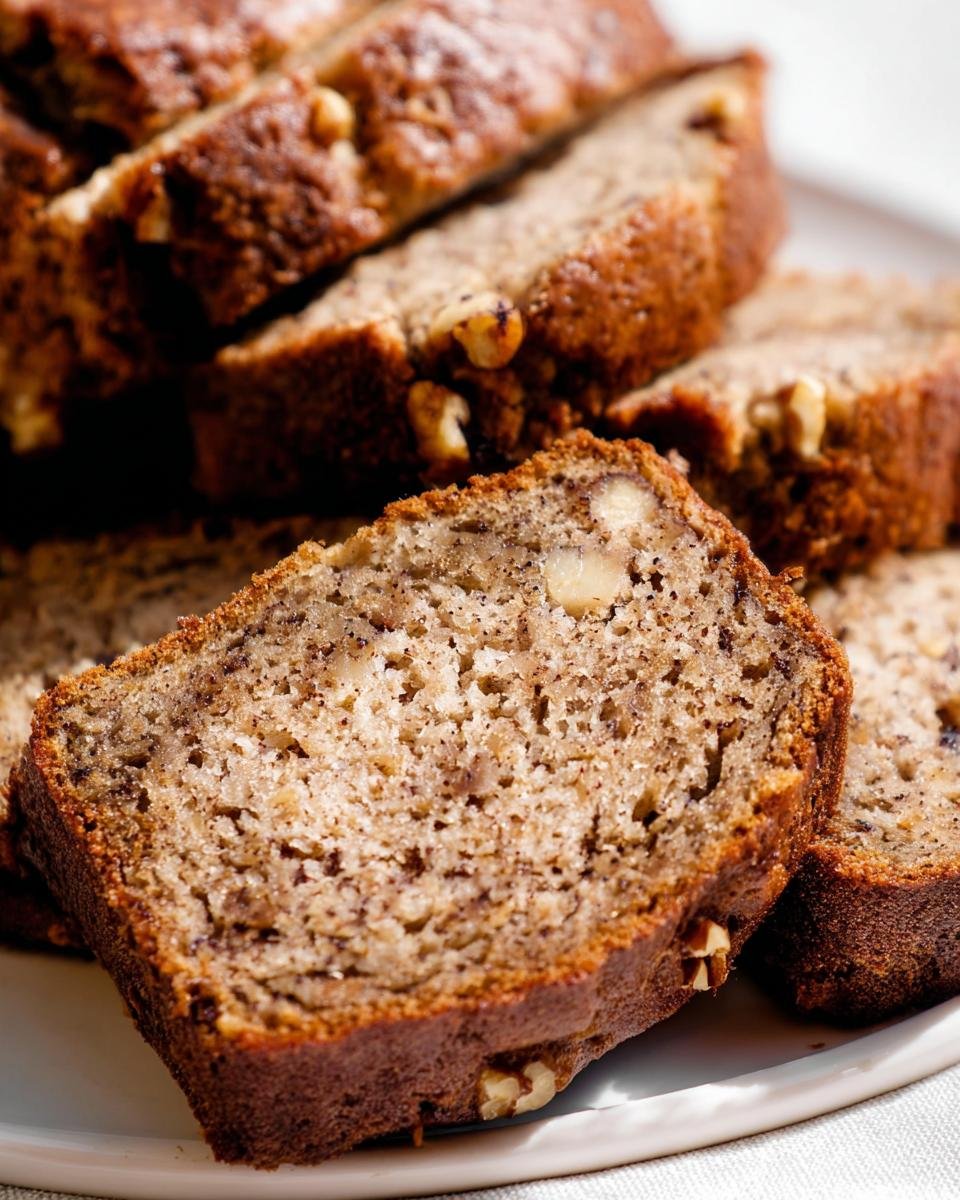
- We use Greek yogurt (or sour cream) to give it that gorgeous, slightly dense but fluffy crumb that mimics bakery style bread.
Gathering Ingredients for the Best Banana Bread Ever Moist and Tender
Okay, stop right there! Before you even think about turning on the oven, we need to look at our ingredients. Getting the right components ready—and paying attention to their temperature—is half the battle in achieving that famous moist texture. Seriously, don’t substitute the brown sugar for white, or you’ll lose so much flavor!
This recipe is meant to be easy, but achieving incredible results means respecting the prep work, especially with our wet ingredients. If you want that bakery feel, make sure your butter, eggs, and yogurt are sitting out for at least 30 minutes before you start mixing.
We have a lot of great additions in here that you can explore later, maybe checking out some other breakfast ideas linked over at our breakfast page, but for now, let’s focus on nailing this list.
Dry Ingredients
- 2 cups all-purpose flour (Remember we need this spooned & leveled, please!)
- 1 teaspoon baking soda
- 1/4 teaspoon salt
- 1/2 teaspoon ground cinnamon
Wet Ingredients
- 1/2 cup unsalted butter, softened to room temperature
- 3/4 cup packed light or dark brown sugar
- 2 large eggs, at room temperature
- 1/3 cup plain Greek yogurt or full-fat sour cream, at room temperature
- 1.5 cups mashed bananas (about 3–4 truly ripe bananas!)
- 1 teaspoon pure vanilla extract
Optional Add-ins
- 3/4 cup chopped pecans or walnuts
- 1 cup semi-sweet chocolate chips
Essential Equipment for Baking Success
I know it sounds like a lot of stuff, but seriously, you probably have most of this sitting around already! Having the right tools just makes the whole process smoother, especially because we are managing liquid and solid ingredients separately before they meet. If things are too complicated, you might skip a vital step, and we want to avoid that!
For this recipe, you absolutely must have a couple of bowls for mixing—one medium bowl for the dry stuff and a nice big bowl for the wet action. If you don’t want to end up stirring until your arm falls off, I highly recommend using an electric mixer for creaming the butter and sugar. It really helps incorporate the air we need for that light texture.
Here is what you should pull out of the cupboard before you start:
- A standard 9×5-inch loaf pan—this is the perfect vessel for this amount of batter!
- Either a handheld or a stand mixer for creaming (your arm will thank you).
- A medium bowl dedicated to holding your dry ingredients.
- A large bowl for all the delicious, messy wet ingredients to hang out in.
- A sturdy cooling rack so the bottom of your perfect loaf doesn’t steam itself soggy.
Step-by-Step Instructions for the Best Banana Bread Ever Moist and Tender
Alright, we have our amazing lineup of ingredients, now it’s time for the magic—the assembly! Believe me when I say the order you do things here makes the entire difference between good banana bread and the Best Banana Bread Ever Moist and Tender. Follow these steps exactly, and you’ll have that perfect, velvety crumb instead of something tough. If you want ideas for baking things like muffins later, you might check out our oatmeal muffins post for inspiration!
Preparation and Dry Mixing
First things first: get that oven warming up! You want it set to 350\u00b0F (177\u00b0C). I always adjust my rack to the lower third position. This stops the top from getting scorched while the inside finishes baking, which is crucial for even cooking. Grab that 9×5-inch loaf pan and grease it up really well—I use cooking spray and a little flour dust. Don’t skip this! Then, just take a quick moment in your medium bowl to whisk the flour, baking soda, salt, and cinnamon together. Give it a good stir so everything is evenly distributed and set it aside.
Creaming Butter and Sugar
This is where we build volume! Grab your big bowl and your mixer. Beat that softened butter and the brown sugar together on medium-high speed for a good 3 minutes. You’re looking for it to look light and truly creamy—almost fluffy! Once that’s perfect, slow the speed down and add your room temperature eggs, one at a time, beating well after each one goes in. Don’t forget to scrape down the sides! Finally, beat in the yogurt (or sour cream), the vanilla, and all 1.5 cups of your mashed bananas until it just comes together.
Combining and Folding
Here is the most important rule for a tender bread: DO NOT OVER-MIX! Add those dry ingredients you whisked earlier right into the wet mixture, but keep that mixer on the lowest speed. Mix only until you see no more white streaks of flour. It should look thick; that’s okay! If you’re adding nuts or chocolate chips, stop the mixer right there. Gently fold them in using a spatula. You want to incorporate them, not mash the beautiful air bubbles we just created.
Baking and Cooling for Perfect Texture
Pour that thick batter into your greased pan and spread it out evenly. Pop it in the preheated 350\u00b0F oven for about 60 to 65 minutes. Now, here’s a pro tip: around the 30-minute mark, loosely tent a piece of aluminum foil over the top. If the top starts looking too dark, the foil protects it while the center finishes baking. Test it with a toothpick! It should come out clean, maybe with just a few small, moist crumbs clinging to it—that’s perfect, means it’s wonderfully moist. After you pull it out, let it chill in the pan on a cooling rack for a full hour. Seriously, wait the hour! This helps it firm up before you try to turn it out.
Expert Tips for the Best Banana Bread Ever Moist and Tender
You’ve followed the steps, but if you want to jump from great banana bread to achieving that legendary status—the Best Banana Bread Ever Moist and Tender—you need to listen to just a couple of these tiny tweaks. These aren’t in the main instructions, but they are what separates the bakers who just make banana bread from those of us who make *the* banana bread!
I’ve learned that baking is just science with a delicious outcome, and sometimes understanding *why* we do something helps us do it better next time. I love sharing these little secrets I’ve gathered over the years!
Choosing the Right Bananas
Never, ever use bright yellow bananas for this. I mean it! For ultimate moisture and sweetness, your bananas need to look sad, almost black, covered in spots. They need to be mushy when you squeeze the peel. As bananas ripen past yellow, their starches convert to sugars, which means two things for us: incredible flavor, and way more natural moisture that we can’t get from any other ingredient. Peel them, mash them quickly, and get them into that wet ingredient bowl!
Temperature Matters for Ingredients
I know I mentioned this when we listed the ingredients, but I have to shout this out again because it’s so vital for a tender crumb: room temperature eggs and dairy! If your eggs are cold when you add them to the creamed butter and sugar, they shock the fat mixture.
Shocking the mixture causes it to curdle slightly, meaning you don’t incorporate nearly as much air. We need that air for lift and lightness! If your eggs and yogurt are room temp, they blend seamlessly into that creamy base, creating a beautiful emulsion that traps air wonderfully. This ensures the final bread is tender and not dense or heavy.
If you want to dive deeper into improving your foundational baking skills, check out some of the tips we compiled over on our homemade goodness recipes board!
Storing Your Moist Banana Bread
Now that you’ve pulled off the miracle of baking the Best Banana Bread Ever Moist and Tender, the next question is how to keep it that way! Nobody wants dry banana bread by day two, so a little strategy goes a long way here. Don’t worry about complicated preservation; this bread is tough enough to handle real life on the counter!
My grandmother always said that quick breads—especially moist ones like this—taste better the second day anyway because the flavors have a chance to really meld together. But you have to wrap it right!
Here is the simple way I handle storage to keep that tenderness locked in:
- Room Temperature: If you plan on eating the loaf within three days, just wrap it up tightly. I use plastic wrap first, making sure I get a good seal around the ends, and then I wrap it again in aluminum foil for extra security. Store it on the counter.
- Refrigerator Storage: If you need it to last longer, up to a week, the fridge is your friend. Wrap it the same way—tightly sealed plastic wrap is key here—and then place it in an airtight container. When you want to eat a slice, just let it sit on the counter for about 20 minutes to take the chill off and soften up again.
The provided recipe notes mention that wrapping it tightly keeps it good for up to 3 days at room temperature, or up to a week if you sneak it into the fridge. I usually just try to eat it all in three days because it never seems to last that long around here!
Frequently Asked Questions About Banana Bread Recipes easy from scratch bakery style moist breakfast
It’s funny how even the easiest recipes bring up the most questions! People want to know how to adapt things, especially when they are aiming for a truly bakery style moist breakfast treat. Don’t worry if you need to make substitutions; we can usually work around things. If you’re ever curious about trimming things down, you can check out our low-carb section, but for this classic recipe, let’s talk about making it work for you!
Can I use frozen bananas in this recipe?
Oh yes, absolutely! Frozen bananas are often even better because they leak out a ton of liquid when they thaw. If you throw them in frozen, it messes up your wet/dry ratios. So, the trick is to thaw them completely in a bowl first. Once thawed, mash them up, but taste the liquid that separates out—it gets super concentrated. You might only want to use about half of that extra liquid in the recipe, otherwise, your bread might get a little gummy instead of tender.
How do I make this banana bread recipe dairy-free?
That’s a really common request! Replacing the yogurt/sour cream is the easiest part—swap it out 1:1 with a non-dairy yogurt, like coconut or almond varieties, making sure it’s full-fat for richness. For the butter, you can usually substitute it with a high-quality stick of non-dairy butter alternative, again using the exact same amount. Just make sure you use those room temperature guidelines when mixing so the emulsion still sets up nicely!
Can I skip the brown sugar in this banana bread?
You really, really shouldn’t skip the brown sugar if you are focused on the moist aspect of these banana bread recipes easy from scratch! Brown sugar contains molasses, which keeps the bread moist and tender way longer than plain white granulated sugar does. If, for some reason, you are completely out, you can substitute it with white sugar, but you must add an extra tablespoon of plain yogurt or sour cream to try and make up for the lost moisture. It won’t be quite the same, but it works in a pinch!
Serving Suggestions for Your Banana Bread
So, the loaf is perfectly golden, cooled down just right, and you’ve managed to slice into that moist, tender center. What now? Well, banana bread isn’t just a great snack; it’s practically the perfect breakfast centerpiece! I love thinking about all the ways you can dress up this simple, elegant bread. It really shines when paired with the right toppings or a beautiful beverage.
When I serve this for Sunday brunch, I love to keep things simple because the bread itself is already so flavorful. Seriously, a thick slice of this bread doesn’t need much help. But if you’re feeling a little fancier, or maybe you’ve got company coming over, here are a few ways I like to serve it up!
Simple Spreads and Butters
Sometimes a little fat makes everything better, right? Skip the jam and try these instead:
- Salted Butter: The classic choice! Use really good quality butter and let it soften completely so it melts right into the warm crumb. A tiny sprinkle of flaky sea salt on top of the butter takes it over the top.
- Cinnamon Honey Butter: Mix softened butter with a drizzle of honey and a dash of extra cinnamon. It gives you that sweet, spiced breakfast feel without slathering on heavy frosting.
- Cream Cheese Schmear: A thin layer of plain cream cheese adds a nice tang that cuts through the sweetness of the banana.
Perfect Pairing Beverages
If you’re having this for breakfast, you need the right fuel! This bread is fantastic alongside coffee, but honestly, it goes divine with a spiced drink. If you’re looking for something cozy to sip on while you enjoy your warm slice, you absolutely need to try making my favorite spiced Chai Tea Latte. The warm spices in the latte really highlight the cinnamon we already baked into the bread!
For simpler morning drinking, a strong black coffee or a cold glass of milk are unbeatable companions to this rich, sweet quick bread.
Turning it into Dessert
Don’t box up the leftovers just yet! If you have a day-old slice that’s solidified a little, try this: lightly toast the slice in a toaster oven or a dry skillet until the edges are slightly crisp. Then, top it with a scoop of vanilla ice cream and maybe a drizzle of caramel sauce. It transforms instantly into a fantastic, easy dessert!
Nutritional Estimate for Best Banana Bread Ever Moist and Tender
Okay, I’m going to be super honest with you here—I totally skip tracking nutrition when I bake banana bread because frankly, it’s comfort food, and nobody wants to feel guilty about the Best Banana Bread Ever Moist and Tender! However, I know some of you wonderful bakers are curious about what goes into your delicious quick bread, so I’ve pulled together a typical estimate based on standard pantry versions of these ingredients.
If you’re watching macros or counting carbs, remember that where you start matters a lot! Using full-fat Greek yogurt versus a lighter version, or adding chocolate chips versus pecans, will change these numbers substantially. Always treat these values as a general guideline. If you want to explore lighter options further, you can always check out the tips over on our nutrition category for more ideas!
For one standard slice (assuming the recipe makes 10 slices):
- Calories: Roughly 300-350 kcal
- Fat: About 15-18g
- Protein: Around 4-5g
- Carbohydrates: Approximately 40-45g
This range reflects making the bread plain (no chocolate chips or nuts added in). If you fold in those walnuts or chocolate chips, expect the fat and calories to tick up a bit, but honestly, it’s always worth it for that extra texture and flavor burst!
Best Banana Bread Ever Moist and Tender
Ingredients
Equipment
Method
- Adjust the oven rack to the lower third position and preheat the oven to 350°F (177°C). Lowering the oven rack prevents the top of your bread from browning too much, too soon. Grease a 9×5-inch loaf pan with nonstick spray. Set aside.
- In a medium bowl, whisk the flour, baking soda, salt, and cinnamon together. Set aside.
- In a large bowl using a handheld or stand mixer fitted with a paddle attachment, beat the butter and brown sugar together on medium-high speed until light and creamy, about 3 minutes. With the mixer running on medium speed, add the eggs one at a time, beating well after each addition. Scrape down the sides of the bowl as needed. Beat in the yogurt, vanilla, and mashed bananas until combined.
- Add the dry ingredients into the wet ingredients and beat on low speed just until combined. Do not over-mix. Fold in the nuts or chocolate chips, if you are using them. The batter should be thick.
- Pour and spread the batter into the prepared baking pan. Bake for 60–65 minutes, making sure to loosely cover the pan with aluminum foil halfway through, to prevent the top from getting too brown. The bread is done when a toothpick inserted in the center comes out clean with only a few small moist crumbs.
- Cool the bread in the pan set on a cooling rack for 1 hour. Remove the bread from the pan and cool it directly on the rack until ready to slice and serve.