
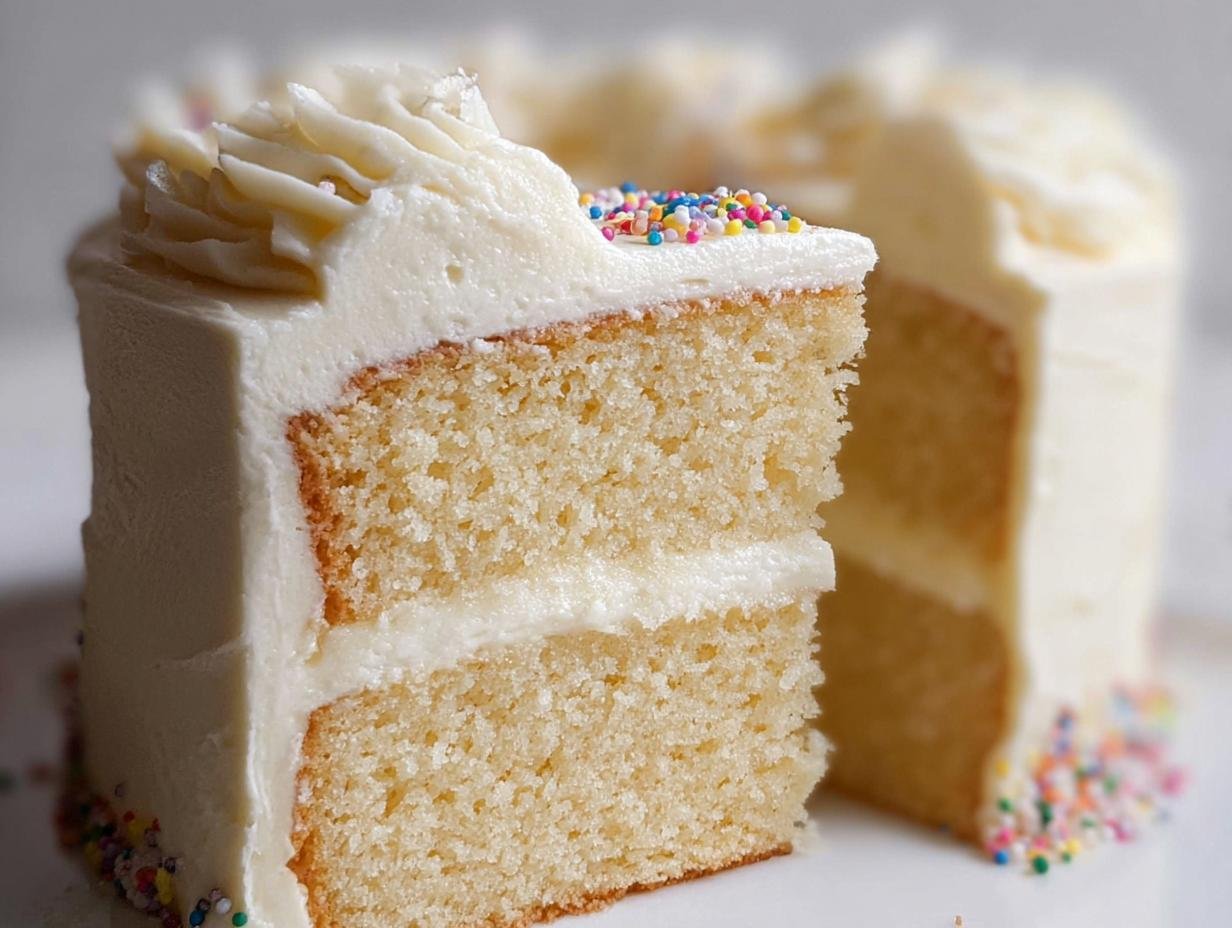
Oh, nothing beats the feeling of pulling a warm, perfectly scented cake out of your own oven, right? Forget the boxes! When I first baked my Classic Vanilla Cake from Scratch, it was just for a tiny family gathering of three people, but the moment that golden, fluffy cake appeared, it felt like the biggest celebration ever. That simple act—transforming flour, sugar, and vanilla into something magical—is why this recipe means so much to me. It’s my go-to for sharing comfort and nostalgia.
This isn’t some fussy, complicated bake, either. I promise this is the most reliable, simple recipe you’ll find for achieving that perfect, tender crumb. I’m Yam Scott, Digital Producer here at Everyday Kravings, and baking this cake is how I bring a little bit of home into my crazy busy day. You can read a bit more about my journey in the kitchen over at my personal page. Trust me, you are going to love learning this one!
Why This Classic Vanilla Cake from Scratch is Your New Favorite
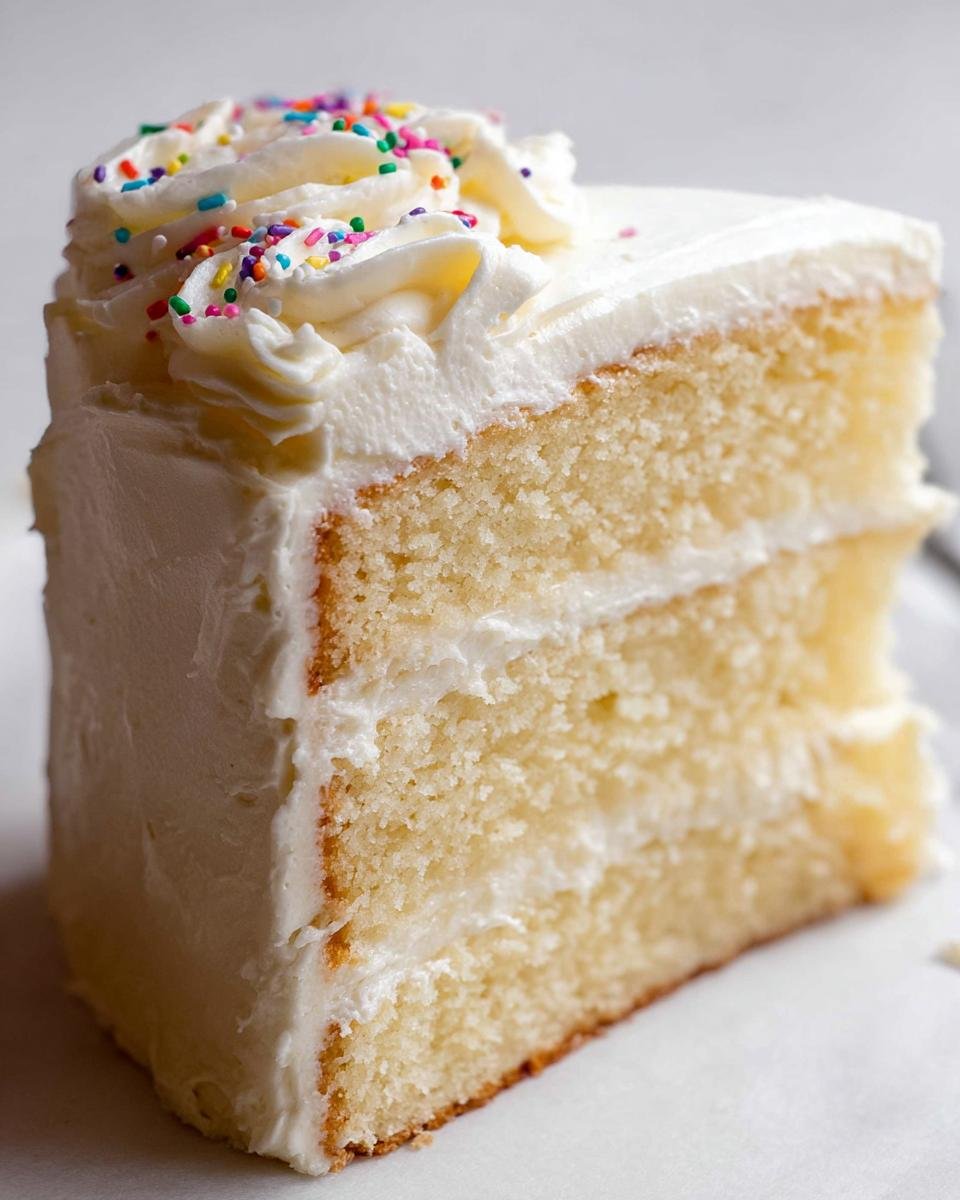
When you’re looking for an easy cake recipe from scratch that just *works*, this is it. Seriously, this recipe delivers that beautiful, classic layer cake party feel without any drama. This cake is pure, comforting vanilla flavor that reminds you why baking from scratch is so rewarding!
- It’s incredibly reliable—I’ve made dozens, and they always turn out gorgeous.
- The flavor is pure nostalgia, the kind everyone loves.
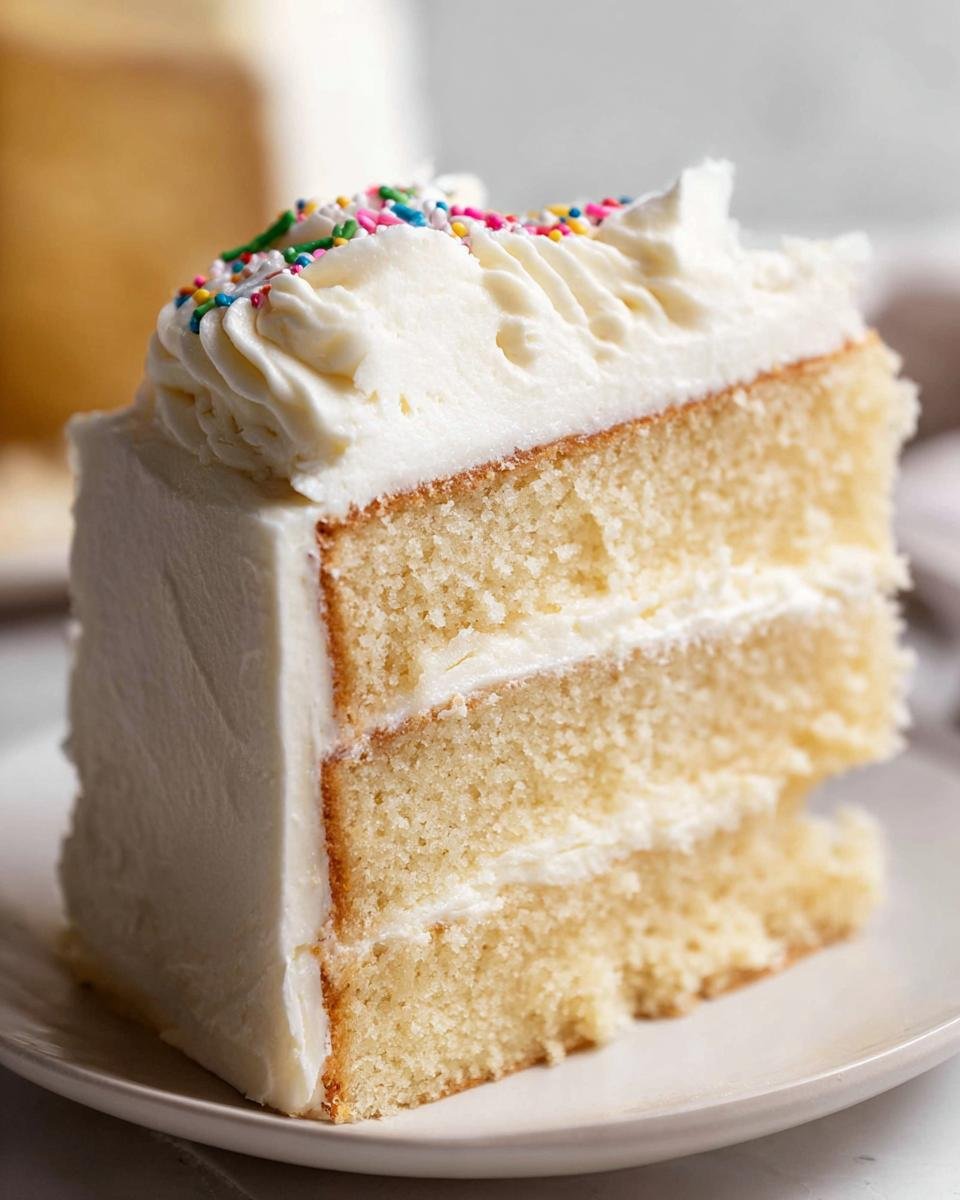
- It sets you up perfectly for stacking or serving as a simple, elegant single layer.
Perfect Texture Every Time
The secret to that fluffy, light crumb isn’t anything crazy; it’s all in the technique! We whip the eggs and sugar until they triple in volume. That’s where all the air gets trapped, making the cake lift beautifully. My biggest expert tip here? Make sure your eggs and milk are fully at room temperature. It makes a huge difference in how well that air whips in!
Simple Ingredients for a Classic Layer Cake Party
You don’t need to hunt down fancy extract bases or strange items for this bake. We’re using pantry staples to create an incredible flavor base. This is the kind of straightforward bake that lets you pull together an amazing dessert for any spontaneous classic layer cake party without panic. It’s simple baking goodness!
Essential Equipment for Your Classic Vanilla Cake from Scratch
Before we even think about mixing, let’s get your kitchen set up! Having the right tools ready makes the whole process so much smoother—especially for beginners. You’ll want to grab your stand mixer, naturally, but make sure you have both the whisk and the paddle attachments handy.
Since this is a layer cake, grab two standard 8-inch round pans. If your oven runs hot or fast, the middle shelf is usually the sweet spot. Here’s the shorthand list of what you need to pull out before starting:
- Stand Mixer with whisk and paddle attachments
- 2 x 20cm / 8” cake pans
- Large bowl
- Heatproof jug
- Whisk
- Cooling racks
Gathering Ingredients for the Classic Vanilla Cake from Scratch Batter
Alright, let’s talk ingredients! This is the exciting part where simple things turn into something grand. For the cake batter itself, we are relying on basics, but the details really matter, so pay attention to those notes I’ve jotted down. You’ll need about 2 cups of all-purpose flour—and if you have cake flour on hand, go for it, but AP is perfect too.
Then we grab the leavening: 2.5 teaspoons of baking powder. Make sure you sniff that baking powder, seriously! If it doesn’t smell sharp, toss it; you need active powder for a good lift. Mix those dry bits with just a pinch of salt. For the wet team, we need 4 large eggs—and please, make sure they are at room temperature, it helps them fluff up so much better! Get your 1.5 cups of sugar (caster is great, but regular granulated is fine) and 115 grams of unsalted butter that you’ve cut into small, half-inch cubes.
Finally, the moisture crew: 1 cup of full-fat milk, 3 teaspoons of really good vanilla extract (splash out a little for this, it’s worth it!), and 3 teaspoons of neutral oil like vegetable or canola. Don’t combine anything yet—just have it organized and measured!
Ingredients for the Vanilla Buttercream
Now for the fluffy topping! For the perfect vanilla buttercream, we need 225 grams of unsalted butter, but this *must* be properly softened—think squishy, not melted or greasy. Next up is the sugar: 500 grams of icing sugar, and I mean it when I say **sift it**, or your frosting will look gritty! Trust me, sifting is half the battle won here.
For flavor, we need 3 teaspoons of vanilla extract again. To get that signature creamy texture, start with 2 tablespoons of milk, but I usually add a little more until it just feels right when you beat it on high speed. Remember, if your kitchen is warm, that butter melts fast, so work quickly once you start whipping!
Step-by-Step Instructions for the Classic Vanilla Cake from Scratch
Okay, here’s where the magic happens! This process moves fast once you get going, so having everything measured out helps tremendously. Remember, we’re aiming for light, fluffy cake, so pay attention to those speeds and times, especially when we whip the eggs!
Preparing Pans and Dry Ingredients
First thing—don’t even touch the mixing bowl until the oven is ready! Preheat your oven to 180°C/350°F (or 160°C if you have a fan!) about 20 minutes before you start mixing the batter. Get your two 8-inch cake pans ready; butter them up well, line the bottoms with parchment paper, and skip any loose-bottomed pans if you have them, they can be tricky!
Now, take your dry ingredients—flour, baking powder, and salt—and whisk them together in a big bowl. This just makes sure everything is evenly distributed before it meets the wet stuff. Set that bowl aside for a moment.
Creating the Light and Aerated Egg Base
This is the most important part for texture! Put your eggs in the stand mixer, fitted with the whisk attachment, and beat them for just 30 seconds until they look a little airy. Then, while the mixer is still running, slowwwly pour in all that caster sugar over about 45 seconds. Don’t rush this pour!
Now, turn the speed way up—Speed 8 or high speed—and let that egg-sugar mixture whip for a full 7 minutes. You’re looking for it to triple in volume and turn pale white. Seriously, set a timer. This step creates the structure, so we don’t want to skip it!
Incorporating Wet and Dry Components
While the eggs are whipping, gently melt your butter and milk together in a heatproof jug—about 2 minutes in the microwave usually does it. Once the eggs are done whipping, scatter about one-third of your dry flour mix over the top, and beat on the absolute lowest speed (Speed 1) for only 5 seconds. Add half of your remaining flour, mix for 5 more seconds, then add the rest of the flour and mix for just 10 more seconds.
As soon as you can’t see any more streaks of flour, STOP mixing. Now, gently pour your hot milk, oil, and vanilla mixture into the empty flour bowl you used earlier. Whisk that combination until smooth. You’ll then take about two ladles worth of your whipped egg batter and mix that vigorously into the milk mixture to lighten it up.
Pour that lightened milk mixture back into the main big bowl of egg batter. Mix on Speed 1 for just 10 seconds, scrape down the sides one last time, and that’s it! Don’t overmix! Pour that gorgeous, airy batter into your prepared pans and bang them sharply on the counter three times to pop any massive air bubbles.
Baking and Cooling the Layers
Pop those pans into the preheated oven and bake them for about 30 minutes. The cake is done when it’s golden, springs back gently if you tap it, and a toothpick inserted into the center comes out totally clean. Don’t open the oven early, or they might sigh in the middle!
When they come out, let them cool in their pans for about 15 minutes—this helps them firm up a bit. Then, carefully turn them out onto the cooling racks. If you plan on stacking them later for your layer cake project, turn them upside down as they cool. This flattens the top slightly for easier frosting later!
Making the Perfect Vanilla Buttercream
While the cakes cool completely—and I mean *completely* or the frosting will melt!—let’s make the buttercream. Put your softened butter (it should indent easily when you press it) into your stand mixer with the paddle attachment. Beat that butter hard on high speed for 3 minutes until it loses its yellow and looks nearly white and super fluffy. That intensive beating is crucial for a light buttercream!
Slowly, and I mean slowly, add your sifted icing sugar in three batches, mixing on low speed first until it just disappears. Once it’s mostly mixed in, crank the speed up high and let it whip for a full 3 minutes until it’s cloud-like. Finally, beat in your vanilla and 2 tablespoons of milk. If it seems too stiff to spread nicely, add another tablespoon of milk until it holds its shape but is easy enough to glide over the cake.
Tips for Baking Success with Your Classic Vanilla Cake from Scratch
Honestly, baking this Classic Vanilla Cake from Scratch is all about small details that add up to a huge difference in the end. Don’t worry if the first time isn’t magazine-perfect; these few pointers will give you a serious confidence boost next time around!
First, I cannot stress enough the importance of temperature management. Use room temperature eggs and milk for the cake batter, as I mentioned earlier. Cold ingredients don’t emulsify well with the butter and sugar, which means you won’t trap enough air. This is vital for that perfect texture!
Next up, when you’re mixing in the flour, you must stop mixing the *second* you can’t see white flour streaks. Seriously, stop the mixer! Overmixing develops gluten in the flour, and that turns a lovely, tender cake into something a little tough. A few tiny lumps in the batter are better than a dense cake, trust me.
Finally, let’s talk about that gorgeous buttercream and what happens if you’ve made it ahead of time. If you refrigerated your vanilla buttercream, don’t try to frost the cake straight from the fridge! It will be too stiff. You need to bring it back to room temperature and take the paddle attachment out of the mixer, stick it back in the bowl, and whip it again on high speed until it’s light and fluffy once more. If your kitchen is warm and the frosting gets too soft while you’re working, pop the whole bowl in the fridge for about 10 minutes, then whip it again to re-fluff. It always bounces back!
Serving Suggestions for Your Beautiful Cake
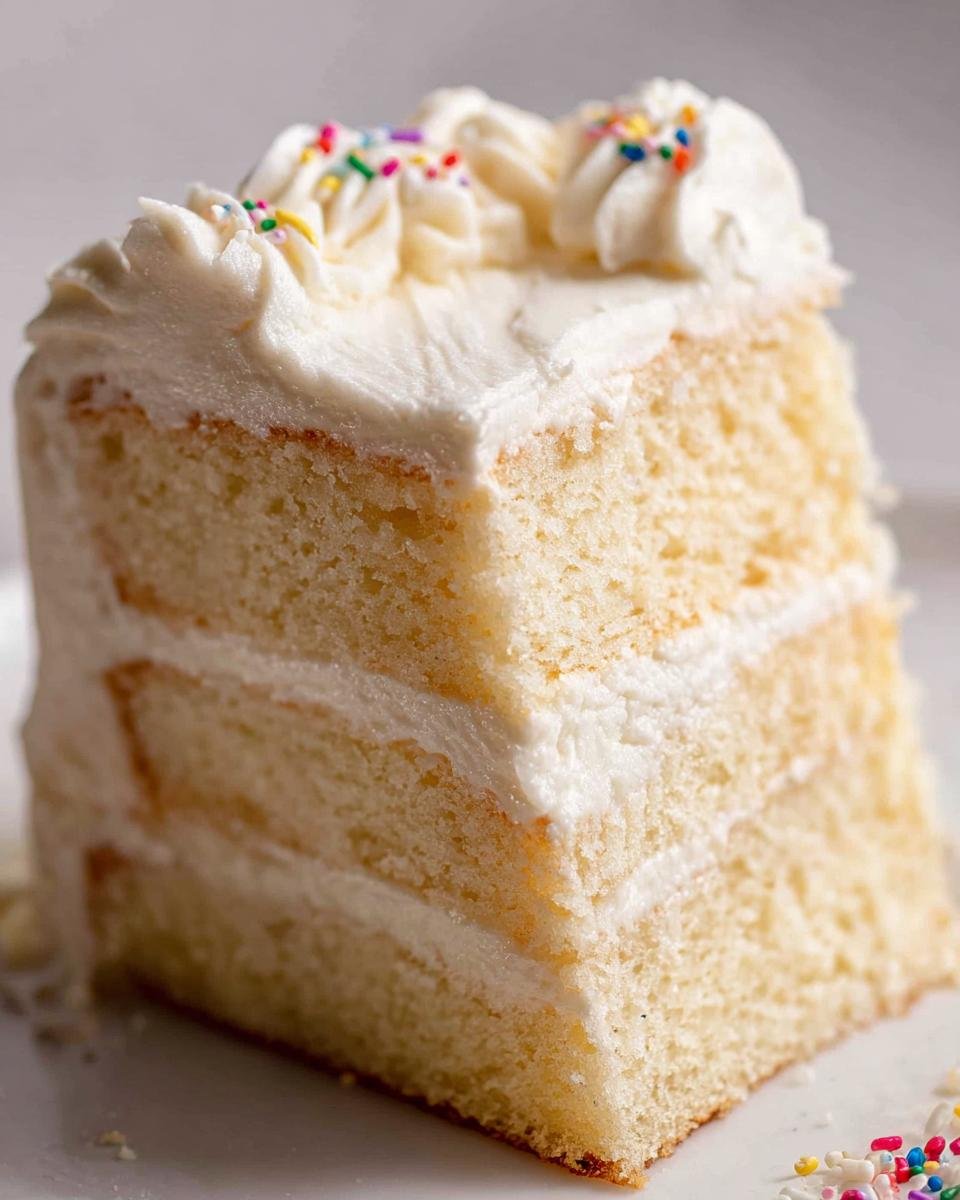
Once that cake is cool and slathered in my fluffy vanilla buttercream—wow! I often try to keep the presentation as simple and classic as the flavor itself. This cake is so good, it truly doesn’t need much fuss.
My favorite way to serve it, if I’m not making a huge deal out of it, is just a light dusting of powdered sugar over the top layer after frosting. It gives it that elegant, slightly vintage bakery look.

But for a real treat, especially since we love fresh simple things around here, grab some mixed fresh berries—raspberries, sliced strawberries, maybe a few perfect blueberries. They cut through the richness of the buttercream beautifully. It’s a lovely way to present a dessert that fits right in with our appreciation for fresh flavor profiles. Check out some of my other ideas for working with fresh ingredients over here!
If you’re in a rush, just grab the prettiest cake stand you own, slice it generously, and that’s honestly all the serving suggestion you’ll need. Enjoy every bite!
Storing Your Classic Vanilla Cake from Scratch
Knowing how to store your beautiful creation is the final hurdle to enjoying it all week! We put so much love into this Classic Vanilla Cake from Scratch, we need to make sure it stays tasting just as amazing the next day—or even three days later!
If your cake is already frosted with that lovely vanilla buttercream, you have options, but airtight is always the goal. At room temperature, a frosted cake will happily sit out for about two days. I keep mine on a cake stand covered with a cake dome or even just a large overturned mixing bowl. This keeps dust off and stops the outside from getting dry. Just make sure your kitchen isn’t too warm, otherwise, that butter starts to weep, and we don’t want that mess!
If you are making a large batch or know you won’t finish it quickly, the fridge is your friend. Wrap individual, unfrosted layers tightly in plastic wrap first. This keeps moisture locked in. Once fully cooled, if you wrap the unfrosted layers tight, they will keep happily in the fridge for up to five days. When you’re ready to frost them, let them sit out on the counter for an hour so they lose that cold chill—it makes frosting so much easier!
Once it’s frosted and sitting in the fridge, it’ll last beautifully for four to five days. The only thing to watch out for is that the cold can slightly dull the flavor, so if you plan to serve it cold, let the portion you’re eating sit out for about 30 minutes before slicing. Honestly, this cake usually doesn’t last past day three in our house, but it’s good to know the tricks just in case!
Frequently Asked Questions About This Classic Layer Cake
It’s totally normal to have questions when you’re baking a cake from scratch for the first time, or even the tenth time! I’ve pulled together some common things people wonder about when they’re whipping up this Classic Vanilla Cake from Scratch. Don’t let little hiccups stop you from enjoying this classic layer cake party staple!
Can I use regular granulated sugar instead of caster sugar in this recipe?
Yes, absolutely! That’s the beauty of baking from scratch—you work with what you have. The recipe notes mentioned that regular granulated sugar is totally fine to use instead of caster or superfine sugar. Caster sugar dissolves just a tiny bit faster because the granules are finer, but since we are whipping those eggs for a solid 7 minutes, regular sugar integrates beautifully. You’ll still get that light, airy texture we worked so hard for!
What is the best way to make this cake ahead of time?
I love making cake layers ahead of time; it saves so much stress on party day! Once your cake layers are completely cooled—and I mean totally cold to the touch—you want to wrap them tightly. I usually use two layers of plastic wrap or you can use aluminum foil. This locks in all that lovely moisture. Store the wrapped layers at cool room temperature for up to two days, or freeze them for up to a month! If you freeze them, let them thaw overnight on the counter before unwrapping, then frost them.
Try to wait until just before serving to frost, though. Frosting a slightly cool cake layer is easier than a room-temperature one, but a completely cold cake can make the buttercream seize up if the kitchen is chilly.
My cake layers sank slightly after cooling. What caused this?
Oh no, the dreaded sink! It’s usually one of two things with a cake like this. First, it might have been slightly underbaked. A toothpick coming out with moist crumbs is good, but if those crumbs are still wet, give it another minute or two. Second, the biggest culprit for sinking is opening the oven door too soon, especially during the first 20 minutes of baking. That sudden drop in temperature before the structure is set makes the trapped air collapse inside. Next time, keep the oven door shut tight until you get close to that 30-minute mark!
If you’re looking for more deep dives into why our best recipes work so well, you can always check out our About Us page for more insight into our standards!
Nutritional Estimate for This Homemade Dessert
Just so you have the basics, here is the estimated nutritional breakdown for one serving of this classic vanilla cake, based purely on standard ingredient averages. Keep in mind that since we are baking everything from scratch, the exact amounts can shift slightly based on the brands of butter or sugar you use!
- Calories: 339
- Fat: 13g
- Carbohydrates: 51g
- Protein: 6g
- Sugar: 31g
This is just a general guideline, of course. We focus on flavor and quality ingredients here, and that’s what truly matters for a delicious homemade dessert!
Nutritional Estimate for This Homemade Dessert
Just so you have the basics, here is the estimated nutritional breakdown for one serving of this classic vanilla cake, based purely on standard ingredient averages. Keep in mind that since we are baking everything from scratch, the exact amounts can shift slightly based on the brands of butter or sugar you use! You can find more information on our approach to baking and diet over at our nutrition category page.
- Calories: 339
- Fat: 13g
- Carbohydrates: 51g
- Protein: 6g
- Sugar: 31g
This is just a general guideline, of course. We focus on flavor and quality ingredients here, and that’s what truly matters for a delicious homemade dessert!
Classic Vanilla Cake from Scratch
Ingredients
Equipment
Method
- Preheat oven to 180°C/350°F (160°C fan) for 20 minutes before starting the batter. Place shelf in the middle of the oven.
- Grease 2 x 20cm / 8” cake pans with butter, then line with parchment / baking paper. Best to use cake pan without loose base, if you can.
- Combine Dry Ingredients: Whisk flour, baking powder and salt in a large bowl. Set aside.
- Beat eggs until aerated: Beat eggs for 30 seconds on speed 6 of a Stand Mixer fitted with a whisk attachment, or hand beater.
- Slowly add sugar: With the beater still going, pour the sugar in over 45 seconds.
- Triple volume: Then beat for 7 minutes on speed 8, or until tripled in volume and white.
- Finish cake batter: While egg is beating, place butter and milk in a heatproof jug and microwave 2 minutes on high to melt butter (or use stove).
- Gently add flour: When the egg is whipped, scatter 1/3 flour across surface, then beat on Speed 1 for 5 seconds. Add half remaining flour, then mix on Speed 1 for 5 sec. Add remaining flour, then mix on Speed 1 for 5 – 10 sec until the flour is just mixed in. Once you can’t see flour, stop straight away.
- Combine milk, vanilla & oil: Pour hot milk, vanilla and oil into the now empty flour bowl.
- Lighten with some Egg Batter: Add about 1 1/2 cups (2 ladles or so) of the Egg Batter into the Milk-Butter. Use a whisk to mix until smooth. It will look foamy.
- Slowly add milk: Turn beater back on Speed 1 then pour the Milk mixture into the Egg Batter over 15 seconds, then turn beater off.
- Scrape and final mix: Scrape down sides and base of bowl. Beat on Speed 1 for 10 seconds – batter should now be smooth and pourable.
- Pour batter into pans.
- Knock out bubbles: Bang each cake pan on the counter 3 times to knock out big bubbles.
- Bake 30 minutes or until golden and toothpick inserted into centre comes out clean.
- Turn out & cool: Remove from oven. Cool in cake pans for 15 minutes, then gently turn out onto cooling racks. If using as layer cakes, cool upside down.
- Frost: Once cake layers are fully cool, top with frosting of choice, or cream and fresh berries or jam.
- Vanilla Buttercream: Beat butter with paddle attachment in stand mixer for 3 minutes on high until it changes from yellow to almost white, and it becomes fluffy and creamy.
- Add icing sugar / powdered sugar gradually in 3 lots, beating slowly then once mostly incorporated, beat on high for a full 3 minutes until fluffy.
- Add vanilla and milk, then beat for a further 30 seconds. Use milk only if needed to make it soft but still holds its form. Use immediately.