
Mornings can be such a rush, right? You’re stumbling around trying to get everyone fed, and suddenly you realize you forgot to plan for breakfast entirely. That’s why I live and breathe for good make-ahead meals, especially on those hectic weekday dashes. Seriously, nothing beats waking up knowing you have something incredible waiting!
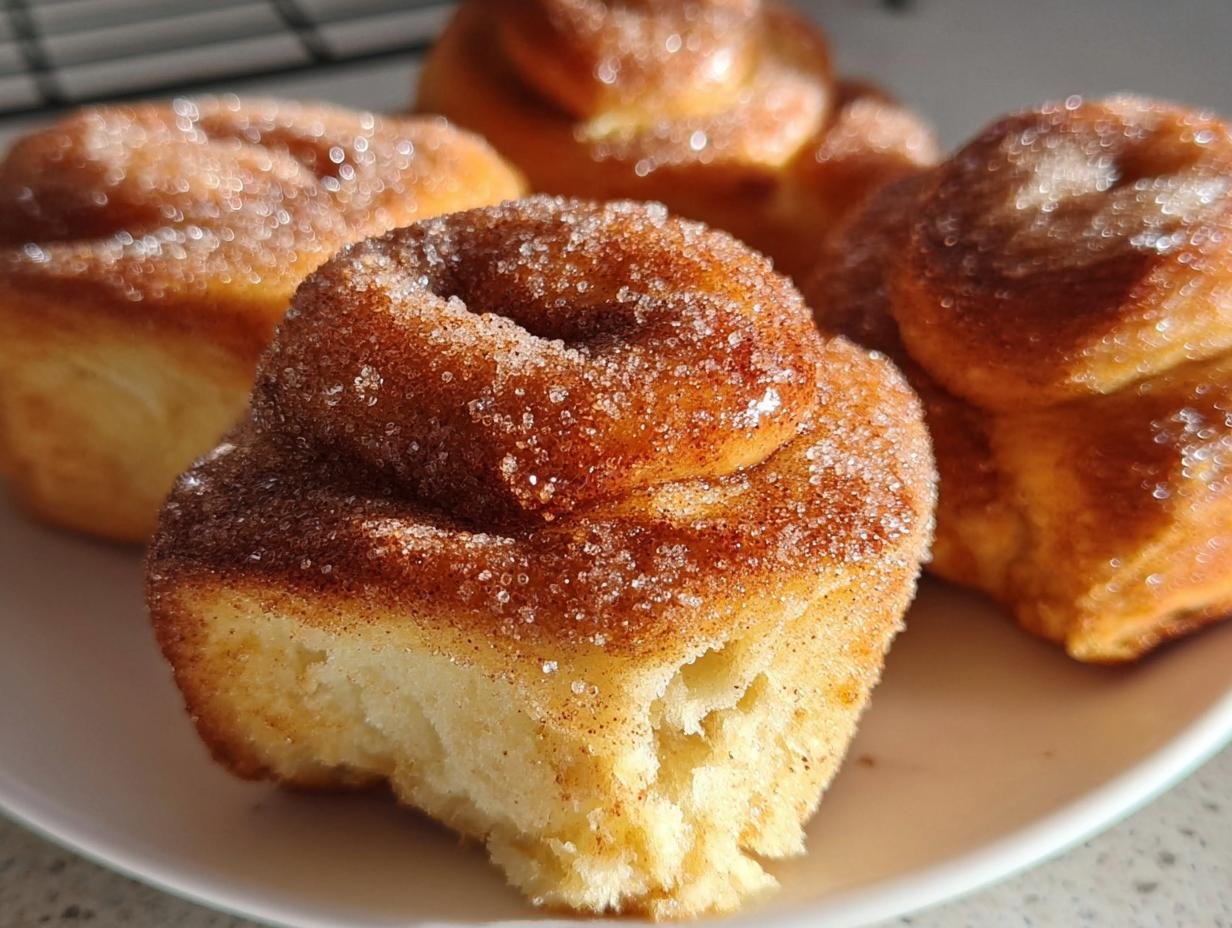
This recipe for my **Breakfast Rolls – Warm, Fluffy & Make-Ahead Friendly (breakfast ideas Recipe, 2025 Edition)** is my absolute lifesaver. We’re talking about soft, sweet little spirals that bake up golden right when you need them. The secret—and this is crucial for amazing texture—is that long, cold rest in the fridge. It just deepens the flavor so much! Trust me, having these ready to pop in the oven makes me feel like a domestic genius, and your family will sing your praises.
If you love starting your day well, you should definitely check out more of my favorite go-to morning recipes; making breakfast easier is my personal mission!
Why These Breakfast Rolls – Warm, Fluffy & Make-Ahead Friendly Are Essential
I know the struggle: you want homemade, but you don’t want to wake up at 4 AM to mix dough. That’s why these rolls are my absolute favorite, because they solve that whole dilemma perfectly! They check all the boxes for a truly great morning treat without needing last-minute fuss.
- Flavor Development: That long overnight rest isn’t just lazy baking—it’s essential! It lets the yeast work slowly, building deep, complex flavors you just can’t rush in the morning.
- Perfect Texture: Because the dough chills, handling it becomes so much easier when you’re ready to roll and shape them. You end up with the fluffiest, softest rolls imaginable.
- Make-Ahead Convenience: Pull them straight from the fridge, let them have their final rise while the coffee brews, and bake. Hello, immediate gratification!
Honestly, once you realize how simple it is to prep these **Breakfast Rolls – Warm, Fluffy & Make-Ahead Friendly** the night before, you’ll never go back to those dried-out store-bought pastries again. If you’re always looking for overnight preparations, you might want to peek at my High-Protein Overnight Oats, too; they save my sanity!
The Magic of Overnight Dough Rest for Breakfast Rolls
This is where the magic happens, folks! When you let yeast dough sit overnight in the cold, it slows down the fermentation, but it gives those yeastie critters time to develop those beautiful, slightly tangy, complex notes we associate with truly artisan bread. It’s a controlled slowdown. This slow, cold proofing is key to getting that superior, luxurious texture in our **Breakfast Rolls – Warm, Fluffy & Make-Ahead Friendly**.
Don’t worry about the dough getting grumpy overnight! Because it’s covered and cold, it stays stable. When you take it out in the morning, it’ll be much easier to roll out flat without snapping back on you. It’s an expert move that’s actually super easy; it just requires a little patience.
Gathering Ingredients for Your Breakfast Rolls – Warm, Fluffy & Make-Ahead Friendly
Okay, let’s talk about what we need to whip up these incredible **Breakfast Rolls – Warm, Fluffy & Make-Ahead Friendly**. Since this dough is enriched—meaning it has butter, eggs, and milk—it makes all the difference in the final softness. Don’t try to substitute the good stuff here; it’s worth the trip to the store for high-quality ingredients!
When you’re looking at the list, try to group them by what you’re doing. We have the main dough structure, the simple filling that goes inside, and that gorgeous cinnamon-sugar coating we roll them in at the end. Remember those notes on the butter and water—temperature is everything for yeast, so read those little details!
If you’re looking for other recipes where ingredient quality really matters for texture, you have to check out my Banana Oatmeal Cookies; they rely on perfectly ripe ingredients too!
Kugelhopf Dough Ingredients
This is the foundation, the good rich dough that makes these rolls so delightful:
-
2 tablespoons warm water (notes say: not hot—very important!)
-
1.5 teaspoons active dry yeast
-
1/3 cup whole milk (notes say: warmed, not hot)
-
1.75 cups flour (notes say: divided—you’ll use this in stages)
-
1 teaspoon almond extract
-
2 large eggs
-
1 large yolk
-
3 tablespoons sugar
-
1/4 teaspoon salt
-
8 tablespoons unsalted butter (notes say: softened to room temperature—we need that softness for creaming!)
Filling and Sugar Coating Components
These are the components that give our breakfast rolls their signature sweet twist:
-
For the Filling:
-
2 tablespoons unsalted butter (notes say: melted)
-
1 tablespoon sugar
-
-
For the Sugar Coating:
-
1/4 cup unsalted butter (just melted is fine here)
-
1 teaspoon cinnamon
-
1/2 cup sugar
-
Step-by-Step Instructions for Perfect Breakfast Rolls
Now for the fun part: turning those measured ingredients into actual, tangible, doughy goodness! While this recipe looks long, it’s really just about following the timing right, especially that critical overnight rest. We’re using the poolish method first, which really helps develop flavor, so don’t skip that initial activation step. Get your stand mixer ready, because we’re going to knead this baby until it’s super smooth and elastic!
Creating the Poolish and Initial Mix
First things first, we wake up the yeast! Grab a small bowl and gently whisk the warm water and yeast until it dissolves. Remember, we want warm, not hot—hot water kills the yeast faster than mold loves moisture! Stir in that milk, then add about half a cup of your flour until it looks like a thick, smooth pancake batter. Cover that up and let it sit for about 20 to 60 minutes. You’re waiting for a visual cue here: it should look happy, doubled in size, and covered in bubbles. That’s how you know your yeast is ready to work!
While that sits, quickly whisk your eggs, yolk, and almond extract together. Once your poolish looks bubbly, whisk that egg mixture right into it. For the mixer bowl, combine the rest of your flour, the sugar, and the salt. Pour the poolish right over the top and give it a quick stir until it’s shaggy—it’ll look messy, and that’s okay at this stage.
Kneading and Primary Rise for the Breakfast Rolls Dough
Time to hook up that dough hook! Knead that shaggy mess on medium-high for about five minutes until it starts coming together into a cohesive ball. Now for the most important part of the kneading: the butter. You can’t just dump eight tablespoons of softened butter in there; it’ll just make a greasy soup! Reduce your speed to medium and add that butter in slowly, waiting until the dough has mostly absorbed the last bit before dropping in the next piece.
Once all the butter is in, crank up the speed to medium-high and run that mixer for a full 10 minutes. I mean it, set a timer! The dough needs this time to build strength so it gets that glossy, elastic look. It should look supple and really cling to the hook, jiggling nicely when you tap it. Once that’s done, transfer it to a clean bowl, cover it, and let it have its first big happy rise for about an hour and a half until it’s doubled.
Make-Ahead Chilling and Shaping the Rolls
“Okay, Sarah, where’s the make-ahead part?” you ask! Right here! Once the dough has risen after that initial hour and a half, punch it down gently and pop that covered bowl right into the refrigerator. It needs to chill overnight—or up to two full days! This cold rest is what builds the gorgeous flavor we want in our **Breakfast Rolls – Warm, Fluffy & Make-Ahead Friendly**.
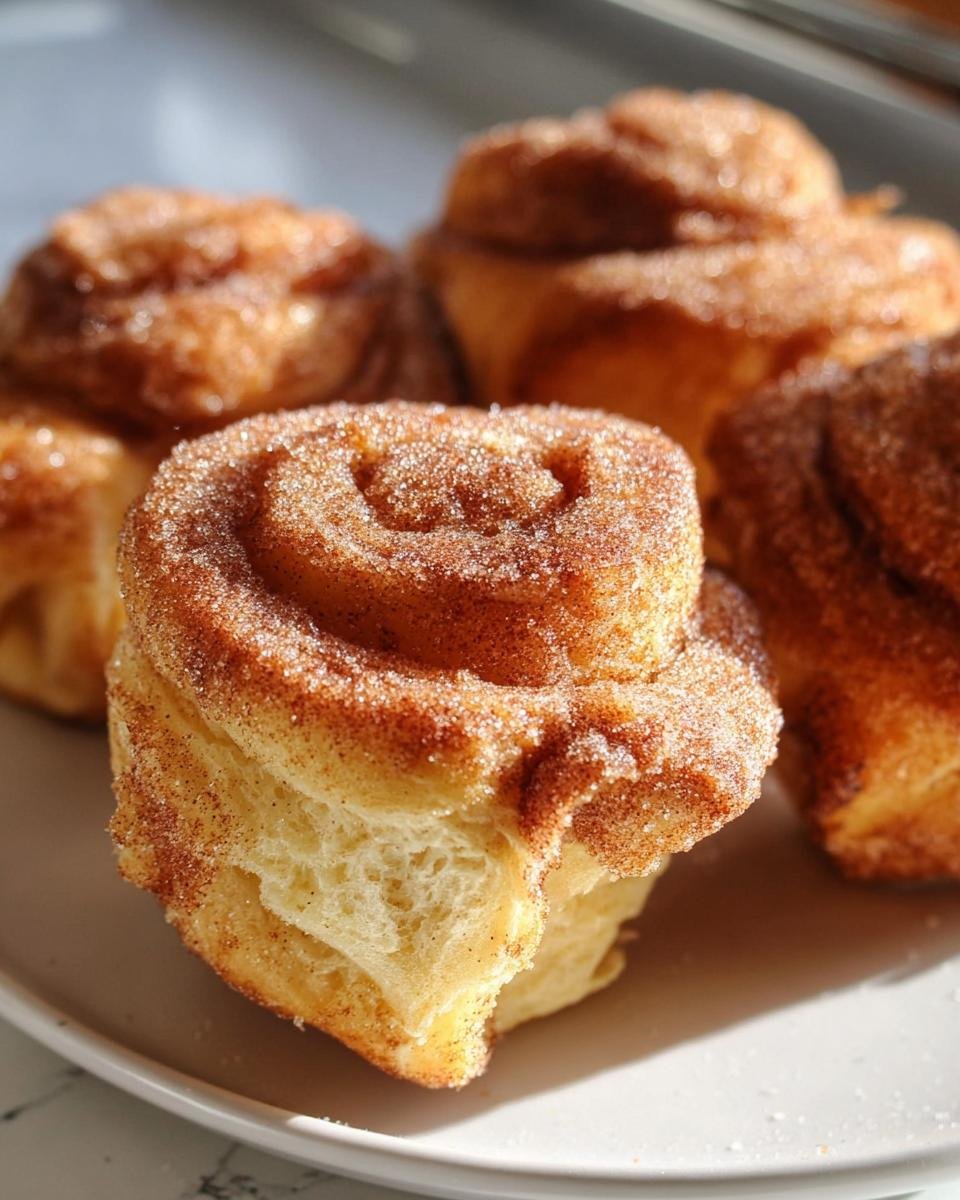
When morning comes, turn that cold dough out onto a lightly floured counter. Roll it out into a rectangle, about 10 by 8 inches and half an inch thick. Melt up that 2 tablespoons of filling butter and brush it all over the dough, leaving that top inch bare. Sprinkle your tablespoon of filling sugar evenly over the buttered area. Now, roll it up tight like you’re closing a sleeping bag, pinching the seam closed at the end. Use a sharp knife or pastry cutter to slice it into 12 equal rounds. Spray those muffin tin wells really well—I use my homemade cake goop for insurance—and nestle each roll right in there.
Final Proofing and Baking the Warm, Fluffy Rolls
Cover those tins loosely and let the rolls proof (rise again) for about an hour. You want them to just peek over the edge of the muffin tin cup. About 15 minutes before this proofing is done, preheat your oven to 375°F. Once they look ready, uncover them and bake for 25 to 30 minutes. If you notice the edges getting dark too fast—which happens with sweet doughs—just gently tent a piece of foil over the tin halfway through baking. You know they’re done when a tester comes out clean and the internal temp hits 200°F. This ensures they are perfectly **Warm, Fluffy**!
Applying the Cinnamon-Sugar Coating
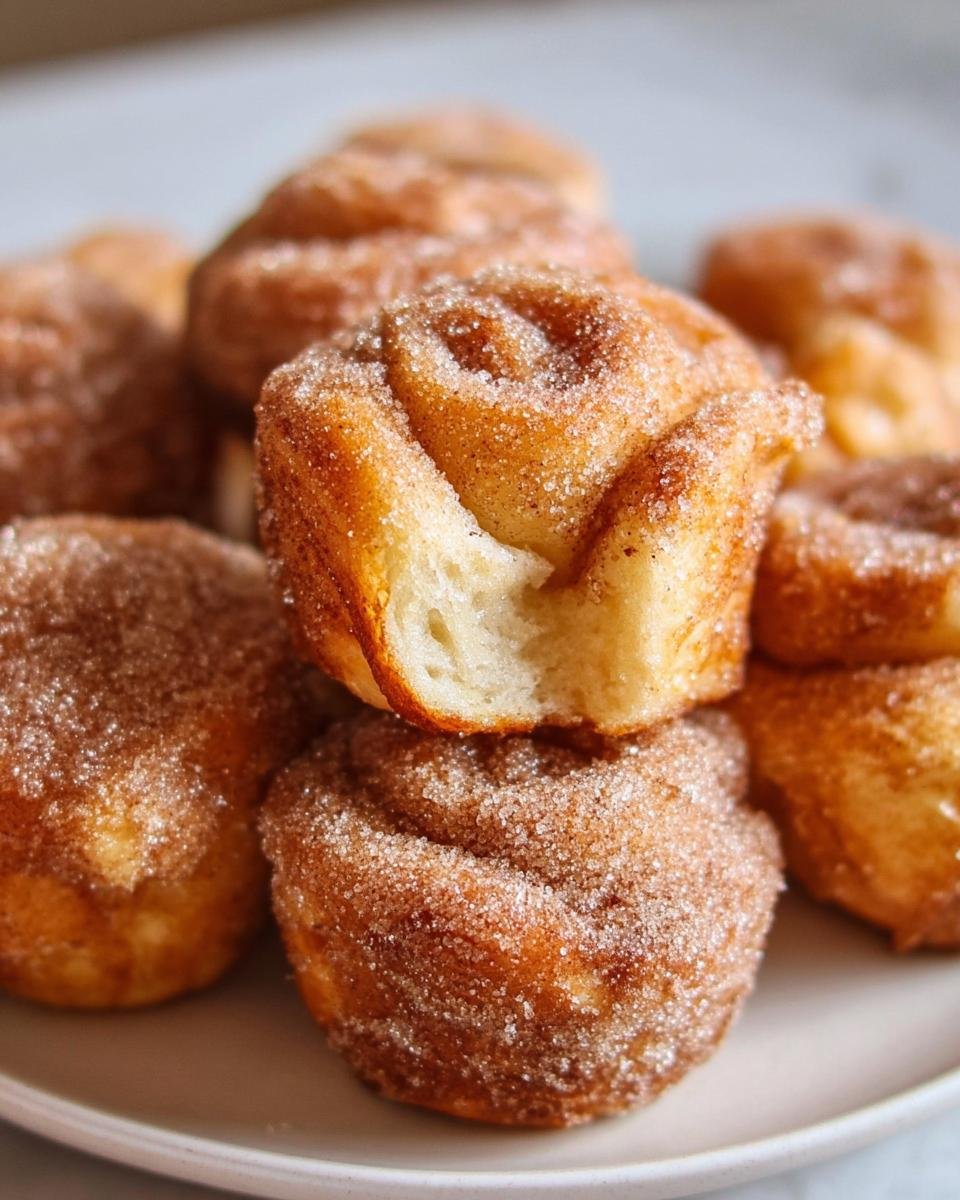
The final step is the best, and it must be done while the rolls are warm! Melt that 1/4 cup of coating butter in one little bowl. In another, mix your 1 teaspoon of cinnamon and 1/2 cup of sugar together well. As soon as you tip the warm rolls out onto the rack, dip the bottom of each one into the melted butter, then immediately roll it all over through the cinnamon-sugar mixture. Don’t forget to dip the tops in too!

Seriously, eat one immediately. If you must save some, store them airtight, but reheating them slightly in a toaster oven later is the key to bringing back that fresh-baked magic.
Tips for Mastering Your Make-Ahead Breakfast Rolls
Even though this recipe is designed to be easy with that overnight component, there are a few tiny kitchen habits you can adopt to make sure those **Breakfast Rolls – Warm, Fluffy & Make-Ahead Friendly** turn out absolutely flawless every single time. Yeast dough can be a little picky, but once you know its little quirks, it’s totally straightforward!
First up, let’s talk yeast health again. I mentioned it before, but I’ll say it a thousand times: if your water or milk is too hot when you add the yeast, you’ve basically made yeast tea instead of bread. We need that yeast alive and kicking! Always stick to warm, not hot, liquids. If you’re unsure about the temperature, stick your pinky finger in—it should feel just slightly warmer than lukewarm, definitely not steaming.
When you take the dough out of the fridge after its overnight rest, don’t panic if it seems stiff or a little sluggish right away. That’s normal! It’s cold! Let it sit on the counter, covered, for about 15 to 20 minutes before you even try to roll it out. If you try to force that cold dough into a 10×8 rectangle, it’s going to fight you and tear. Patience while cold dough warms up is non-negotiable for a good shape.
Finally, for the coating adherence—it all comes down to timing! You have to dip those **Sweet Rolls** while they are still warm, right after they come out of the oven and cool just enough to handle. If you wait until they are completely cold, the butter won’t stick, and all that lovely cinnamon-sugar will just fall off. It’s a quick double-dip process, bottom first, then top, and then enjoy!
If you are looking for other simple, make-ahead morning staples that save you time, you absolutely have to check out my tips for those Veggie-Loaded Egg Muffins. They are fantastic for grabbing on your way out the door!
Storage and Reheating for Your Breakfast Rolls – Warm, Fluffy & Make-Ahead Friendly
This is where the ‘Make-Ahead’ part really shines, and frankly, I think they taste even better the next day after the flavors have really settled into that rich Kugelhopf dough. After they cool just slightly—you want them warm, but not steaming hot—transfer any leftovers to a good airtight container. Don’t try storing them on a plate under plastic wrap; that’s a recipe for sticky, sad rolls!
For room temperature storage, they should be fine for about two days, provided your kitchen isn’t too warm or humid. If you’re planning on keeping them longer, or if you’re worried about the humidity, the refrigerator is your best friend. They’ll last about four or five days in the fridge this way. I know, I know, refrigerated bread can get a little firm, but wait until you see how easy they are to revive!
Restoring the Warm, Fluffy Texture
The goal here is to get that beautiful, **Warm, Fluffy** texture back without turning them into little dry hockey pucks. Forget the microwave if you can! The microwave heats things unevenly and can make the dough rubbery very quickly.
My number one method for reheating these **Sweet Rolls**? It has to be the toaster oven or a standard oven set low. If you have a few rolls, wrap them loosely in foil. Pop them into an oven preheated to about 300°F (150°C) for about 5 to 8 minutes. The foil traps the steam and heat, bringing back that soft interior beautifully. If you want that ultimate fresh-baked feel, take them out of the foil for the last two minutes to let the cinnamon sugar crisp up again.
If you’re in a frantic morning hurry and HAVE to use the microwave, put one roll on a microwave-safe plate and place a tiny, damp paper towel next to it. Microwave it for about 10 to 15 seconds on 50% power. That damp towel creates steam, which is the key to keeping any microwaved pastry soft!
We love quick, easy kitchen wins around here, and these Rolls deliver morning after morning. If you’re always prepping your food ahead of time, you absolutely must look at my guide for Low-Calorie Snacks; planning ahead saves you every time!
Common Questions About Making Breakfast Rolls
When you work with yeast dough, there are always a few things that pop up! I get so many questions about the chilling process and the yeast activation, because those two steps are really critical for getting truly fantastic **Breakfast Rolls – Warm, Fluffy & Make-Ahead Friendly**. Don’t worry if you have questions; even I had to test this a few times before I got it perfect for the family!
Here are the things I hear most often when people are attempting their first batch of these delicious **Sweet Rolls**:
Can I skip the overnight rest for these breakfast rolls?
Oh, you certainly *can*, and you’ll still end up with totally decent rolls! But, and this is a big but, you’ll be missing out on the best part. If you skip the overnight rest, you’re just making a very rich sweet roll. The overnight, cold rest is what develops those deep, slightly nutty, complex flavors that elevate it from “good” to “OMG, what is this magical thing?”
Also, texture-wise, the cold dough is way easier to handle when you roll it out for the filling. If you rush it, the dough will be airy and springy, and it fights the rolling pin. Trust me on this one: give the yeast the whole night to work its magic if you can!
What temperature should the milk be for the yeast?
This is the most crucial temperature check in the entire recipe! We need the milk just warm enough to feed the yeast, but not so hot that we burn them alive. I always tell people to use the “pinky test.” The milk should feel pleasantly warm when you dip your pinky finger in—like a warm bath, not a hot shower.
If you want to get technical with a thermometer (which I sometimes do when I’m feeling fancy), aim for between 105°F and 115°F (40°C to 46°C). If it’s colder than that, the yeast will activate too slowly. If it’s hotter than 120°F, you risk killing them off, and then you just have warm, sweet milk, which isn’t what we want for these beautiful **Breakfast Rolls – Warm, Fluffy & Make-Ahead Friendly**.
Can I use a different extract instead of almond in these sweet rolls?
Absolutely! Almond extract is traditionally used in Kugelhopf dough, which is the inspiration for this recipe, and it gives a sophisticated, slightly nutty background note. But if you aren’t a fan—or if you’re out of almond)—vanilla extract is a perfect, seamless substitute. Use the same amount, 1 teaspoon.
If you want to try something a little more seasonal or exciting, a tiny splash of orange zest or even a combined half-teaspoon of lemon and vanilla extract works wonderfully with the sweetness of the dough. Whatever you choose, don’t overdo it, because extracts are really potent once baked in!
I hope this clears up any dough dilemmas! If you managed to bake these up, you should check out my tips for easy high-protein lunch boxes; preparation is key for any busy week!
Serving Suggestions for Warm, Fluffy Breakfast Rolls
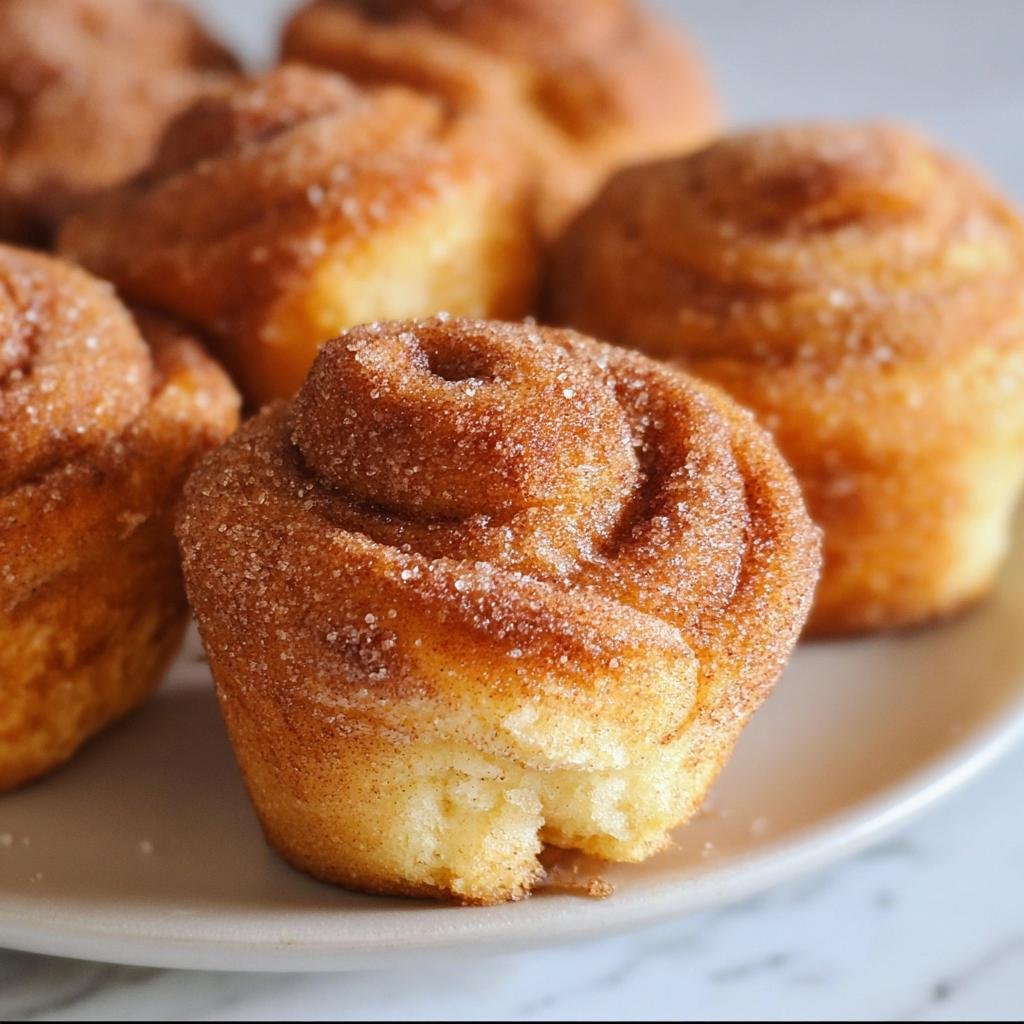
So, you’ve got these gorgeously golden, **Warm, Fluffy Breakfast Rolls** that are practically dripping with cinnamon sugar. They are fantastic all on their own, truly! They don’t *need* anything else, which is what makes them such a perfect grab-and-go option.
But if you’re sitting down to actually enjoy them—maybe on a lazy weekend morning—you need a few things to balance out all that sweet, buttery goodness. Coffee is non-negotiable for me; the bitterness of a strong black cup cuts right through the dense sweetness of the dough. It’s the perfect partnership, honestly.
If you want something a little lighter on the side, I love serving a small bowl of fresh mixed berries—strawberries, blueberries, maybe some raspberries if they are in season. The slight tartness of the fruit brings a fresh contrast to the warmth of the rolls.
For something slightly heartier that still feels light, a small scoop of plain Greek yogurt is amazing. You can even swirl a tiny bit of honey into the yogurt first. It adds a nice creamy texture alongside the rolls without adding too much extra sugar.
If you’re looking for other ways to start your day right with a little protein boost, you have to check out my recipe for a High-Protein Smoothie Bowl. Sometimes you need the chewiness of a roll, and sometimes you just need something cold and light!
Estimated Nutritional Snapshot for Breakfast Rolls
Okay, so we’ve established these **Breakfast Rolls – Warm, Fluffy & Make-Ahead Friendly** are heavenly, but it’s always good to have a rough idea of what you’re enjoying, even with rich, delicious yeast doughs like this one! Since this is an enriched dough with butter and eggs, they certainly pack a flavorful punch.
Based on all the ingredients we used to make 12 servings, here is a rough breakdown of what you can expect from one of these glorious, cinnamony bites. Remember, this is just an estimate, as the exact amounts can change based on your specific flour brand or how accurately you measure your sugar!
For those of you who track your intake so you can plan your week ahead effortlessly, I have a full 5-Day Clean Eating Meal Plan you can look at too—but sometimes, you just need a decadent roll!
Here’s the estimated nutritional info per serving (1 roll):
- Calories: 350
- Fat: 16g
- Carbohydrates: 45g
- Protein: 7g
- Saturated Fat: 9g
- Cholesterol: 75mg
- Sodium: 150mg
- Fiber: 1g
- Sugar: 20g
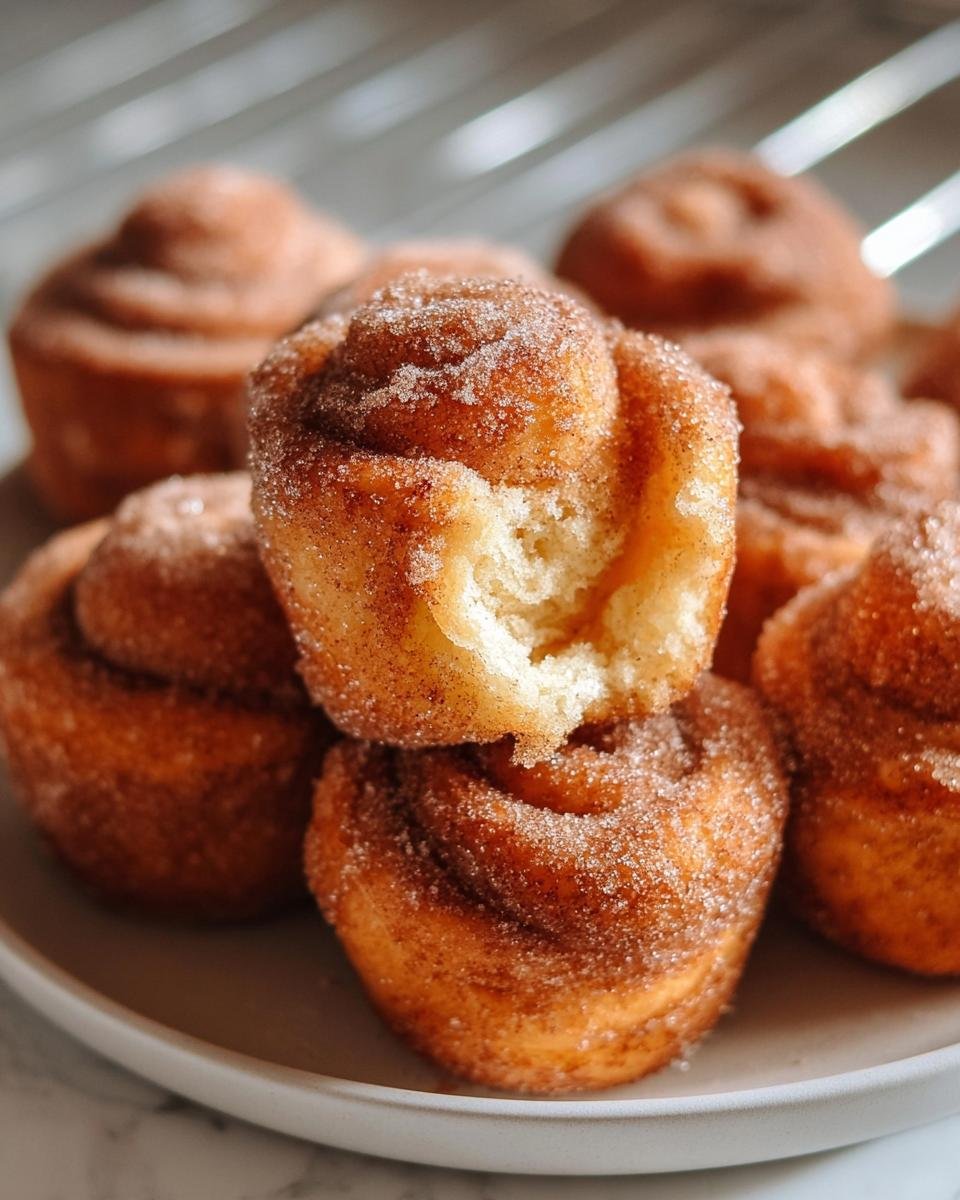
See that sugar content? That’s where that delicious cinnamon-sugar coating comes in! If you wanted to trim this down significantly, you could use half the coating mixture when you dip the rolls, but honestly, why would you want to do that to a perfect **Warm, Fluffy Breakfast Roll**?
Enjoy these treats knowing they were made with love and a whole lot of good butter. Everything in moderation, right?
Share Your Warm, Fluffy Breakfast Rolls Experience
Now that you’ve gone through the process—from activating the yeast poolish to enjoying those glorious, sticky cinnamon-sugar tops—I really, truly want to hear about it! Baking is always better when we can share notes, tips, and the occasional triumphant photo!
If you loved waking up to the smell of these **Breakfast Rolls – Warm, Fluffy & Make-Ahead Friendly (breakfast ideas Recipe, 2025 Edition)**, please take a minute to leave a rating right down below. Stars speak volumes, you know!
Did you try prepping them two days ahead? Did the overnight dough rise perfectly in your fridge? Did you manage to keep your counter clean while rolling them up? Don’t leave me hanging!
When you finish baking, snap a picture and share it on social media! Tag me so I can see your perfectly shaped, glistening **Sweet Rolls**! There is nothing I love more than seeing my recipes make it into your kitchen and make your mornings a whole lot easier.
And if you found this recipe helpful, maybe check out my About Me page so you can learn a little more about why I’m obsessed with making your life easier, one make-ahead batch at a time!
Warm, Fluffy & Make-Ahead Friendly Breakfast Rolls
Ingredients
Equipment
Method
- Make the poolish: Stir the water and yeast together in a small mixing bowl until the yeast dissolves. Stir in the milk. Add 1/2 cup of the flour and stir until you form a smooth batter, about 100 strokes. Cover the bowl and let this poolish sit for 20 to 60 minutes. The poolish should rise to twice its size and show many bubbles on the surface.
- Stir in the eggs, yolk, and almond extract: Whisk the eggs, yolk, and almond extract in a small bowl. Stir this mixture into the poolish and mix until completely combined.
- Mix the dough together: In the bowl of a standing mixer, combine the remaining 1 1/4 cups of flour, the sugar, and the salt. Pour the poolish-egg mixture into the flour and stir until you have a wet, shaggy dough.
- Knead the dough until smooth: Fit the mixer with a dough hook attachment and knead this dough on medium-high speed for five minutes until it comes together and becomes smooth.
- Add the butter with the mixer running: Reduce the mixer speed to medium and add the softened butter in small amounts, waiting until each addition is nearly incorporated before adding the next. You may need to stop the mixer and scrape down the sides of the bowl.
- Continue kneading until the dough comes together in a glossy, elastic ball: Once all the butter is added, increase the mixer speed to medium-high and knead the dough for 10 minutes. The dough should form a ball, look glossy and supple, and jiggle when tapped.
- Let the dough rise for 1 1/2 hours: Transfer the dough to a clean bowl, cover it, and let it rise for about an hour and a half, until doubled in size.
- Refrigerate the dough overnight: Put the dough in the refrigerator and let it rest overnight (or up to 2 days). Punch the dough down if it looks like it will rise over the edge of the bowl.
- Roll the dough flat and brush with butter: When ready to make the rolls, turn the chilled dough out onto a lightly floured work surface. Roll the dough out to a roughly 10-x-8-inch rectangle that is about 1/2-inch thick. Brush the dough with melted butter, leaving an inch of un-buttered dough at the top. Sprinkle the buttered areas with the sugar.
- Roll the dough into a log and slice into rounds: Roll the dough into a log and pinch it closed at the seam. Cut the dough into 12 equal pieces using a pastry cutter or chef’s knife. Spray a muffin tin liberally with non-stick spray. Nestle each roll into a well, pressing gently to settle it in the bottom.
- Let the rolls rise for 1 hour: Cover the tin and let the rolls rise for about an hour, until they just start to peak over the tops of the wells.
- Bake the rolls: Fifteen minutes before baking (when the rolls are almost to the top of the tins), preheat the oven to 375°F. Uncover the rolls and bake them for 25 to 30 minutes. Tent the rolls with foil halfway through cooking if the edges are browning too much. The rolls are done when a cake tester comes out clean and the internal temperature reaches 200°F.
- Cool the rolls slightly: Tip the rolls out onto a cooling rack and let them cool until just cool enough to handle.
- Dip the rolls in butter and cinnamon-sugar: Melt the butter in a small bowl and combine the cinnamon and sugar in a second bowl. While the rolls are warm, dip each roll into the butter and then roll it in the cinnamon-sugar. Dip and roll the bottom first, then dip and roll the top. Eat them right away for best results, or store them in an airtight container and reheat them in a toaster oven later.