

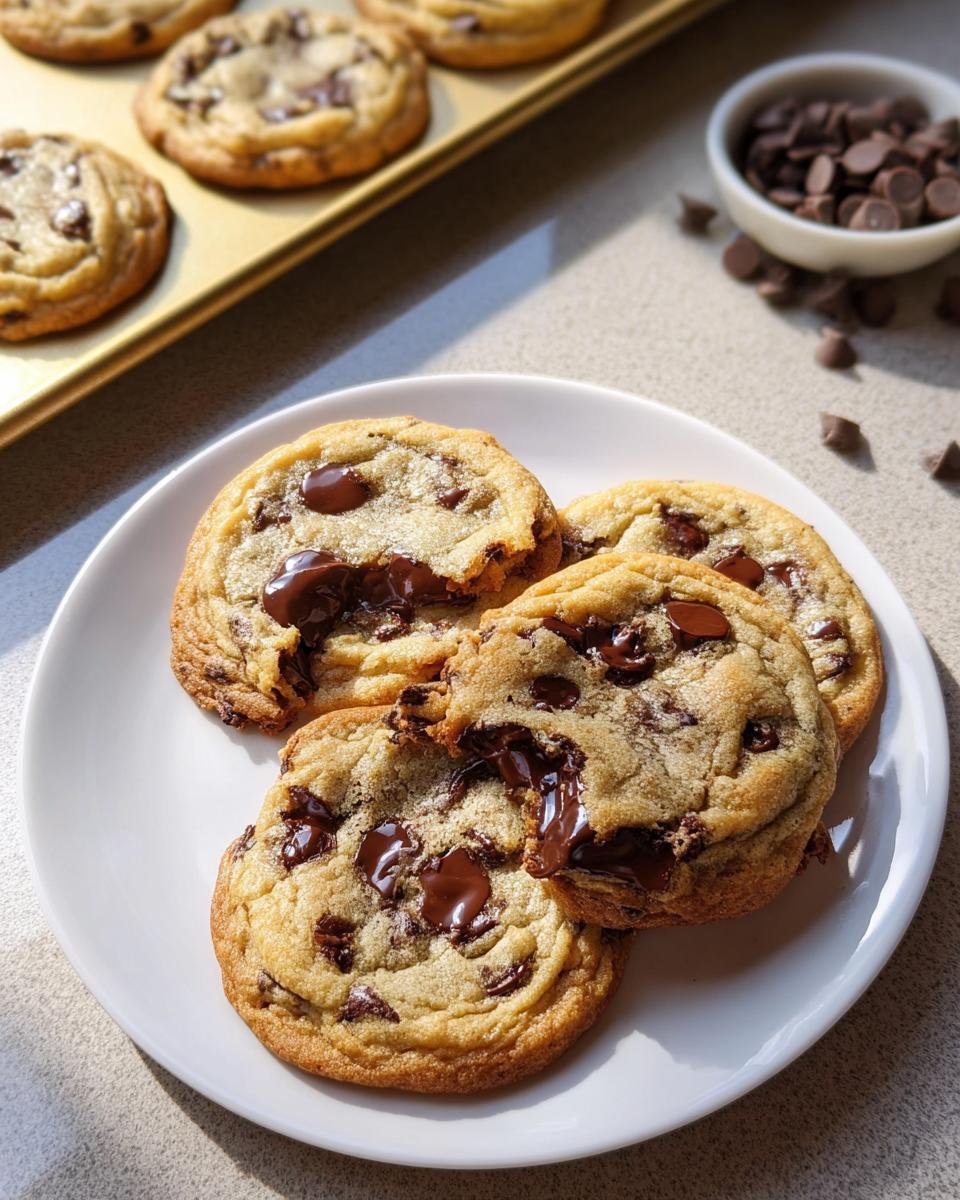
Listen, I was tired of flat, sad cookies that taste like paper the second they hit room temperature. For years, I chased that perfect bite—you know the one. The kind you have to sneak out of the display case at those fancy local bakeries? Well, after endless batches, I finally cracked the code for the absolute best Bakery Style Chocolate Chip Cookies Thick.
I tweaked everything—the butter temperature, the sugar ratio, and especially the resting time. Trust me, you don’t want a thin cookie here; we’re aiming for a substantial, impossibly chewy center wrapped in a slightly crisp edge. This isn’t just a recipe; it’s the culmination of about a hundred messy kitchen experiments that led to buttery, chocolate-loaded perfection every single time we bake them now.
Why You Will Love These Bakery Style Chocolate Chip Cookies Thick
Seriously, why bother with anything else? These cookies nail that perfect balance that most homemade batches miss. You’re not just getting a cookie; you’re getting a dependable, rich dessert that tastes like you spent all day fussing over it. But honestly? It’s sneakily simple!
- Thick centers that stay soft for days.
- Deep, complex flavor thanks to the necessary chilling time.
- They bake up beautifully uniform—no more weirdly spread-out crisps!
- The ultimate chewy texture comes standard.
Essential Ingredients for Bakery Style Chocolate Chip Cookies Thick
Okay, listen up, because this is where the magic starts, and if you mess with these ratios or temperatures, you won’t get that gorgeous height we want! The real secret to getting these Bakery Style Chocolate Chip Cookies Thick isn’t just the chilling; it’s starting with ingredients that are cooperative. Everything except the chocolate chips needs to be at that sweet spot temperature.
When I say cool room temperature butter, I mean it—soft enough to dent with your finger, but not oily or melty. And most importantly, your eggs need to be room temperature too! Cold eggs can shock the creamed butter mixture, ruining those tiny air bubbles we worked so hard to create. Don’t skip the chilling time, but also don’t skip prepping your ingredients right!
Cookie Dough Components
Here’s exactly what you need to grab before you even think about turning on the mixer. I always measure everything out first—it makes the mixing process super fast!
- All-Purpose Flour: 3 cups (that’s about 380 grams, so weigh it if you can!)
- Baking Soda: 1 teaspoon
- Fine Sea Salt: 1 teaspoon (Don’t use iodized table salt; it changes the flavor profile!)
- Unsalted Butter: 2 sticks (227 grams), must be at cool room temperature, aiming for about 67°F.
- Granulated Sugar: 1/2 cup (100 grams)
- Light Brown Sugar: 1.25 cups (247 grams), make sure it’s lightly packed in the measuring cup.
- Vanilla: 2 teaspoons (Use the good stuff, it makes a difference!)
- Large Eggs: 2, make sure these are also at room temperature.
- Semisweet Chocolate Chips: 2 cups (340 grams)—use a mix of chips and roughly chopped chunks for extra texture, if you ask me!
Equipment Needed for Thick Cookies
Since we want quick prep time to get this dough chilling ASAP, having your tools ready makes a huge difference. You don’t need a dozen fancy gadgets, but you do need the right basics to get that perfect dough texture before it hits the fridge. Honestly, if you’re planning on making these regularly—which you will be—invest in a good scoop; it’s a game-changer!
Here is what you need pulled out and ready to go. It’s a short list, which is great when you need a fast dessert fix:
- Baking sheets (You’ll need at least two, maybe three, depending on how big you scoop!)
- Parchment paper (A must-have to prevent sticking and aid cleanup!)
- An electric mixer (Handheld or stand mixer works fine, but save your arm, use the machine!)
- A large cookie scoop (Seriously, aim for a 3-tablespoon size—this is critical for thickness.)
- Wire racks for cooling down the glorious results.
Step-by-Step Guide to Bakery Style Chocolate Chip Cookies Thick
Alright, let’s get these glorious balls of dough mixed up! Because we are aiming for thick cookies, the order in which we combine things is everything. Don’t rush through the mixing; we’re building structure here. Make sure you have your oven preheated to 350ºF and your baking sheets lined with parchment paper before you start. This keeps everything moving smoothly so we can get the dough into the fridge on time!
If you are looking for some quick inspiration for dinner while these chill later this week, check out these easy and healthy recipes for everyday life. But for now, focus on these cookies!
Mixing the Dry and Wet Ingredients
First things first: grab a medium bowl and whisk together your flour, baking soda, and salt. Just a quick combines is all you need here. Now, onto the big stuff in your mixer. Beat that cool room temperature butter with both sugars until it looks genuinely creamy—we’re talking light and fluffy, scrape down the sides about halfway through! Then, add your vanilla, followed by those room temperature eggs, beating well after each addition. Finally, add the flour mixture gradually, mixing just until it comes together. Remember, we want minimal mixing once the flour is in!
Forming and Chilling the Bakery Style Chocolate Chip Cookies Thick Dough
This step is non-negotiable if you want that bakery thickness! Once the dough has just come together and the chocolate chips are folded in, grab your large cookie scoop. Use it to portion out consistent 3-tablespoon balls right onto your prepared sheets. Now, here’s the crucial part: Cover that entire pan tightly and send it DIRECTLY into the refrigerator.
You absolutely need to chill this dough for a minimum of 24 hours, though 48 hours is even better. Why? When the butter is ice cold, the cookies won’t spread out flat in the oven, giving you the towering height we demand. It also lets the flour hydrate and concentrates that incredible flavor.
Baking and Cooling for Perfect Texture
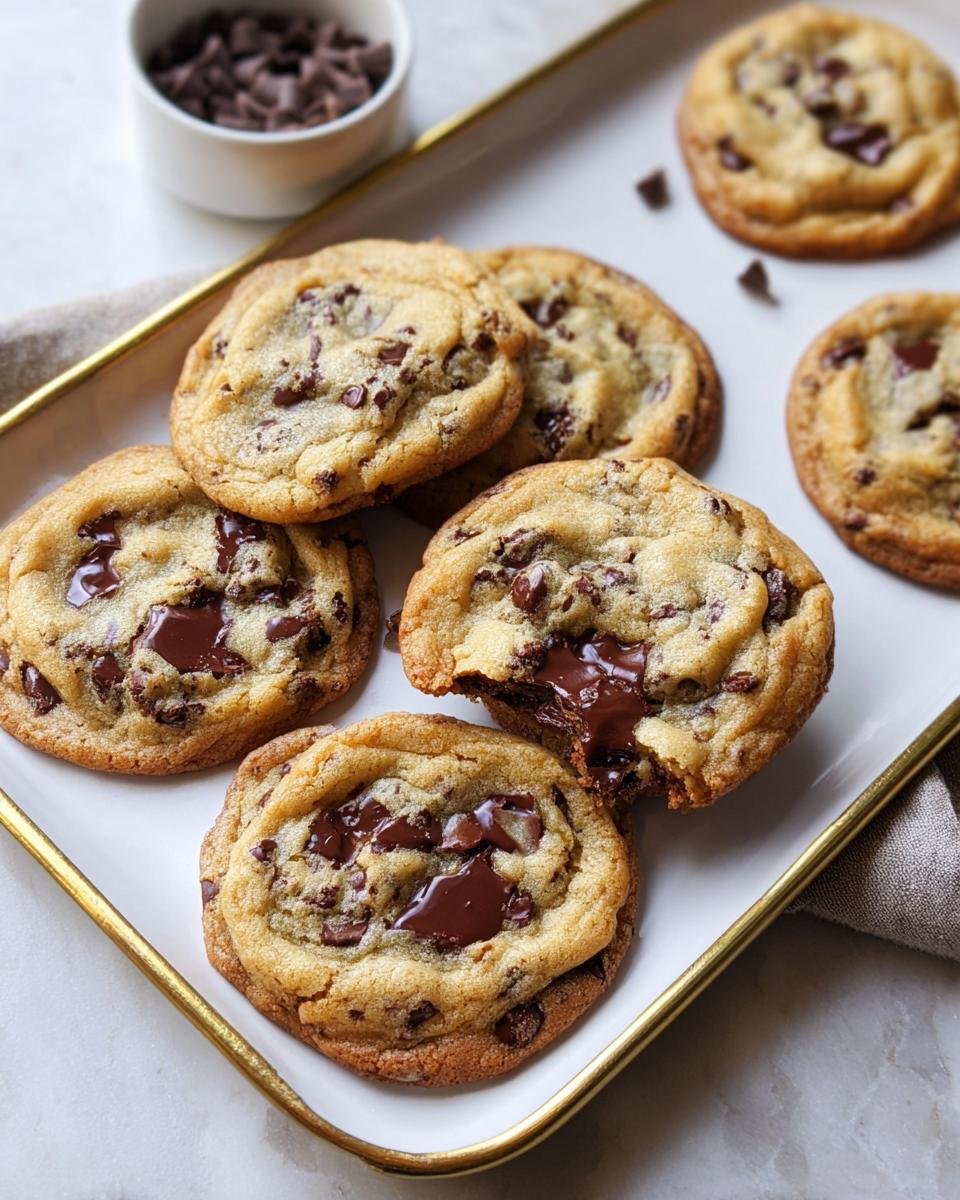
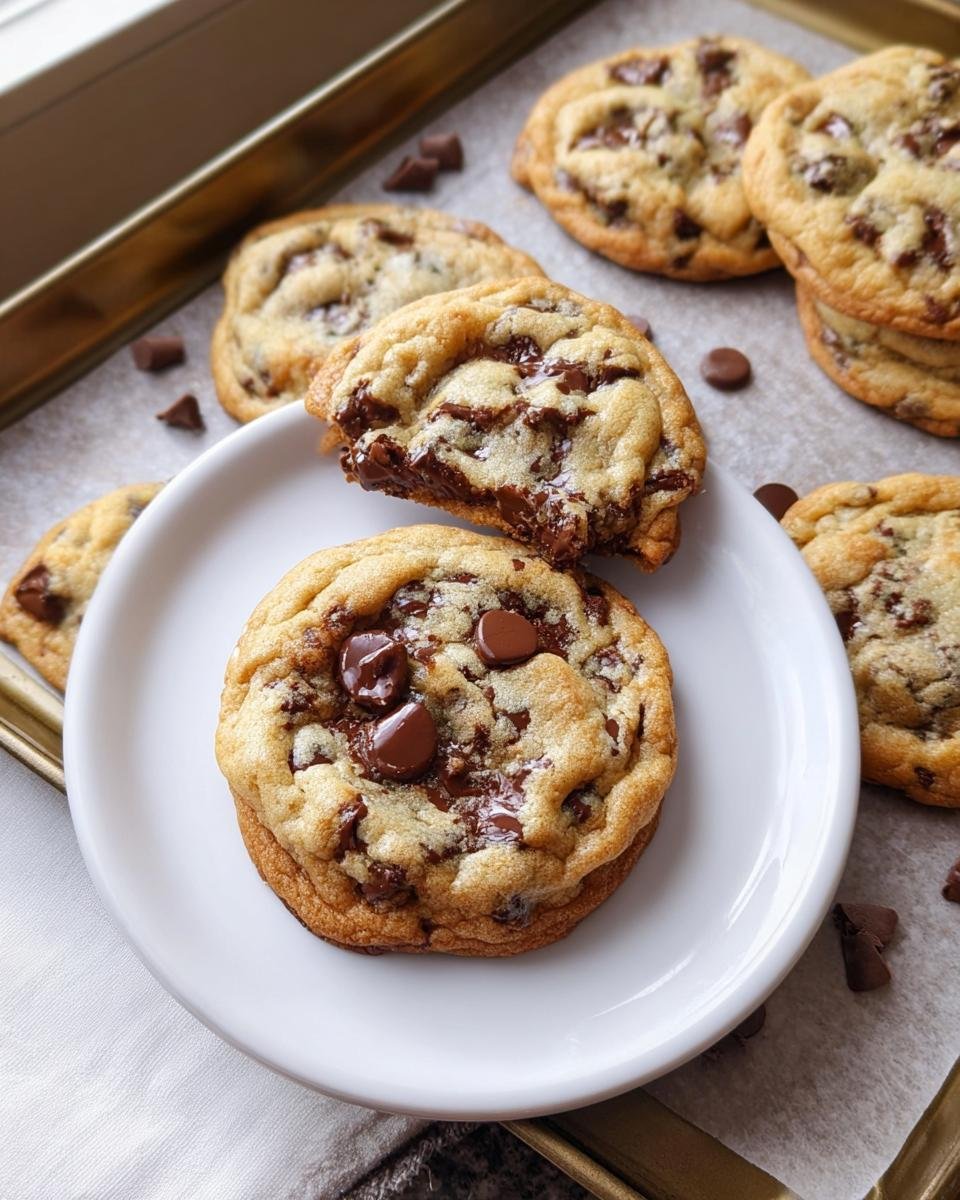
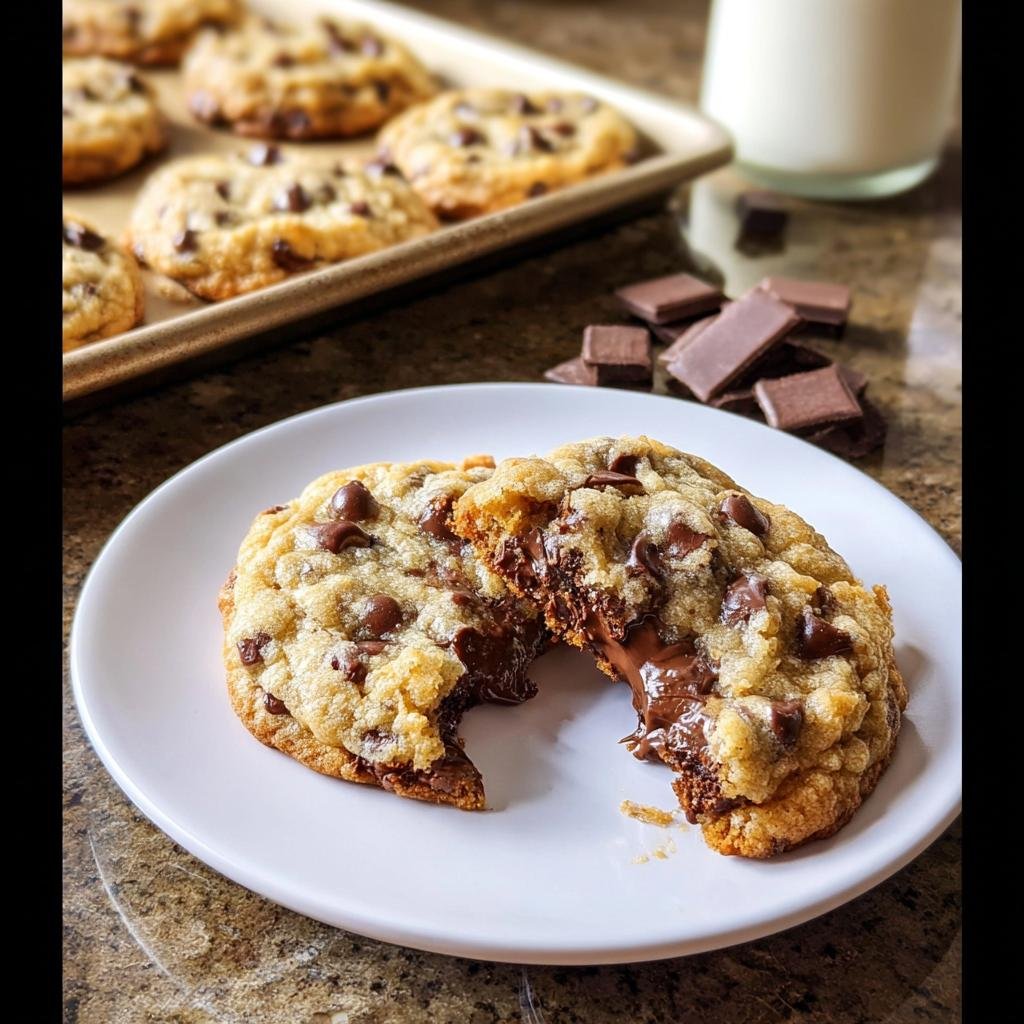
When you are ready to bake, pull the dough from the fridge—no need to let it warm up first! Bake those perfectly portioned scoops at 350ºF for about 11 to 13 minutes. You’re looking for the edges to just be turning golden brown, but the centers should still look slightly soft and underdone. Pull them immediately. Let them rest right there on the hot baking sheet for five minutes; this allows the residual heat to finish cooking the center without drying it out. After five minutes, carefully move them onto wire racks to cool completely. Enjoy that perfectly thick, chewy reward!
Expert Tips for Achieving Bakery Style Chocolate Chip Cookies Thick Results
I’ve made thousands of these cookies, I swear, and over time I’ve learned a few little tricks that take them from “great” to “I need to hide these from my family.” These aren’t in the main instructions because they are extra steps, but they absolutely guarantee you get those gorgeous, thick cookies every single time. Don’t forget, if you need more inspiration for making things at home, I keep a running list of my favorite homemade goodness recipes over here!
If you’re looking for something specific—like adapting these for a quick dinner idea instead of a dessert—remember that sometimes the best cooking hacks are about troubleshooting on the fly!
The Secret to Chocolate Melt vs. Puddles
If you want those lovely pools of melted chocolate across the top (and who doesn’t?), you need variety in your chocolate chips. I always use two types. First, I toss in the standard semisweet chips as called for in the recipe because they hold their shape better in the dough.
But here’s the genius part: right before they go into the oven, I gently press a few extra chocolate *chunks*—not chips, but quality chopped chocolate—right onto the exposed top of the dough balls. These larger pieces melt slower and wider, creating those beautiful puddles without letting the whole cookie turn into a flat chocolate swamp. You get structure *and* incredible melt!
Troubleshooting: If Your Cookies Still Spread Too Much
Sometimes, even after chilling, your oven might run a little hot or your butter might have been slightly softer than intended. If you notice your cookies starting to spread too fast in the first five minutes of baking, I have an emergency bake trick. Quickly open the oven, take the pans out for just ten seconds, and pop them into the freezer while the oven door is open. This shocks the butter back into a solid state!
Close the door, give the oven a minute to recover its temp, and put the cookies back in. It sounds crazy, I know, but this little jolt helps them set up taller instead of melting sideways! Another thing—sometimes using slightly less brown sugar (if yours is super moist) can help, too.
Baking on the Right Pan Surface
This one is subtle but important for thickness! If you normally bake on dark metal pans, they retain heat like crazy and can cause the bottoms and edges to brown too fast before the center cooks, leading to spread. Dark pans encourage crispy edges, which we are trying to minimize for a chewy cookie.
For these thick cookies, I wholeheartedly recommend using light-colored, heavy-duty aluminum baking sheets. They reflect heat better. If you only have dark pans, try lining them with two layers of parchment paper—it acts as a slight insulator, giving the center the time it needs to bake up high and proud!
Ingredient Notes and Substitutions for Bakery Style Chocolate Chip Cookies Thick
We’ve gotta talk about substitutions because sometimes you just don’t have exactly what the recipe calls for! Remember, our goal here is those tall, chewy Bakery Style Chocolate Chip Cookies Thick, so certain changes can really mess with the structure.
If you even *think* about using melted butter, stop right there! Melted butter means super flat cookies, which defeats the entire purpose of this recipe. You need that cool, barely softened butter to hold the air when you cream it.
When it comes to sugar, you *can* substitute some of the light brown sugar with dark brown sugar if you want a deeper molasses flavor, but never go all white sugar—that’s what makes cookies thin and crisp!
- Butter Temperature: Stick to cool room temperature; never melted.
- Sugar Swap: You can mix light and dark brown sugars, but avoid straight granulated sugar.
- Flour: Don’t reduce the flour amount! That 3 cups is essential for holding the height.
Storage and Reheating Instructions for These Cookies
Part of the joy of making big batches of these cookies is knowing you have a secret stash waiting for you later, right? Since we worked so hard to get that perfect, thick, chewy texture, we definitely don’t want to ruin it by storing them wrong! The rule is simple: make-ahead cooking masters always have treats ready, and that applies to cookies too.
As my little note says, these keep great for about three days in an airtight container. Keep them on the counter; don’t put them in the fridge, because that actually dries them out faster, which is the opposite of what we want for our soft centers!
If you happen to find yourself with leftovers that are a little harder than you remember, don’t fret! You can totally revive them. Pop the cookie onto a microwave-safe plate and zap it for about 8 to 10 seconds. It gets wonderfully warm, slightly gooey, and you’re right back to that fresh-from-the-oven chewiness.

For long-term stash planning—maybe you want these ready for a potluck next week—you can freeze the dough balls! I always make sure to follow my own advice and check out how others make ahead for their dinner plans, like checking out these great make-ahead healthy lunch and dinner ideas when planning my week. For freezing the dough, just drop the portioned balls onto a parchment-lined tray and freeze until solid. Then, transfer them to a freezer bag. You still need that minimum 24-hour chill time for the best results when baking from frozen, so plan ahead!
Frequently Asked Questions About Bakery Style Chocolate Chip Cookies Thick
I know you’re excited to bake these, but sometimes the details trip people up, especially when time is tight. These FAQs are all about getting you those perfect, thick, chewy cookies without confusing you. If you’re looking for other quick ideas for when you need fast meals, I’ve got guides for that too, but let’s conquer cookie prep first!
Can I skip the chilling time for these thick cookies?
Oh, I wish you could! Truly! But if you skip the chilling time, you are essentially guaranteeing flat cookies. The reason this recipe is so good at making Bakery Style Chocolate Chip Cookies Thick is because that 24-hour rest lets the flour fully absorb the liquids while the butter stays locked up solid. If you bake them warm, the butter melts instantly, and bam—you have thin, crispy cookies. Yes, it’s an extra wait time, but it’s what makes them truly bakery-worthy!
How do I make these cookies even chewier?
If you want to lean even harder into the chewy cookies territory, you can make two small adjustments! First, slightly increase your light brown sugar by about 1/4 cup and cut the granulated sugar by the same amount. Brown sugar brings more moisture and chewiness due to the molasses content. Second, pull them out of the oven one minute earlier than suggested—when the edge looks set but the center still looks wet. They firm up perfectly on the hot pan doing that crucial five-minute rest!
What if my cookies spread too much during baking?
This usually means your dough wasn’t cold enough, or your butter was too soft when you started creaming. My absolute emergency fix, which surprises everyone, is to take the entire hot baking sheet out of the oven when they look like they are spreading past the point of no return. Put the sheet directly into the freezer for about three minutes flat! This shocks the fat in the dough, making it solidify again, which helps them stop spreading immediately. Pop them back in the oven to finish baking. It rescues most flat cookie disasters!
Estimated Nutritional Information for Bakery Style Chocolate Chip Cookies Thick
Now, let’s talk numbers. Since these are absolutely decadent Bakery Style Chocolate Chip Cookies Thick, I’m not going to lie to you—they aren’t a low-calorie snack! But hey, we deserve a rich, satisfying treat after all that diligent chilling and mixing work, right?
I ran these ingredients through a standard calculator to give you a basic idea of what one of these magnificent cookies packs into it. Just remember, this is a general estimate. If you use super high-fat butter or premium dark chocolate, these numbers will shift slightly. Always check your specific packaging if you are tracking closely!
If you are following specific meal plans, you might want to check out some tips on diet and nutrition to balance out the indulgence of these amazing cookies!
For one standard, 3-tablespoon-sized cookie, here is what you can generally expect:
- Calories: Approximately 250-280 kcal
- Total Fat: Around 14g
- Protein: About 3g
- Total Carbohydrates: Roughly 33g, including about 22g of sugar
See? Totally worth it for that chewy thickness! Enjoy accounting for these in your weekly treats!
Bakery Style Chocolate Chip Cookies Thick
Ingredients
Equipment
Method
- Preheat your oven to 350ºF. Line baking sheets with parchment paper.
- In a medium bowl, combine the flour, baking soda, and salt.
- In the bowl of an electric mixer, beat the butter, granulated sugar, and brown sugar until creamy, about 2 minutes. Scrape down the sides and bottom of the mixing bowl. Add the vanilla and eggs and beat until combined, scraping the bowl down as needed. Gradually beat in the flour mixture. Stir in the chocolate chips.
- Divide the dough into 3-tablespoon sized balls using a large cookie scoop and drop onto prepared baking sheets.
- If time permits, place the dough scoops into an airtight container and refrigerate for at least 24 hours but no more than 72 hours. This allows the dough to “marinate” and makes the cookies thicker, chewier, and more flavorful. Bake from the fridge.
- Bake for 11-13 minutes, or until golden brown. Cool for 5 minutes before removing to wire racks to cool completely.