
There’s just something about a rich, chocolatey cake, isn’t there? That anticipation when you pull it out of the oven, the smell filling your kitchen… it’s pure magic! And when you get to that final, fun part – decorating – that’s where the real joy begins. This recipe for a simple, moist chocolate cake is my go-to because it’s just so darn reliable. It creates the perfect canvas for any kind of chocolate cake design you can dream up, whether it’s for a birthday, an anniversary, or just because. I still remember the first time I made this cake for my best friend’s surprise party; I went a little wild with chocolate ganache drips and edible flowers, and seeing her face light up made all the effort totally worth it!
Why You’ll Love This Simple Chocolate Cake for Your Next Chocolate Cake Design
Honestly, this cake is a winner for so many reasons, especially when you’re planning to get creative with your decorating. Here’s why it’s my absolute favorite:
- Super Easy to Make: Seriously, even if you’re new to baking, this cake comes together so quickly. No fancy techniques needed!
- Incredibly Moist: Thanks to the buttermilk and oil, this cake stays wonderfully moist, even after a day or two. No dry crumbs here!
- Rich Chocolate Flavor: It’s got that deep, satisfying chocolate taste that everyone loves, without being too overpowering. Perfect!
- Fantastic Base for Decorating: This is the big one! It bakes up beautifully flat and even, making it the dreamiest canvas for any chocolate cake design you can imagine.
- Holds Frosting Like a Dream: Whether you’re frosting it smooth or piping details, this cake is sturdy enough to handle all your artistic flourishes.
- Tastes Amazing Plain, Too: If you’re not a big decorator, it’s also absolutely delicious just as it is, maybe with a dusting of powdered sugar!
Essential Ingredients for Your Chocolate Cake Design Base
Alright, let’s talk about what goes into making this chocolate cake truly special. Having the right ingredients on hand is the first step to a spectacular gluten-free chocolate cake design, and trust me, these are the ones that make all the difference. Don’t skimp here – they are the foundation of that amazing texture and deep flavor!
Dry Ingredients
First things first, let’s get our dry ingredients all measured out and ready to go. It’s like setting up your paint palette – you want everything neat and tidy!
- 2 cups All-purpose flour: This is your standard flour, nothing fancy needed here.
- 2 cups Granulated sugar: For that perfect sweetness and moisture.
- 3/4 cup Unsweetened cocoa powder: Make sure it’s unsweetened for the best control over your chocolate flavor! This gives it that deep, rich color.
- 2 tsp Baking soda: Our leavening agent, crucial for lift.
- 1 tsp Baking powder: Yep, a little extra help for a tender crumb.
- 1 tsp Salt: Just a pinch to enhance all those yummy chocolatey notes.
Wet Ingredients
Now for the bits that bring it all together and make it super moist. Little details like room temperature ingredients really do matter!
- 1 cup Buttermilk, room temperature: This is key for a tender, moist cake. If you don’t have buttermilk, you can just add a tablespoon of lemon juice or white vinegar to a cup of regular milk and let it sit for 5 minutes – works like a charm!
- 1/2 cup Vegetable oil: This keeps our cake unbelievably moist.
- 2 large Eggs, room temperature: Room temp eggs incorporate better, so pop them out a bit before you start.
- 1 tsp Vanilla extract: Because vanilla makes everything better, especially chocolate!
- 1 cup Hot water or coffee, boiling: Trust me on this! Using boiling water or hot coffee helps bloom the cocoa powder, making the chocolate flavor so much richer. Coffee really intensifies the chocolate without making it taste like coffee.
Step-by-Step Guide to Baking Your Chocolate Cake
Okay, let’s get this party started! Baking this chocolate cake is so straightforward, you’ll feel like a pro in no time. Just follow these simple steps and get ready for a cake that’s perfect for decorating. Learn more about making a wonderfully moist chocolate cake right here.
First off, get that oven of yours fired up to 350 degrees F (that’s 175 degrees C). While it’s heating, make sure to grease and flour your two 9-inch round cake pans. This little bit of prep work is super important to make sure your cakes don’t stick. Nobody wants to struggle with getting their beautiful cake out of the pan!
In a nice big bowl, whisk together all your dry ingredients: the flour, sugar, cocoa powder, baking soda, baking powder, and salt. Give it a good whisk until everything is nicely combined. It’s like mixing your paints before you start your masterpiece.
Now, toss in your buttermilk, oil, eggs, and vanilla extract with those dry ingredients. Grab your electric mixer and beat it on medium speed for about two minutes. You want it to get all smooth and lovely. Don’t worry if it looks a little thick right now.
Here comes the magic! Carefully, and I mean carefully because it’s hot, stir in the boiling water or coffee by hand. Just stir until the batter is smooth. It’s going to be pretty thin – thinner than you might expect for a cake batter, but trust me, that’s exactly what you want! For an even richer chocolate flavor, use hot brewed coffee instead of hot water. It really kicks up that chocolatey goodness without tasting like coffee!
Now, divide that glorious, thin batter evenly between your prepared cake pans. So nice and even!
Time to bake! Pop them into your preheated oven for about 30 to 35 minutes. You’ll know they’re ready when a wooden pick that you stick right into the center comes out clean. That’s the classic test, and it never fails.
Once they’re baked, let those cakes hang out in their pans for about 10 minutes. This little cooling period helps them firm up. Then, gently invert them onto a wire rack to cool completely. Patience here is key – you *must* let them cool all the way down before you even think about frosting them. Otherwise, you’ll have a melty mess!
Tips for Perfect Chocolate Cake Design Preparation
Getting this chocolate cake just right before you even think about frosting is super important, especially when you want a clean base for your amazing chocolate cake design. Trust me, a few little tricks can make all the difference!
First off, remember I mentioned room temperature buttermilk and eggs? It’s not just a suggestion! When your wet ingredients are at the same temperature, they blend so much smoother with the dry ingredients. If you forget to take them out early, just pop the eggs in a bowl of warm water for a few minutes and gently warm up your buttermilk on the stove or in the microwave – just don’t cook it!
When you’re mixing, be sure not to overdo it once the flour goes in. Overmixing can make your cake a bit tough, and we want tender, moist perfection. Mix just until everything comes together. The same goes for adding that hot liquid; stir until it’s combined and smooth, but don’t go crazy whisking it for ages.
And for the pans! Greasing and flouring is a must, but I also like to add a circle of parchment paper at the bottom of my round pans. It’s like a little insurance policy against sticking, especially if you’re going to flip the cake out onto a pretty cake stand. A little extra effort there means you won’t have any heartbreaking cake casualties!
Cooling and Frosting Your Chocolate Cake
Okay, so your beautiful chocolate cakes are out of the oven! Now, this next part is super important for getting that perfect finish for your chocolate cake design. You absolutely *have* to let them cool completely before you even think about frosting. If you try to frost a warm cake, the frosting just melts right off, and nobody wants that! Let them sit in their pans for about 10 minutes, then carefully flip them out onto a wire rack to cool down all the way. Once they’re totally cool, they become the best base for whatever frosting or buttercream you have planned – they’re ready for your artistic touch!
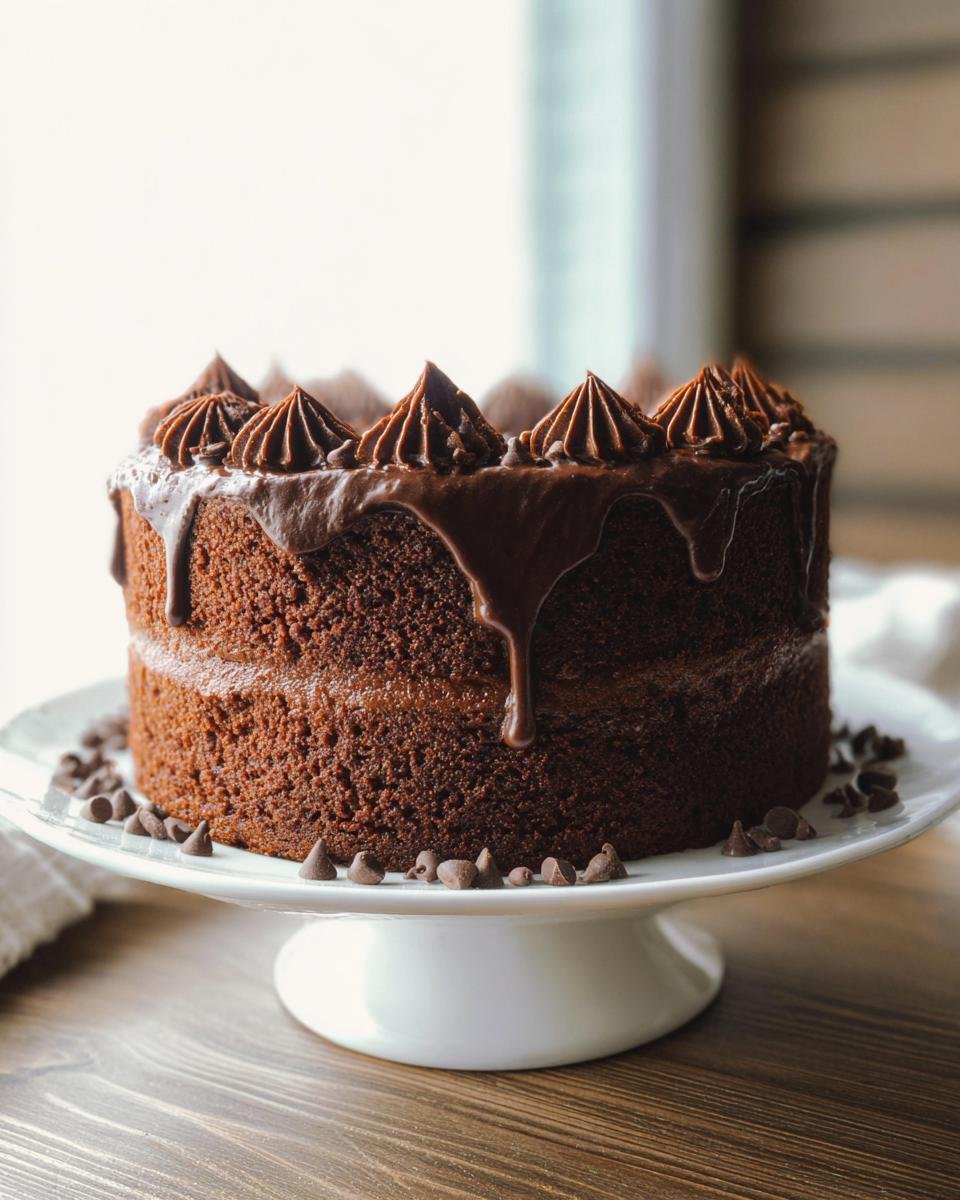
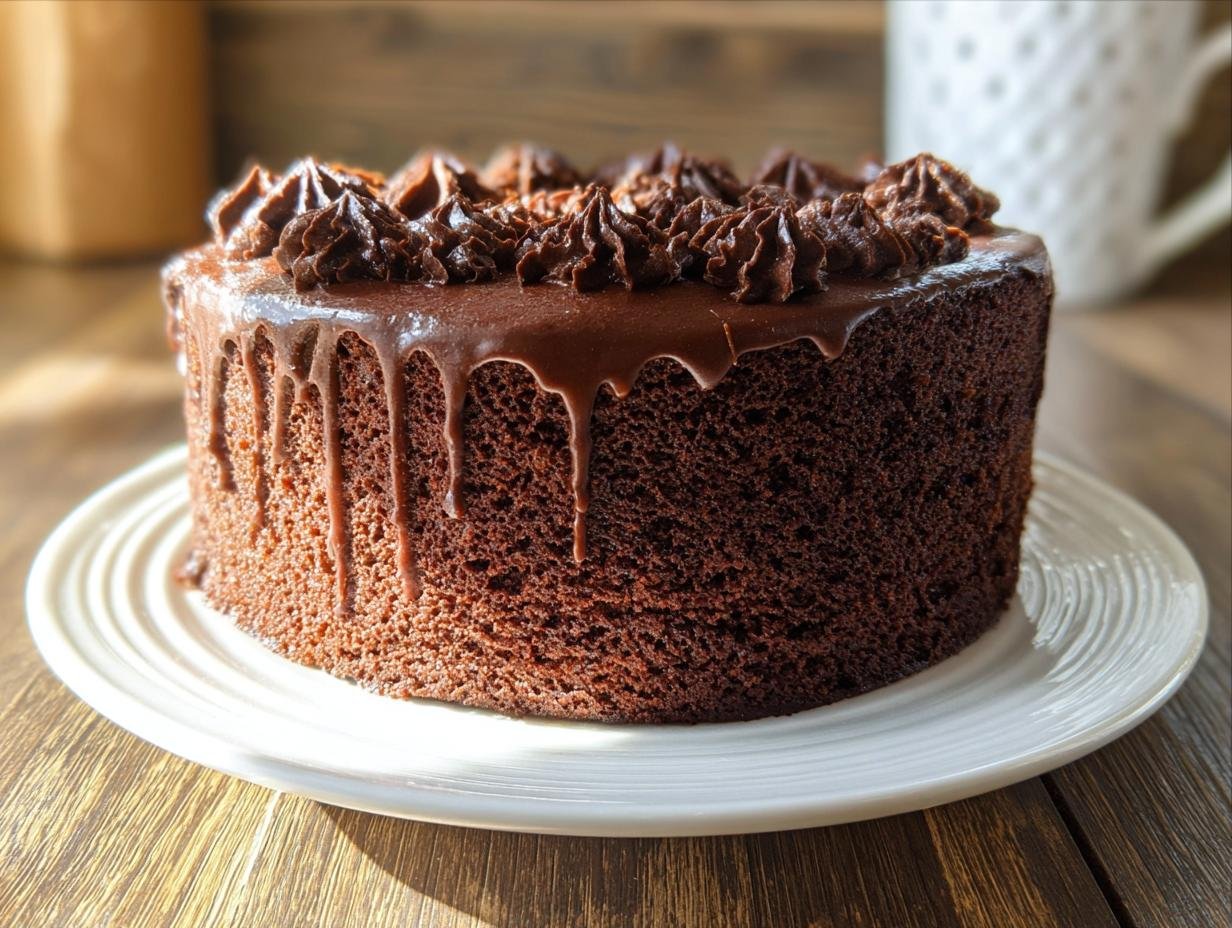
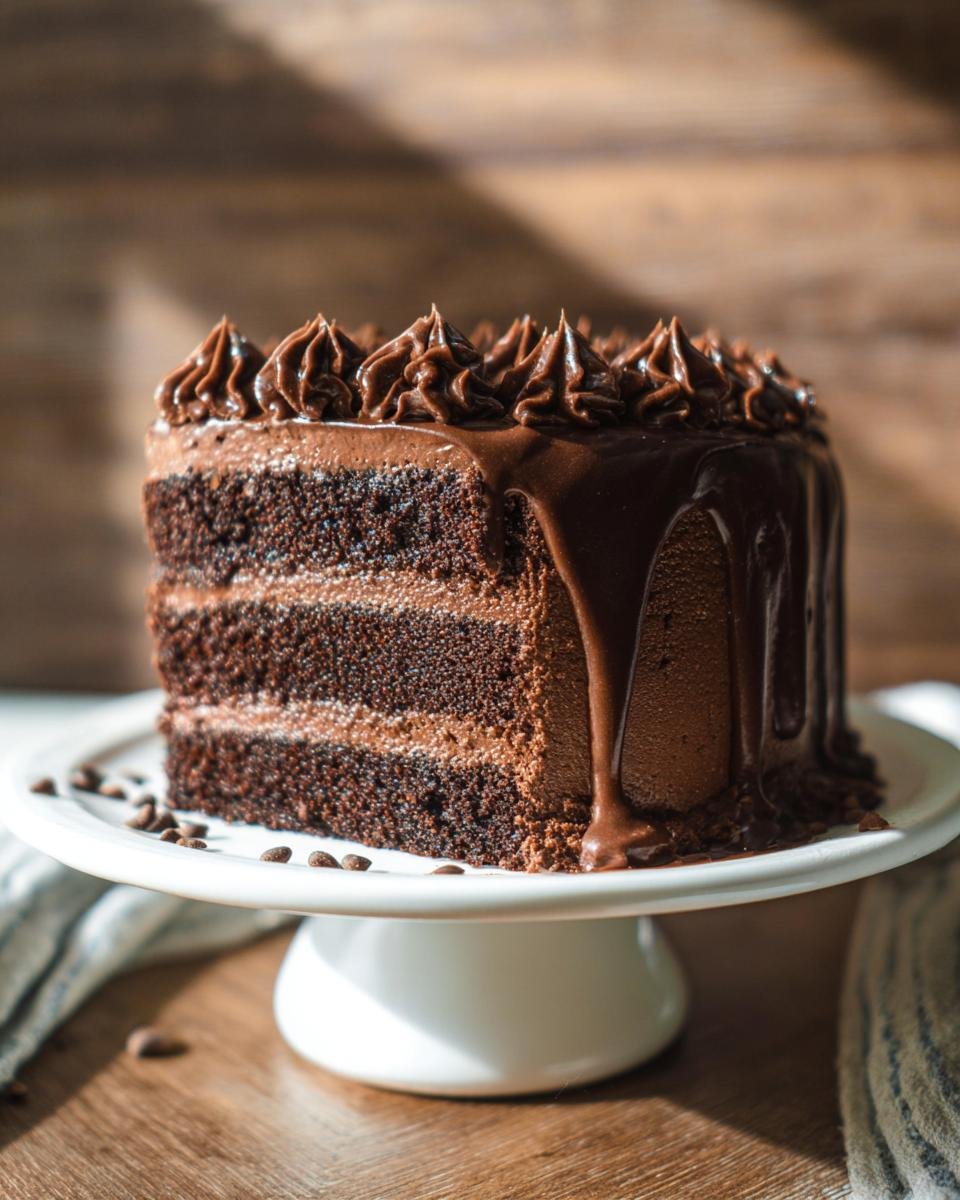
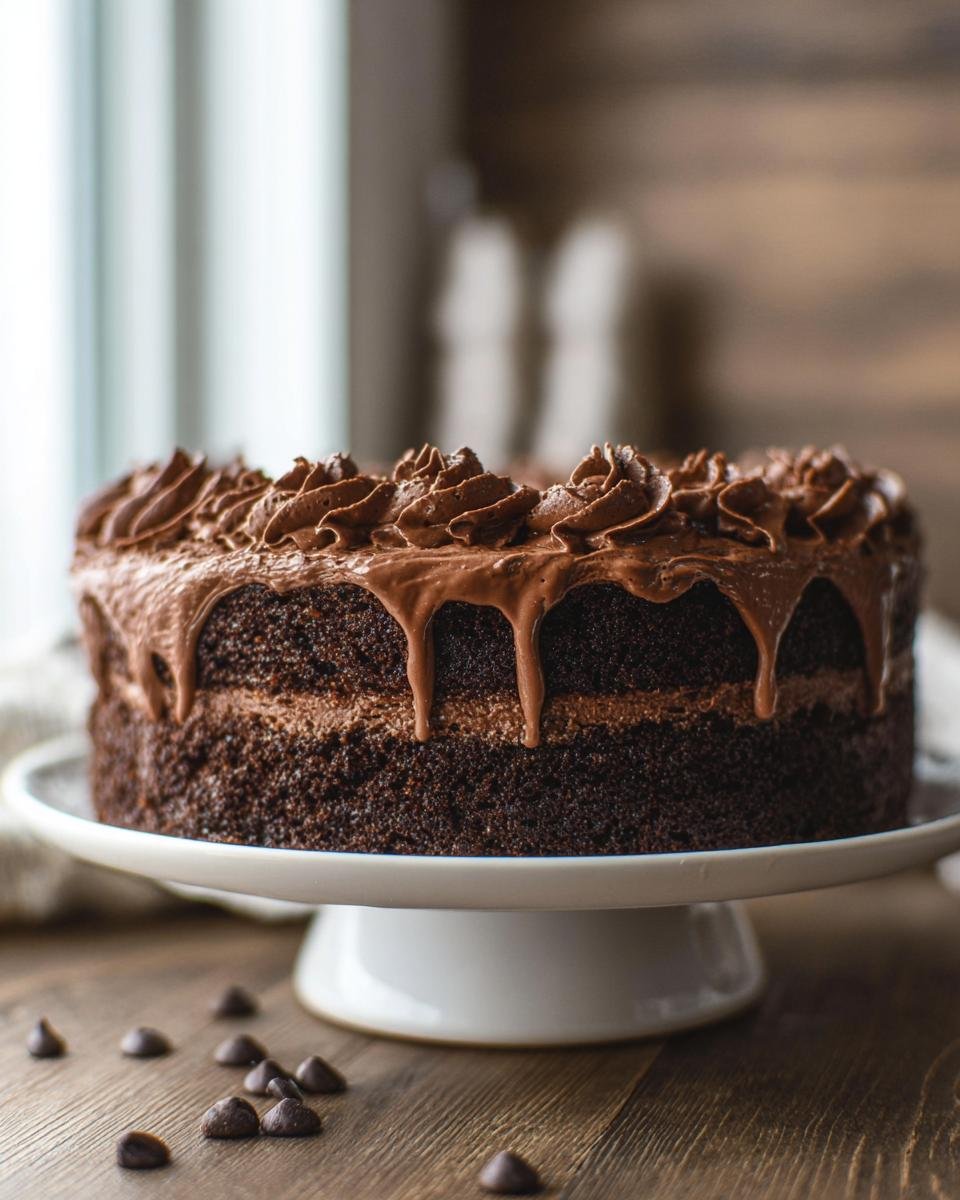
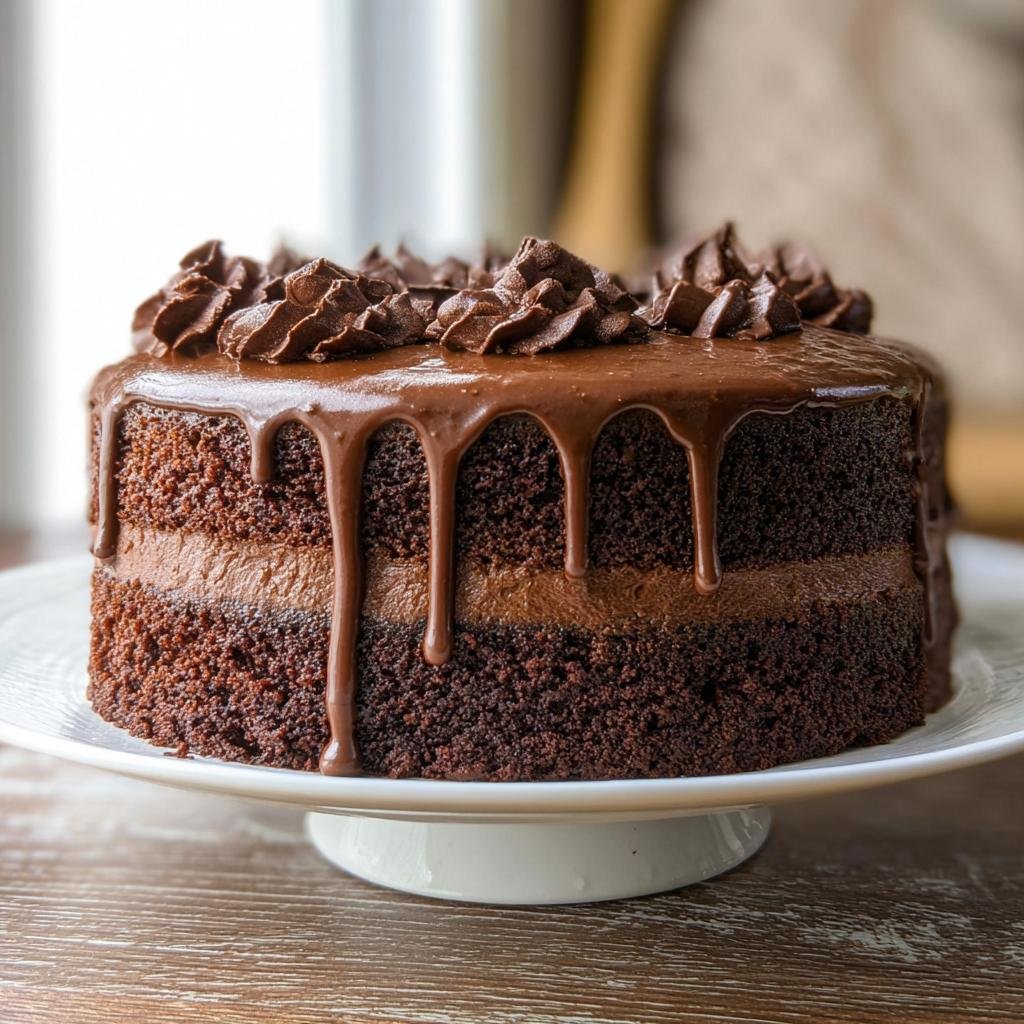
Creative Chocolate Cake Design Ideas
Now for the really fun part – turning this delicious chocolate cake into a showstopper! This recipe is such a wonderful foundation for any chocolate cake design you can imagine. You can go super simple or get totally elaborate. Think about a classic chocolate buttercream, whipped smooth all over, or maybe some elegant chocolate ganache drizzles cascading down the sides. If you’re feeling a bit more artistic, try swirling a contrasting frosting on top, or using a piping bag with a star tip to create beautiful borders or rosettes. Even just a scattering of fresh berries or chocolate shavings can elevate this cake beautifully. Check out some amazing inspiration here!

Frequently Asked Questions About Your Chocolate Cake
Got questions about this wonderful chocolate cake? I totally get it! Baking can sometimes have its little mysteries, but don’t worry, I’ve got you covered. Here are some common things people ask:
Can I make this chocolate cake ahead of time?
Absolutely! This is one of my favorite things about this recipe. You can bake the cake layers one day, let them cool completely, wrap them tightly in plastic wrap, and store them at room temperature for up to two days. For longer storage, pop them into the fridge. Just make sure to bring them back to room temperature before frosting for the best results and a smooth finish on your chocolate cake design!
What’s the best frosting for this moist chocolate cake?
Oh, the possibilities are endless! This cake is a fantastic base for pretty much any frosting you love. A classic chocolate buttercream is always a hit, or you could go for a rich chocolate ganache for that super decadent feel. Cream cheese frosting is also divine with chocolate! If you’re keeping it simple, a dusting of powdered sugar or a quick glaze works beautifully too. No matter what, it’ll be delicious!
Can I use a different pan size, like a 9×13 inch pan?
Yes, you definitely can! If you want to make this cake in a 9×13 inch pan instead of two round pans, just pour the batter in and adjust your baking time. It might take a bit longer for the center to bake through, so keep an eye on it. Start checking around 35-40 minutes and use that trusty wooden pick test to see if it’s done. This recipe is super forgiving!
Why is my chocolate cake dry?
That’s the worst, isn’t it? The main reasons this particular recipe *avoids* dryness are the oil and buttermilk, which add tons of moisture. If yours turned out dry, it might be from over-baking. Check for doneness a little earlier next time, and remember that thin batter is a good thing here! Also, make sure you didn’t accidentally measure too much flour, as that can also lead to a drier cake.
Nutritional Information (Estimated)
This nutritional information is just an estimate per serving, so keep that in mind! It can change a bit depending on exactly what you use and how you prepare it. But generally, you’re looking at around 350 calories, 55 grams of carbs, 5 grams of protein, and 14 grams of fat per slice. It’s a delightful treat that’s worth every bite!
Simple Chocolate Cake
Ingredients
Equipment
Method
- Preheat your oven to 350 degrees F (175 degrees C). Grease and flour two 9-inch round cake pans.
- In a large bowl, whisk together the flour, sugar, cocoa powder, baking soda, baking powder, and salt.
- Add the buttermilk, oil, eggs, and vanilla extract to the dry ingredients. Beat with an electric mixer on medium speed for two minutes.
- Carefully stir in the hot water or coffee by hand until the batter is smooth. The batter will be thin.
- Pour the batter evenly into the prepared cake pans.
- Bake for 30 to 35 minutes, or until a wooden pick inserted into the center comes out clean.
- Let the cakes cool in the pans for 10 minutes before inverting them onto a wire rack to cool completely before frosting.