
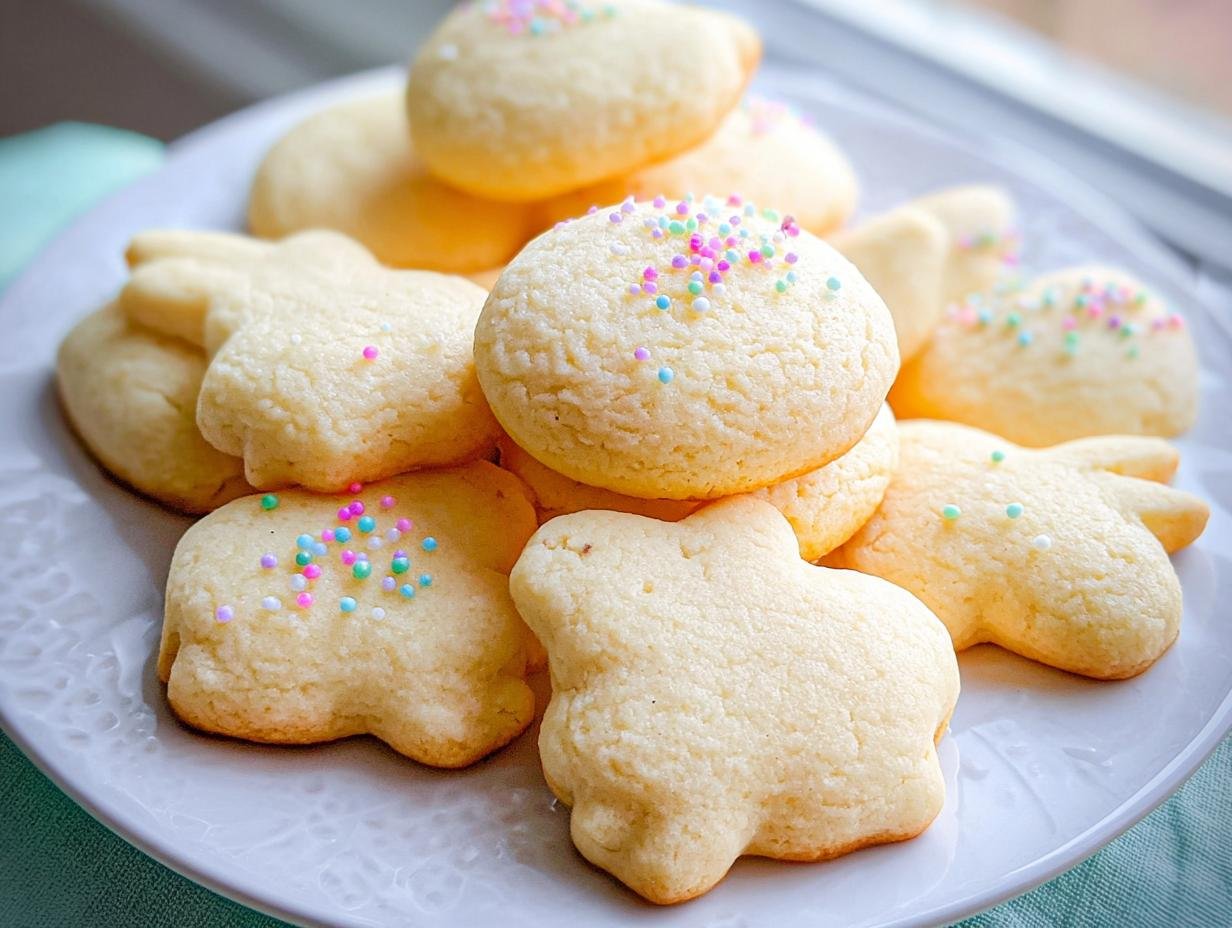
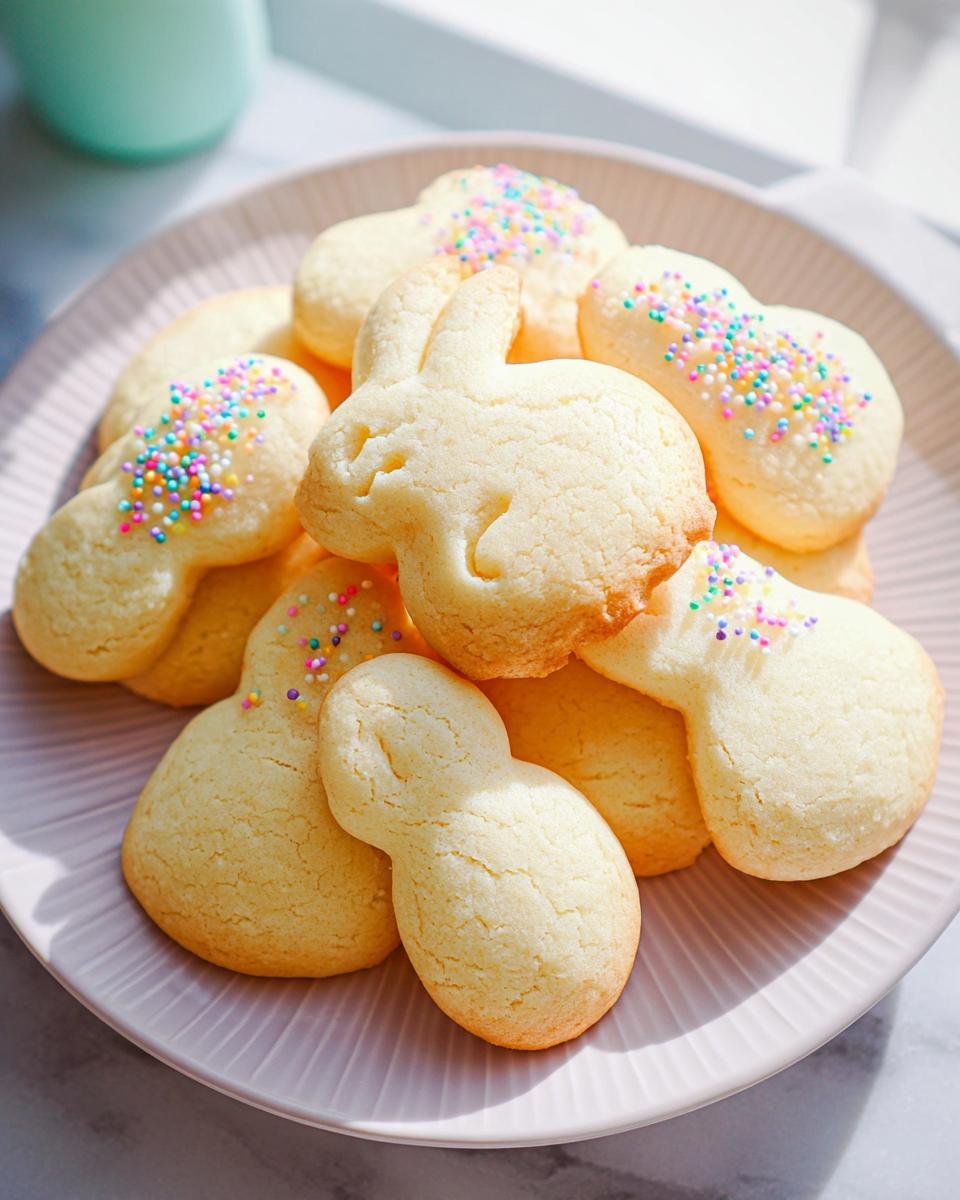
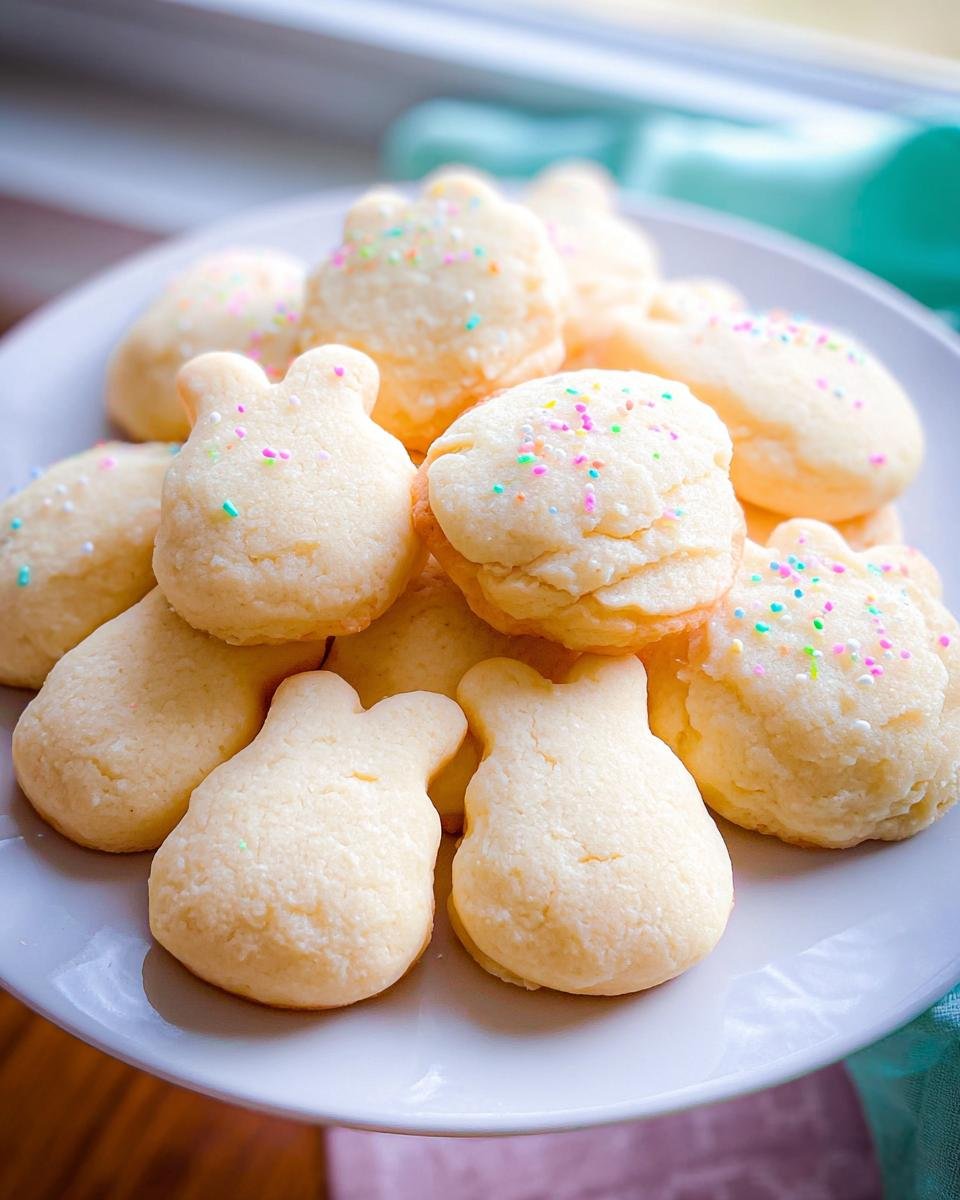
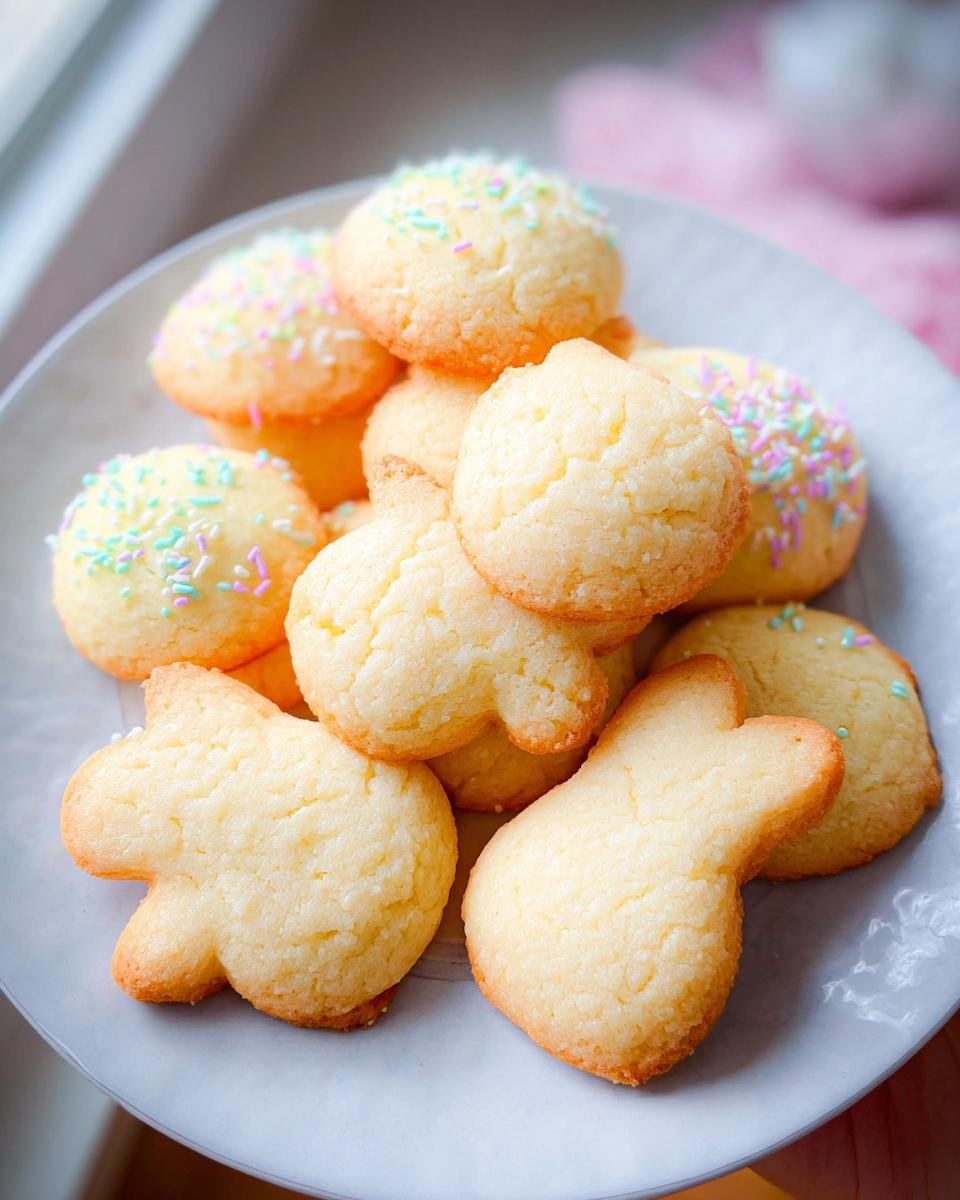
Oh, Easter baking! It’s honestly one of my favorite times of the year to get into the kitchen. There’s just something so special about filling the house with that sweet, comforting smell of cookies, especially when you know how much fun the decorating part is going to be! This easter cookies recipe is my absolute go-to because it’s just so wonderfully straightforward. Seriously, these sugar cookies are super reliable, they roll out like a dream, and they hold their shape perfectly so your cute bunny and egg cutouts actually look like bunnies and eggs. I remember making these with my own grandma when I was little, and the sheer excitement of getting to frost them with pastel colors is a memory I’ll always treasure. These are the perfect simple canvas for all your fun Easter decorating ideas!
Why You’ll Love This Easter Cookies Recipe
Honestly, these cookies are just pure joy to make and eat! Here’s why you’ll totally get hooked:
- So Easy to Whip Up: Seriously, even if you’re new to baking, you can totally nail this recipe. It’s straightforward and doesn’t ask for any fancy tricks.
- Dough That Cooperates: This dough is just… pleasant! It rolls out like a dream without sticking everywhere, which means less frustration and more fun with those cute Easter cookie cutters.
- Holds Its Shape Perfectly: You know how some cookies spread out in the oven and lose their cute shapes? Not these! Your little bunnies, eggs, and chicks will look just as you cut them.
- Classic, Delicious Taste: They’re not overly sweet or complicated. Just a perfect, buttery, vanilla-y sugar cookie that tastes like childhood.
- The Ultimate Decorating Canvas: These are basically made to be decorated! They’re the perfect base for all your royal icing masterpieces, sprinkles, and pastel magic.
Gather Your Ingredients for the Perfect Easter Cookies Recipe
Alright, let’s get our Easter cookie game face on! You don’t need anything too wild for these simple sugar cookies. Just make sure your butter and egg are at room temperature – it really helps everything combine smoothly. Oh, and for the flour, using plain all-purpose is best here so the cookies have that perfect, tender bite.
For the Cookie Dough:
- 1 cup (that’s two sticks!) unsalted butter, softened
- 1 cup granulated sugar
- 1 large egg
- 1 teaspoon vanilla extract
- 2 ½ cups all-purpose flour
- 1 teaspoon baking powder
- ½ teaspoon salt
That’s it for the cookie dough part! We’ll talk about decorating goodies in a bit, but these are the stars of our easter cookies recipe show!
Step-by-Step Guide to Making Your Easter Cookies Recipe
Alright, let’s get down to business and bake these fantastic easter cookies recipe gems! You’ve got your ingredients ready, so let’s make some magic happen. The process is super simple and totally doable, even if you’re wrangling little helpers. My biggest tip? Just relax and have fun with it!
Preparing the Cookie Dough
First things first, grab your big mixing bowl! You’ll want to cream together that softened butter and sugar. Beat them until they’re really light and fluffy – this is where we build the foundation for a tender cookie. Think pale yellow and almost cloud-like! Then, just pop in your egg and that lovely vanilla extract and give it a quick mix until it’s all combined. Now, in a *separate* bowl, give your flour, baking powder, and salt a little whisk to make sure they’re friends. Slowly add these dry bits to your buttery mixture, mixing on low speed (so you don’t end up wearing flour!) until a soft dough forms. Don’t go crazy mixing it here!
Rolling, Cutting, and Baking Your Easter Cookies
Once your dough is all together, divide it into two flat discs. Wrap ’em up tight in plastic wrap and send them to the fridge for at least 30 minutes. This is a crucial step, trust me! It makes the dough so much easier to handle. While they’re chilling, preheat your oven to 350°F (that’s 175°C) and get your baking sheets ready with parchment paper.
Now for the fun part! Lightly flour your counter and roll out one disc of dough to about 1/4 inch thick. Grab those adorable Easter cookie cutters – bunnies, eggs, chicks, whatever you’ve got! Press them down firmly and gently lift them away. Place your cute creations about an inch apart on your prepared baking sheets. We want golden edges, not browner-than-brown edges, so keep an eye on them. They usually take about 8 to 10 minutes. Pop them in and set a timer!
Cooling and Decorating Tips
As soon as the edges look just *barely* golden, pull those cookies out. Let them hang out on the hot baking sheet for about 5 minutes – they’re still a little delicate and need to firm up slightly. Then, carefully transfer them to a wire rack to cool *completely*. Seriously, they need to be totally cool before you even think about frosting. If they’re even a little warm, your beautiful icing will just melt right off. Patience is key here for the best decorating results!
Tips for Perfect Easter Cookie Decorating
Okay, so you’ve got these perfect little sugar cookies all cooled and ready for their glow-up! Decorating is honestly where the real magic happens. My absolute favorite way to get that smooth, professional look is by using royal icing. It dries super hard, which is great if you plan on stacking them or packaging them up. Just make sure it’s the right consistency – you want it thick enough to hold its shape but thin enough to pipe easily. A good test is if it falls off a spatula in ribbons that slowly melt back into the bowl.
I always use piping bags because they give you so much control. If you don’t have fancy tips, just snip a tiny bit off the corner of the bag. For Easter, think pastel colors are a must! I love making little polka dots, simple stripes, or even trying to draw bunny faces. And here’s a little trick I learned: Once your base icing is dry, you can add sprinkles or even edible glitter for extra sparkle!

Don’t forget you can always find more holiday inspiration over on our Christmas recipes page – sometimes ideas from one holiday can spark something for another, right?
Ingredient Notes and Substitutions for Your Easter Cookies
So, let’s chat real quick about a few things in this easter cookies recipe that might have you wondering. First off, the butter! You really want unsalted butter here because it lets you control the saltiness yourself. If you only have salted butter, just cut back the added salt in the recipe a little bit. For the flour, all-purpose is king for this recipe. It gives us that perfect balance of tender and sturdy.
As for swapping things out, I wouldn’t mess too much with the flour or leavening (that’s the baking powder, folks!). But, if you needed to make these dairy-free, there are some pretty good plant-based butter sticks out there now that work well. Just make sure they’re the solid stick kind, not the spreadable tub stuff!
Frequently Asked Questions About This Easter Cookies Recipe
Got questions about making these cute little Easter cookies? I’ve got answers! These are some things people often ask me, so hopefully this helps you out.
Why are my cut-out cookies spreading in the oven?
Oh, the dreaded cookie spread! It usually happens when the butter gets too warm. Make sure your butter is softened, not melted, when you cream it. Also, chilling the dough is super important – don’t skip that! If your dough feels too soft when you’re rolling, pop it back in the fridge for a bit. Rolling them out “cold” really helps them keep their shape.
Can I use a different type of flour for these sugar cookies?
For this specific easter cookies recipe, I really recommend sticking with all-purpose flour. It gives you that classic sugar cookie texture – sturdy enough to decorate but still nice and tender. Other flours, like whole wheat or almond flour, have different protein and fat contents, which can totally change how the cookies bake, spread, and taste. So, for the best results, stick to the tried-and-true!
How long do these Easter cookies stay fresh?
These simple sugar cookies are pretty hardy! Once they’ve completely cooled, you can store them in an airtight container at room temperature for about 3 to 5 days. If you’ve decorated them with royal icing, they’ll last even longer, sometimes up to a week or more because the icing acts as a bit of a seal. Just make sure they’re definitely cool before you put them away, or you’ll get condensation, which is no fun for crisp cookies!
Can I make these cookies ahead of time for Easter?
Absolutely! Making cookies ahead is my secret weapon for stress-free holidays. You can bake the cookies and store them as mentioned above for up to a week. Or, you can make the dough, wrap it well, and keep it in the fridge for up to 3 days before you plan to bake. Just let it sit at room temp for a few minutes to soften slightly before rolling. It makes Easter morning so much easier!
Storing and Reheating Your Delicious Easter Cookies
Once your adorable Easter cookies are completely cooled and decorated, storing them is key to keeping them tasting fresh. Pop them into an airtight container – you can layer them with parchment paper if you’re worried about the decorations smudging, though with royal icing, they’re usually pretty solid! They’ll stay yummy at room temperature for about 3-5 days. Honestly, I’ve never had them last longer than that because they disappear so fast! Reheating isn’t usually necessary for these, but if you wanted them a little crisper, a few minutes on a warm (not hot!) baking sheet might do the trick, though I find they’re best at room temp.
Estimated Nutritional Information
Just a heads-up, this is a rough idea of what you’re getting in each little cookie! Because everyone’s baking can be a little different, actual numbers might vary a bit. But roughly, you’re looking at around 150 calories, with about 7 grams of fat and 20 grams of carbs per cookie. Of course, if you go wild with frosting and sprinkles, that number will tick up – but hey, it’s Easter! For more diet and nutrition info, check out our other posts!
Share Your Easter Cookie Creations!
I’d absolutely LOVE to see your beautiful easter cookies! Did you try this recipe? How did they turn out? Did you make a super cute bunny or a perfectly speckled egg? Leave a comment below and tell me all about it, or even better, share a picture on social media and tag me – I can’t wait to see your gorgeous creations!

Simple Sugar Cookies for Easter
Ingredients
Equipment
Method
- In a large bowl, cream together the softened butter and sugar until the mixture is light and fluffy.
- Beat in the egg and vanilla extract until just combined.
- In a separate bowl, whisk together the flour, baking powder, and salt. Gradually add the dry ingredients to the wet ingredients, mixing on low speed until a dough forms.
- Divide the dough in half, wrap each half in plastic wrap, and chill in the refrigerator for at least 30 minutes.
- Preheat your oven to 350 degrees Fahrenheit (175 degrees Celsius). Line baking sheets with parchment paper.
- On a lightly floured surface, roll out one portion of the chilled dough to about 1/4 inch thickness. Use Easter-themed cookie cutters to cut out shapes.
- Place the cut-out cookies onto the prepared baking sheets, leaving about 1 inch between them.
- Bake for 8 to 10 minutes, or until the edges are lightly golden. Do not overbake.
- Let the cookies cool on the baking sheet for 5 minutes before transferring them to a wire rack to cool completely before decorating.