

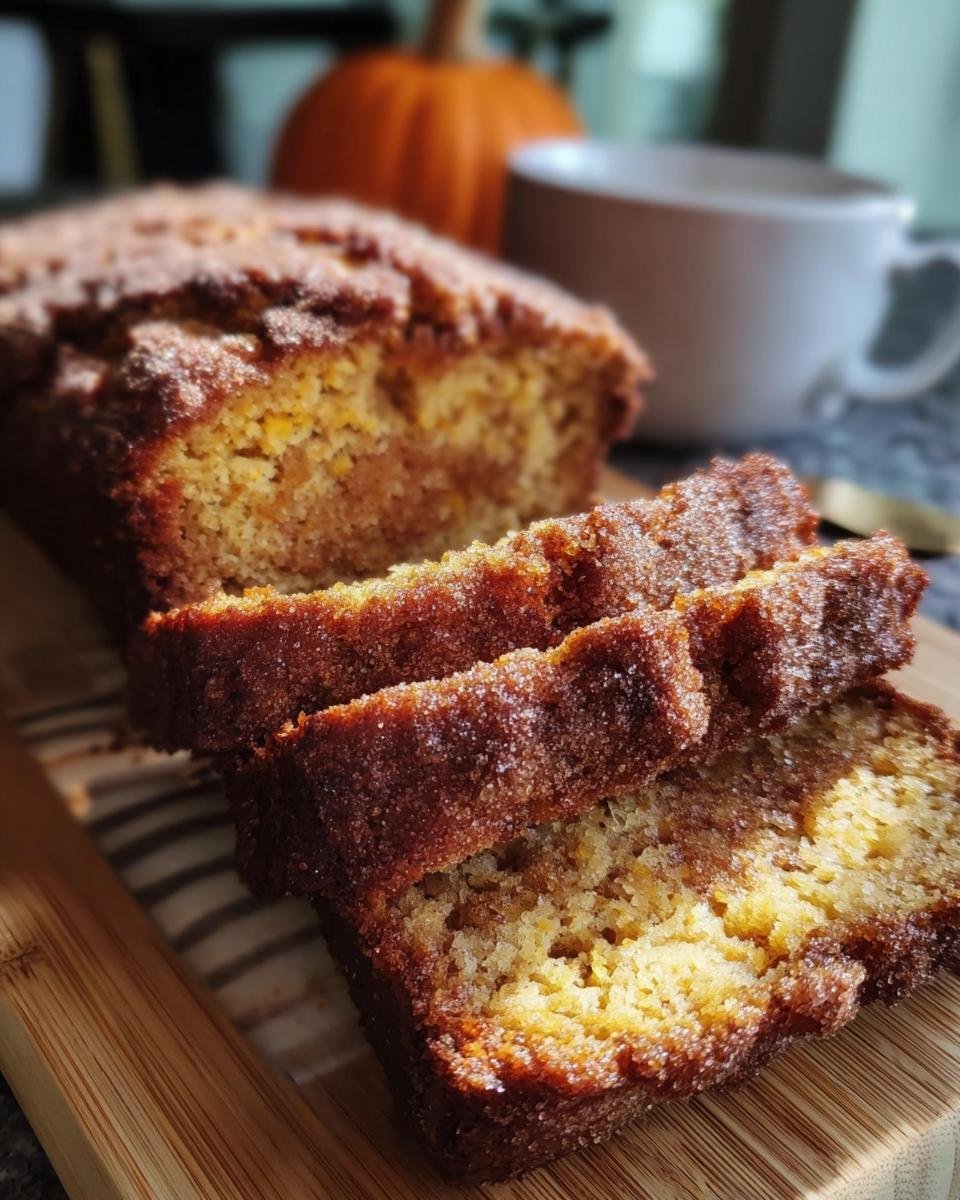
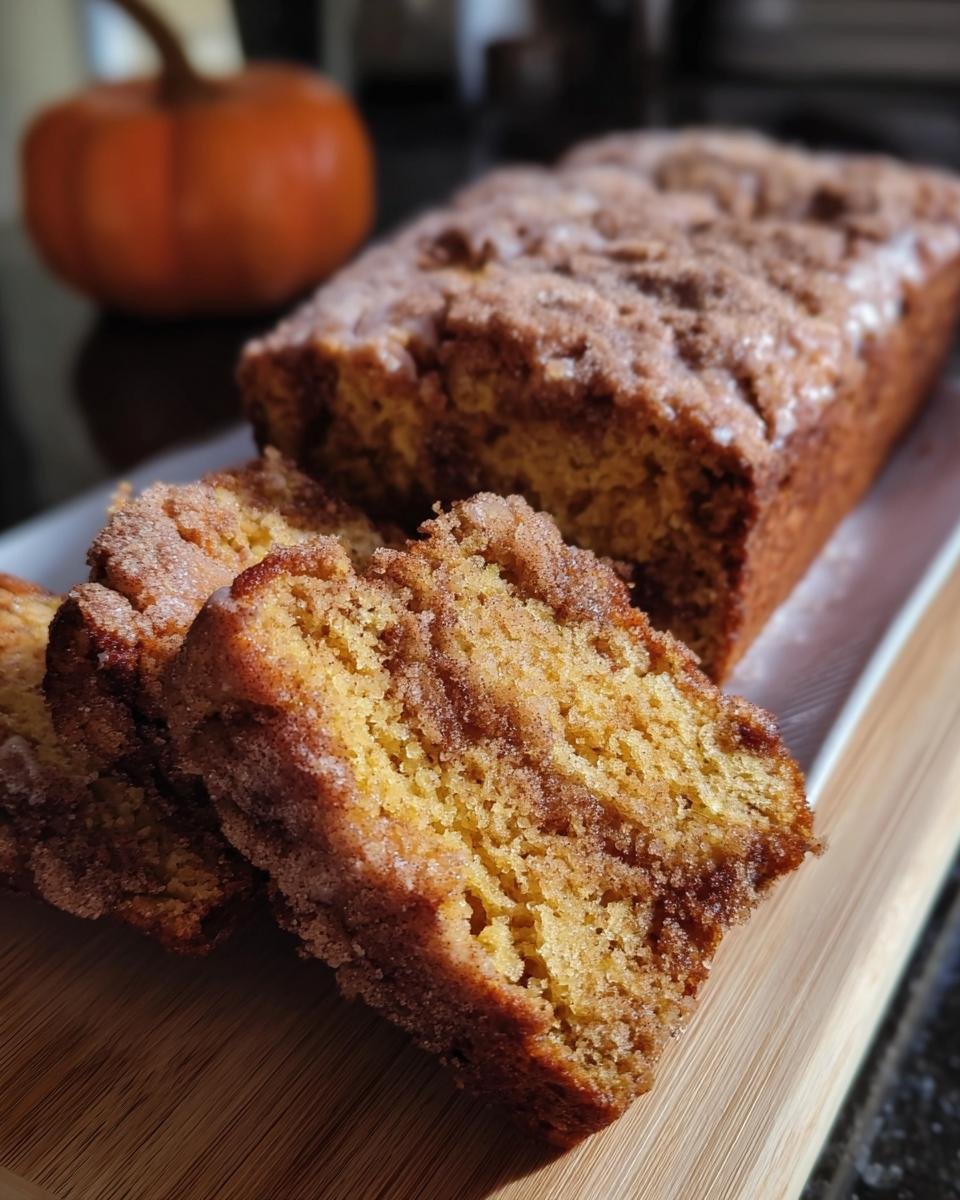
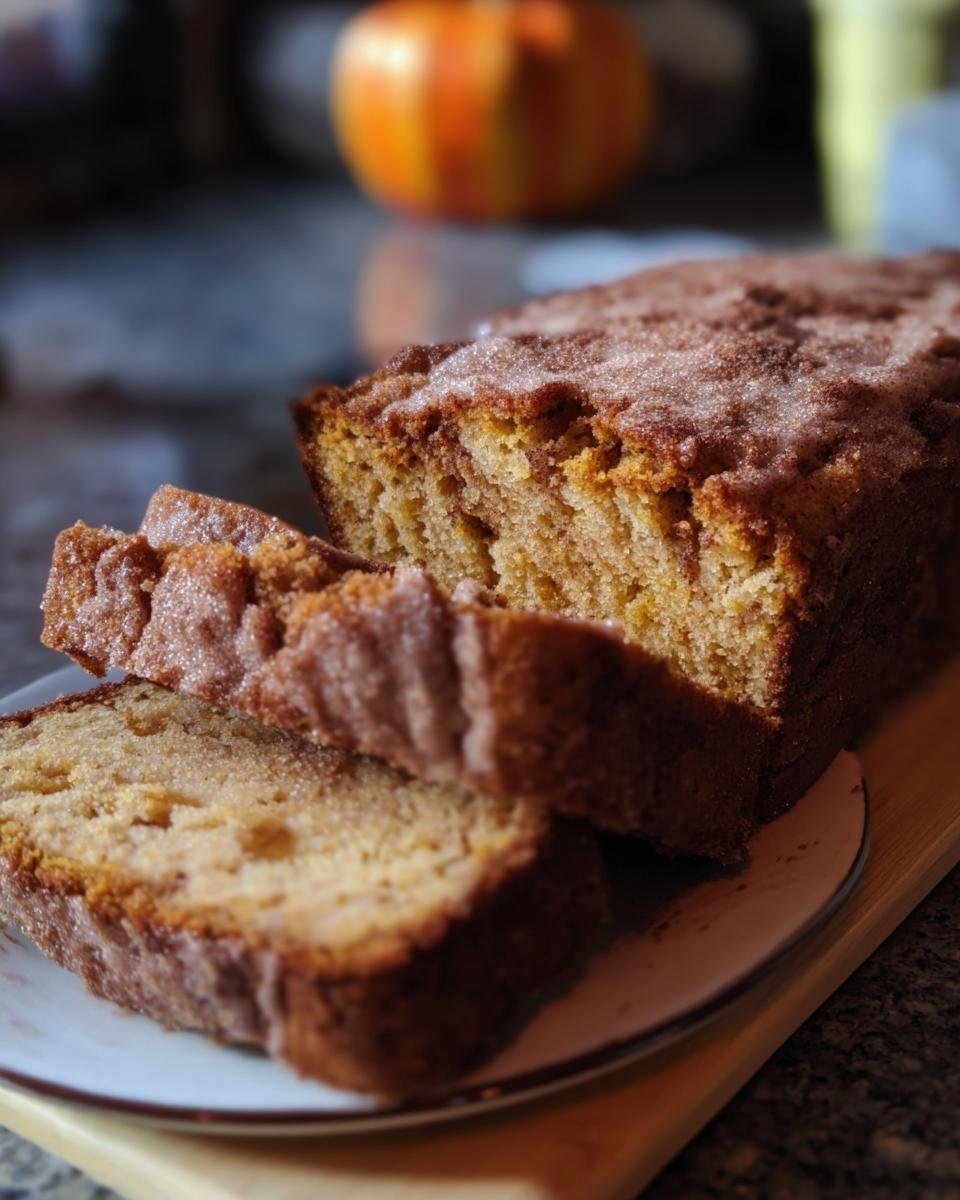
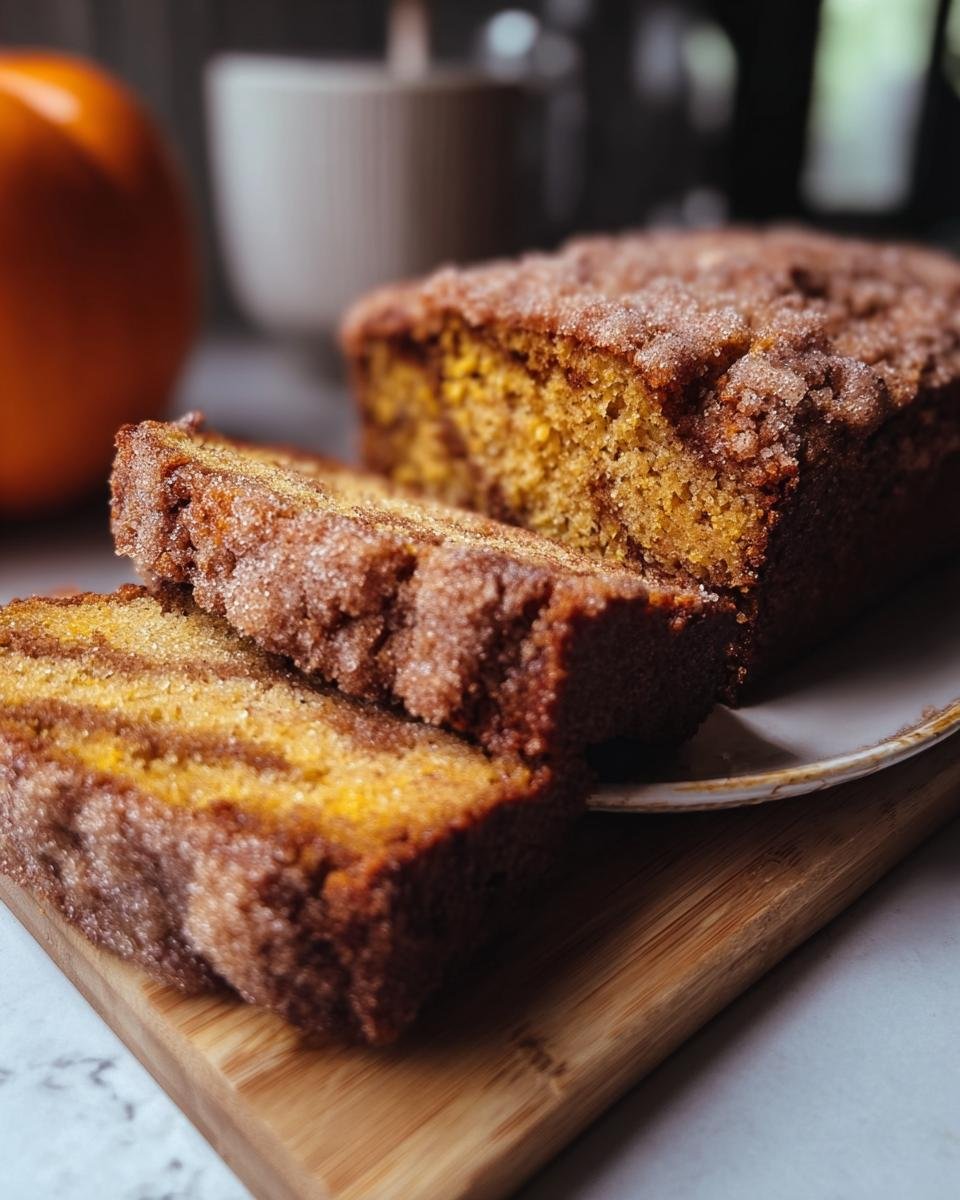
Oh my goodness, get ready for your new favorite fall treat! This Snickerdoodle Pumpkin Bread is just pure cozy magic. For years, I’ve loved a good fluffy pumpkin bread, and I’m obsessed with the crinkly tops of snickerdoodles. One day, I just thought, “Why not put them together?!” And WOW, it was a game changer. It’s got that perfect spice from the pumpkin and cinnamon, but then you bite into that crisp, sugary cinnamon topping. It’s like a warm hug for your taste buds. Seriously, this recipe is special because fall baking should always be this fun and delicious, don’t you think?
Why You’ll Love This Snickerdoodle Pumpkin Bread
Seriously, this bread is a winner for so many reasons:
- It’s ridiculously easy to whip up – perfect for a busy weeknight or a lazy weekend.
- The flavor combo is unreal: warm pumpkin spices meet that sweet cinnnamon-sugar crunch.
- It smells absolutely divine while baking, filling your home with cozy autumn vibes.
- It’s moist and tender on the inside, with that perfect snickerdoodle crust on top.
- Great for breakfast, a snack, or even dessert. Talk about versatile!
- It’s a fun twist on two classic favorites, guaranteed to impress!
Ingredients for Snickerdoodle Pumpkin Bread
Alright, let’s gather our goodies! Here’s what you’ll need to make this dreamy bread come to life. It’s pretty straightforward ingredient-wise, which makes it even better!
For the Bread:
- 2 cups all-purpose flour
- 1 teaspoon baking soda
- 1/2 teaspoon salt
- 1 teaspoon ground cinnamon (for the bread batter)
- 1/2 teaspoon ground nutmeg
- 1/4 teaspoon ground cloves
- 1 cup granulated sugar
- 1/2 cup unsalted butter, softened (make sure it’s nice and soft!)
- 2 large eggs
- 1 cup pumpkin puree (just the plain stuff, not pie filling!)
- 1/4 cup milk
For the Snickerdoodle Topping:
- 1/4 cup granulated sugar
- 1 tablespoon ground cinnamon
A little note from my kitchen: If you’re feeling fancy, I love adding about 1/2 cup of chopped pecans or walnuts right into the batter with the dry ingredients. They add such a lovely little crunch!
Before we dive into all the yummy mixing, let’s make sure you’ve got the right tools ready to go! Having everything handy makes the whole baking process way smoother. You don’t need anything super fancy for this recipe, just some kitchen basics:
When it comes to the pans, you’ll want a standard 9×5 inch loaf pan. This is the perfect size for this amount of batter and gives you that classic bread shape we all love.
You’ll also need a couple of good mixing bowls – one for your dry stuff and one for your wet ingredients. Trust me, keeping them separate until the right moment is key! And don’t forget a sturdy whisk for getting those dry ingredients perfectly blended and a trusty spatula for scraping down your bowls and folding everything together. Easy peasy!
How to Make Snickerdoodle Pumpkin Bread: Step-by-Step
Alright, let’s get this baking party started! Making this Snickerdoodle Pumpkin Bread is a joy, and honestly, it’s super straightforward. Just follow along, and you’ll have a loaf of pure autumn happiness in no time. If you’ve ever made pumpkin bread before, this is just a fun little upgrade!
Preparing the Pan and Oven
First things first, let’s get that oven nice and toasty. Preheat it to 350°F (175°C). While that’s heating up, grab your 9×5 inch loaf pan and give it a good grease and flour. This is super important to make sure your beautiful bread doesn’t stick. No one wants a broken loaf!
Mixing the Dry Ingredients
In a big mixing bowl, let’s get all those dry ingredients acquainted. Whisk together your all-purpose flour, baking soda, salt, cinnamon (that’s the one for the bread batter itself!), nutmeg, and cloves. A good whisking makes sure everything is evenly distributed, so you don’t get any weird clumps of baking soda or spice.
Creaming Butter and Sugar
Now, for the magic! In a separate, good-sized bowl, take your softened butter and granulated sugar and just go to town. Cream them together until the mixture looks light and fluffy. This step adds air into the batter, which is what gives you that lovely tender texture that’s so important. Like making any good pumpkin bread, this creaming step really counts!
Incorporating Wet Ingredients
To that creamy butter and sugar mix, beat in your eggs, one at a time, making sure each one is fully incorporated. Then, stir in the star of the show – the pumpkin puree – along with your milk. Give it a little stir until it’s all nice and combined. It should look like a lovely, smooth, orangey mixture. You can see how we love our pumpkin here at Everyday Kravings, just like in these yummy muffins!
Combining Wet and Dry Mixtures
Here comes the crucial part: gently add your dry ingredients to the wet mixture. Mix them together until *just* combined. I can’t stress this enough – do NOT overmix! Overmixing develops the gluten in the flour, and that can make your lovely bread tough. Just mix until you don’t see any big streaks of flour left. A few little lumps are okay!
Adding the Snickerdoodle Topping
Speaking of snickerdoodle magic, it’s topping time! In a little separate bowl, simply mix together the 1/4 cup of granulated sugar and the 1 tablespoon of cinnamon. Sprinkle this glorious mixture evenly all over the top of your batter in the loaf pan. This is what gives you that delightful crust!
Baking the Snickerdoodle Pumpkin Bread
Pop that pan into your preheated oven and let it bake for about 50 to 60 minutes. How do you know it’s done? Easy! Just insert a wooden skewer or a toothpick into the center of the bread. If it comes out clean (or with just a few moist crumbs attached, not wet batter), your bread is ready to go! Remember, ovens can be a bit quirky, so keeping an eye on it is always a good idea. This part is really similar to how you’d check if our other pumpkin bread is done.
Cooling and Serving
Once it’s baked to perfection, let the loaf cool in the pan for about 10 minutes. This helps it set up a bit. Then, carefully invert it onto a wire rack to cool completely. This is so important! Trying to slice into a hot bread is a recipe for disaster (and mushy slices!). Patience, my friend!
Tips for Perfect Snickerdoodle Pumpkin Bread
Okay, so we want this bread to be *perfect*, right? Here are a couple of little tricks I always use to make sure my Snickerdoodle Pumpkin Bread turns out amazing every single time. These aren’t complicated at all, but they make a *huge* difference!
First off, make sure your butter is truly softened. I can’t tell you how many times I’ve rushed this! You want it to be soft enough that you can easily dent it with your finger, but NOT melted. If it’s too cold, your creamed butter and sugar won’t get fluffy enough, which can lead to a denser bread. If it’s melted, well, that’s a whole different issue! Softened butter is key for that light texture we’re after, so take it out of the fridge about 30-60 minutes before you start mixing.
Also, and I cannot say this enough: DO NOT OVERMIX the batter once you combine the wet and dry ingredients. Seriously. I get so excited to mix things together, but you have to stop yourself! Just mix until those dry streaks of flour disappear. Overmixing develops the gluten in the flour, which will make your beautiful, tender pumpkin bread tough and tough is not what we want here. A light hand is your best friend for a tender crumb!
Ingredient Notes and Substitutions
Let’s chat a little bit about some of the ingredients in this Snickerdoodle Pumpkin Bread. You know, sometimes you don’t have exactly what a recipe calls for, or you just want to make sure you’re using the right thing!
First off, the pumpkin puree! Make sure you’re grabbing 100% pure pumpkin puree and NOT pumpkin pie filling. The pie filling already has sugar and spices mixed in, and that would totally throw off the flavor and sweetness of our bread. Stick with the plain stuff.
For the nuts – I mentioned adding chopped pecans or walnuts in the batter, and trust me, it’s a delicious little addition for some crunch! But if nuts aren’t your thing, or if you have allergies, just skip them. No worries at all!
And if you’re looking for gluten-free options down the line, a good quality gluten-free all-purpose flour blend usually works pretty well in quick breads like this, but you might need to add a pinch more moisture. And for those watching sugar, you can experiment with sugar substitutes appropriate for baking, just be mindful they might alter the texture a bit. Happy baking!
Frequently Asked Questions about Snickerdoodle Pumpkin Bread
Got questions? I’ve got answers! It’s totally normal to wonder about a few things when you’re trying a new recipe, especially one as fun as this Snickerdoodle Pumpkin Bread. Here are some things people often ask:
Can I make this gluten-free?
Oh, absolutely! If you need to go gluten-free, you can totally swap out the all-purpose flour for a good quality gluten-free all-purpose baking blend. Just make sure it contains xanthan gum. You might notice the texture is a *little* different, but it should still be super yummy. You can find some great tips for gluten-free baking on my site!
How long does Snickerdoodle Pumpkin Bread stay fresh?
This bread stays delightfully moist for about 3-4 days when stored properly. Just wrap it up tightly in plastic wrap or pop it into an airtight container at room temperature. If your kitchen is super warm, popping it in the fridge is a good idea, though it might make it a tad firmer. You can also freeze slices for a longer treat!
Can I add chocolate chips to this recipe?
You know what? If chocolate chips make everything better for you, then go for it! Add about 1/2 cup of semi-sweet or dark chocolate chips to the batter when you’re adding the dry ingredients. It’s not traditional for snickerdoodles or pumpkin bread, but hey, it’s *your* bread, and I bet it’ll be amazing!
Can I make this recipe sugar-free or low-carb?
For those watching sugar intake, you can certainly experiment with sugar substitutes that are meant for baking. Just be aware that they might change the texture and moisture slightly. For more ideas on that front, check out my diabetic-friendly and low-carb recipes section. It takes a little trial and error to get it just right!
Nutritional Information
Just a little heads-up, the nutritional info below is an estimate, okay? It can totally change depending on the brands you use and even how precise you are with your measurements. But generally, one slice of this delicious Snickerdoodle Pumpkin Bread comes out to roughly 300-350 calories, with about 15-20g of fat, 4-6g of protein, and 40-45g of carbohydrates. Happy baking!
Share Your Snickerdoodle Pumpkin Bread Creations!
Alright, bakers, I’d absolutely LOVE to hear how your Snickerdoodle Pumpkin Bread turned out! Did you try adding nuts? Did it disappear in minutes? Let me know in the comments below! And if you snapped a picture, tag me on social media – I live for seeing your delicious creations! You can learn more about my baking adventures anytime!

Snickerdoodle Pumpkin Bread
Ingredients
Equipment
Method
- Preheat your oven to 350°F (175°C). Grease and flour a 9×5 inch loaf pan.
- In a large bowl, whisk together the flour, baking soda, salt, cinnamon, nutmeg, and cloves.
- In a separate bowl, cream together the granulated sugar and softened butter until light and fluffy.
- Beat in the eggs one at a time, then stir in the pumpkin puree and milk until well combined.
- Gradually add the dry ingredients to the wet ingredients, mixing until just combined. Do not overmix.
- Pour the batter into the prepared loaf pan and spread evenly.
- In a small bowl, combine the sugar and cinnamon for the topping. Sprinkle evenly over the batter.
- Bake for 50-60 minutes, or until a wooden skewer inserted into the center comes out clean.
- Let the bread cool in the pan for 10 minutes before transferring it to a wire rack to cool completely.