
Easter is just around the corner, and you know what that means – it’s time for some seriously cute and ridiculously easy baking! Forget those fancy, complicated treats. My family absolutely adores these little guys: Cinnabunnies! They’re basically my favorite cinnamon rolls all dressed up for spring. Seriously, they’re so simple, a total lifesaver when you want that homemade charm without all the fuss. I remember my niece giggling so hard when we made these last year, thinking we’d conjured up actual bunny bread right from the oven. Trust me, they’re guaranteed to bring smiles!
Why You’ll Love These Cinnabunnies
Honestly, what’s not to love about these little guys? They’re a total win-win in my kitchen:
- Super Easy Peasy: We’re talking store-bought biscuit dough here, folks! No complicated yeasted doughs, just pure, simple fun.
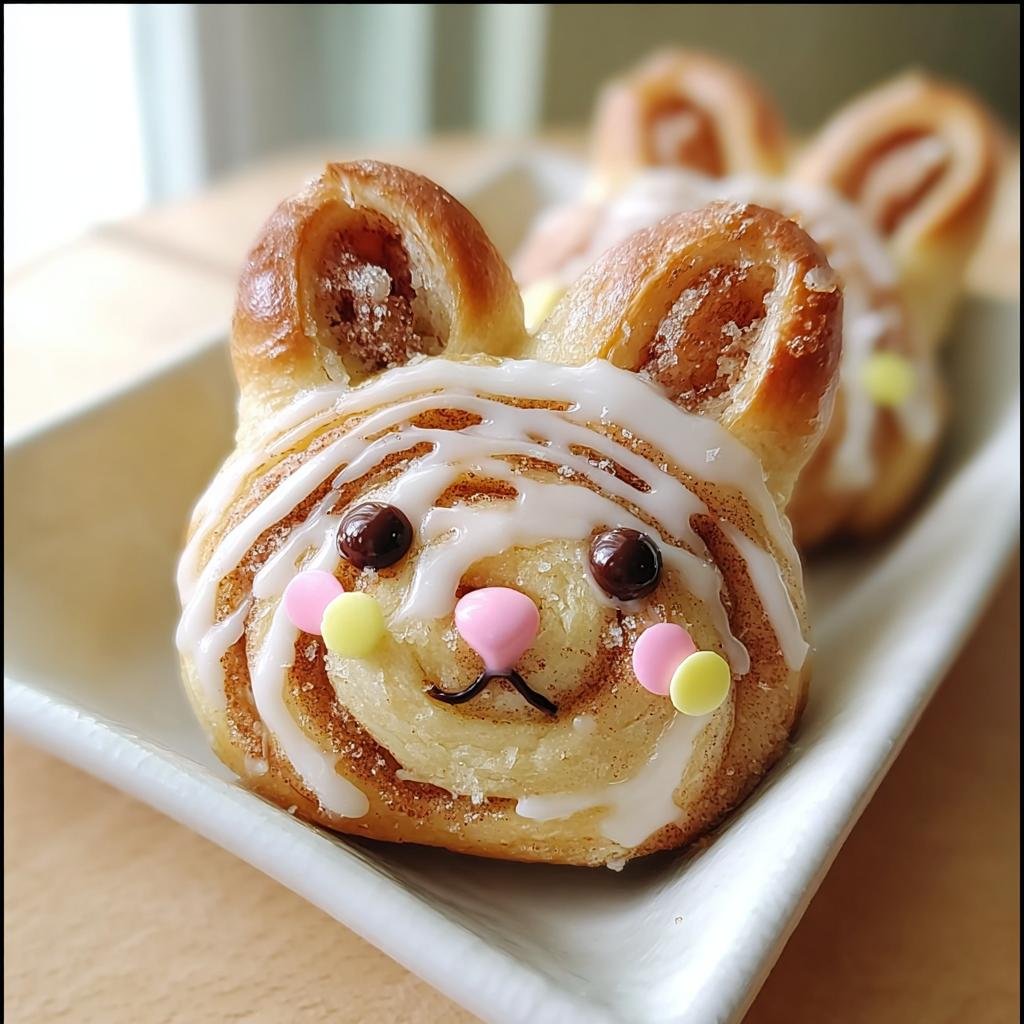
- Adorable Factor: Just look at them! They’re the cutest little bunny cinnamon rolls you’ve ever seen, perfect for making your Easter table extra special.
- Quick to Make: With minimal prep and a short bake time, you can whip these up without spending hours in the kitchen.
- Crowd Pleaser: Kids and adults alike go crazy for them. They have that perfect soft, sweet cinnamon roll taste we all crave.
- Festive Fun: They’re basically made for holidays like Easter and spring parties. They’re too cute not to make!
- Customizable: You can totally play around with the decorations and the glaze to make them your own.
Gather Your Cinnabunnies Ingredients
Okay, getting these Cinnabunnies together is going to be a breeze with what you probably already have! We’re keeping it super simple here, just like the recipe itself. Using good ol’ basic ingredients is key to that homemade charm. You won’t need anything fancy, but trust me, the quality of even the simple stuff makes a difference!
For the Dough
- 1 package refrigerated biscuit dough (trust me, the canned kind is magic here!)
For the Filling
- 2 tablespoons melted butter (real butter, please! It makes such a difference)
- 2 tablespoons granulated sugar
- 1 teaspoon ground cinnamon
For the Decoration
- 1/4 cup powdered sugar
- 1-2 teaspoons milk
- 2 mini chocolate chips (these are perfect for the eyes!)
- 2 pink sprinkles or small candies (for the cutest little nose and ears)
Step-by-Step Guide to Making Cinnabunnies
Alright, get ready to have some fun in the kitchen! Making these Cinnabunnies is honestly way easier than you might think, and seeing them come to life is the best part. We’re going to go from a simple can of biscuits to the cutest little bunny treats ever. Just follow along, and don’t be afraid to get your hands a little messy – that’s where the magic happens! If you like making sweet rolls, you might even find inspiration from traditional cinnamon roll recipes to understand the base flavors we’re working with!
Preparing the Dough and Filling
First things first, crank up that oven to 375°F (190°C) and get a baking sheet ready with some parchment paper. Trust me, parchment paper is your best friend here; it means way less sticking and easier cleanup! Now, pop open that can of biscuits. Gently separate them and give each one a little pat to flatten it out slightly – just enough so we have a nice surface to work with. In a little bowl, whisk together that melted butter, granulated sugar, and cinnamon. Smell that? Pure cinnamon roll bliss!
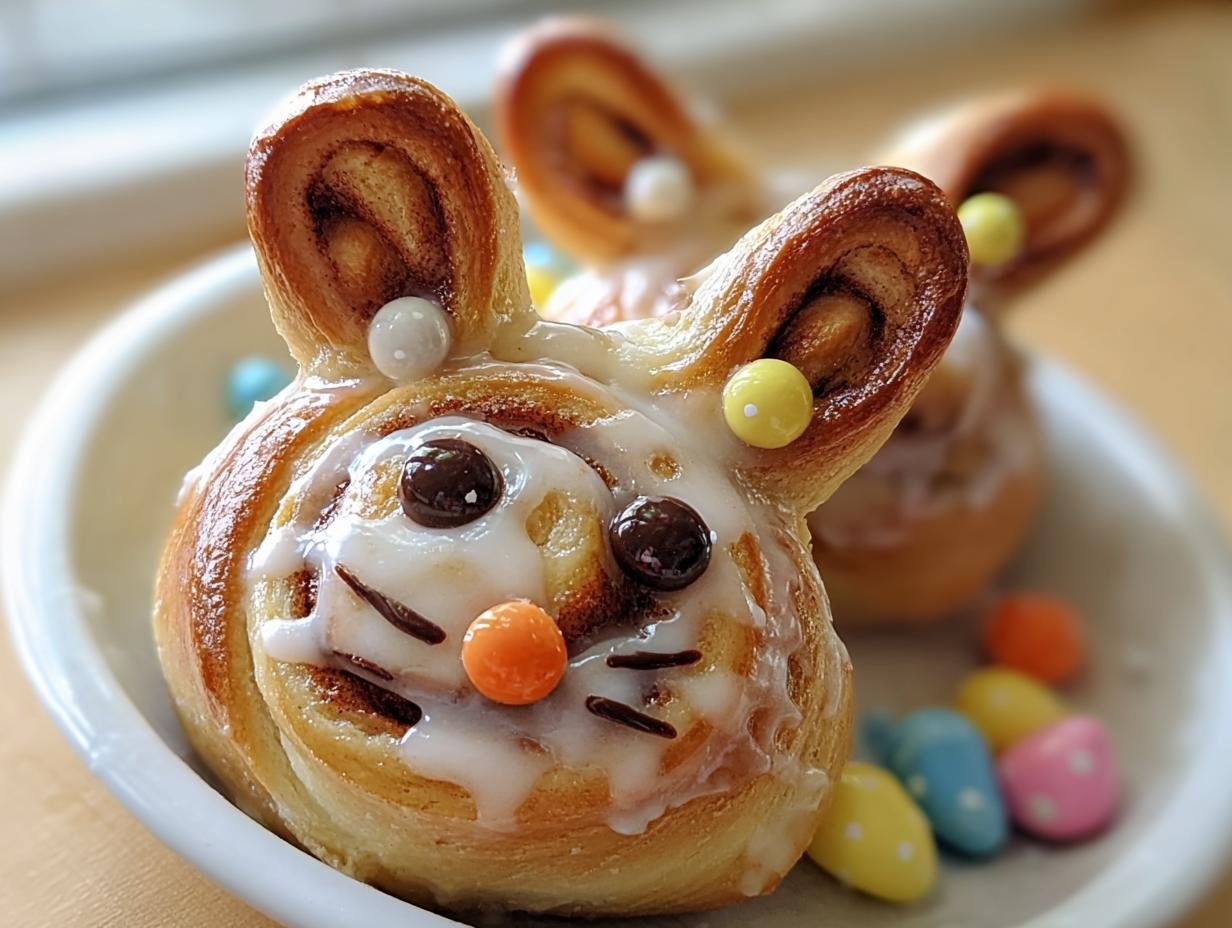
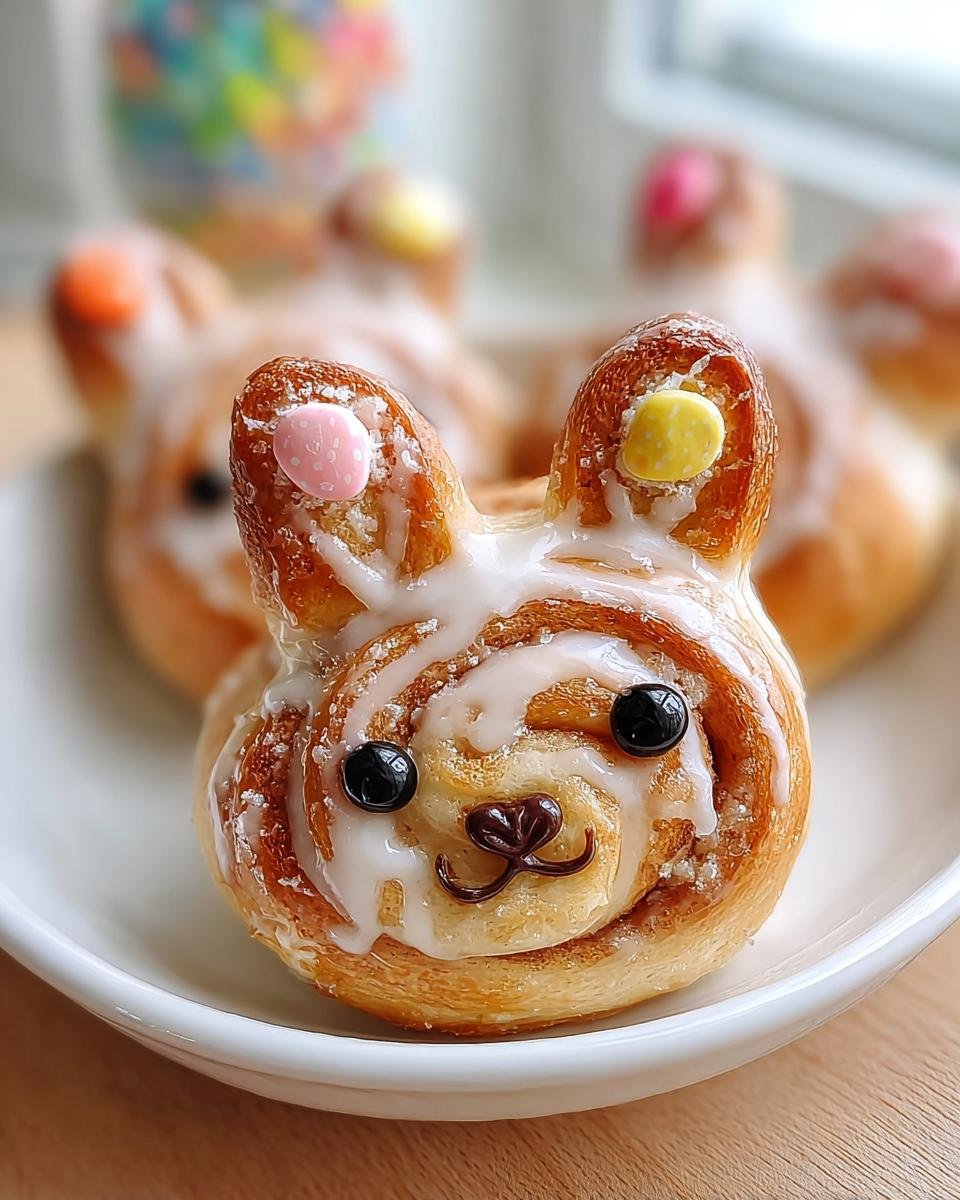
Shaping Your Adorable Cinnabunnies
Now for the fun shaping part! Take that cinnamon-sugar mixture and spread a thin, even layer onto each flattened biscuit. Don’t go too crazy with it, or it’ll all ooze out. Then, roll each biscuit up nice and tight, starting from one end. Think of it like making a tiny cinnamon roll log. Once you have your logs, take one and carefully slice it right in half. Now, grab a whole log and place one of the cut halves on top, cut-side down, to make the head. It’s like building a little cinnamon bunny! You can use a toothpick to hold them together if they seem a bit wobbly, but usually, they stick pretty well.
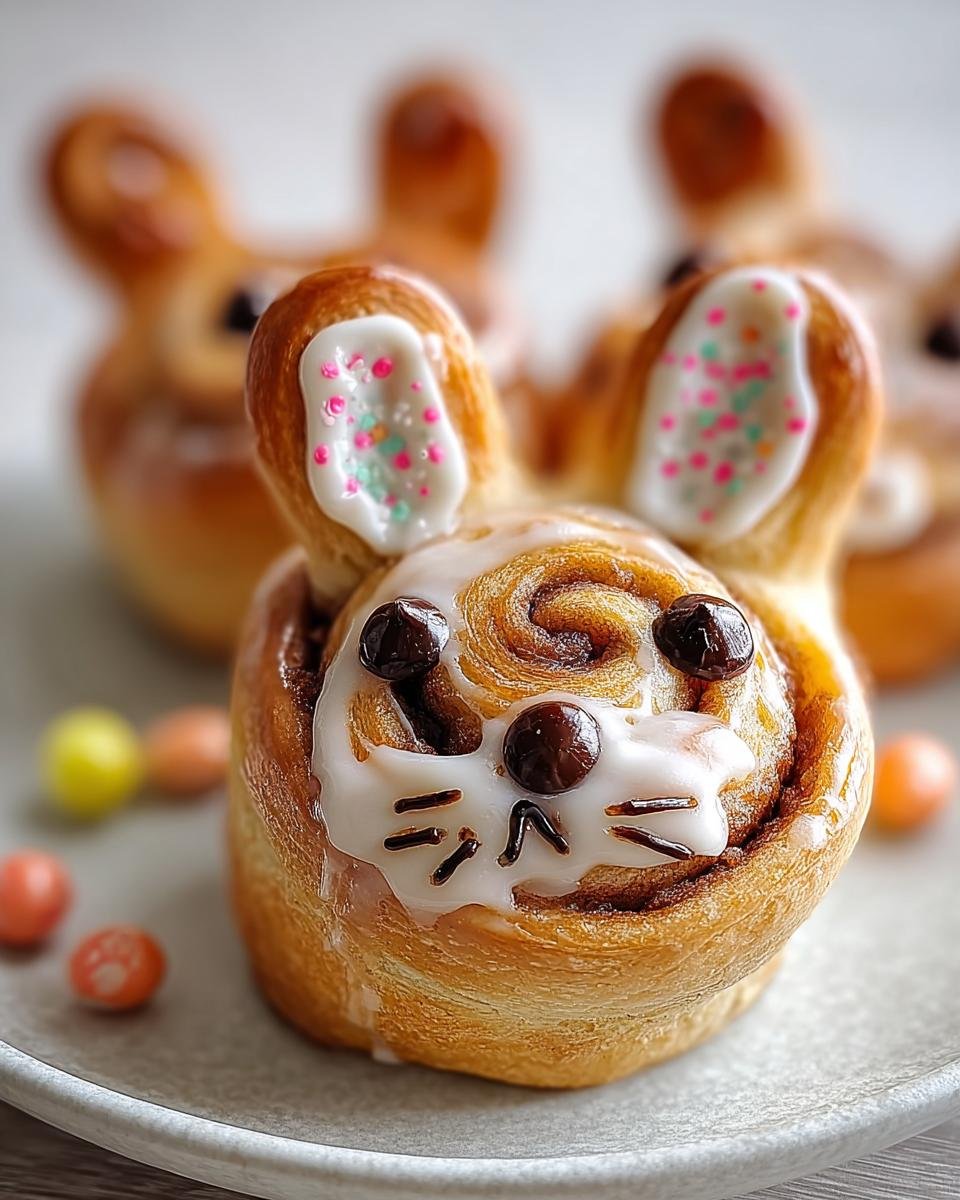
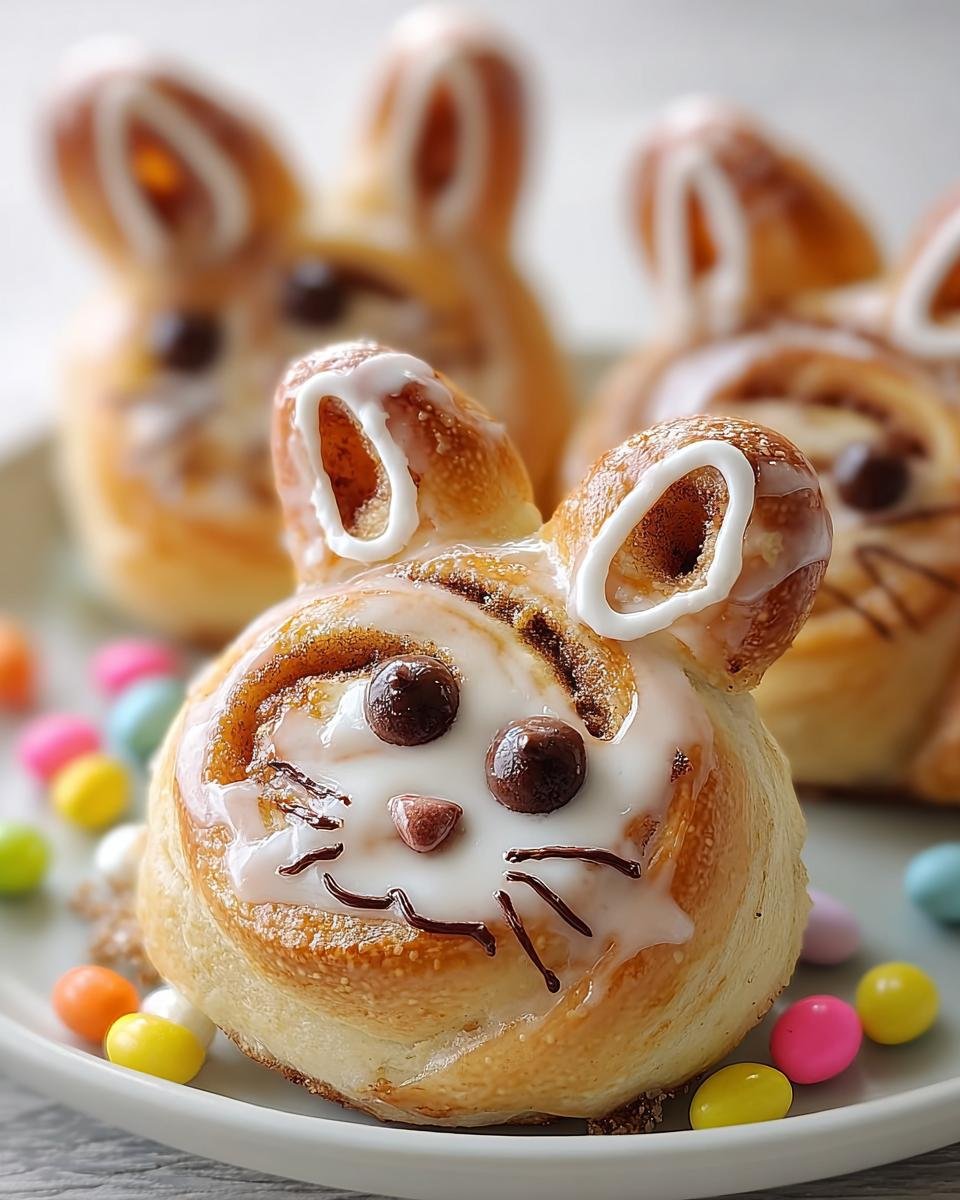
Baking and Decorating Your Cinnabunnies
Carefully place your shaped Cinnabunnies onto that parchment-lined baking sheet. Pop them into the hot oven and let them bake for about 12-15 minutes. You want them to be puffed up and beautifully golden brown. While they’re baking, whip up your glaze. Just whisk the powdered sugar and a teaspoon or two of milk together until it’s smooth and drizzly. Once the bunnies have cooled on the pan for just a few minutes, move them to a wire rack to cool a bit more. Then comes the best part: drizzle that sweet glaze over them, and immediately stick on those mini chocolate chips for eyes and your pink sprinkles for a cute nose and ears. Ta-da! Instant adorable!
Tips for Perfect Cinnabunnies Every Time
You know, pulling off these adorable Cinnabunnies isn’t just about following the steps – though that’s super important! It’s also about a few little tricks I’ve picked up along the way. Don’t worry if your first batch isn’t absolutely perfect; mine weren’t either! A little patience and a few smart moves will get you there. For example, make sure your biscuit dough isn’t too cold; slightly room-temperature dough is easier to work with and flattens nicely without tearing. And if you want an even more intense cinnamon flavor in your Cinnabunnies, a tiny pinch of nutmeg or cardamom mixed into the filling can be divine!
Ingredient Notes and Substitutions for Cinnabunnies
Okay, let’s talk ingredients for these sweet little Cinnabunnies! The beauty of this recipe is its simplicity, but sometimes you might have a question or need a quick swap. The star here is definitely the **refrigerated biscuit dough**. Trust me, it’s a lifesaver! If you *really* want to go from scratch, you could use a homemade biscuit recipe, but it’ll take a bit longer. For the filling, good old **melted butter**, **granulated sugar**, and **cinnamon** are perfect. If you don’t have granulated sugar, brown sugar would add a nice caramel note to your Cinnabunnies, but it might make the filling a bit toastier. For the glaze, **powdered sugar** is key for that smooth finish. If you need a dairy-free option, you can swap the milk for almond milk or even a tiny bit of water! And those **mini chocolate chips** and **pink sprinkles**? Totally interchangeable! You could use regular chocolate chips (just cut them smaller!), candy eyes, or even little fruit-flavored candies for the nose.

Make-Ahead and Storage for Your Cinnabunnies
Planning ahead? Great idea! You can totally get a head start on these adorable Cinnabunnies. You can shape them completely, place them on a parchment-lined baking sheet, cover them well with plastic wrap, and pop them in the fridge for up to 24 hours before baking. Just make sure they’re not touching each other. Bake them straight from the fridge, they might just need a minute or two extra. Leftovers? Store cooled, undecorated bunnies in an airtight container at room temperature for a day or two. Once they’re decorated, they’re best eaten fresh!
Frequently Asked Questions About Cinnabunnies
Can I use homemade biscuit dough for Cinnabunnies?
You totally can! If you have a favorite homemade biscuit recipe, feel free to use that. Just make sure it’s not too sticky to handle and rolls out nicely. It might take a little longer, but the flavor will be fantastic!
How do I get the bunny shape to hold?
The key is a gentle touch! Don’t overwork the dough when shaping. Securing the head to the body with a toothpick while they bake helps keep them together. Make sure they have a little space on the baking sheet so they bake evenly.
What other decorations can I use for Cinnabunnies?
Get creative! Instead of chocolate chips, try candy eyes for a fun look. For the nose and ears, you could use little red or pink candies, a dot of colored frosting, or even small pieces of fruit leather. Tiny edible flowers are also super cute!
Nutritional Information
Just a heads-up, these numbers are estimates! Since we’re using canned biscuits and the exact brands can vary, your results might be a little different. But generally, you’re looking at roughly 150-200 calories per Cinnabunny, with about 8-12g of fat, a few grams of protein, and around 15-20g of carbs. It’s a small, cute treat, so enjoy responsibly!
Share Your Cinnabunnies Creations!
I absolutely *love* seeing what you all create in your kitchens! If you make these adorable Cinnabunnies, please leave a comment below and tell me how they turned out. Did your little ones love them? Did you get creative with the decorations? I’d be thrilled if you shared a photo on social media and tagged me – seeing your baking adventures makes my day! Happy baking!
Cinnabunnies
Ingredients
Equipment
Method
- Preheat your oven to 375°F (190°C). Line a baking sheet with parchment paper.
- Separate the biscuit dough. Gently flatten each biscuit slightly.
- In a small bowl, mix together the melted butter, granulated sugar, and cinnamon for the filling.
- Spread a thin layer of the cinnamon mixture onto each flattened biscuit.
- Roll up each biscuit tightly, starting from one end.
- To form the bunny shape, take one rolled biscuit and cut it in half. Place one half (cut side down) at the top of another whole rolled biscuit to form the head. Use a toothpick to secure if needed.
- Place the shaped bunnies on the prepared baking sheet.
- Bake for 12-15 minutes, or until golden brown.
- While the bunnies are baking, whisk together the powdered sugar and milk in a small bowl until you have a smooth glaze. Add more milk if needed to reach desired consistency.
- Let the bunnies cool on the baking sheet for a few minutes before transferring them to a wire rack to cool completely.
- Once cooled, drizzle the glaze over the bunnies. Immediately add the mini chocolate chips for eyes and the sprinkles or candies for the nose and ears.