
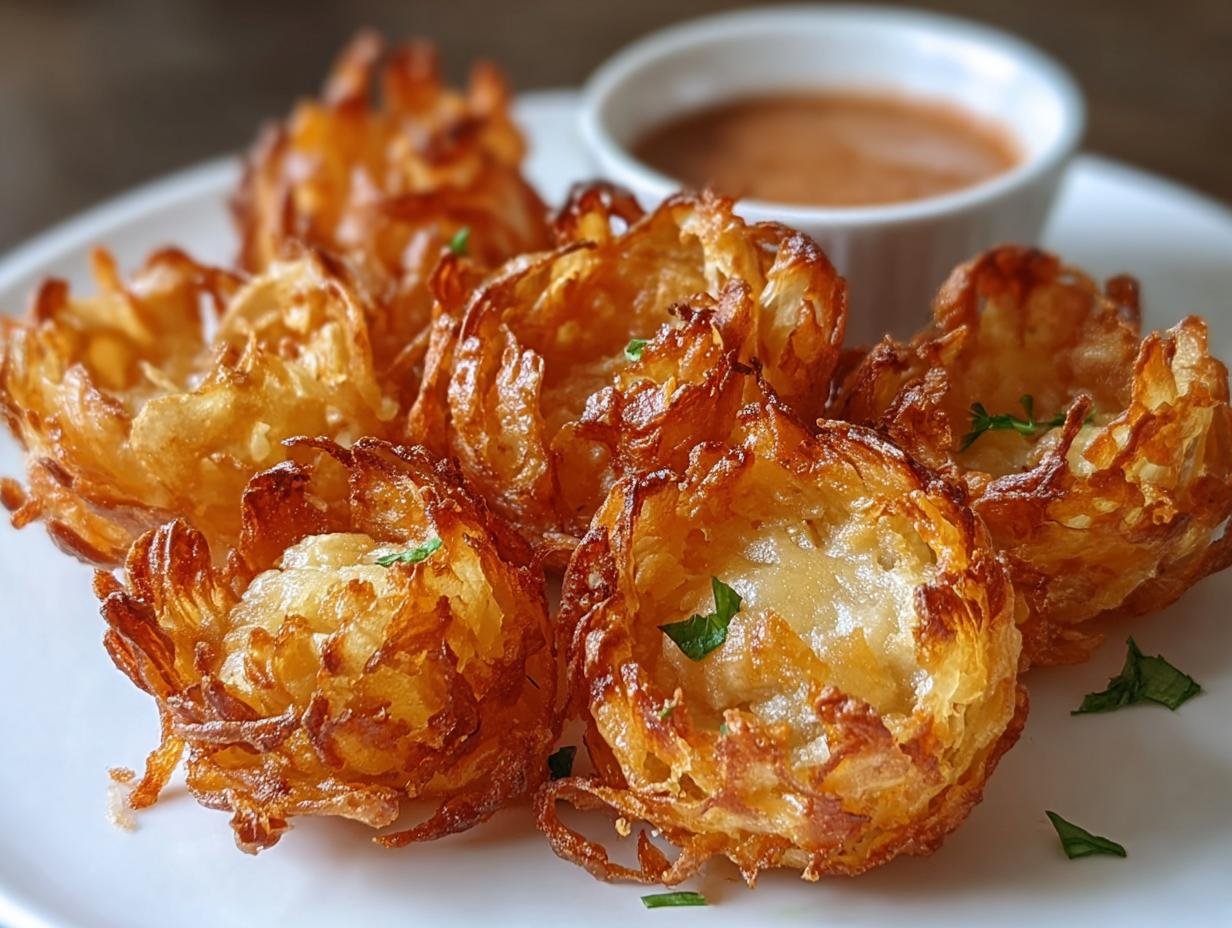
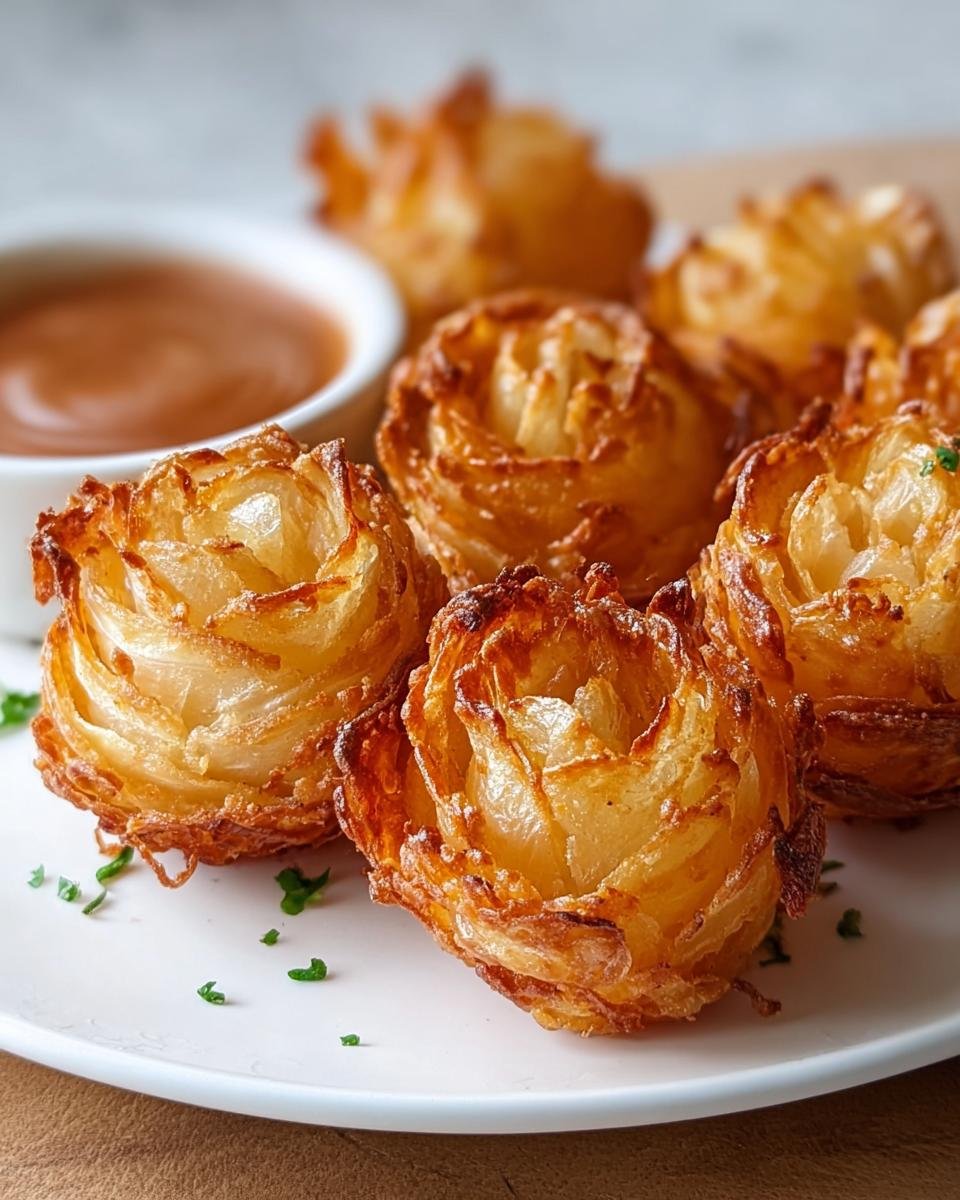
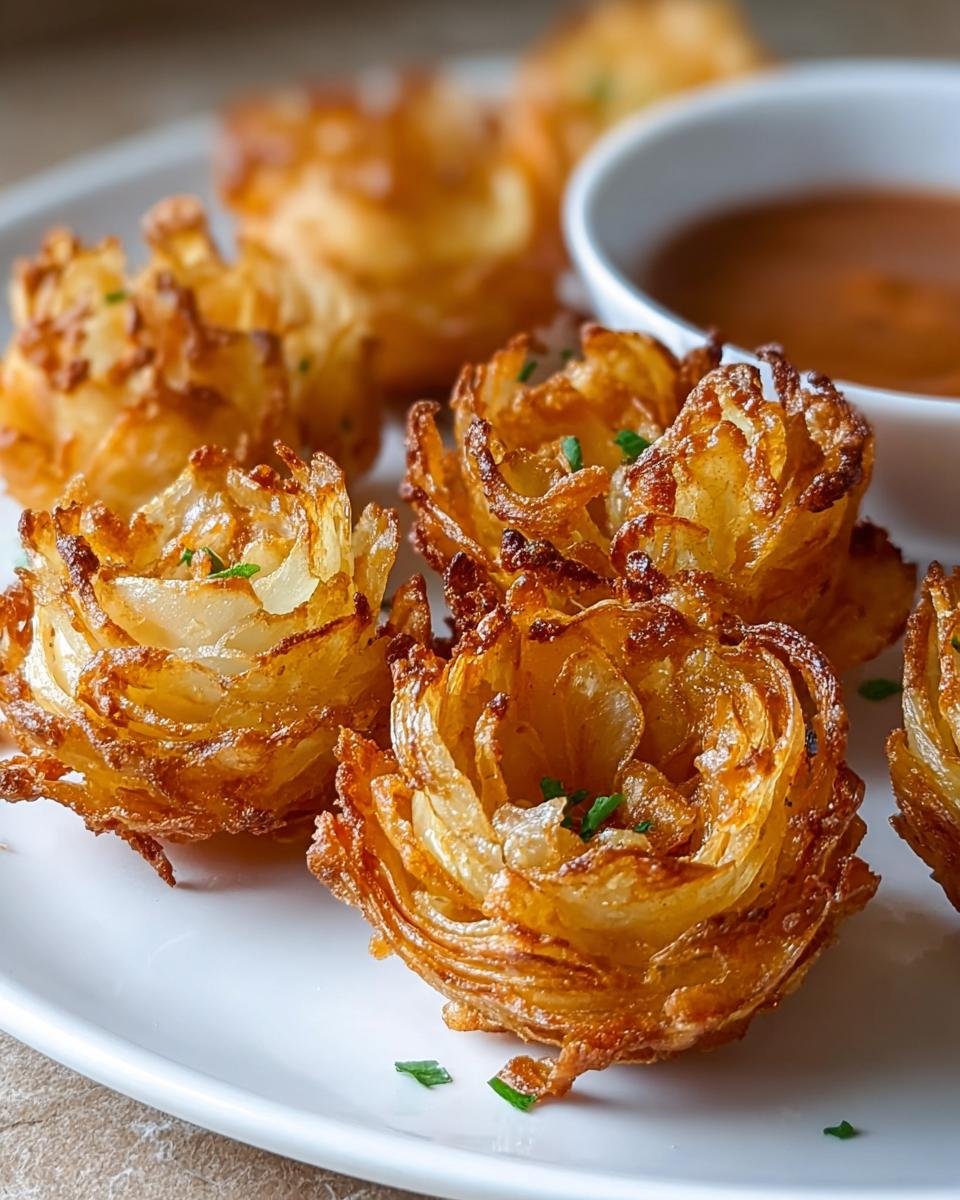
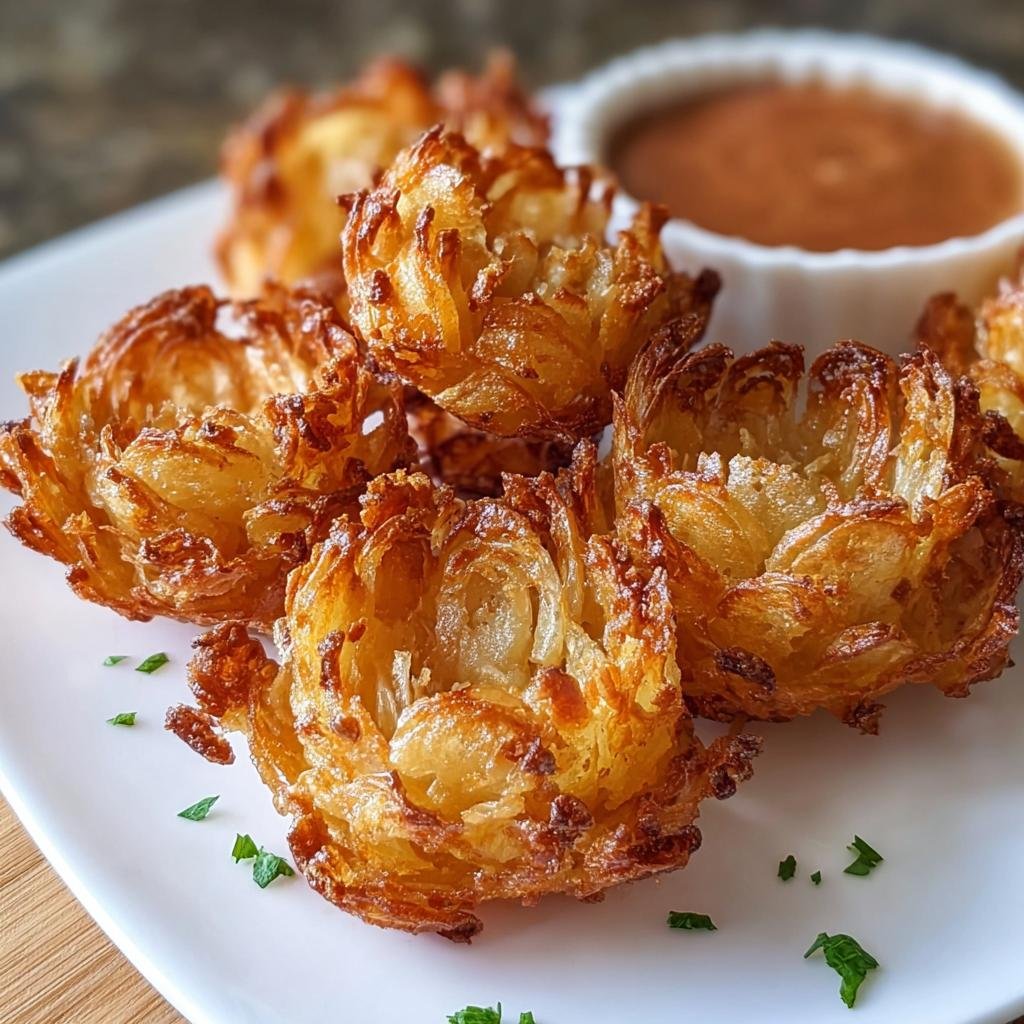
Oh, party time! Seriously, who doesn’t love a good appetizer that just screams “fun”? Forget those giant, tricky-to-eat blooming onions for a sec. I’m talking about the little guys, the Crispy Mini Blooming Onions! They’re like the personal-sized, totally manageable cousins that show up to the party ready to impress. I remember the first time I made these for my sister’s birthday get-together. I was a bit nervous about getting them to “bloom” right, but trust me, they’re way less intimidating than you think. The best part? They get SO perfectly crispy on the outside and stay wonderfully tender on the inside, making them an absolute showstopper that people will be raving about. They’re genuinely my go-to for game nights and holiday gatherings – seriously, you can’t go wrong!
Why You’ll Love These Crispy Mini Blooming Onions
Seriously, why wouldn’t you want to whip up a batch of these? They’re a total game-changer for any get-together:
- Super Easy to Make: Forget the complicated big ones! These mini versions are way more approachable, even for beginners.
- Irresistibly Crispy Texture: That golden-brown crunch? Oh yeah, they’ve got it. Plus, the inside stays perfectly tender.
- Party Perfect: They’re just the right size for grabbing and dipping. Your guests will be fighting over the last one!
- Delicious Flavor: The sweet onion flavor, combined with the seasoned batter, is just *chef’s kiss*.
- Versatile Appetizer: Whether it’s game day, a holiday party, or just a Tuesday night craving, these fit the bill perfectly.
- Impressive Presentation: They look fancy, but they’re surprisingly simple to whip up. You’ll totally score host points!
Ingredients for Crispy Mini Blooming Onions
Alright, let’s talk about what you’ll need to make these little guys! It’s pretty straightforward, mostly pantry staples you probably already have. Having everything measured out makes the whole process a breeze. Trust me on this!
For the Onions:
- 3 large yellow onions (these work the best, seriously!)
For the Batter:
- 1 cup all-purpose flour
- 1/2 cup cornstarch
- 1 teaspoon salt
- 1/2 teaspoon black pepper
- 1/4 teaspoon paprika (just for a little color and zing!)
- 1 cup milk
- 2 large eggs
For Frying:
- 4 cups vegetable oil (or any neutral oil you prefer for frying)
Essential Equipment for Making Crispy Mini Blooming Onions
You don’t need a professional kitchen for these! Just a few basics will get you there:
- Baking sheet: For draining the crispy onions after frying.
- Small bowl: Perfect for whisking up that egg and milk mixture.
- Medium bowl: Where all the dry ingredients hang out before meeting the wet stuff.
- Whisk: Gotta get that batter nice and smooth!
- Tongs: Essential for safely handling those hot onions in the oil.
Step-by-Step Guide to Crispy Mini Blooming Onions
Alright, let’s get down to business! Making these Crispy Mini Blooming Onions is honestly super satisfying. It might sound a little fancy, but trust me, once you get the hang of it, it’s a piece of cake… or, well, a piece of onion! Follow along, and you’ll have a fantastic appetizer in no time. We’ll start with the prep and get them ready for frying.
Preparing the Onions for Blooming
This is where the magic starts! First, grab your yellow onions and peel off that papery skin. Then, slice off the top and bottom ends, so you have a nice flat surface. Next, cut each onion half in half, right through the middle, from top to bottom. Now, here’s the crucial part: place each onion half cut-side down. Carefully make about 4 to 6 cuts, spacing them out evenly. You want to cut down towards the root, but *don’t* cut all the way through! Leave about a half-inch intact at the very bottom. This is what allows them to open up like a flower. After cutting, gently use your fingers to spread those onion petals apart just a little. If the very center seems stubborn, you can carefully tease it out – just don’t break anything!
Crafting the Perfect Batter
Now for the coating! In your medium bowl, go ahead and whisk together the all-purpose flour, cornstarch, salt, pepper, and that little bit of paprika. Give it a good whisk to make sure everything is nicely combined and there are no big clumps. In your small bowl, crack in the two eggs and pour in the milk. Whisk these together until they’re smooth and well blended. This wet mixture is going to help our seasoned flour stick perfectly to those onion petals!
Coating and Dredging the Onions
This is the fun part where they start looking like actual blooming onions! Take one of your cut onion halves and dip it into the milk and egg mixture. Make sure it gets all over, especially down between the petals. Let any excess drip back into the bowl for a second. Then, carefully place it into the flour mixture. Here’s the key: really get that flour down in between all those onion slices! Gently press and pat it on. Once it’s nicely coated, give it a little shake to get rid of any extra flour that’s just hanging on. Repeat this whole dip-and-dredge process for all your onion halves.
Frying Your Crispy Mini Blooming Onions to Perfection
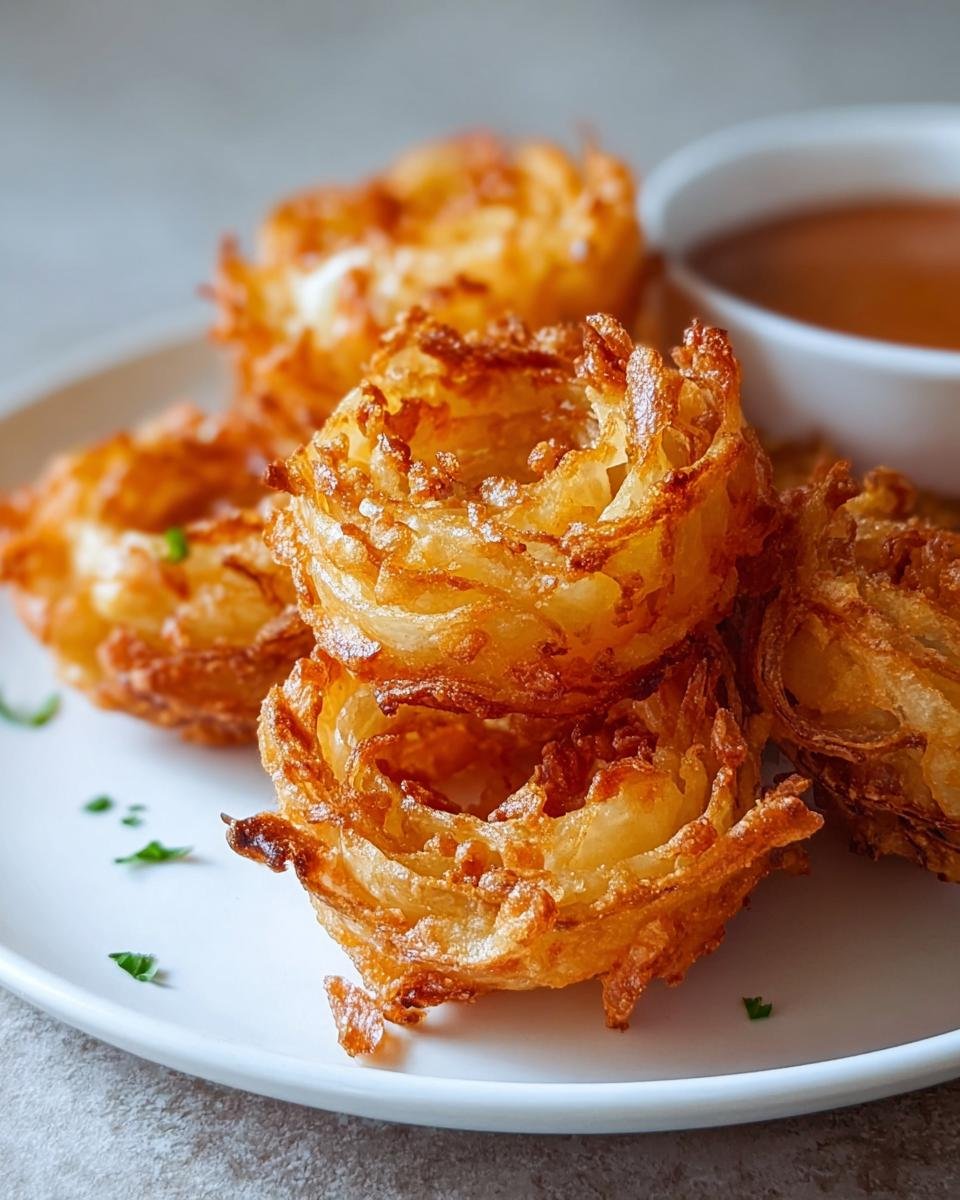
Time for the sizzle! Grab a sturdy pot or Dutch oven and pour in about 4 cups of vegetable oil. Heat it up over medium-high heat until it reaches that perfect frying temperature of 350°F (175°C). If you don’t have a thermometer, a little sprinkle of flour into the oil should sizzle right away but not burn too quickly. Now, carefully add 1 or 2 battered onion halves into the hot oil. Be really careful here, folks – hot oil splatters! Don’t crowd the pot; give them space to crisp up. Fry them for about 3 to 5 minutes on each side. You’re looking for a gorgeous golden-brown color and that unmistakable crispy texture. Use your tongs to gently turn them over halfway through. Once they’re perfectly done, carefully lift them out of the oil and place them on a wire rack that’s set over a baking sheet. This lets all that extra oil drip away, keeping them super crispy!

Tips for the Crispiest Mini Blooming Onions
Okay, so you’ve made these beauties, and you want them to be *perfectly* crispy, right? I get it! Here are a few little tricks I’ve picked up that really make a difference. These are the secrets to getting that amazing crunch, almost like you’d get with something like super crispy air fryer chicken thighs!
Keep that oil HOT! Seriously, don’t let your oil temperature drop too much between batches. If it gets too cool, your onions will soak up grease instead of getting that amazing crisp. If you’re frying a lot, you might need to crank the heat up a bit between rounds. I usually keep my thermometer handy to make sure it stays right around 350°F (175°C).
Don’t overcrowd the pot! I know it’s tempting to cram ’em all in there, but resisting that urge is key. Frying in batches of 1 or 2 allows the oil to keep its temperature and ensures each onion gets crispy all around. Otherwise, they kind of steam instead of fry.
Drain ’em right! That wire rack over a baking sheet? It’s not just for show! Letting them drain there allows air to circulate, which is super important for keeping that crunch factor. Avoid letting them sit in a pile of oil.
Fresh is Best: Use fresh onions and make sure your flour and spices are good too. Stale ingredients just don’t give you that zip! It makes a bigger difference than you might think.
Serving Suggestions for Your Crispy Mini Blooming Onions
Okay, so these Crispy Mini Blooming Onions are fantastic on their own, but let’s be real, they’re *made* for dipping! The classic spicy bloomin’ onion sauce is always a winner – that creamy, zesty mix of mayo, ketchup, and horseradish is just divine. But don’t stop there! A simple, cool ranch dressing is a crowd-pleaser, especially with the kids. Or, if you’re feeling a bit adventurous, a spicy aioli adds a nice kick that complements the sweet onion perfectly. Honestly, any good dipping sauce that you’d use for fries or onion rings will work wonders! You can even check out some quick dipping sauce ideas if you need more inspiration!
Frequently Asked Questions about Crispy Mini Blooming Onions
Can I bake these instead of frying?
You know, you *can* bake them, but honestly, they just don’t get that same super-crispy, golden-brown perfection that frying delivers. If you absolutely have to try baking, I’d suggest baking them at a really high temperature (like 400°F or 200°C) on a greased baking sheet and flipping them halfway through. They’ll be more tender and less crunchy, but still tasty! Just don’t expect them to be exactly like the fried version.
How do I prevent my mini blooming onions from falling apart?
Ah, the dreaded “falling apart” onion! The biggest secret is that root end – don’t cut through it! That’s what holds everything together. Make sure your cuts are deep enough so the petals can open, but still connected at the bottom. Also, be gentle when you’re spreading the petals and when you’re dredging them in the flour. Giving them a little nudge to spread is fine, but don’t force them too much. And again, that cutting technique is key!
What’s the best way to reheat leftover crispy mini blooming onions?
Unfortunately, these are best enjoyed fresh out of the fryer. Once they sit, they lose that amazing crisp. But if you *do* have leftovers, the absolute best way to reheat them to get some crispiness back is in a hot oven or an air fryer. Pop them on a baking sheet in a preheated oven at around 375°F (190°C) for about 5-10 minutes, or toss them in an air fryer at 370°F (185°C) for 3-5 minutes. Microwaving them is a definite no-no if you want any crunch!
Why didn’t mine “bloom” nicely?
This is usually down to one of two things! Either the cuts weren’t deep enough at the start, so the petals didn’t have room to open, or you might have cut through the root end entirely. Sometimes, if the onion is really tightly packed or has a weird shape, it can be a bit tricky. Try using slightly larger yellow onions, and really focus on getting those cuts just right without going all the way through the bottom. Gentle spreading is also your friend!
Nutritional Information (Estimate)
Just a heads-up, this is an estimate, and the exact numbers can wiggle around depending on your ingredients and how perfectly you fry them! A serving of these Crispy Mini Blooming Onions tends to be around 300-400 calories, with a good chunk of that being from the delicious fried goodness (think 20-30g fat). You’ll get about 8-12g of protein and roughly 30-40g of carbs. Enjoy them guilt-free as a fantastic appetizer!
Crispy Mini Blooming Onions
Ingredients
Equipment
Method
- Peel the onions. Cut off the top and bottom of each onion. Cut each onion in half from top to bottom. Place the cut side down and make 4-6 evenly spaced cuts from the top down, stopping about 1/2 inch from the root end. Do not cut all the way through.
- Gently spread the onion petals apart to create a “blooming” effect. If needed, you can carefully remove the very center core to help them open more.
- In a medium bowl, whisk together the flour, cornstarch, salt, pepper, and paprika.
- In a small bowl, whisk together the milk and eggs.
- Dip each onion half into the milk and egg mixture, ensuring it is well coated. Let any excess drip off.
- Dredge the wet onion halves in the flour mixture, making sure to get the flour down between the petals. Shake off any excess.
- Heat the vegetable oil in a large pot or Dutch oven over medium-high heat until it reaches 350°F (175°C).
- Carefully place 1-2 battered onion halves into the hot oil, being careful not to overcrowd the pot. Fry for 3-5 minutes per side, or until golden brown and crispy. Use tongs to turn them gently.
- Remove the fried onions from the oil and place them on a wire rack set over a baking sheet to drain any excess oil.
- Serve immediately with your favorite dipping sauce.