

Oh, no-bake desserts! There’s just something about them, right? Especially when that glorious peanut butter flavor is involved. Seriously, forget the oven, because I’ve got something absolutely magical for you today: The Dreamiest No Bake Peanut Butter Pie Recipe Ever Created. This isn’t just any pie; it’s my go-to when that craving hits hard and I need something ridiculously delicious without all the fuss. It reminds me of lazy Sunday afternoons growing up, when Mom would whip this up, and the whole house smelled like pure happiness!
Why This No Bake Peanut Butter Pie Recipe is a Winner
Okay, I know claiming it’s “the dreamiest” is bold, but trust me, this no-bake peanut butter pie really lives up to the hype! It’s become my absolute favorite for so many reasons. First off, the sheer simplicity of it blows my mind. You barely need any ingredients, and most of them you probably already have in your pantry right now. Seriously, it’s a lifesaver when you need a last-minute dessert!
And the flavor? Pure peanut butter bliss! It’s creamy, rich, and perfectly sweet. It’s got that classic peanut butter taste that everyone adores, and the way it just melts in your mouth is pure magic. Plus, it’s incredibly versatile:
- Super Easy: No oven required means less stress and less cleanup. Winning!
- Minimal Ingredients: You’ll be surprised at how few things you need to pull this off.
- Crowd Pleaser: Seriously, who doesn’t love peanut butter pie? It’s a guaranteed hit.
- Quick to Make: Prep is a breeze, and then it just needs to chill.
It’s genuinely one of those desserts that makes everyone happy, no matter the occasion!
Ingredients for The Dreamiest No Bake Peanut Butter Pie Recipe Ever Created
Alright, let’s talk about what you’ll need to make this dreamy pie happen! It’s honestly pretty straightforward, which is part of why I love it so much. Make sure you grab these things from the store, or dig ’em out of your pantry. The key here is using regular creamy peanut butter – none of that natural stuff where the oil separates, okay? Trust me on this one!
For the Crust:
- 1 1/2 cups graham cracker crumbs (that’s about 10 full graham crackers, crushed up!)
- 1/4 cup granulated sugar
- 6 tablespoons unsalted butter, melted
For the Filling:
- 8 ounces cream cheese, make sure it’s softened!
- 1 cup creamy peanut butter (again, the smooth kind, not natural!)
- 1 cup powdered sugar
- 1 cup heavy whipping cream, and it HAS to be cold for this part!
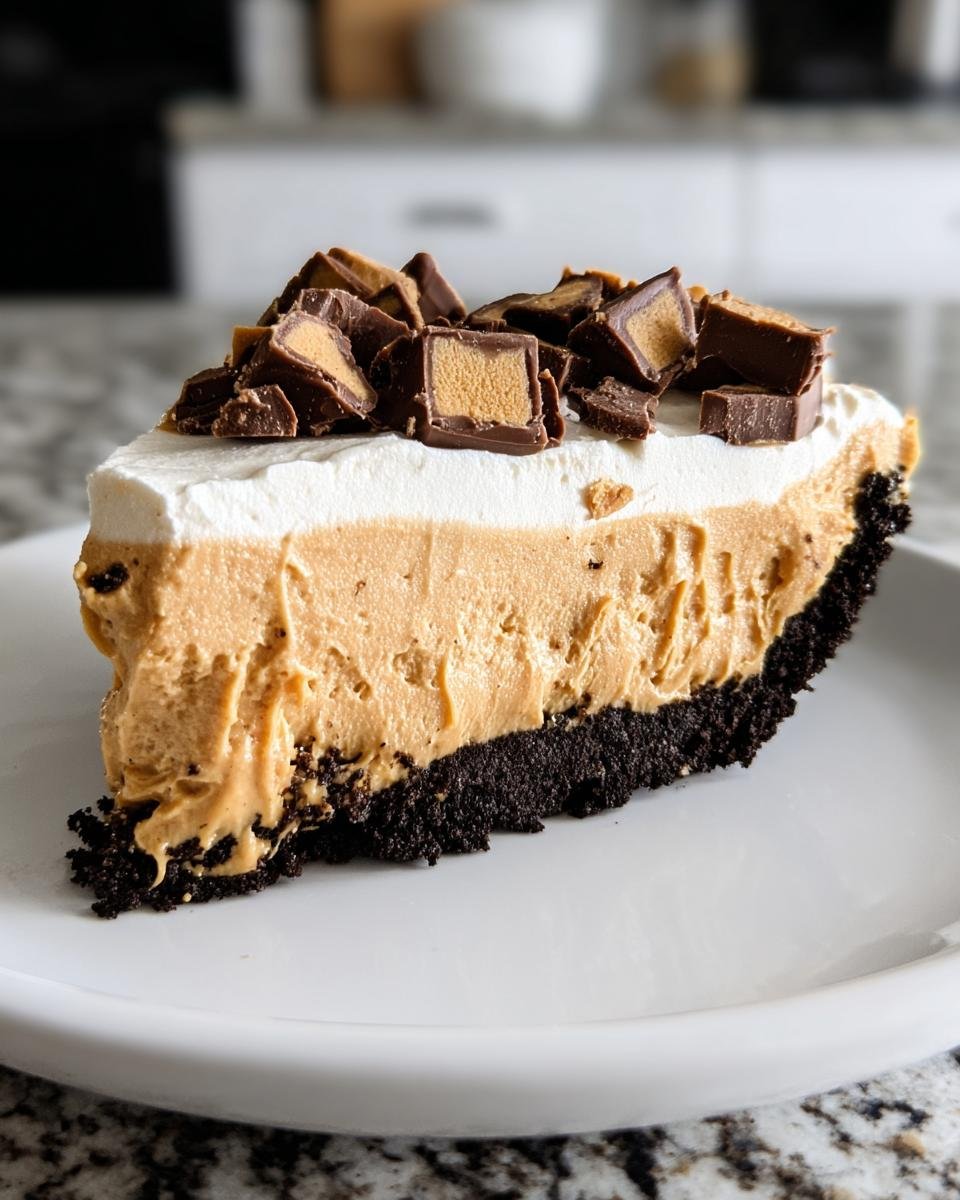
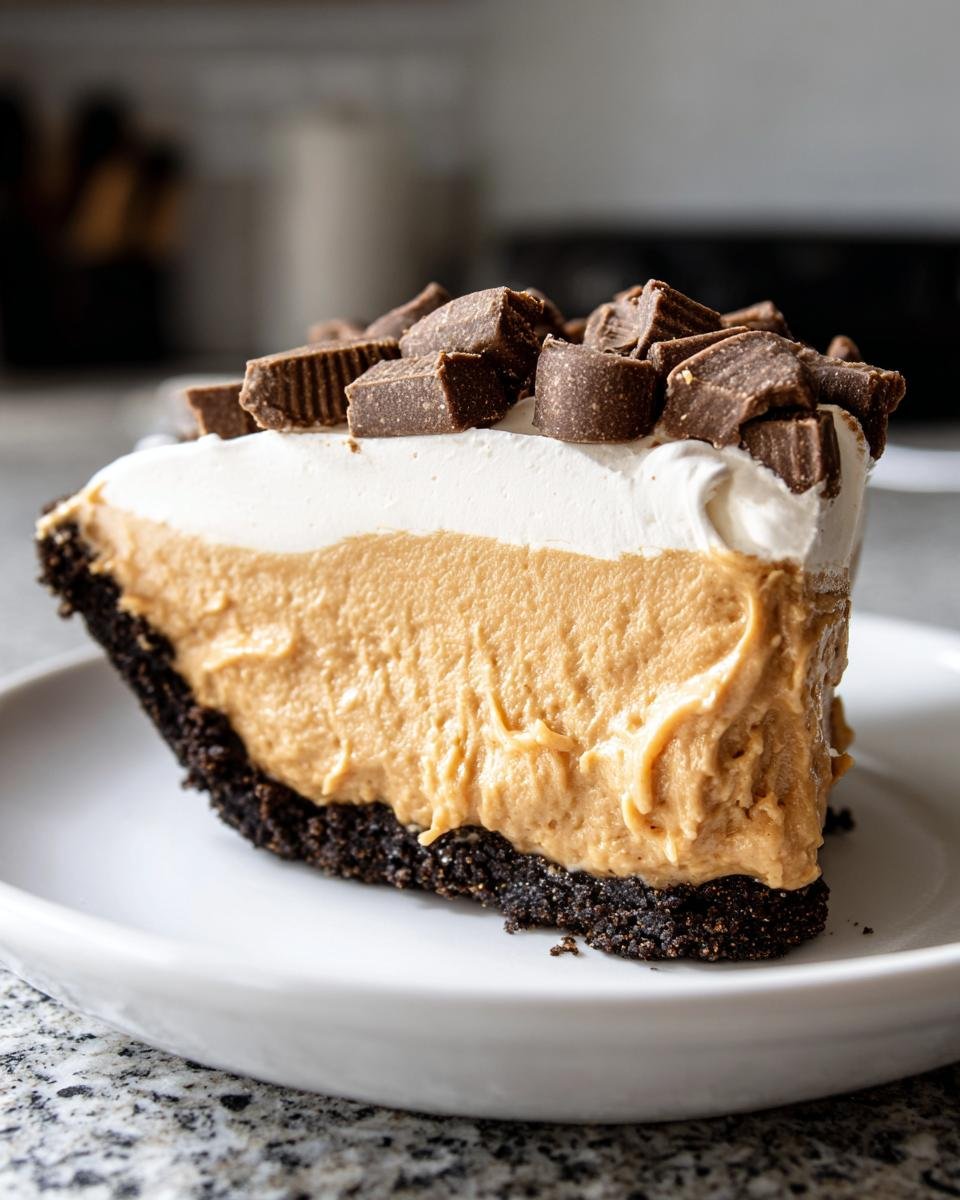
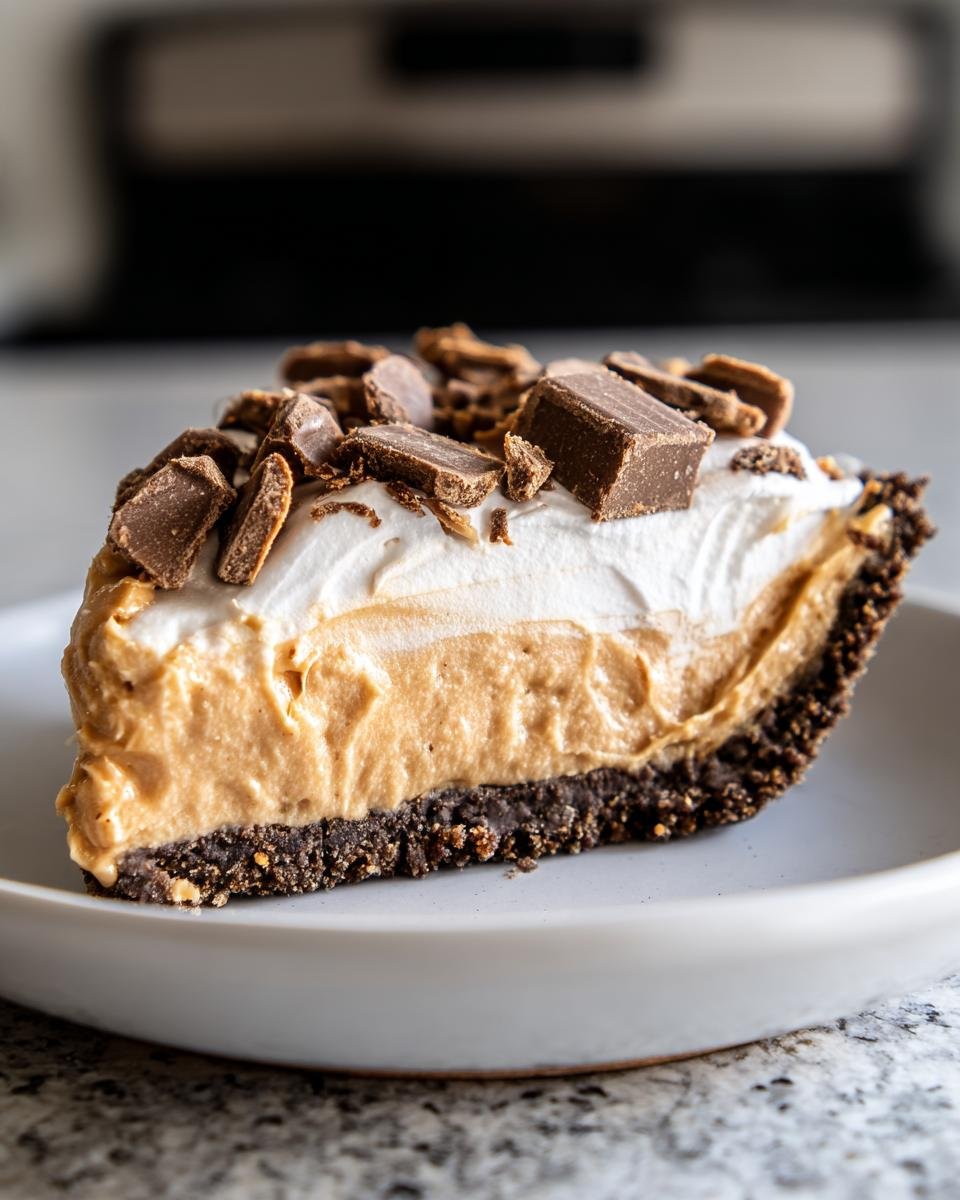
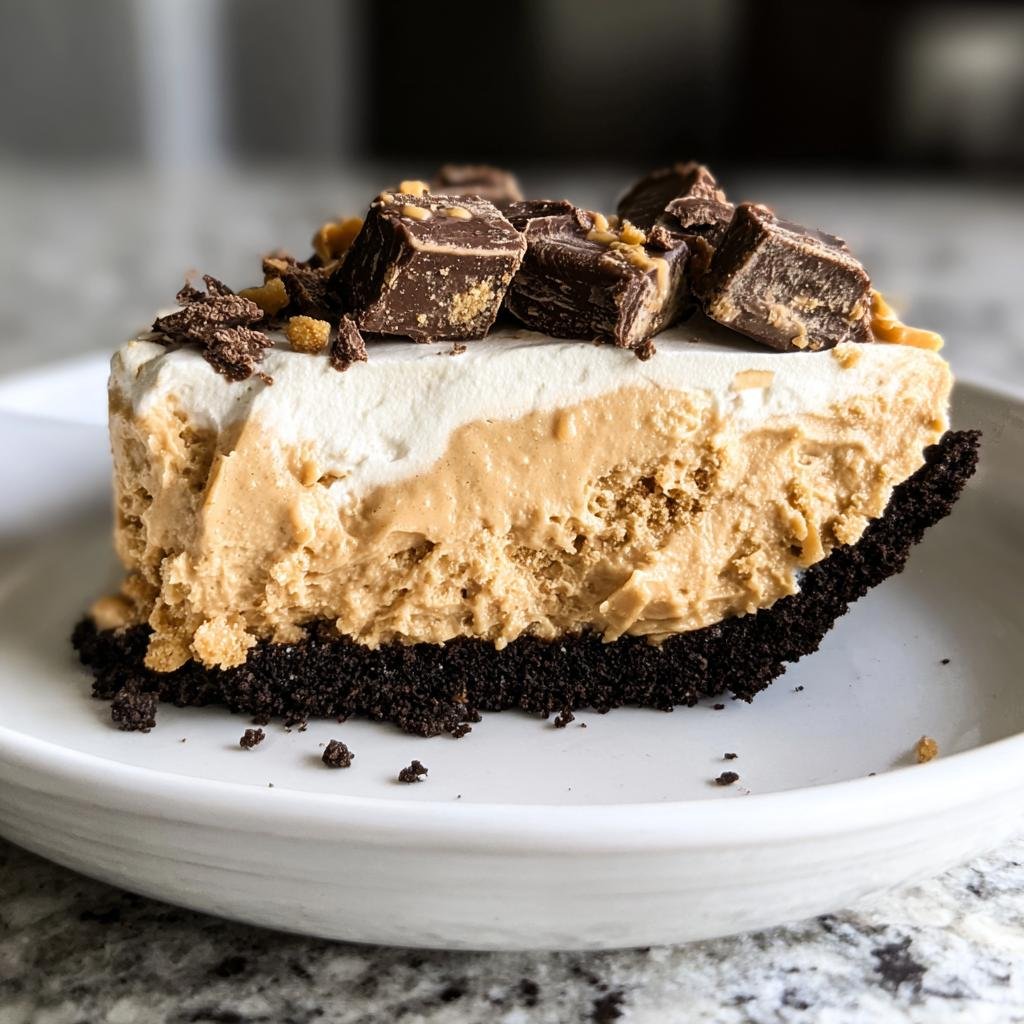
For the Topping (Optional, but highly recommended!):
- 1 cup whipped topping, thawed (like Cool Whip, you know the one!)
Crafting The Dreamiest No Bake Peanut Butter Pie Recipe Ever Created: Step-by-Step
Okay, let’s get down to business and make some magic happen! This pie is seriously so easy, you’ll feel like a total baking rockstar without even turning on the oven. Just follow along, and we’ll have this dreamy dessert ready in no time. It all starts with getting that perfect crust ready, kind of like how we start with a simple marinade for delicious air fryer chicken thighs.
Preparing the Perfect No Bake Peanut Butter Pie Crust
First things first, we need to get our crust looking and tasting amazing. Grab a medium bowl and mix up those graham cracker crumbs with the granulated sugar. Pour in that melted butter and give it a good stir until every crumb looks nicely moistened. It should feel like wet sand. Then, here’s the important part: press this mixture *firmly* into the bottom and all the way up the sides of your 9-inch pie plate. Really pack it in there! Pop the whole thing into the freezer while we whip up the filling. This helps it set up nice and firm.
Whipping Up the Dreamy Peanut Butter Filling
Now for the star of the show – the filling! Grab your electric mixer and a large bowl. Beat that softened cream cheese until it’s super smooth and has no lumps. Seriously, get it nice and creamy. Then, add in your peanut butter and powdered sugar. Beat those together until everything is perfectly combined and smooth. It’ll be pretty thick at this point! In a separate, clean bowl (make sure it’s totally clean and dry!), whip up that cold heavy cream until you get stiff peaks. You know, when you lift the beater, the cream holds its shape? That’s what you’re going for. Now, gently fold that fluffy whipped cream into the peanut butter mixture. Be gentle here; we want to keep all that lovely air in! Just fold until there are no more streaks of white. You don’t want to overmix it.
Assembling and Chilling Your No Bake Peanut Butter Pie
Okay, our crust is chilly, and our filling is heavenly! Time to put it all together. Spoon that gorgeous peanut butter filling right into your prepared crust. Use a spatula to smooth the top out so it looks super neat and even. If you’re going for that extra delicious topping (and why wouldn’t you?), gently spread the thawed whipped topping all over the smooth peanut butter layer. Now, the hardest part: patience! You’ve gotta tuck this beauty into the refrigerator for at least 3 hours. It needs time to chill and get nice and firm so it slices beautifully. Trust me, it’s worth the wait!
Tips for the Ultimate No Bake Peanut Butter Pie Experience
Okay, so you’ve got the recipe, you’re ready to go, but let me give you a couple of little secrets I’ve picked up over the years. These tricks really make this No Bake Peanut Butter Pie go from great to absolutely out-of-this-world amazing. It’s all about those little details!
First off, about the peanut butter: seriously, skip the natural stuff. You know, the kind where you have to stir it all up? It just doesn’t work the same way in a pie filling because the fats separate. Stick to the classic, creamy kind like Jif or Skippy. It gives you that super smooth, consistent texture that’s just *chef’s kiss*.
If you’re feeling fancy, and who doesn’t want to feel fancy when making dessert? you can totally amp up the topping. Instead of just the whipped topping, try whipping your own heavy cream with a little bit of powdered sugar and a splash of vanilla. It’s like making the filling, but just that part! Or, for an extra oomph, you can add a tablespoon or two of that peanut butter into the whipped topping itself. Talk about a flavor boost!
Something else to remember, especially if you’re not using the optional whipped topping, is how you spread the filling. Make sure it’s super smooth before it chills. It sets up firm, so any bumps will stay there! It’s kind of like how getting the dough just right for chewy chocolate chip cookies makes all the difference in the final cookie. You want that perfect surface!
Serving and Storing Your Dreamy No Bake Peanut Butter Pie
Alright, the moment you’ve been waiting for! Slice this beauty up while it’s nice and chilled – that’s when it’s at its absolute best. A little drizzle of extra chocolate syrup or some chopped peanuts on top never hurt anyone, either! If you happen to have any leftovers (which I highly doubt!), just pop it back into the fridge. Cover it up well and it should stay wonderfully fresh for about 3-4 days. Enjoy every single creamy, dreamy bite!

Frequently Asked Questions about No Bake Peanut Butter Pie
Can I use crunchy peanut butter instead of creamy?
While I haven’t personally tested it for this specific recipe, you *can* use crunchy peanut butter if you really love that texture! Just be aware that it might make the filling a little less smooth, and you might get little bits of peanuts in every bite. For the absolute creamiest, dreamiest texture like the one I describe, stick with creamy, smooth peanut butter. It really makes a difference!
How long does it take for the pie to set up properly?
Patience, my friend! The pie needs at least 3 hours in the refrigerator to really firm up. I usually make mine earlier in the day, or even the night before, just to be safe. If you’re in a real pinch, you can probably get away with 2 hours, but it might be a little softer when you slice it. It’s that chilling time that really lets everything meld together and get firm, kind of like how letting cookies cool makes them just right.
Can I make this No Bake Peanut Butter Pie ahead of time?
Absolutely! This is one of my favorite make-ahead desserts. You can easily prepare the whole pie the day before you need it. In fact, I think it tastes even better after it’s had a full night to chill in the fridge; the flavors really get a chance to deepen. Just keep it covered so it doesn’t pick up any funny smells from other things in the fridge.
What happens if I use natural peanut butter?
Oh, honey, please don’t! If you use natural peanut butter where the oil separates, your filling might turn out greasy or won’t set up properly. The oils in natural peanut butter just don’t behave the same way in a no-bake recipe. Stick to the standard, processed creamy peanut butter for the best results. It’s a small thing that makes a *huge* difference in the final outcome!
Nutritional Information for The Dreamiest No Bake Peanut Butter Pie Recipe Ever Created
Just a heads-up, these numbers are estimates and can bounce around a bit depending on exactly what you use. This information is a general guide per slice! You’re looking at roughly:
- Calories: 450
- Fat: 25g
- Protein: 10g
- Carbohydrates: 45g
- Sugar: 30g
It’s a pretty satisfying treat, for sure!
No Bake Peanut Butter Pie
Ingredients
Equipment
Method
- Prepare the crust: Mix the graham cracker crumbs and granulated sugar in a medium bowl. Pour in the melted butter and mix until the crumbs are evenly moistened.
- Press the crumb mixture firmly into the bottom and up the sides of a 9-inch pie plate. Place the crust in the freezer while you prepare the filling.
- Make the filling: In a large bowl, use an electric mixer to beat the softened cream cheese until it is smooth. Add the peanut butter and powdered sugar. Beat until the mixture is fully combined and smooth.
- In a separate, clean bowl, whip the cold heavy cream until stiff peaks form. Gently fold the whipped cream into the peanut butter mixture until no streaks remain.
- Spoon the filling into the chilled crust. Smooth the top with a spatula.
- If using the topping, spread the thawed whipped topping evenly over the peanut butter filling. Chill the pie in the refrigerator for at least 3 hours, or until firm.
- Slice and serve cold. Store leftovers covered in the refrigerator.