

Okay, confession time: I live for grab-and-go snacks, especially those little squares of happy energy for hiking or just surviving a tough mid-afternoon slump. Store-bought bars always taste a little too processed or strangely chewy, right? Over the years, I’ve finally landed on a recipe that just *works* every single time. Trust me, after years of tweaking things like the sweetener ratio and the way I toast the oats, I can confidently say these are the most truly simple, no-fuss Easy Homemade Granola Bars you’ll ever make.
We aren’t messing around with complex gelatin sheets or twenty weird ingredients here. This recipe is pure pantry staples—oats, a little butter, and honey—and it sets up like a dream. I remember making the first successful batch back when I was trying to meal prep for my sister’s college move; I needed something fast, delicious, and reliable. We’ve kept these **Easy Homemade Granola Bars** in heavy rotation ever since because they prove homemade doesn’t have to mean complicated!
Why You Will Love These Easy Homemade Granola Bars
Honestly, these are my emergency stash bars! They just cover all the bases without any fuss. If you’re worried about time or texture, don’t be. I’ve linked my favorite healthy oatmeal bars here if you want another option, but these homemade ones are superior because:
- They are incredibly fast; you just toast, melt, mix, and press!
- The texture is perfect—chewy yet sturdy enough for lunchboxes.
- They are the ultimate base for Easy Homemade Granola Bars that you can customize every time.
- You know exactly what’s going into them (no weird stabilizers needed!).
Essential Ingredients for Perfect Easy Homemade Granola Bars
One of the reasons these bars are so reliable is that I never compromise on the core components. When I first started making these, I tried substituting things, and let me tell you—they just fell apart! You absolutely need the oats and the binder right. I even have my recipe for energizing banana oatmeal bars if you want a fruitier version, but here’s the list for this specific sturdy, slightly crisp bar. For any recipe based on structure, precision matters!
For the Bars
- 2 1/2 cups old fashioned rolled oats (that’s 230g)
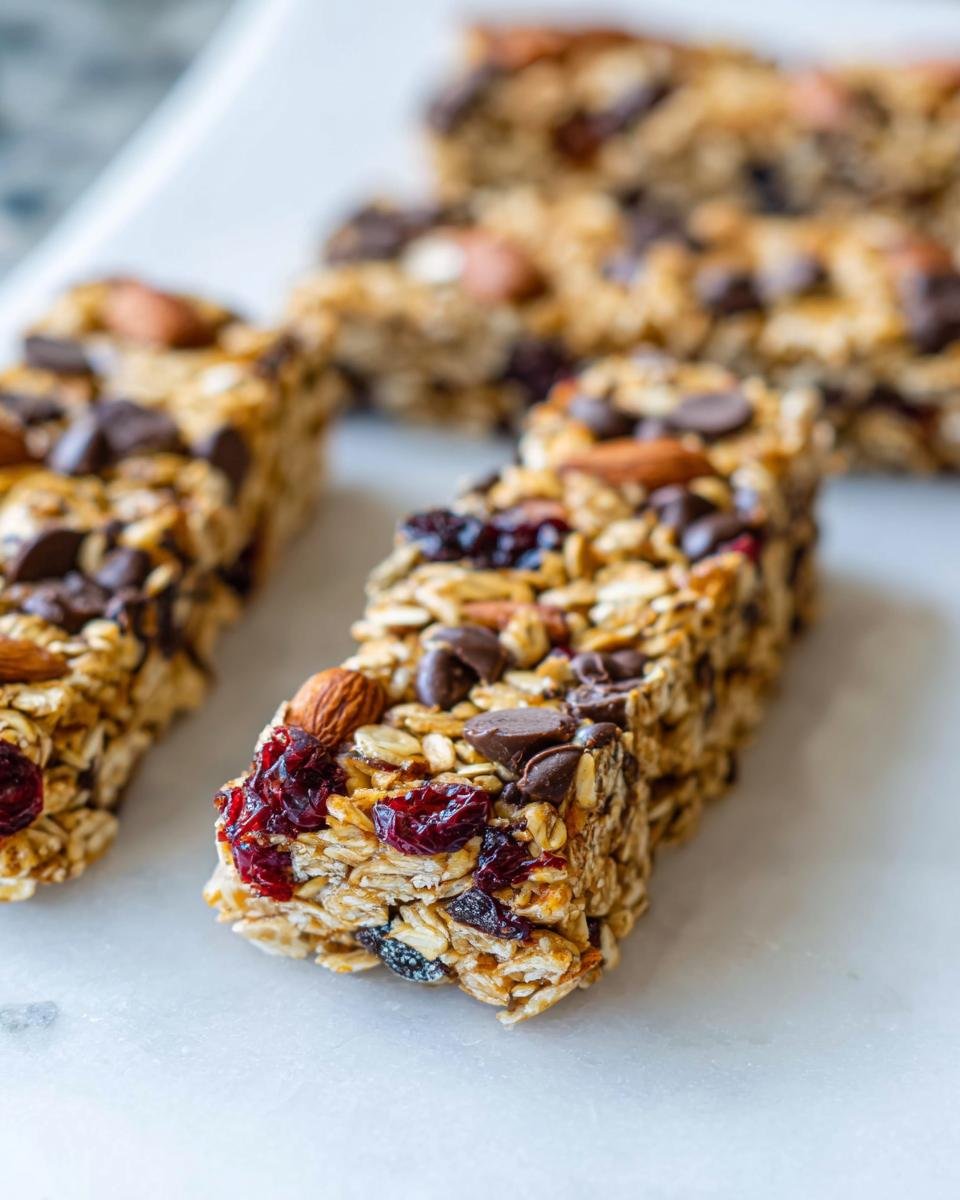
- 1/2 cup whole almonds, coarsely chopped (80g)
- 1/3 cup pure honey (113g)
- 1/4 cup unsalted butter, cut into pieces (56g)
- 1/4 cup packed light brown sugar (50g)
- 1/2 teaspoon vanilla extract
- 1/4 teaspoon fine sea salt
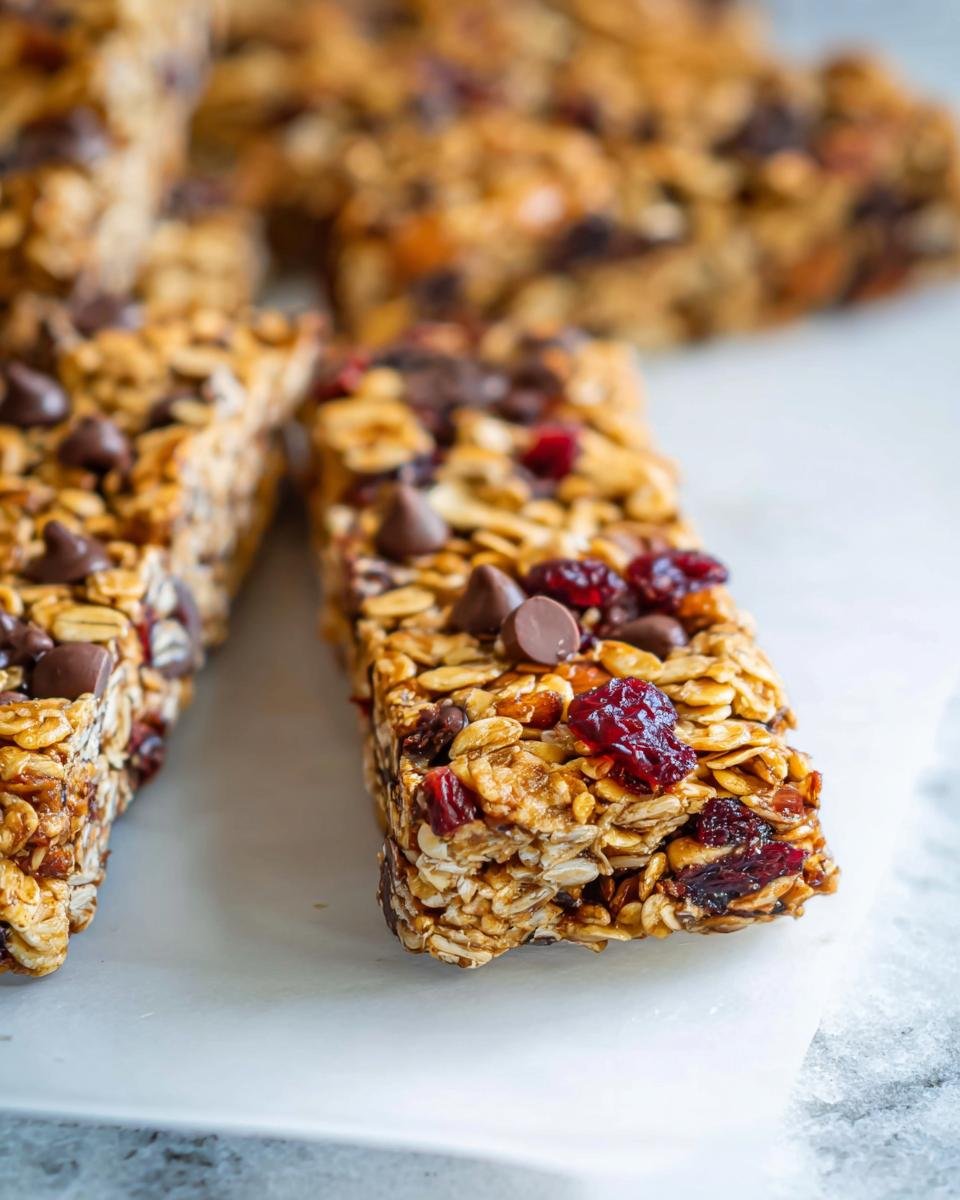
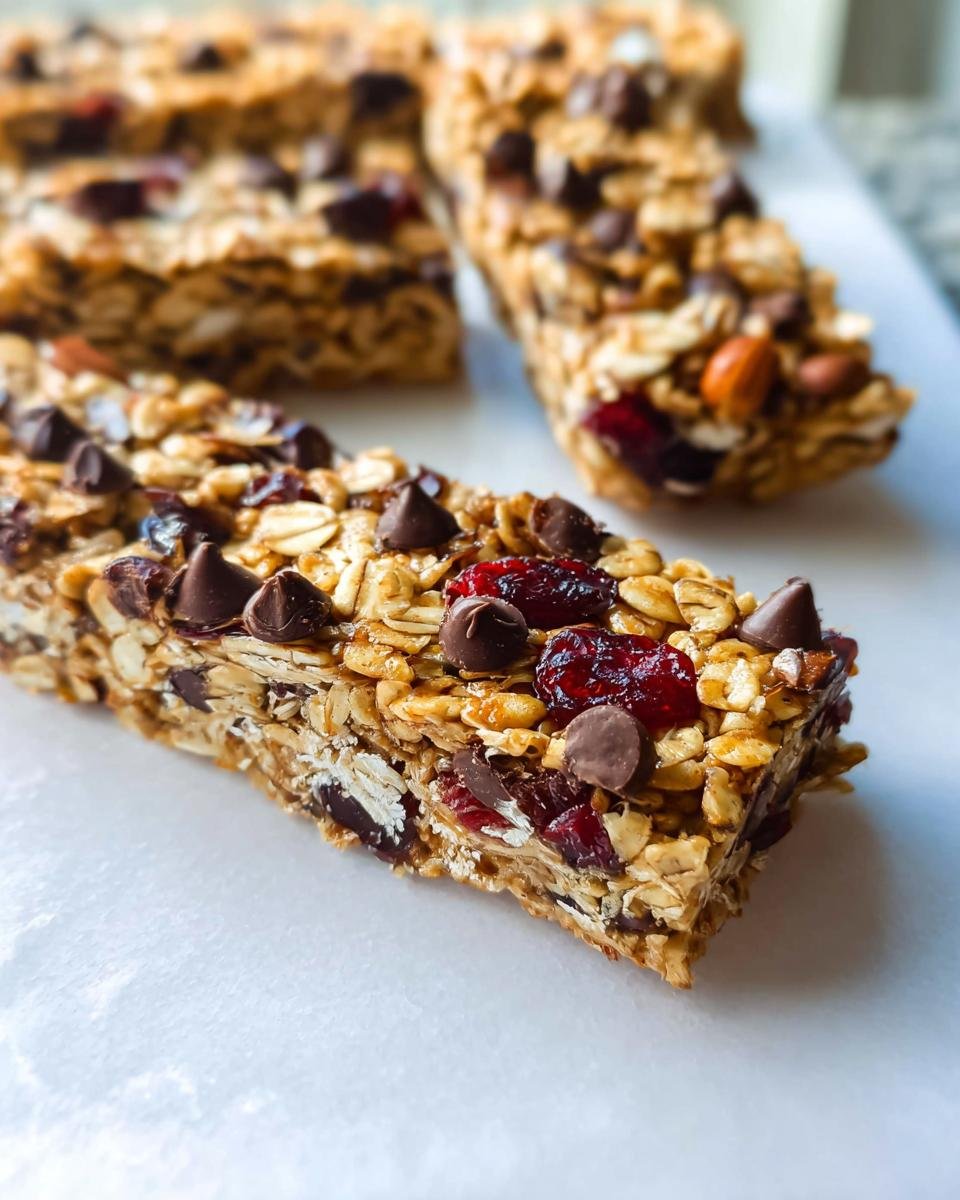
- 1/2 cup dried cranberries, coarsely chopped (60g)
- 1/4 cup plus 2 tablespoons mini chocolate chips (65g)
Step-by-Step Instructions for Easy Homemade Granola Bars
Getting the texture right in these bars means following a few simple, non-negotiable steps—my years of practice have shown me shortcuts just lead to crumbs! If you’re looking for a similar baked treat, you should check out my healthy pumpkin oatmeal bars recipe too!
Toasting the Oats and Nuts
First things first, we need some flavor development! Preheat your oven to 350°F—don’t skip this—and line your 8 or 9-inch pan well with foil or parchment paper so it sticks up over the edges for easy lifting later. Toss your oats and chopped almonds onto a baking sheet. This step blooms their flavor beautifully! You’ll bake them for about five minutes, give them a stir so everything toasts evenly, and bake for another three to five minutes until they smell nutty and look golden brown. Transfer those lovely toasted bits immediately into a large bowl.
Creating the Sweet Binder for Your Easy Homemade Granola Bars
This creamy, sticky mixture is what holds our perfect Easy Homemade Granola Bars together. Grab a small saucepan and toss in your butter, honey, brown sugar, vanilla, and salt. You want to cook this mixture over medium heat. Keep stirring it gently until that butter is fully melted and the whole thing starts to gently bubble and the sugar seems to vanish. It cooks fast, so don’t walk away!
Combining and Pressing the Mixture Firmly
Once the binder is made, pour it right over your toasted oats and almonds in the big bowl. Give it a good stir with your spatula—let it sit for just five minutes so it cools slightly so you don’t melt all your chocolate chips too soon. Now, mix in the chopped cranberries and three-quarters of those mini chips. When everything is coated, it’s time for the most important part: dump it into your prepared pan. You *must* press this down with real force using your rubber spatula.

I mean it, press hard! You need to compact the mixture so it doesn’t crumble when you cut it later. Once it’s flat and firm, sprinkle the last two tablespoons of chocolate chips right on top and just gently press those in so they stick. Don’t mix them through this time!
Chilling and Cutting Your Easy Homemade Granola Bars
The waiting game starts now, but it’s critical for structure. Cover the pan and slide it into the fridge. You need at least two whole hours—seriously, don’t peek or try to cut them at one hour, or they will resist! Once they are totally firm, lift the whole block out using the foil sling, peel that liner off, and use a sharp knife to slice neatly into 12 bars. You’ve done it!
Tips for Success Making Easy Homemade Granola Bars
If you’ve ever made a batch of bars that just turned into a pile of delicious crumbs when you tried to pick one up, don’t worry! I’ve been there many, many times. Achieving that perfect balance—chewy but won’t fall apart in your hand—comes down to a few key things I learned the hard way. For more chewy options, you could look at my no-bake cookie recipe, but for these baked bars, pay attention to these crucial details:
Pressing is Non-Negotiable! I cannot stress this enough. When you transfer the oat mix to the pan after melting the binder, grab that spatula and really lean into it. You need to eliminate air pockets. If your bars are crumbly, it’s almost always because the mixture wasn’t pressed down firmly enough against the bottom of the pan. This compression creates density, which equals bar integrity!
Don’t Over-Toast Your Oats. Toasting adds a wonderful depth, but if you burn them—even slightly—they become brittle and dry, and your final bar texture will suffer. Toast them just until they are fragrant and lightly golden; you are looking for color enhancement, not total crispness. If you use raw oats, they tend to bake up a bit too hard and chalky once cooled.
Let the Binder Cool Down Slightly First. When you pour that honey-butter mixture over the dry oats, make sure you let it sit for about five minutes before mixing in your add-ins like the chocolate chips and cranberries. If the binder is scorching hot, the chocolate chips will melt completely into the mix, and you won’t get those nice little pockets of chocolate you want throughout the bar or on top.
Parchment is Your Best Friend for Removal. Always use parchment paper and make sure you create an overhang or a “sling” on two sides of the pan. This way, once the bars have chilled completely, you can gently lift the entire block out in one piece. Trying to pry them out while still in the pan guarantees damaged corners and uneven cuts!
Ingredient Notes and Substitutions for Easy Homemade Granola Bars
I get so many questions about tweaking this recipe, and that’s the beauty of making homemade snacks! You definitely have some wiggle room. While I highly recommend sticking close to the original recipe for the first try—especially since we want sturdy Easy Homemade Granola Bars—I’ve tested a few swaps that work well. If you’re curious about other baked favorites, I highly recommend checking out my recipe for small-batch banana muffins; they call for similar pantry staples.
The binder ingredients (honey and butter) provide the structure, so those are best left alone, but the mix-ins? Go wild! Here are the most common ingredient questions I get:
What nuts work besides almonds?
Pecans are a fantastic one-to-one swap for the almonds. Walnuts work too, though they have a slightly stronger flavor profile. If you have a nut allergy or are worried about packing these for schools, you can easily use sunflower seeds or pepitas (pumpkin seeds) instead. Just make sure you toast whatever you choose along with the oats!
Can I swap the honey for maple syrup?
You absolutely can swap honey for maple syrup, but understand that it changes things slightly. Maple syrup is thinner than honey, which means your final binder might be a little less stiff. If I use pure maple syrup, I often reduce the liquid binder slightly (maybe 1 tablespoon less syrup than honey called for) and press the bars down *extra* hard in the pan to compensate for that slight difference in viscosity.
What about dried fruit substitutions?
The recipe explicitly asks for chopped dried cranberries, but chopped apricots or dried cherries are lovely in the summer months. If you use raisins, make sure they are plump; dry, tough raisins can actually pull moisture out of the oats as they sit. For these specific bars, you want about 1/2 cup of dried, chopped fruit total.
Can I leave out the chocolate chips?
Of course! If you skip the chocolate, you might want to replace that volume with another textural element, like an extra half-cup of oats or some toasted coconut flakes. Leaving them out makes these bars feel more like traditional oat bars, which is great if you’re skipping the sugar glaze on top later.
Storage and Make-Ahead Options for These Easy Homemade Granola Bars
One of the best parts about making a big batch of these snacks is knowing I have breakfast or a quick dessert set for weeks! Since these Easy Homemade Granola Bars rely on that honey-butter binder, how you store them absolutely impacts how soft or firm they feel when you grab one. I always keep my extras tucked away because they are excellent for meal prepping months in advance.
The main thing to remember is that temperature changes their texture. If you like a softer, chewier bar—almost like a fresh cookie—you’ll want to keep them on the countertop. If you prefer something denser, crisper, and more solidly set, the fridge is your friend here.
Storing at Room Temperature
Grandma always told me, if you keep them air-tight, they keep well! Store your cut bars in an airtight container. You don’t even need to wrap them individually if you plan to eat them within a week. I keep mine tucked away in my dark pantry or a low cupboard. They should stay perfectly fresh and wonderfully soft for about two to three weeks this way. Make sure the area isn’t too hot, though, because warm temperatures can make the chocolate chips weep a little!
Refrigeration for Firmer Bars
If you’re making these during a hot summer or you just prefer a firmer chew, pop them straight into the fridge. Keep them layered between pieces of parchment paper inside a sealed container. They maintain their structure much better when cold and feel a bit denser, which I love if I’m packing them for a hot day hike. They’ll last safely in the refrigerator for several weeks this way, too, though they will be harder coming right out of the cold.
Freezing for Long-Term Make-Ahead
This is my secret for when I’m feeling super organized! These bars freeze like a dream. The key here is wrapping them properly so they don’t absorb any freezer smells. Wrap each bar tightly first in plastic wrap, and then place them all together in a freezer-safe, airtight bag or container. If you wrap them well, you can enjoy these Easy Homemade Granola Bars for up to three months! When you want one, just let it sit on the counter for about 15 minutes to soften up to the room temperature chewiness you prefer.
Variations on Your Favorite Easy Homemade Granola Bars
I always tell people that the base recipe for these Easy Homemade Granola Bars is basically a blank canvas waiting for your personality to shine through! Once you nail the toasting and the binder—you know, the hard parts—you can switch up the mix-ins all the time. Switching ingredients is a great excuse to make another batch sooner, right? If you’re feeling cocktail-inspired, I have a fantastic cranberry bourbon smash recipe that uses some of these same fruit flavors, but let’s stick to the bars for now!
Here are a few fast, fun swaps I use throughout the year:
Change Up Your Chocolate Situation: We use mini chips because they disperse nicely, but trust me on this one: swap those out for dark chocolate chunks if you like that bittersweet hit against the sweet honey. Or, if you’re feeling totally decadent, use white chocolate chips along with some dried raspberries instead of the cranberries. It tastes like a fancy candy bar!
Add Some Nice Crunch with Seeds: If you want to boost the nutrition without doing major damage to the binder, toss in a few spoonfuls of seeds. Toasted sunflower seeds add a great salty nuttiness, but I also love adding chia seeds or ground flaxseed right into the oat mixture along with the dry ingredients before you add the binder. They don’t change the flavor much, but they sneak in some healthy fats.
Go Tropical for Summer: This is my favorite summer swap. Keep the almonds but swap the cranberries for chopped dried mango or pineapple pieces. Then, replace the mini chocolate chips with white chocolate chips. It becomes a totally different, bright, sunny bar! You don’t even need to change the chilling time.
Spice It Up a Little! You don’t need a full variation, just a little extra flavor boost. When you are toasting your oats, sprinkle in a tiny pinch of ground cardamom or just half a teaspoon of pumpkin pie spice mix right onto the baking sheet with them. It adds a warmth that pairs beautifully with the brown sugar and toasted nuts. Makes them smell incredible while baking!
Frequently Asked Questions About Easy Homemade Granola Bars
I always gather up the tricky questions I get in my DMs about these bars because chances are, you’re wondering the same thing! We want these Easy Homemade Granola Bars to be perfect for you—whether you are grabbing them for a quick snack or packing them for later. If you love easy comfort food in general, you might want to see my recipe for chicken noodle soup from scratch, but back to the snack bars!
Can I make these granola bars completely no-bake?
That’s a great question if you’re tight on time! As written, this recipe relies on a quick five to ten minutes of toasting the oats and nuts in the oven. That light toast is what gives them their amazing depth of flavor and helps them set up nicely when the warm binder hits them. If you skip the oven entirely and use raw oats, you *can* technically skip the oven, but I have to warn you: the texture will be much softer, and they won’t hold together quite as reliably as these sturdy ones. They’ll be closer to a pressed oatmeal mixture than a firm bar.
What is the best way to cut the bars cleanly?
The secret to pristine, bakery-straight cuts is pure patience, my friend! Remember that long refrigeration time—at least two hours? Don’t rush it! The bars need to be completely chilled through so the honey binder is rock hard. Once they are totally firm, lift the whole slab out onto a cutting board. For the absolute cleanest line, wipe a long, sharp knife under hot running water for a few seconds, dry it quickly, and then make your first cut. The warmth from the knife melts the binder just enough on the surface to glide through without tearing. Wipe the knife off after every cut, and you’ll get gorgeous, professional-looking **oat bars**!
How can I make these bars lower in sugar?
We need sugar and honey to create that perfect sticky binder, so it’s tricky to eliminate them completely without changing the structure, but you can definitely dial them back a bit! For a reduced-sugar batch, I recommend cutting the brown sugar down by half—so use just 2 tablespoons instead of 1/4 cup. You can leave the honey exactly as written because that’s doing most of the heavy lifting for binding. If you want to try a sugar-sweetened alternative, pure maple syrup works, but remember it is thinner, so that might push you back into needing extra-firm pressing to avoid crumbly **no bake bars**!
Share Your Experience Making These Easy Homemade Granola Bars
Now that you have a big, beautiful, sturdy batch of these Easy Homemade Granola Bars cooling on the counter, I’d absolutely love to hear how they worked out for you! This is where my real learning comes in—seeing what mix-ins you all get creative with!
Did you stick to the tried-and-true chocolate and cranberry combo, or did you sneak in some seeds or dried fruit? Don’t be shy about telling me! Please take a moment to leave a quick rating below, maybe 1 star if you hated them (though I hope that doesn’t happen!) right up to 5 stars if they hit that perfect chewy spot.
Leave a comment right below this section and let me know your absolute favorite combination of mix-ins for your perfect batch. I’m always looking for new ideas to try out on my next bake! If you want to know a little more about me and why I love making these simple recipes, you can always check out my About Me page. Happy snacking!

Easy Homemade Granola Bars
Ingredients
Equipment
Method
- Preheat the oven to 350°F. Line the bottom and sides of an 8-inch or 9-inch square pan with aluminum foil or parchment paper.
- Add the oats and chopped almonds to a small baking sheet and bake for 5 minutes. Stir and bake another 3 to 5 minutes or until lightly toasted. Transfer to a large bowl.
- Combine the butter, honey, brown sugar, vanilla extract, and salt in a small saucepan over medium heat. Cook, stirring occasionally, until the butter melts, the mixture bubbles, and the sugar dissolves.
- Pour the butter mixture into the bowl with toasted oats and almonds. Mix well. Let cool for 5 minutes.
- Stir in the cranberries and 1/4 cup of the mini chocolate chips. Some of the chocolate chips might melt, but they help hold the bars together.
- Transfer the oat mixture to the prepared pan and press it into the pan firmly using a rubber spatula. Press hard so that the bars will stay together once cooled and cut. Press for about one minute.
- Scatter the remaining 2 tablespoons of chocolate chips over the pressed granola mixture, and then use a rubber spatula to gently press them into the top.
- Cover and refrigerate for at least 2 hours. Remove the block of granola mixture from the pan and peel away the foil or parchment. Cut into 12 bars.