
Who ya gonna call when you need a seriously fun treat? Me, because I’ve got the ultimate recipe for homemade Ghostbusters Stay Puft Marshmallows! Seriously, if you grew up loving Ghostbusters (and who didn’t?), then you know the sheer, delightful absurdity of the Stay Puft Marshmallow Man. Making these homemade marshmallows feels like bringing a little bit of that 80s magic right into your kitchen. I remember watching Ghostbusters with my dad on VHS, totally mesmerized, and now I get to share that same fun with my own kids. These aren’t just any marshmallows; they’re a fluffy, sweet tribute to an icon, and trust me, they taste way better than the store bought stuff!
Why You’ll Love These Ghostbusters Stay Puft Marshmallows
Honestly, these aren’t just marshmallows, they’re a whole vibe! Here’s why you’ll totally dig making them:
- Super Easy to Make: Don’t let the homemade label scare you. With a stand mixer, it’s surprisingly straightforward!
- Seriously Delicious: Tastes SO much better than anything you can buy in a bag. They’re light, fluffy, and melt-in-your-mouth divine.
- The Fun Factor: They’re shaped like the iconic Stay Puft Marshmallow Man! Perfect for parties, movie nights, or just making your day more awesome.
- Perfect for Parties & Gifts: Imagine serving these at a Ghostbusters-themed bash! Or package them up all cute for a sweet, handmade gift. Way more special than store-bought.
- Nostalgia City: If you grew up with Ghostbusters, these are a delicious trip down memory lane. Pure 80s joy in marshmallow form!
Ingredients for Your Ghostbusters Stay Puft Marshmallows
Alright, let’s get our supplies ready! You’ll need a few things, and trust me, they make all the difference for these fluffy clouds of fun. Here’s your shopping list:
For the Marshmallows:
- 1/2 cup Water: This is just for blooming our gelatin, so no need to get fancy here.
- 3 packets Unflavored gelatin: Make sure it’s unflavored! This is key for the marshmallow texture.
- 1 cup Corn syrup: This gives our marshmallows that lovely smooth, chewy texture.
- 1 cup Granulated sugar: Your basic white sugar works perfectly here.
- 1/4 cup Water: This is for making our sugar syrup.
- 1 tsp Vanilla extract: A good splash of vanilla ties everything together. Use the real stuff if you can!
For dusting:
- 1/4 cup Powdered sugar: Also known as confectioners’ sugar.
- 1/4 cup Cornstarch: Helps keep those sticky marshmallows from, well, sticking together! Mix these two for our dusting magic.

Essential Equipment for Making Ghostbusters Stay Puft Marshmallows
Okay, so you don’t need a whole Ecto-1 to whip these up, but a few key tools really make the process smooth sailing. You’ll want a stand mixer – it honestly does all the heavy lifting for whipping that marshmallow goodness. Grab a good medium saucepan for making that sugar syrup, and a reliable candy thermometer is a must; getting the temperature just right is crucial! Then, you’ll need an 8×8 inch baking pan for your marshmallow slab, and of course, some parchment paper to make sure everything lifts out like a dream. Don’t forget a trusty spatula (greased!) and a knife for cutting!
Step-by-Step Guide to Perfect Ghostbusters Stay Puft Marshmallows
Making these fluffy guys is actually pretty fun, almost like a science experiment gone deliciously right! Just follow these steps and you’ll have your own batch of Stay Puft goodness in no time. Don’t forget to check out my other fun Halloween party snacks for more inspiration!
Preparing Your Pan for Ghostbusters Stay Puft Marshmallows
First things first, grab your 8×8 inch pan. You want to get it ready before things get too sticky! Lightly grease it all over, then line it with parchment paper. Make sure to leave some overhang on the sides—this is our secret weapon for lifting the whole slab out later without a fuss. Give that parchment paper a little extra grease too, just to be safe!
Blooming the Gelatin for Your Marshmallow Base
Okay, now for the magic ingredient: gelatin! In the bowl of your stand mixer (make sure it’s clean!), sprinkle those 3 packets of unflavored gelatin over the 1/2 cup of water. Just let it sit there for about 5 to 10 minutes. You’ll see it get all thick and jiggly – that’s called “blooming,” and it means your gelatin is ready to do its thing and make our marshmallows super fluffy.
Creating the Sugar Syrup for Ghostbusters Stay Puft Marshmallows
Time to make some syrup! In a medium saucepan, toss in the corn syrup, that 1 cup of granulated sugar, and the other 1/4 cup of water. Heat it up over medium heat, stirring just until the sugar completely dissolves. Once it’s dissolved, stop stirring! You need to bring this mixture to a rolling boil. Clip on your candy thermometer – we’re aiming for exactly 240°F (115°C). This temperature is super important!
Whipping the Marshmallow Mixture to Perfection
Once your syrup hits that perfect 240°F mark, carefully, carefully, *carefully* pour it into the bowl with the bloomed gelatin. Add your teaspoon of vanilla extract right in there too. Now, put the bowl on your stand mixer and let it whip! Start on low speed, then crank it up to high for about 10 to 15 minutes. You want the mixture to get really thick, super glossy, and triple in volume. It should hold stiff peaks when you lift the whisk attachment – that means it’s ready!
Setting and Dusting Your Ghostbusters Stay Puft Marshmallows
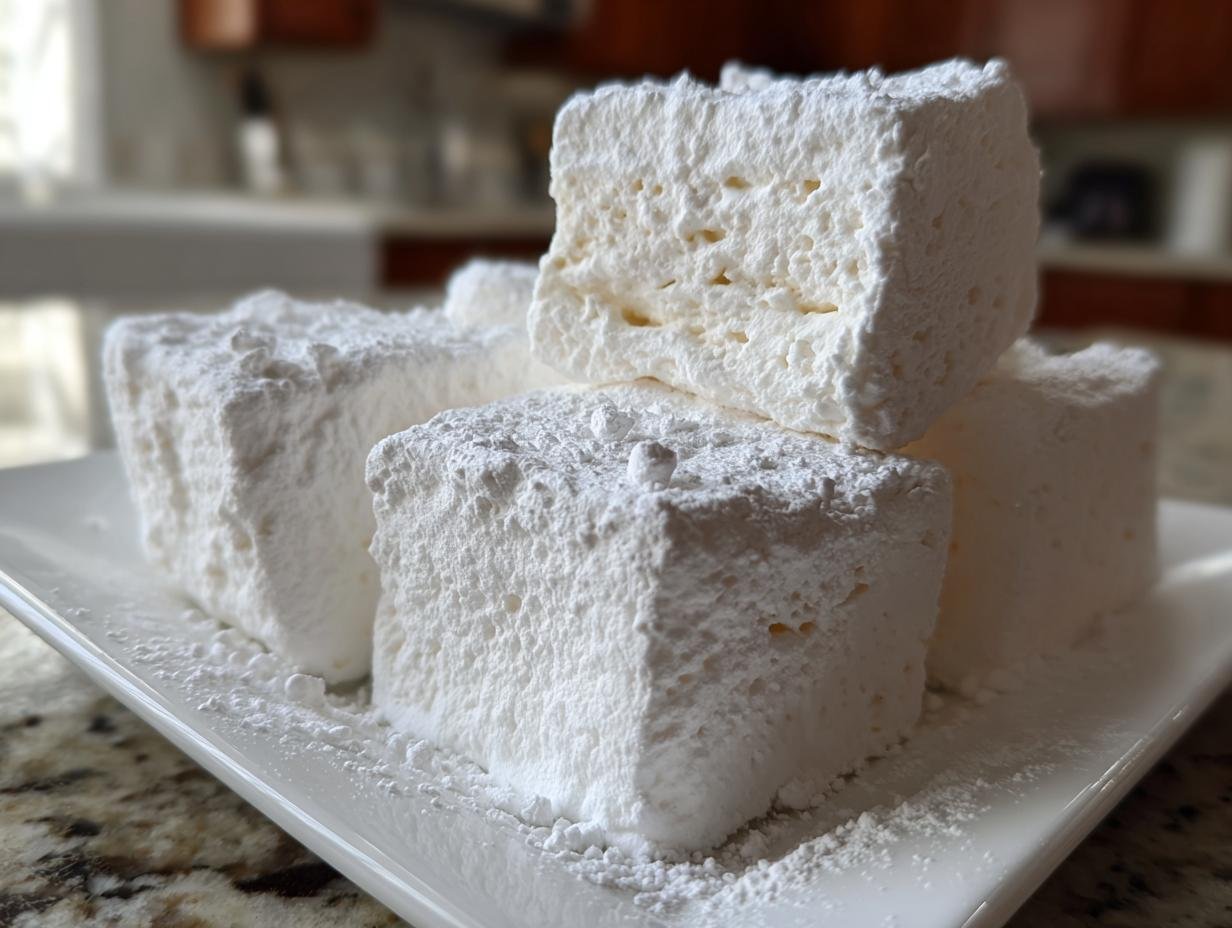
Gently scrape that glorious, thick marshmallow mixture into your prepared pan. Use a greased spatula to smooth the top as best as you can. Now, in a little bowl, mix up your powdered sugar and cornstarch. Sprinkle about half of this dusting mixture evenly over the top of the marshmallows. We need patience here! Let them sit out, uncovered, for at least 4 hours, or even better, overnight. This is when they firm up and get that perfect chew.
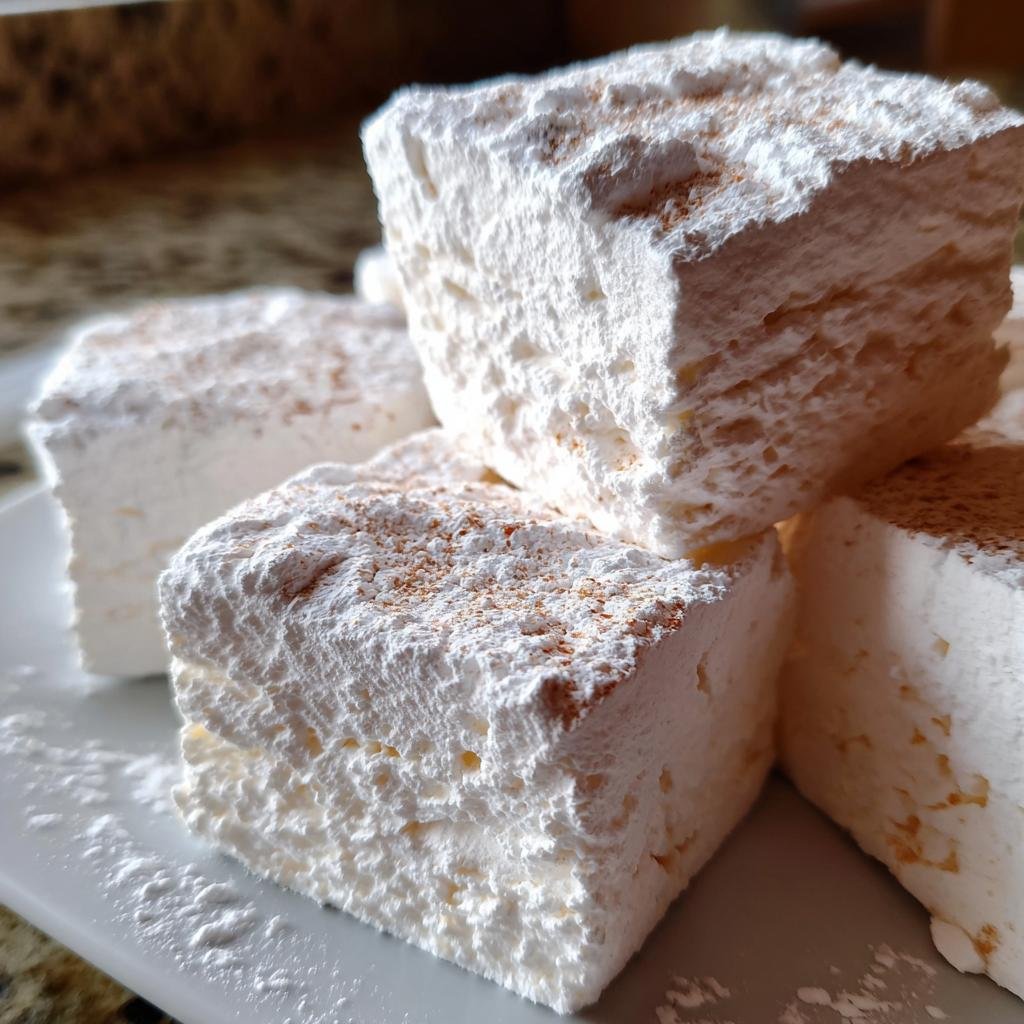
Cutting and Finishing Your Homemade Marshmallows
Once they’re all set and firm, it’s cutting time! Use those handy parchment overhangs to gently lift the whole slab out of the pan and onto a clean cutting board. Sprinkle the rest of your powdered sugar/cornstarch mixture all over the board. Lightly grease a knife or grab some fun cookie cutters—you can even use a round one to get that Stay Puft shape! Cut them into squares or get creative, then toss each piece gently in the dusting mixture so they don’t stick together. Voila! You’ve made your own marshmallows!
Tips for Ghostbusters Stay Puft Marshmallow Success
Making these marshmallows is honestly a blast, but like anything good, a few little tricks can make all the difference. Trust me on this! First off, don’t skimp on the candy thermometer. Getting that sugar syrup to exactly 240°F isn’t just a suggestion; it’s what gives you that perfect chewy texture versus a sticky mess. Also, make sure your gelatin is fresh – old gelatin can be grumpy and won’t bloom properly. I learned that the hard way! And when you’re whipping the mixture, give it the full 10-15 minutes. Resist the urge to stop early; that long whip time is what makes them light and airy. If you’re worried about them not setting up perfectly, just give them a little extra time in the pan. Patience is key here, just like waiting for Gozer to show up! You can read a bit more about my kitchen adventures here.
Ingredient Notes and Substitutions
Let’s talk about these ingredients for a sec, because sometimes you gotta flex what you have in the pantry! For the gelatin, make sure it’s unflavored; flavored gelatin will turn your Stay Puft marshmallows into weird, colorful blobs, and that’s not quite the vibe we’re going for. If you can’t find regular corn syrup, you could try golden syrup or even a light agave nectar, but know that it might change the color a little. For the vanilla, pure vanilla extract is best, but if you only have imitation, it’ll still work. Just use a little less if it’s super strong. These little tweaks won’t ruin your Ghostbusters fun, promise!
Storage and Reheating Instructions
So, you’ve got your fluffy, homemade Ghostbusters Stay Puft marshmallows – congrats! To keep these little guys fresh and delicious for as long as possible, store them in an airtight container at room temperature. Seriously, just pop them in a container and seal it up tight. They’ll stay good for about a week, maybe even a little longer if your kitchen isn’t too humid. They don’t really need reheating, but if they happen to get a bit stiff (which is rare if stored right!), a few seconds in a low-heat microwave can sometimes soften them up a bit. But honestly, they’re best enjoyed at room temp!
Frequently Asked Questions About Ghostbusters Stay Puft Marshmallows
Got questions? I’ve got answers! Making marshmallows can seem a bit tricky, but don’t worry, we’ll get through it together. Here are some things people often ask:
Can I make these without a stand mixer?
Oh, honey, technically yes, but it’s going to be a serious workout! The whipping stage needs a lot of power to get that super thick consistency. You’d be whisking by hand for a very, very long time (like, 20+ minutes of serious effort). If you have a really good immersion blender with a whisk attachment, that might be a slightly better alternative, but a stand mixer is really the star of the show for this recipe. It makes it SO much easier!
How long do homemade marshmallows last?
These homemade beauties will last about a week, maybe a little longer, if you store them in an airtight container at room temperature. Just make sure they’re properly coated in that powdered sugar and cornstarch mixture to prevent them from getting too sticky. I find they are absolutely best within the first few days, but they’re still yummy for a while! If you want more fun treat ideas, check out my Ghost Popcorn Cups!
Can I color these marshmallows?
You totally can! If you want to make them even more like the Stay Puft Marshmallow Man, or just have some fun, add a few drops of **gel food coloring** when you add the vanilla extract before whipping. Gel colors work best because they don’t add extra liquid. Start with just a tiny bit; you can always add more! Imagine little mini Stay Pufts or even blue and white ones!
Why are my marshmallows not setting?
If your marshmallows are still super gooey after the baking time, there are a couple of reasons this might happen. The sugar syrup might not have reached the correct temperature (240°F is key!), or the gelatin might not have bloomed properly. Sometimes, if it’s really humid, they can take longer to set too! Just give them more time. You can also try putting the pan in the fridge for an hour or two, but be careful – condensation can make them sticky!
Nutritional Information (Estimated)
Alright, let’s talk numbers! Keep in mind these are just estimates, because we all use slightly different ingredients, right? Based on the recipe, you’re looking at roughly 100-120 calories per marshmallow. You’ll also get about 0-1g of protein and 20-25g of carbohydrates per piece, most coming from the sugar. There’s very little fat. These are definitely a fun treat, not exactly a health food, but totally worth it!
Ghostbusters Stay Puft Marshmallows
Ingredients
Equipment
Method
- Grease an 8×8 inch baking pan and line it with parchment paper, leaving an overhang on the sides. Lightly grease the parchment paper.
- In the bowl of a stand mixer, sprinkle the gelatin over 1/2 cup of water. Let it sit for about 5-10 minutes to bloom.
- In a medium saucepan, combine the corn syrup, granulated sugar, and 1/4 cup of water. Heat over medium heat, stirring until the sugar dissolves.
- Bring the sugar mixture to a boil and cook without stirring until it reaches 240°F (115°C) on a candy thermometer.
- Carefully pour the hot sugar syrup into the bloomed gelatin mixture. Add the vanilla extract.
- Beat on high speed with the stand mixer for 10-15 minutes, until the mixture is thick, glossy, and has increased in volume. It should hold stiff peaks.
- Pour the marshmallow mixture into the prepared baking pan. Smooth the top with a greased spatula.
- In a small bowl, mix together the powdered sugar and cornstarch. Sprinkle half of this mixture evenly over the top of the marshmallows.
- Let the marshmallows sit at room temperature, uncovered, for at least 4 hours, or preferably overnight, to set.
- Once set, use the parchment paper overhang to lift the marshmallow slab out of the pan. Sprinkle the remaining dusting mixture onto a clean cutting board.
- Cut the marshmallows into desired shapes using a lightly greased knife or cookie cutters. Toss the cut marshmallows in the dusting mixture to prevent sticking.