
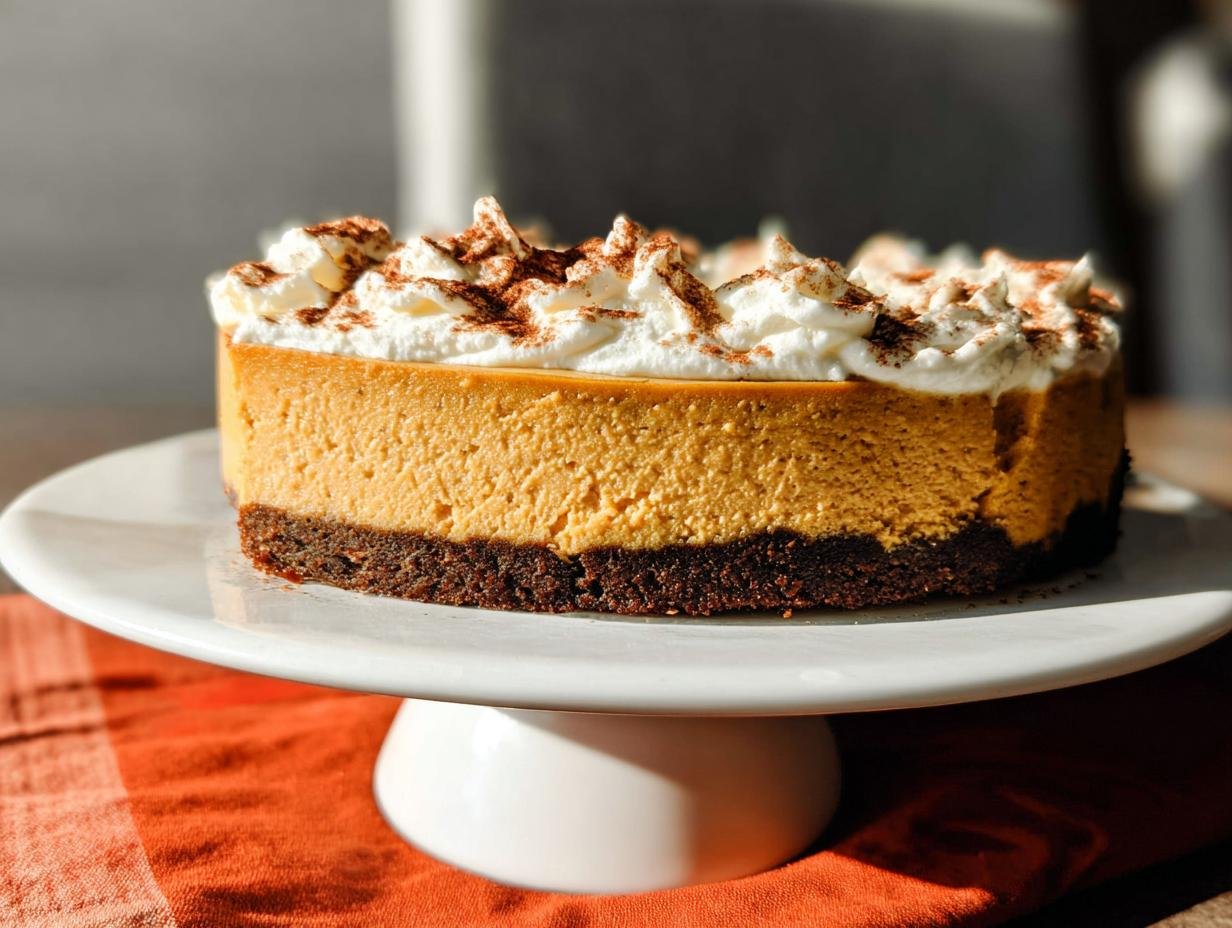
When the fall weather hits, you start dreaming of pumpkin spice, but truthfully, who has time to babysit an oven when company is due in an hour? Trust me, I know that scramble! I first had to whip up this incredible No-Bake Pumpkin Cheesecake when my oven promptly died right before a huge autumn dinner party. Seriously, kaput! So I got quick. One bowl for the gingersnap crust, one bowl for the creamy, spiced filling, and then I put the whole thing out on the chilly porch to set. When we finally served slices, everyone thought I had planned it for days!
This recipe is pure magic because it delivers that rich, velvety texture and all those warm spices without ever turning on the heat. It sets up perfectly in the fridge, travels like a dream, and tastes way more complicated than it is. If you need a guaranteed showstopper that looks gourmet but is actually ridiculously simple, you’ve landed in the right spot. I’m Clara, by the way, and I love sharing recipes that save the day!
You can check out more about my kitchen adventures over on our About Me page if you’re curious about my photography journey!
Why This No-Bake Pumpkin Cheesecake is Your New Favorite Fall Dessert
I seriously can’t say enough good things about this treat. It’s the ultimate rescue dessert because it relies on the fridge, not the oven, which means no stress if you’re hosting a crowd during the holidays. You can whip it up the day before and forget about it until serving time! It’s why this No-Bake Pumpkin Cheesecake has become a staple for everything from potlucks to last-minute movie nights.
- Effortless Preparation for Busy Cooks
- Perfect Texture and Flavor in Every No-Bake Pumpkin Cheesecake Slice
If you love easy holiday treats, you should definitely peek at our collection of holiday recipes!
Effortless Preparation for Busy Cooks
The beauty here is the sheer simplicity. You smash cookies, melt butter, mix the wet and dry stuff, and that’s basically it for the active part! No water baths, no cracking eggs, and absolutely zero risk of a cracked top because it never touches the heat lamp. It’s the perfect recipe if you’re new to baking or just tired of fussing in the kitchen.
Perfect Texture and Flavor in Every No-Bake Pumpkin Cheesecake Slice
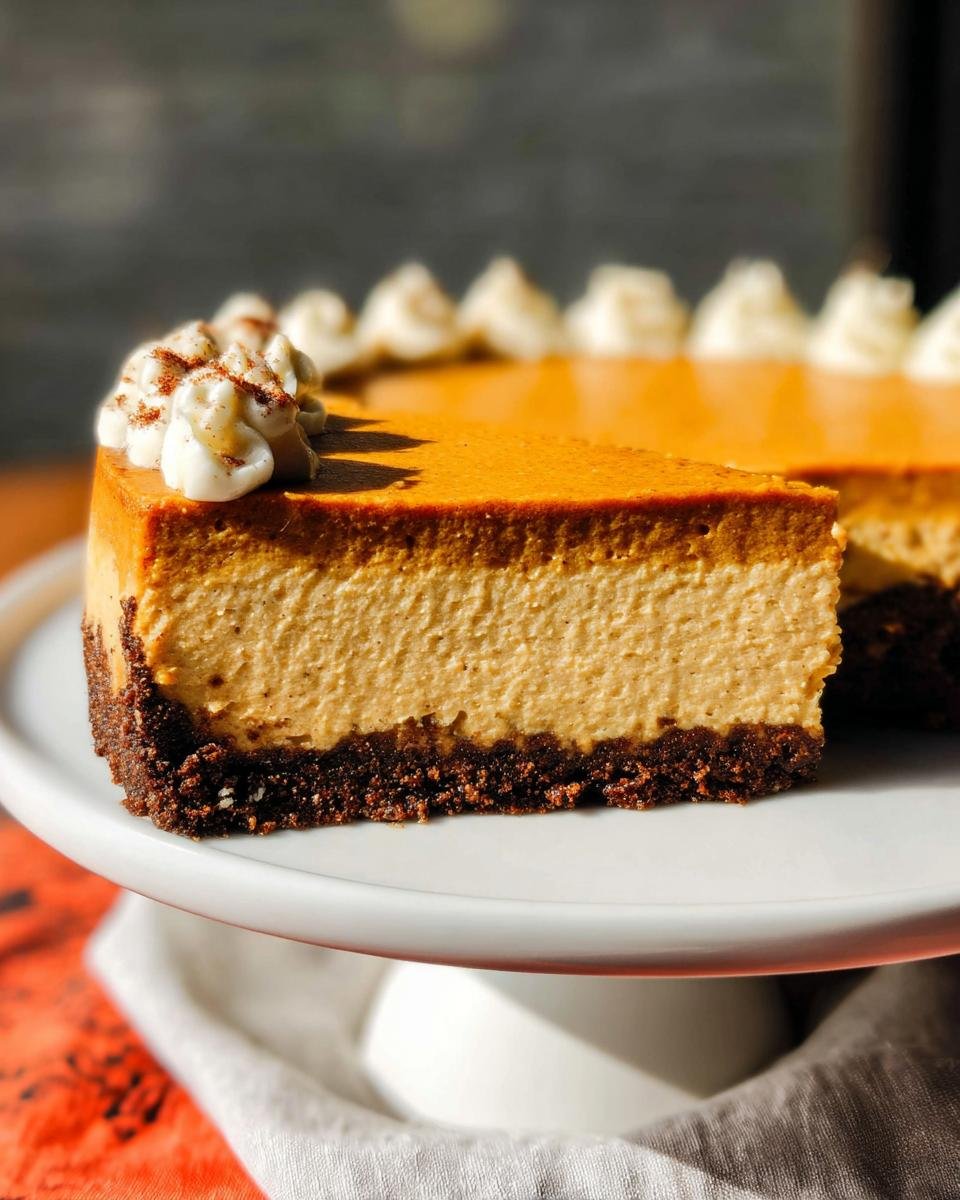
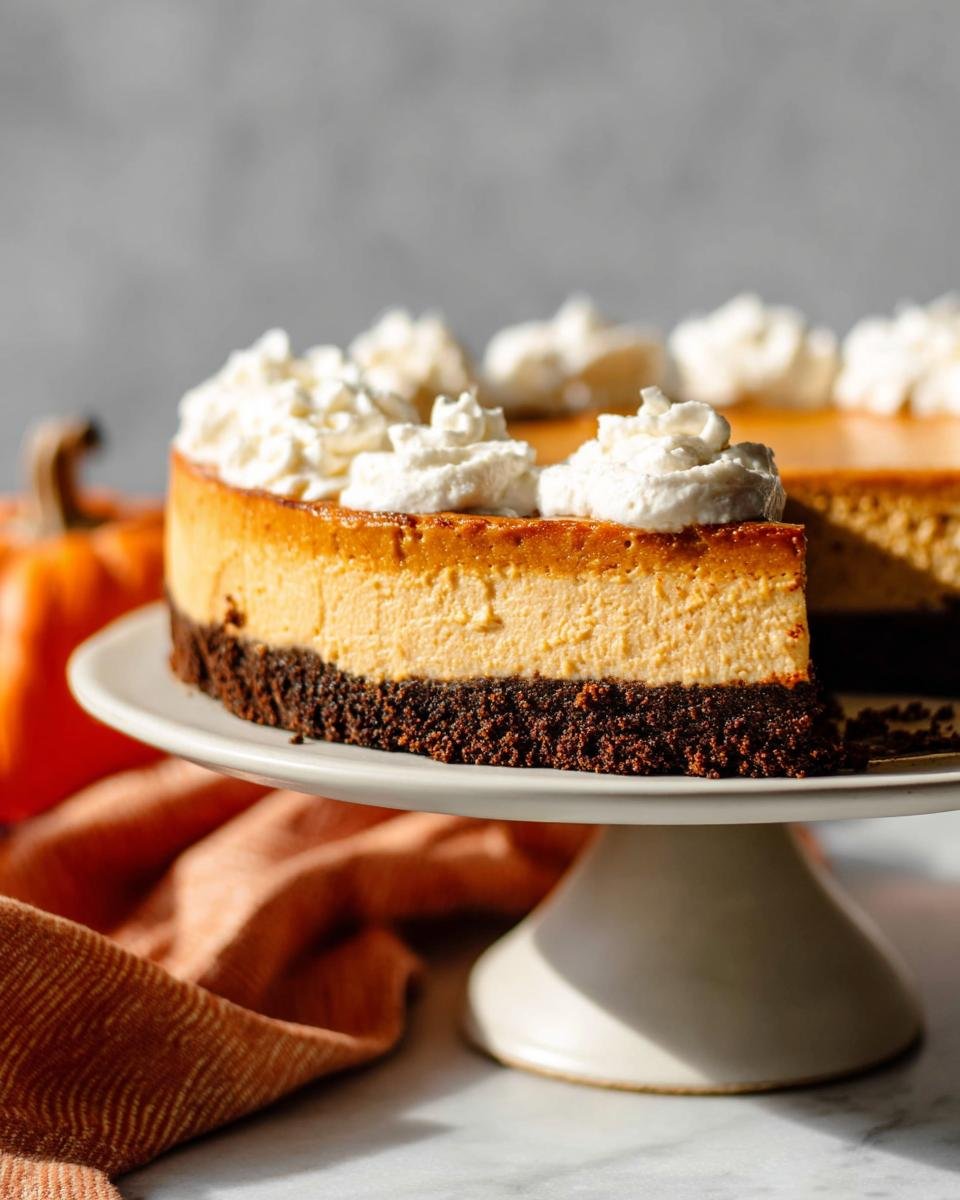
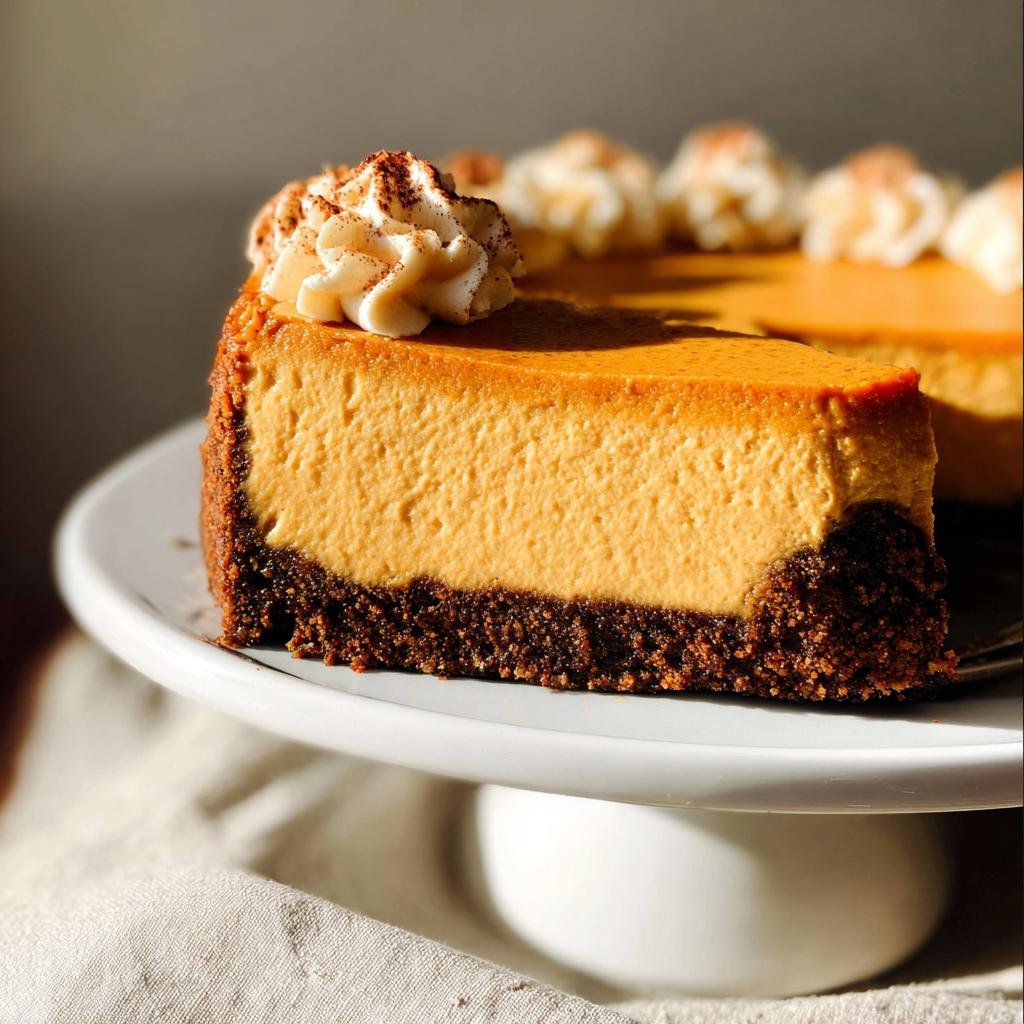
When you bite into this, you get that signature velvety, cool mouthfeel that only a chilled cheesecake can offer. The gingersnap crust gives such a wonderful spicy, crisp counterpoint to the smooth filling. Honestly, every single spoonful of this No-Bake Pumpkin Cheesecake tastes like spiced autumn perfection.
Essential Equipment for Your No-Bake Pumpkin Cheesecake
Since this recipe cuts out the oven entirely, the equipment list is nice and short—you won’t need any fancy baking gear at all! However, getting the right tools does make the mixing process smoother, especially when you’re dealing with whipping that cream and smoothing out the base.
We’re relying on what you most likely already have on hand. You don’t need a giant professional mixer, but a good hand mixer really helps whip the cream up into those sturdy peaks we need for structure. Here’s what you’ll want ready to go:
- A 9-inch or 10-inch springform pan. This is non-negotiable since we need to release the sides easily!
- A hand mixer or a stand mixer.
- The whisk attachment for getting that heavy cream airy.
- The paddle attachment for creaming the cream cheese mixture properly.
- A silicone spatula for scraping down the sides—this is key for avoiding those cream cheese lumps!
- An offset spatula, which is fantastic for spreading the filling evenly over your crust.
That’s it! No special thermometers or candy making tools here. We keep things simple for maximum flavor with minimum fuss, which is the whole point of a refrigerated dessert!
Gathering Ingredients for the Gingersnap Crust and No-Bake Pumpkin Cheesecake Filling
Okay, let’s talk ingredients! Since this is a no-bake recipe, the quality of what you put in really shines, especially since we aren’t baking away any minor flavor issues. We are dividing our shopping list into two parts: the crunchy base and the dreamy filling. Getting these elements just right is how we guarantee the best No-Bake Pumpkin Cheesecake ever!
Before you start measuring, a quick look at the notes section in the recipe is super helpful. Remember that cold cream and room-temperature cream cheese are your secret handshake for success!
If you are looking for other fun ways to use pumpkin, you absolutely have to check out my pumpkin pie tacos—they are surprisingly delicious!
For the Gingersnap Cookie Crust
This crust is always such a winner because it’s spicy and buttery, making it the perfect pairing for the creamy pumpkin. I love mixing in a little extra spice right into the crumbs just to make sure that ginger flavor pops!
- Two cups of gingersnap cookie crumbs. Make sure they are packed nicely into your measuring cup!
- One-quarter teaspoon of ground ginger (if you want it extra zesty).
- One-quarter teaspoon of ground cinnamon.
- A quarter cup of granulated or brown sugar, packed tight.
- Six tablespoons of unsalted butter, and this needs to be fully melted!
For the Creamy Cheesecake Filling
This is where all the magic happens! Getting the temperature right for these items is crucial for a smooth batter—no one wants lumps in their cheesecake, right? Make sure you take the cream cheese out early!
- One cup of cold heavy cream or heavy whipping cream. Keep this in the fridge until the absolute last second!
- Sixteen ounces of full-fat brick cream cheese—this must be completely softened to room temperature. I mean squishy soft!
- One cup of pumpkin puree (not pumpkin pie filling—just the plain puree!).
- Three-quarters cup of confectioners’ sugar.
- A quarter cup of that glorious packed light or dark brown sugar.
- One teaspoon of pure vanilla extract.
- Two teaspoons of your favorite homemade or store-bought pumpkin pie spice.
- A half teaspoon of ground cinnamon and just an eighth of a teaspoon of salt to balance it all out.
Don’t forget the optional extras! A drizzle of salted caramel or a dollop of fresh whipped cream on top makes it look totally professional.
Step-by-Step Instructions to Make Perfect No-Bake Pumpkin Cheesecake
This is where the assembly happens, and honestly, it’s faster than baking any regular pie! We’re moving fast, but we’re not rushing the important stuff, like whipping that cream. Remember, since this is a no-bake recipe, attention to temperature and mixing technique is what keeps everything from turning into runny soup. Follow these steps closely for the best texture in your No-Bake Pumpkin Cheesecake.
You can find my recipe for easy cheesecake fluff here, which uses a similar technique for mixing!
Preparing and Setting the Crust
First things first, let’s build our foundation! Mix together those gingersnap crumbs, extra spices, sugar, and melted butter. Make sure you press this mixture down into your springform pan really tight! I use the bottom of a glass to really compact it along the base and halfway up the sides. You want it brick solid! Then, pop that pan into the freezer for about 10 to 20 minutes while you tackle the filling.
Whipping the Cream and Mixing the Filling Base
We need two separate mixing jobs here. Take your cold heavy cream—and I mean ice-cold—and whip it up until you get stiff peaks. Set that fluffy goodness aside for a minute. Now, grab your softened cream cheese. Beat it until it’s perfectly smooth and there are zero little lumps hiding anywhere. I always scrape down the sides of the bowl multiple times here! Once it’s creamy, add your sugars, pumpkin, vanilla, and all those lovely spices. Beat until it’s totally combined and creamy again.
Folding and Chilling the No-Bake Pumpkin Cheesecake
This is the step that requires a delicate touch! You must fold the pre-whipped cream into the pumpkin mixture—do not just beat it in! Use your spatula and work gently on low speed if you’re using a mixer, just until you see no more big white streaks. You want to keep all that air in there; that air is what keeps this No-Bake Pumpkin Cheesecake light!
Pour the filling over your chilled crust and smooth the top with an offset spatula. Now comes the hardest part: the waiting game! Cover it tightly without touching the surface and refrigerate for a minimum of 8 hours. Honestly though, I always aim for 12 hours, or even overnight, for the firmest, best slice possible.
Tips for Success with Your No-Bake Pumpkin Cheesecake
Even though this is a no-bake recipe, there are a few little secrets I’ve learned over the years that keep it from getting too soft or developing those annoying lumps. When you are dealing with cream cheese that needs to hold its shape in the fridge, temperature is seriously your best friend! I’ve learned to never rush the prep work because it pays off in the final texture we’re aiming for, which is pure, chilled silkiness.
For more tips on avoiding cracks and getting a professional finish on creamy desserts, take a peek at my full regular pumpkin cheesecake recipe; the principles for creaming are very similar!
Achieving the Smoothest Filling Texture
I cannot stress this enough: your cream cheese needs to be at true room temperature. I mean it! If your cream cheese is still cold when you start beating it, you will end up with little tiny frozen flecks of cheese throughout your filling, and no amount of beating will fix that.
What I do if I forget to take it out early is I cut the bricks into small cubes and let them sit on a plate for about 30 minutes, maybe even microwaving them on 20% power for 10-second bursts, checking constantly so they don’t melt, just soften. You want it yielding easily when you press it with your finger. That initial smoothness is what makes the rest of the filling come together perfectly!
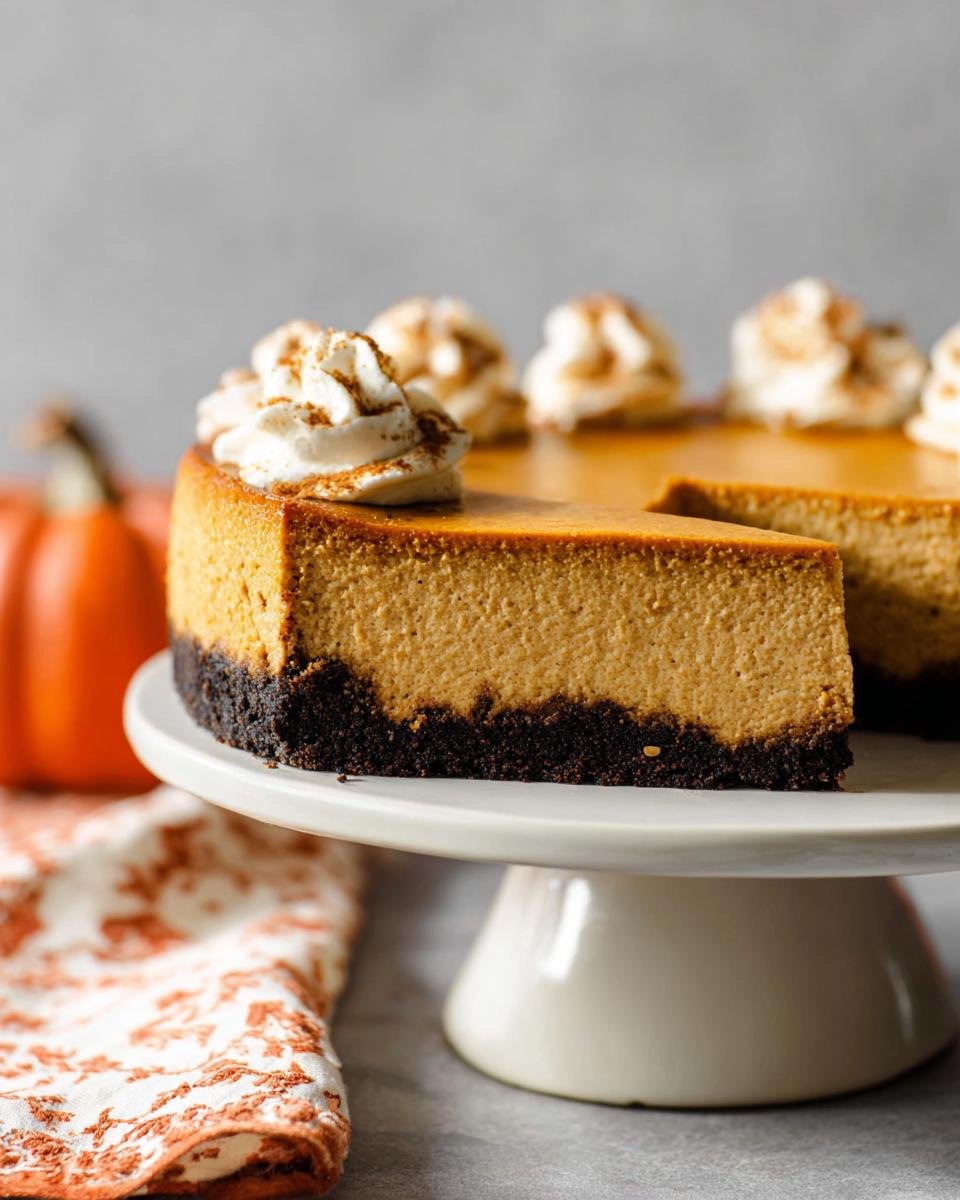
Getting Clean Slices of No-Bake Pumpkin Cheesecake
This is the make-or-break moment if you’re transporting this beauty or serving it at a fancy holiday table. If you try to slice a chilled cheesecake straight from the fridge, the filling sticks to the knife, and your beautiful presentation gets ruined with smeared edges.
Here’s my move: Grab a tall glass and fill it with very hot water. Dip your sharpest, thinnest knife completely into the hot water for about 10 seconds, wipe it completely dry with a clean dish towel, and then make one clean slice through the No-Bake Pumpkin Cheesecake. Dip, wipe, slice, repeat for every single cut! It works like a charm every time to give you those picture-perfect slices.
Make-Ahead and Storage for Your No-Bake Pumpkin Cheesecake
One of the absolute best things about this recipe is how perfect it is for planning ahead! Since it’s totally oven-free, you can finish assembling the entire No-Bake Pumpkin Cheesecake the day before your party. In fact, I think the flavor actually deepens a little overnight once everything really firms up. It’s such a relief when I know dessert is completely done and chilling while I focus on the main course!
You absolutely have to fight the urge to pop this into the freezer to speed things up, though. That’s the biggest trap with no-bake desserts! If you freeze it, the cheesecake won’t set properly when you bring it back to temperature; it will weep and become watery instead of staying nice and smooth.
Once it’s chilled and set firmly in the fridge, you can keep leftovers—if you are lucky enough to have any—covered tightly for about five days in the refrigerator. That’s five whole days of easy, spiced perfection ready to go! If you need more quick, no-bake solutions for busy weeks, you need to try my no-bake protein balls recipe—they are lifesavers!
Dietary Considerations and Ingredient Substitutions
I always try to make sure everyone at the table can have a taste of what I’m serving, even if they have a few dietary quirks! Since the beauty of this creamy dessert is its simplicity, there are a few swaps you can make easily. Remember, this is a no-bake recipe, so we are focusing on ingredient swaps rather than baking chemistry changes.
If you’re navigating dietary needs, this recipe is super forgiving compared to baked goods. Just make sure you substitute like-for-like when it comes to structure. Before you go shopping, take a peek at my gluten-free ideas if you are trying to navigate anything GF!
Here are the changes I suggest if you’re missing an ingredient or need to adapt something:
- Swapping the Crust: If you can’t find gingersnaps, don’t panic! Plain graham crackers work beautifully. Just grab about two cups of crumbs and perhaps add an extra half teaspoon of ground ginger to the mix to keep that warm spice factor up.
- Sugar Adjustments: If you absolutely must avoid brown sugar, you can use all granulated sugar, but flavor-wise, you’ll lose some of that molasses depth. Alternatively, if you have maple syrup, you can try substituting some of the lighter sugar, but you might need to reduce the melted butter slightly because maple syrup adds moisture! I haven’t tested it extensively, so start small!
- Dairy-Free? This is harder because the structure relies heavily on the fat content of the cream cheese and heavy cream. Full-fat coconut cream, whipped stiff, can substitute for the heavy cream, but you’ll need to use a firm vegan cream cheese alternative for the base, and the texture might be slightly softer.
Because the filling relies on the firmness that full-fat ingredients provide when chilled, I really caution against swapping out the brick cream cheese for a light or whipped version. That extra fat is what keeps the whole dessert standing tall!
Serving Suggestions for No-Bake Pumpkin Cheesecake
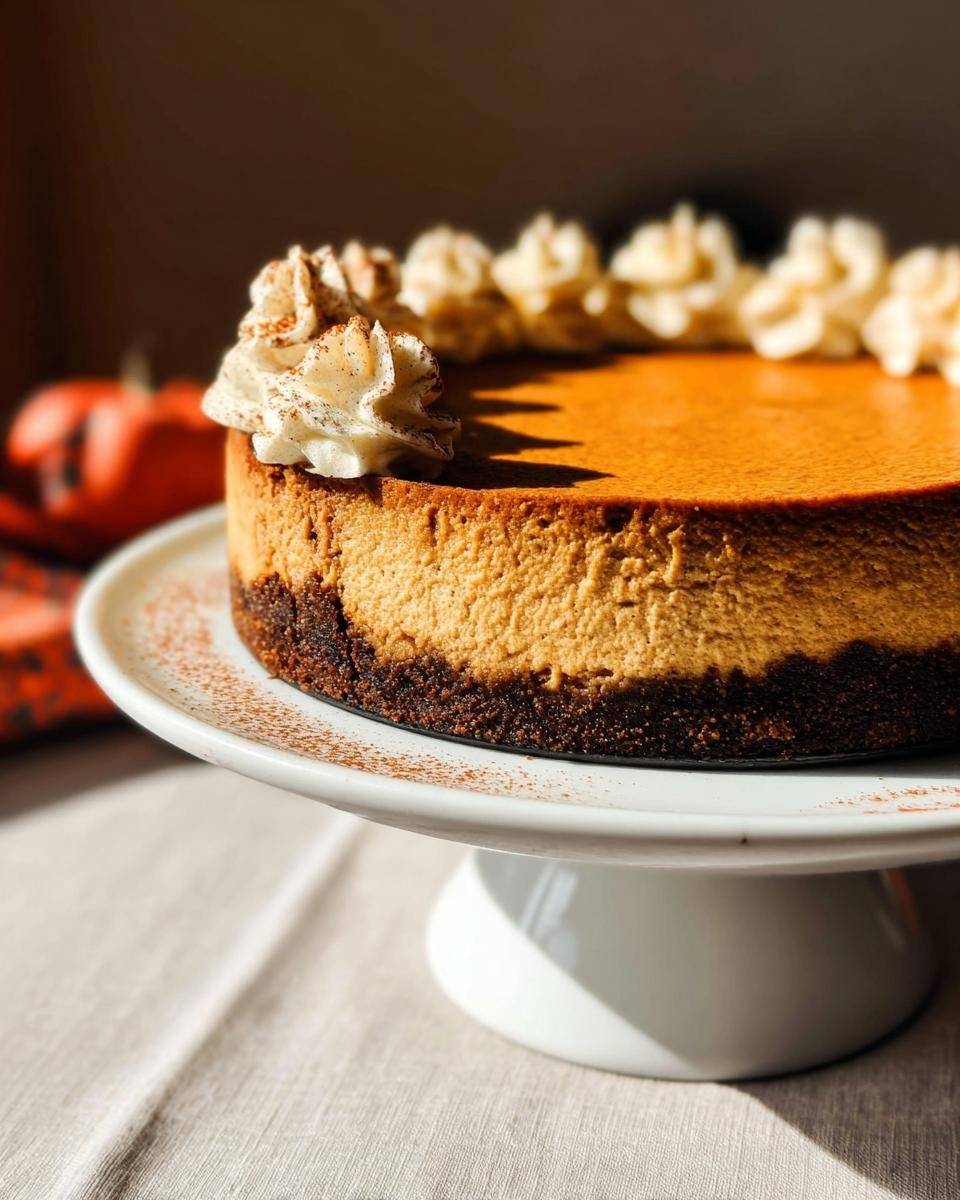
Once you’ve finally released your perfectly chilled beauty from the springform pan, it’s time for the fun part: making it look absolutely stunning on the table! Since this No-Bake Pumpkin Cheesecake is so rich already, a little flair on top goes a long way. My favorite trick is to keep the toppings simple so that beautiful, creamy surface remains the star.
We talked about salted caramel in the ingredient list, and seriously, if you want an instant upgrade, drizzle on some good quality salted caramel sauce just before you slice it. The slight saltiness cuts through the sweetness beautifully, and it looks so indulgent!
If you’re hosting a party and need a festive drink to pair with this, I have a fantastic recipe for a Cosmopolitan Party Punch that is bright and citrusy—it cuts through the richness of the pumpkin perfectly!
Here are my go-to ways to dress up your slices when serving:
- Classic Cloud of Cream: A generous swirl of freshly whipped cream on top of each slice really emphasizes that light, fluffy texture we worked so hard to achieve when folding in the heavy cream. Don’t use the canned stuff if you can avoid it; homemade tastes so much better!
- Spice Dusting: A light dusting of cinnamon or, even better, a mixture of cinnamon and nutmeg right before serving looks professional and really brings out the autumn aroma.
- Pecan Crunch: For texture lovers, lightly toasted pecans, roughly chopped and sprinkled on top, add a welcome crunch next to the soft gingersnap crust.
- Coffee Pairing: I always serve coffee alongside any pumpkin dessert. A simple dark roast or even an espresso brings out the deep notes of the brown sugar in the crust and filling.
Remember, since this No-Bake Pumpkin Cheesecake is so sturdy, it actually holds up really well on a buffet if you keep it slightly chilled until serving time. Enjoy watching everyone grab their slice!
Frequently Asked Questions About This Recipe
I always get the most questions about setting time and texture, which makes total sense because we aren’t baking anything! If you’re used to traditional baked cheesecakes, the no-bake timing can feel a little confusing. Don’t worry—I’ve answered the top three reader questions right here so you can feel confident mixing this up!
If you are looking for baked pumpkin recipes to compare notes, my classic pumpkin bread recipe is another fall favorite!
Can I use a different cookie for the crust?
Oh yes, you absolutely can! While I adore the warm spice of gingersnaps, they aren’t always easy to find. If you can’t find them, reach right for graham crackers—they crush beautifully and provide excellent structure. You’ll need about two cups of crumbs, just like the recipe calls for. Shortbread cookies work too, though they are a little sweeter and less spiced, so you might want to add an extra half teaspoon of ground ginger into your melted butter mixture to compensate for that missing kick.
What happens if I skip chilling the No-Bake Pumpkin Cheesecake?
If you skip the chilling or try to rush it, you’re going to end up with a creamy pumpkin dip instead of a sliceable dessert! The chilling time—we recommend at least 8 hours, but ideally overnight—is crucial because it allows the fat in the heavy cream and the cream cheese to firm up properly in the cold. Without that time, the filling simply won’t set, and your lovely dessert will be a gooey, delicious mess on your plate. Patience is the key ingredient here!
Can I use light cream cheese instead of full-fat brick cream cheese?
Please, please stick to the full-fat brick cream cheese, I beg you! This is one area where trying to lighten things up really sabotages the texture of the whole cheesecake. Light cream cheese or the whipped varieties sold in tubs have way too much water content. When you mix those in, the filling will never achieve that dense, stable texture we want; it will stay soft and might even separate as it chills. You need that high fat from the brick cheese layer to make sure your dessert holds its shape when you slice it!
Share Your Favorite No-Bake Pumpkin Cheesecake Moments
I truly hope this recipe saves your next gathering, just like it saved mine when that oven decided to take a sudden vacation! Now that you’ve made this fantastic No-Bake Pumpkin Cheesecake, I absolutely want to know what you think! Did you try it with the salted caramel, or did you stick to a dusting of cinnamon?
The greatest joy for me in the kitchen is seeing you all make these recipes come to life at your own tables. Nothing makes me happier than knowing my tips helped you pull off a show-stopping dessert!
Please leave a star rating right here on the recipe card so other busy cooks know how reliable this dessert is. It helps me out so much down the line!
And if you’ve snapped a picture of your beautiful, perfectly chilled slice, please tag me on social media! You can find me whipping up more quick treats over on my site where we celebrate joyful eating: check out our Joyful Eating category!
I can’t wait to hear all about your gorgeous No-Bake Pumpkin Cheesecake creations!
No-Bake Pumpkin Cheesecake
Ingredients
Equipment
Method
- Stir the gingersnap crust ingredients together. Pour into a 9-inch or 10-inch springform pan and pack in very tightly. Pack it into the bottom and up the sides. Freeze for 10 to 20 minutes while you prepare the filling.
- Using a hand mixer or a stand mixer fitted with a whisk attachment, whip the cold heavy cream into stiff peaks on medium-high speed for about 4 minutes. Set the whipped cream aside.
- Using a hand mixer or a stand mixer fitted with a whisk or paddle attachment, beat the cream cheese on medium speed until smooth and creamy. Scrape down the sides and bottom of the bowl as needed.
- Add the pumpkin, confectioners’ sugar, and brown sugar and beat on medium-high speed until combined. Scrape down the sides and bottom of the bowl as needed.
- Add the vanilla extract, pumpkin pie spice, cinnamon, and salt and beat until combined, creamy, and smooth. Continue beating until there are no large lumps of cream cheese.
- Using your mixer on low speed or a silicone spatula, fold the whipped cream into the cheesecake filling until combined. Combine slowly to avoid deflating the air in the whipped cream.
- Remove the crust from the freezer and spread the filling into the crust. Use an offset spatula to smooth the top.
- Cover the cheesecake tightly with plastic wrap or aluminum foil and refrigerate for at least 8 hours and up to 2 days. For best results, chill for at least 12 hours.
- Use a knife to loosen the chilled cheesecake from the rim of the springform pan, then remove the rim. Cut into slices using a clean sharp knife, wiping the knife clean between each slice for neat cuts.
- Serve the cheesecake with optional toppings. Cover and store leftover cheesecake in the refrigerator for up to 5 days.