
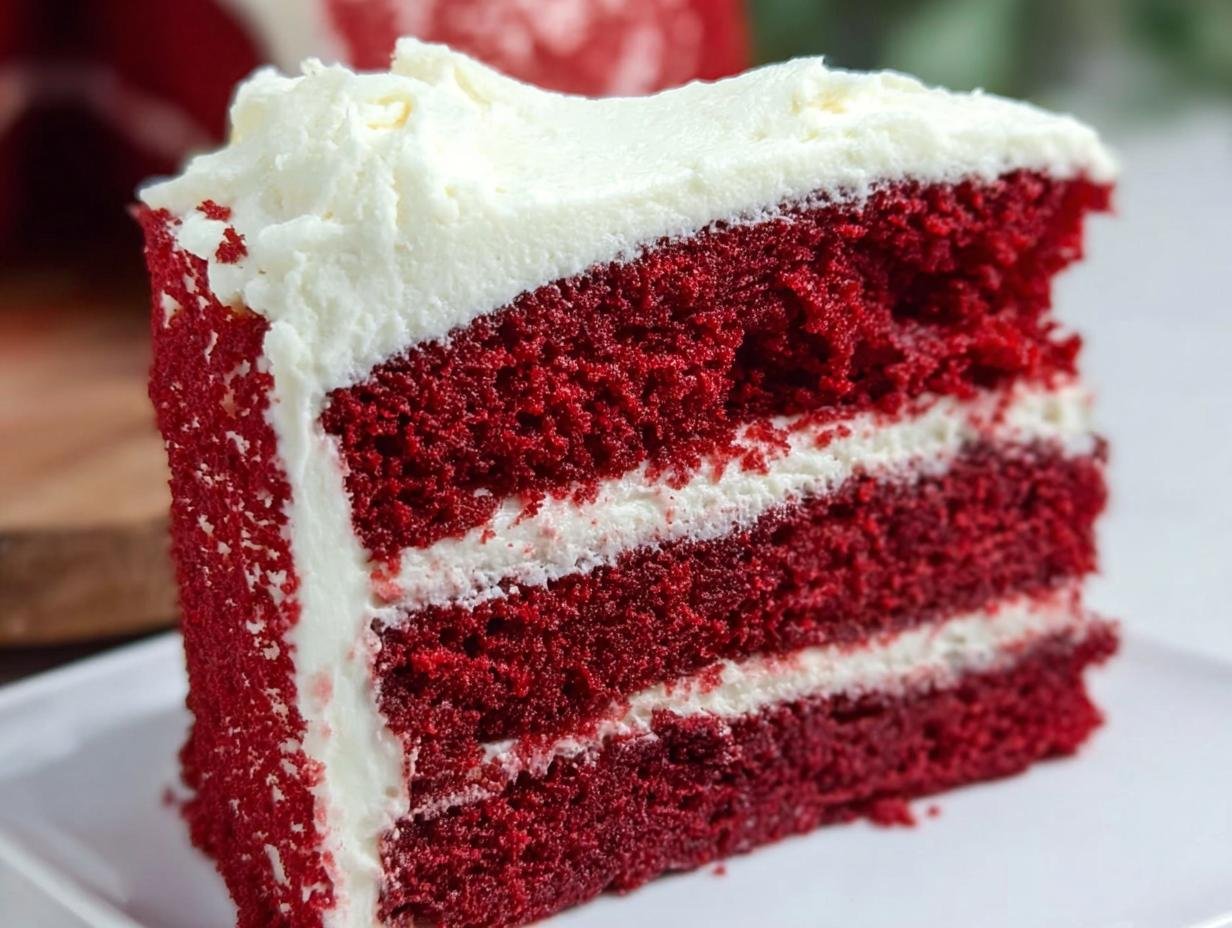
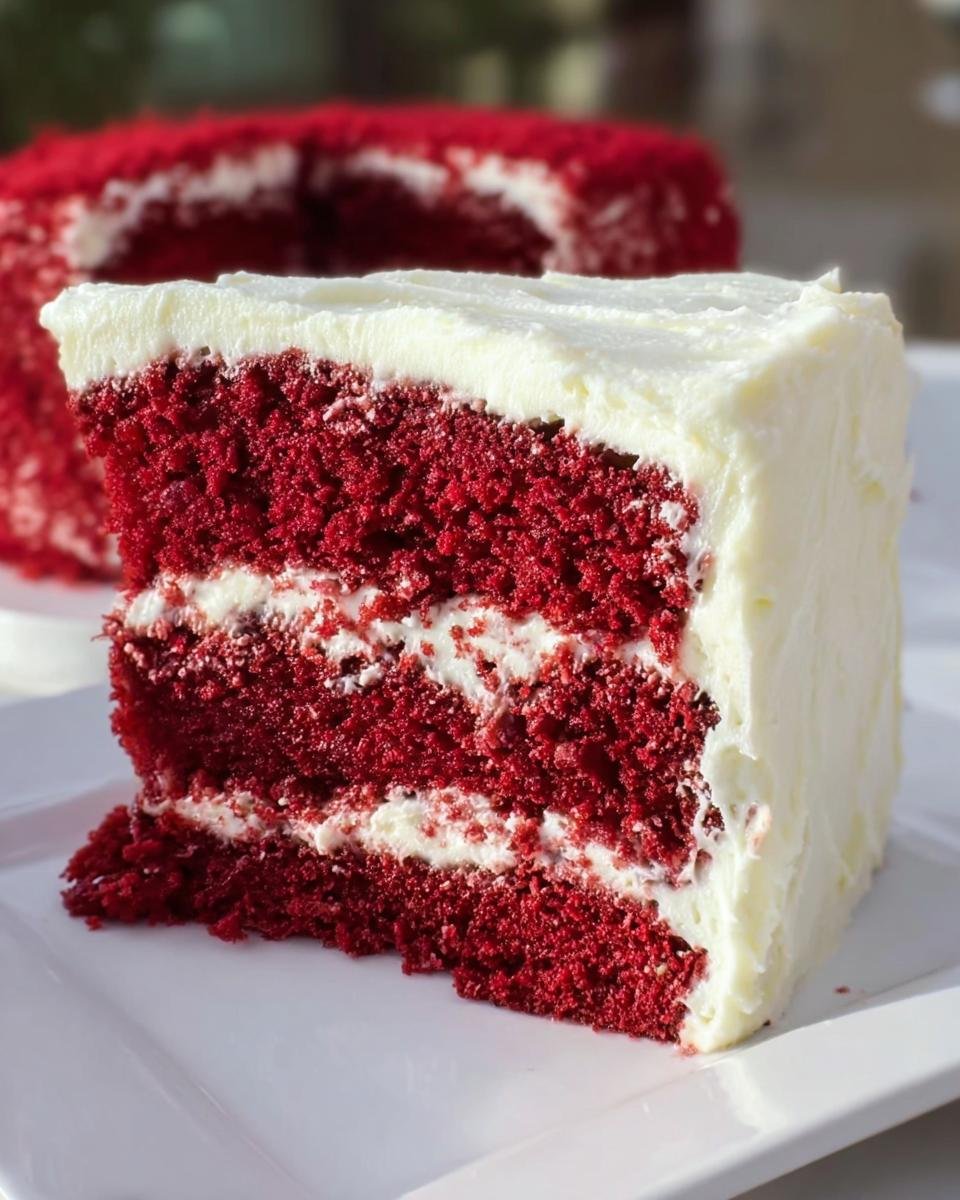
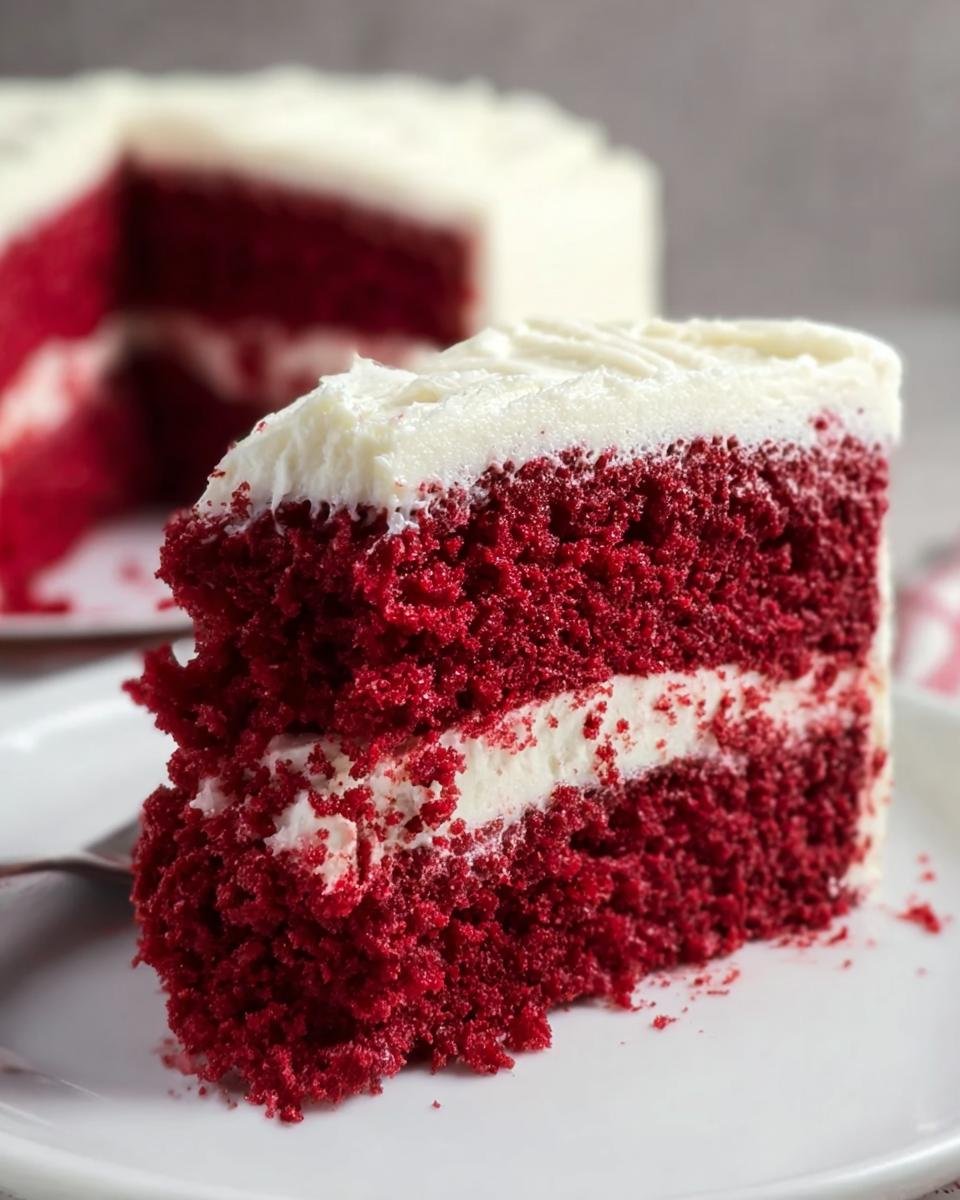
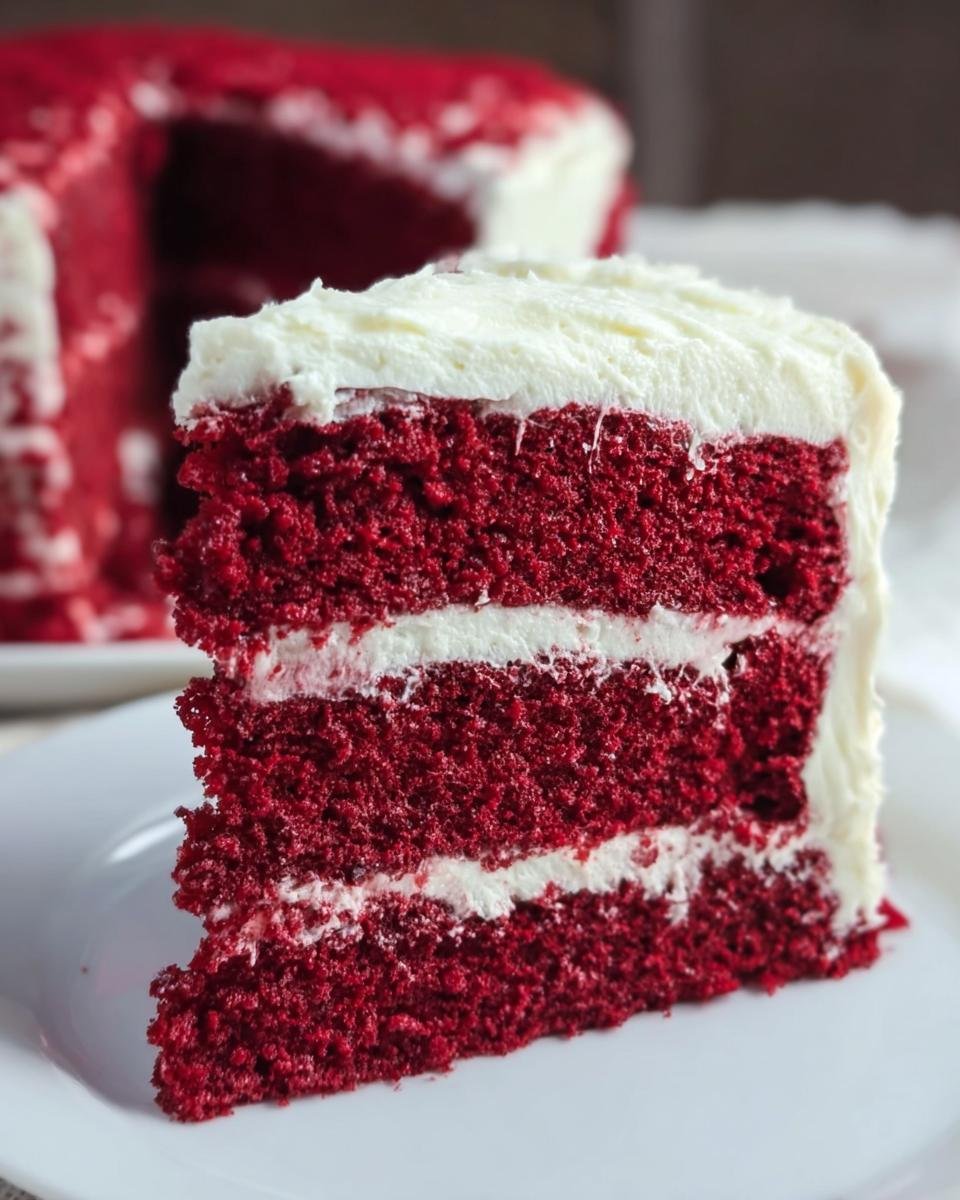
There’s something truly nostalgic and comforting about a classic dessert, isn’t there? Those deep flavors and beautiful layers scream celebration and tradition. I totally get why everyone loves striking a balance between that gorgeous presentation and actually being able to bake it successfully at home. When I first tackled my own Red Velvet Cake with Cream Cheese Frosting, I remember hovering by the oven, terrified the color wouldn’t pop or the crumb would be dry. But wow, when I finally sliced into that stunning red and white contrast, it felt magical!
That moment solidified why I bake: turning simple ingredients into something that brings people together. I promise you, this recipe takes away all the guesswork. I’ve refined the technique so you can achieve that bakery-quality look and unbelievably moist texture without any kitchen drama. Trust me, this is the version of Red Velvet Cake with Cream Cheese Frosting you’ll be using for every birthday from now on!
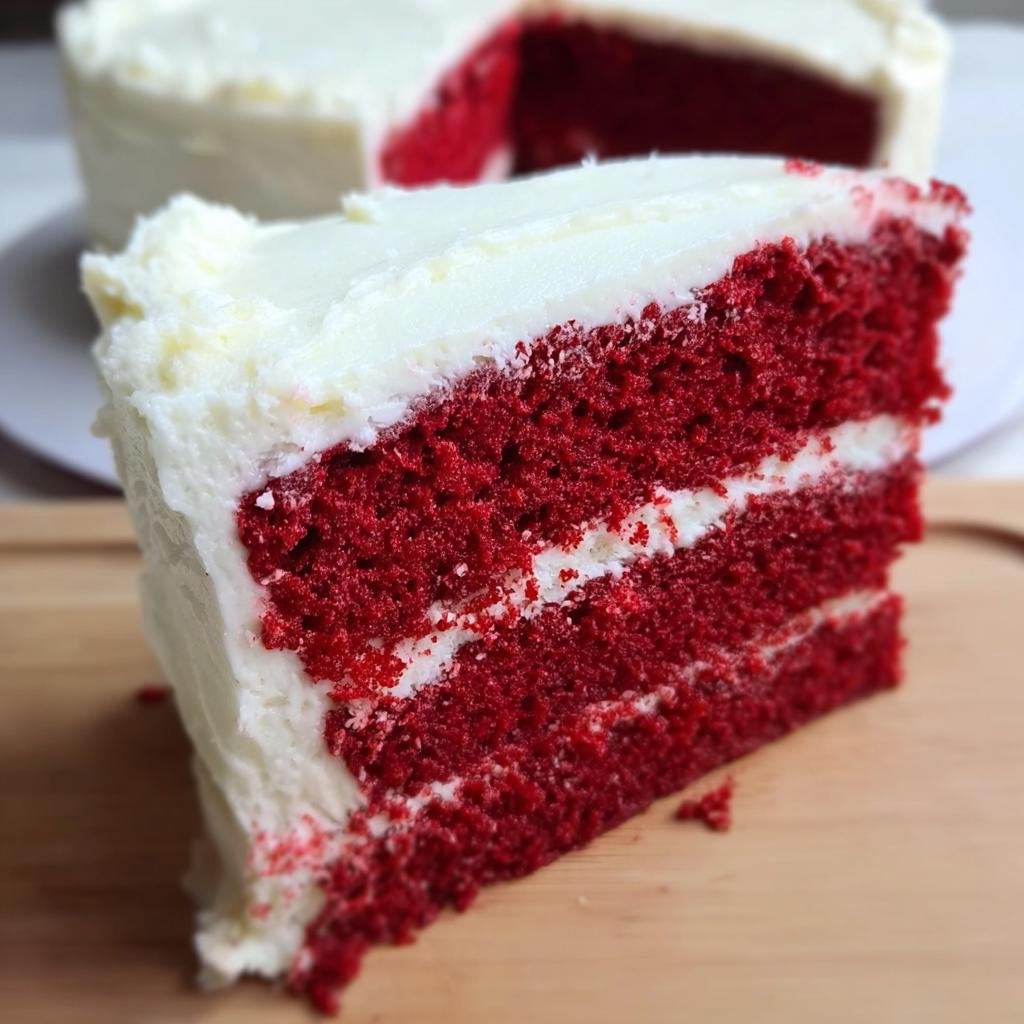
Why This Red Velvet Cake with Cream Cheese Frosting Recipe Works
I know what you might be thinking: “Red Velvet is tricky!” Not this one. We’ve cracked the code to make this classic showstopper completely manageable for your weeknight dessert goals. It’s all about the texture and that irresistible tang.
- It’s surprisingly straightforward, making it perfect for your first classic layer cake attempt.
- The resulting crumb is unbelievably moist, never cakey or dry—hello, oil base!
- We nail that signature subtle cocoa flavor that balances perfectly with the rich frosting.
Baking Tips for Perfect Cake Layers
Okay, if you want that picture-perfect Red Velvet Cake with Cream Cheese Frosting, you have to listen to the science behind the color and crumb. Don’t worry if you only have basic equipment; intuition beats the fancy mixer sometimes!
First off, never skip the hot coffee. I know, I know, it sounds crazy in a cake! But that hot liquid blooms the cocoa powder and helps dissolve the sugar, creating a deeper flavor and a richer red base. It activates the baking soda beautifully.
Secondly, remember the buttermilk and vinegar are your friends! That acid reacts with the cocoa and baking soda to give you the rise you need and that essential slight tang. Lastly, when combining the wet and dry ingredients, mix only until you just don’t see flour streaks anymore. Overmixing this thin batter is the fastest way to end up with tough layers, and nobody wants that!
Gathering Ingredients for Your Red Velvet Cake with Cream Cheese Frosting
Before we even think about mixing, we need to talk about what you need to pull this off. Getting your ingredients ready, or mise en place as the fancy bakers say, is half the battle won! You’ll notice the cake batter is pretty straightforward, relying on pantry staples, but the liquids and color are key. Remember, this list covers the cake itself—you’ll need to whip up the frosting separately!
I found a fantastic resource for stocking your pantry if you need some inspiration for future baking adventures over at Homemade Goodness Recipes.
For the Red Velvet Cake Batter
These are the essentials to get that beautiful, slightly tangy base. It seems like a lot, but once you organize it, it comes together fast!
- 2 cups all-purpose flour
- 1 teaspoon baking soda
- 1 teaspoon baking powder
- 1 teaspoon salt
- 2 Tablespoons unsweetened cocoa powder
- 2 cups sugar
- 1 cup vegetable oil or canola
- 2 eggs
- 1 cup buttermilk
- 2 teaspoons vanilla extract
- 1 oz red food coloring (Use more or less depending on desired color depth!)
- 1/2 cup plain hot coffee prepared (Seriously, don’t skip this ingredient!)
- 1 teaspoon white distilled vinegar
For the Cream Cheese Frosting
This frosting is non-negotiable for a true Red Velvet. The most important rule here is to let your butter and cream cheese sit out! They have to be room temperature, or you end up with lumps, and that totally ruins the smooth texture we’re aiming for.
- 8 oz cream cheese, softened
- 1/2 cup unsalted butter, softened
- 3 to 4 cups powdered sugar (sifted!)
- 1 teaspoon vanilla extract
- A splash of milk or heavy cream (only if needed for thinning)
Step-by-Step Instructions for the Red Velvet Cake with Cream Cheese Frosting
Now for the fun part! Look, I’ve found that when you follow the instructions for this cake exactly, you end up with levels that stack beautifully and don’t crumble when you even look at them funny. Since you already have your ingredients ready to go, we can move quickly through the process. If you’re looking for some faster kitchen tools to make life easier, check out these tips on Quick Low-Carb Recipes for inspiration—though this cake isn’t low-carb, the efficiency tips apply!
Preparing the Cake Pans and Oven
First things first, we need to get that oven warmed up to 325 F. Don’t try to cheat and crank it higher; Red Velvet likes a gentle heat!
Next, grab your two 9-inch round cake pans. You have to be generous here! Grease them really well with butter or shortening, and then dust them thoroughly with flour. Make sure the flour gets into every nook and cranny—a sticky layer is the bane of cake layers everywhere!
Mixing the Red Velvet Cake Batter
Grab your medium bowl for the dry stuff. Whisk together the flour, baking soda, baking powder, salt, and the cocoa powder. Just whisk it until it looks uniform.
In your big bowl, cream the sugar and the oil together. Then, introduce the eggs, buttermilk, vanilla, and that vibrant red food coloring. When you mix in the color, really go for it! That’s where the magic hue comes from. Finally, stir in the hot coffee and the vinegar. This wet mixture will be very colorful and thin—don’t panic!
Slowly combine the wet and dry mixtures, adding the dry ingredients in batches. Mix only until they disappear into the batter. I mean it, stop mixing! The batter will look super thin, almost soupy, and that’s exactly how it should be for this recipe.
Baking and Cooling the Layers
Divide that thin batter evenly between your two prepared pans. Pop them into the middle rack of that preheated oven.
They should bake for about 30 to 40 minutes. You need to test them with a toothpick—you want moist crumbs clinging to it, not wet batter. If it comes out totally clean, you’ve gone too far! Let them cool in the pans until they are just warm to the touch. When handling warm Red Velvet, you have to be gentle because they are incredibly delicate at this stage!
Making the Cream Cheese Frosting
While those cakes are cooling, let’s tackle the frosting. Make sure your softened cream cheese and butter are truly soft—no hard edges allowed!
Beat the butter and cream cheese together until they are totally smooth and look almost fluffy. Then, start adding the powdered sugar, one cup at a time, beating well after each addition. Add your vanilla. Keep beating until it’s light and airy. If it feels too stiff, add just a tiny splash of milk until it spreads perfectly.
Assembling Your Red Velvet Cake with Cream Cheese Frosting
Once the cake layers are completely cool—and I mean completely cool, or the frosting will melt right off—it’s time to stack! This step is pure satisfaction.
Place one cooled layer on your serving plate. If you want extra stability, you can add a very light layer of frosting first (that’s the crumb coat secret!). Then, spread a generous layer of cream cheese frosting on top of the first layer.
Carefully place the second layer on top. Use the rest of your gorgeous cream cheese frosting to cover the top and sides. Slather it on! This amazing Red Velvet Cake with Cream Cheese Frosting is best served slightly chilled but let it sit on the counter for about 30 minutes before slicing into that beautiful party cake!
Ingredient Notes and Substitutions for Red Velvet Cake with Cream Cheese Frosting
Look, I know not everyone keeps buttermilk chilling in the fridge just waiting for a cake emergency. Don’t sweat it! If you don’t have buttermilk, you can fake it easily. Just take your regular milk—about a cup—and stir in one teaspoon of white vinegar or lemon juice. Let it sit for about five minutes until it curdles slightly. That’s your homemade buttermilk!
And we talked about the coffee, but let me reiterate: The hot coffee isn’t for flavor, it’s for blooming that cocoa! If you absolutely cannot handle coffee in your kitchen, you can use hot water instead, but you might lose a little bit of that deep color saturation. For more tips on using fresh, natural ingredients in your baking, check out my thoughts on Natural Fresh Recipes.
Frosting Alternatives
While the tang of cream cheese frosting is the only thing that truly belongs on a classic Red Velvet, I get it; sometimes you just don’t have the right ingredients or you’re trying to avoid the dairy slightly. If you must substitute, a really good quality vanilla buttercream works in a pinch. It won’t have that necessary sharpness to cut through the cake’s richness, but it’s still delicious!
For a lighter option—maybe for a summer party—you could try a stabilized whipped cream piped on top. You just have to be very careful with temperature control, as it won’t hold up as long as the cream cheese version. But seriously, try the cream cheese first; it’s worth it for this party cake!
Storage and Serving Suggestions for Red Velvet Cake with Cream Cheese Frosting
Because this beauty is covered in cream cheese frosting, storage is super important! You definitely need to keep your finished Red Velvet Cake with Cream Cheese Frosting tucked away in the refrigerator, covered tightly. It usually stays pristine tasting for about three or four days this way.
If you’re planning ahead, the unfrosted cake layers freeze wonderfully! Just wrap them tight in plastic wrap. When you’re ready to serve, let them thaw slightly, then whip up your frosting.
For serving, keep the cake chilled until about an hour before you cut it. A slice of this rich cake pairs perfectly with a strong cup of coffee or maybe even one of my favorite warm drinks, like a Chai Tea Latte. A few fresh raspberries on the plate make the red color pop even more!
Troubleshooting Common Red Velvet Cake with Cream Cheese Frosting Issues
Even when we follow the recipe perfectly, sometimes baking throws us a little curveball! Don’t toss that cake batter just yet. Most issues with a wonderful Red Velvet Cake with Cream Cheese Frosting are super easy fixes, and usually come down to temperature or timing.
Did your cake layers sink slightly in the middle? That usually means one of two things: either your oven temperature was running a little hot, or you stopped mixing the batter too soon. If the dry flour isn’t quite incorporated, the structure won’t hold when it tries to rise. Give it another gentle fold!
Now, if you find that gorgeous cream cheese frosting is just turning into a puddle when you try to spread it, I bet your butter or cream cheese was too warm or even slightly melted. That makes the emulsion break. Pop the whole bowl into the fridge for about 15 minutes—just until it firms up slightly—then give it a quick whip again. It should come right back together!
Frequently Asked Questions About Red Velvet Cake
If you still have questions swirling after reading through my tips, don’t worry a bit! We all start somewhere, and sometimes getting the details just right makes the difference between a good cake and an amazing one. Here are some things I hear all the time about making this classic dessert at home.
For more general inspiration on making things easy but still wholesome, you should definitely take a look at my posts categorized under Easy Healthy Recipes.
Can I make this Red Velvet Cake with Cream Cheese Frosting ahead of time?
Absolutely! That’s one of the best parts of making a layer cake. The unfrosted cake layers are actually better if you wrap them up tightly and let them rest in the fridge overnight—it helps them hold together when you frost. However, once the cake is fully assembled with the cream cheese frosting, you’ll want to keep it refrigerated. For the best flavor and texture, pull the finished Red Velvet Cake with Cream Cheese Frosting out about an hour before serving so it isn’t rock hard from the fridge!
How do I achieve that classic deep red color?
This is crucial! You honestly cannot use the weak liquid food coloring you buy in the little plastic bottles—it just disappears against the cocoa. You need a high-quality gel food coloring, like the kind used by bakers. Add it gradually when mixing your wet ingredients until you hit a rich, vibrant hue. Remember, the cocoa powder does mute the color slightly, so aim for a color that looks *almost too bright* before baking. Trust me, you want that deep, classic color!
Is this considered an easy cake recipe from scratch?
That’s a great question about these Cake Recipes easy from scratch! It’s definitely approachable, but I wouldn’t classify it as ‘dump cake’ easy. Because we are working with a very thin batter and relying on an oil base instead of creaming butter for structure, it requires a little more precision in mixing—especially not overmixing! If you follow the steps in order, though, you’ll find that creating this gorgeous, classic layer cake is totally manageable for a dedicated home baker like you!
Estimated Nutritional Information
Now, listen up because I have to give you the standard disclaimer here: as much as I try to perfectly measure every little dash of sugar and oil, this is a scratch recipe, and ingredients vary wildly! If you use full-fat cream cheese versus reduced fat, or if you use different brands of oil, those numbers will shift. What I’m sharing here is a good ballpark estimate for one slice, assuming you use the full amount of frosting on the 12 servings.
If we are being honest, this is a rich, celebratory dessert—we are not trying to trim calories here! But it’s good to know where you stand. For more insights on balancing treats with daily eating, you can always check out my nutrition-focused posts over at Diet & Nutrition.
Here is a rough guide for one slice (1/12th of the cake):
- Estimated Calories: 550-650 per slice
- Total Fat: Around 30g
- Carbohydrates: Approximately 70g
- Protein: About 5g

Remember, this number increases if you manage to make your layers extra tall or if you decide to use a thicker layer of cream cheese frosting—which, honestly, I fully support! Enjoy the indulgence!
Share Your Red Velvet Cake with Cream Cheese Frosting Creations
Okay, my baker friend, the oven is clean, the frosting is done, and your gorgeous cake is ready! Now, this is the part where I turn it over to you. I truly want to see your results!
Please, please, please come back here after your party or family dinner and let me know how it went. Did the layers stack up perfectly? Was the cream cheese frosting perfectly tangy? Leave a rating—five stars is always appreciated, but I want to hear the real scoop!
- Rate this recipe out of five stars right here on the page!
- Drop a comment below telling me what looked great or if you made any tweaks to your Red Velvet Cake with Cream Cheese Frosting.
- Snap a photo of your finished layers—I live for seeing those beautiful red slices! Tag us if you post online. You can learn a bit more about me and my vision for sharing these recipes over at About Me.
Baking should always feel like a shared experience, not just a solitary task!
Red Velvet Cake with Cream Cheese Frosting
Ingredients
Equipment
Method
- Preheat your oven to 325 F.
- Generously grease and flour two 9-inch round cake pans. Set them aside.
- In a medium bowl, whisk together the flour, baking soda, baking powder, cocoa powder, and salt. Set this mixture aside.
- In a large bowl, combine the sugar and vegetable oil.
- Mix in the eggs, buttermilk, vanilla, and red food coloring until everything is combined.
- Stir in the hot coffee and white vinegar.
- Combine the wet ingredients with the dry ingredients a little at a time, mixing after each addition, just until combined. The batter will be thin.
- Pour the batter evenly into each prepared pan.
- Bake on the middle rack for 30 to 40 minutes, or until a toothpick inserted in the center comes out with moist crumbs clinging to it. Do not overbake the cake.
- Let the pans cool on a cooling rack until they are warm to the touch.
- Slide a knife or offset spatula around the inside of the pans to loosen the cake from the pan.
- Gently remove the cakes from the pan and let them finish cooling. The warm cake will be very delicate.
- Frost the cake with cream cheese frosting when the cakes have cooled completely.