
Birthdays are just… pure magic, aren’t they? That moment when the lights dim, the candles flicker, and everyone bursts into song – it’s one of my absolute favorite things ever! And what’s a birthday without a show-stopping cake? I still remember the most incredible unicorn cake I had when I turned eight. It was this towering, pastel masterpiece that literally took my breath away! That’s exactly why I’m obsessed with creating Whimsical Birthday Cake Ideas to Make Any Party Magical! Trust me, a truly whimsical cake doesn’t just taste amazing; it transforms a regular party into an unforgettable celebration. It’s the centerpiece, the wow-factor, the thing everyone talks about long after the confetti settles!
Why This Whimsical Birthday Cake Recipe is Pure Magic
So, you’re wondering what makes *this* whimsical birthday cake recipe so darn special? Honestly, it’s the perfect blend of straightforward baking and pure, unadulterated fun! It’s not overly complicated, which is a HUGE plus when you’re already juggling party plans. You get a wonderfully moist and tender cake that tastes as good as it looks, bursting with classic vanilla flavor that everyone adores. But the real magic? That comes from the way you can customize the frosting colors and decorations. It’s your blank canvas for creating a true showstopper that promises to make any birthday party absolutely magical!
Key Features of Our Whimsical Birthday Cake
- Vibrant, Customizable Colors: Loads of fun with the gel food coloring – you can make it *exactly* how you imagine!
- Moist and Tender Crumb: It’s just perfectly baked, not too dense, not too light, simply delightful.
- Fun Decorating Possibilities: With sprinkles and glitter galore, the sky’s the limit for creativity!
- Surprisingly Easy: Even if you’re not a pro baker, this recipe is super forgiving and forgiving.
Gather Your Ingredients for Magical Whimsical Birthday Cake Ideas
Alright, let’s get everything ready to whip up this magical cake! You’ll want to gather these goodies so we can get baking. Think of it as gathering your spell components for a truly fun bake-off!
For the Cake:
- 2 cups all-purpose flour
- 1 ½ cups granulated sugar
- 1 cup unsalted butter, softened (make sure it’s nice and squishy!)
- 4 large eggs
- 1 tsp vanilla extract
- 1 cup milk
For the Frosting and Decoration:
- 1 cup unsalted butter, softened (yep, more butter, it’s worth it!)
- 4 cups powdered sugar
- 1 tsp vanilla extract
- 2 tbsp heavy cream
- Gel food coloring (various colors – this is where the real whimsical fun begins!)
- Edible glitter and assorted sprinkles (go wild with these!)
Seriously, having everything prepped makes the whole process, dare I say, *smooth*? And for that extra whimsical pop, the gel food coloring is key – it gives you super vibrant colors without watering down your frosting. And the sprinkles? Oh, the sprinkles!
Ingredient Notes and Substitutions
Don’t you worry if you’re missing something or need a little tweak! For the milk, you can totally use buttermilk for an even more tender cake, or even a plain dairy-free milk like almond or oat if you need to. If you’re out of gel food coloring, liquid coloring *can* work, but you’ll need a bit more, and it might make your frosting a little runnier. For sprinkles, honestly, use whatever makes your heart sing! Jimmies, nonpareils, stars, you name it – they all add to the magical charm. And for the butter, make sure it’s properly softened, not melted! It makes a huge difference in how fluffy your cake and frosting turn out.
Step-by-Step Guide to Creating Whimsical Birthday Cake Magic
Alright, let’s roll up our sleeves and get this magical cake party started! Making this whimsical wonder is easier than you think, and I promise, the results are totally worth it. Just follow along, and you’ll be creating a cake that looks like it floated right out of a fairy tale! For more fun cake ideas, you can always check out some other great cake recipes.
- Preheat and Prep: First things first, get that oven preheated to 350°F (that’s 175°C for my metric friends!). Grab your two 8-inch cake pans, give ’em a good grease and flour – this is super important to prevent any sticking disasters later!
- Creaming Magic: In a big ol’ mixing bowl, get that softened butter and granulated sugar together. Cream them until they’re nice and fluffy, like a little cloud. This is where the cake starts getting its lovely texture, so don’t rush it!
- Egg-cellent Addition: Now, crack in your eggs one at a time. Mix well after each one goes in. Then, stir in that fragrant vanilla extract. You’re building such a beautiful base here!
- The Flour and Milk Dance: In a separate bowl, give your flour a quick whisk. Now, here’s the fun part: you’re going to add the flour mixture and the milk a bit at a time, alternating between them. Start and end with the flour. Just mix until everything is *just* combined. Seriously, don’t overmix it! We want a tender cake, not a tough one.
- Bake Away!: Divide your gorgeous batter evenly between those prepped pans. Pop them into that hot oven and bake for about 30 to 35 minutes. The best way to know it’s done? Stick a toothpick right in the center – if it comes out clean, you’re golden!
- Cool Down: Let those beautiful cakes hang out in the pans for about 10 minutes. Then, carefully flip them onto a wire rack to cool completely. Patience here is key – never frost a warm cake, it’ll just melt into a sticky mess!
- Frosting Fiesta: While the cakes cool, let’s make the frosting! Beat your softened butter until it’s super smooth. Then, gradually add the powdered sugar, mixing on low speed at first so you don’t create a sugar snowstorm in your kitchen! Once it’s all incorporated, add the vanilla and heavy cream. Now, crank that mixer up and beat it until it’s light, fluffy, and oh-so-spreadable.
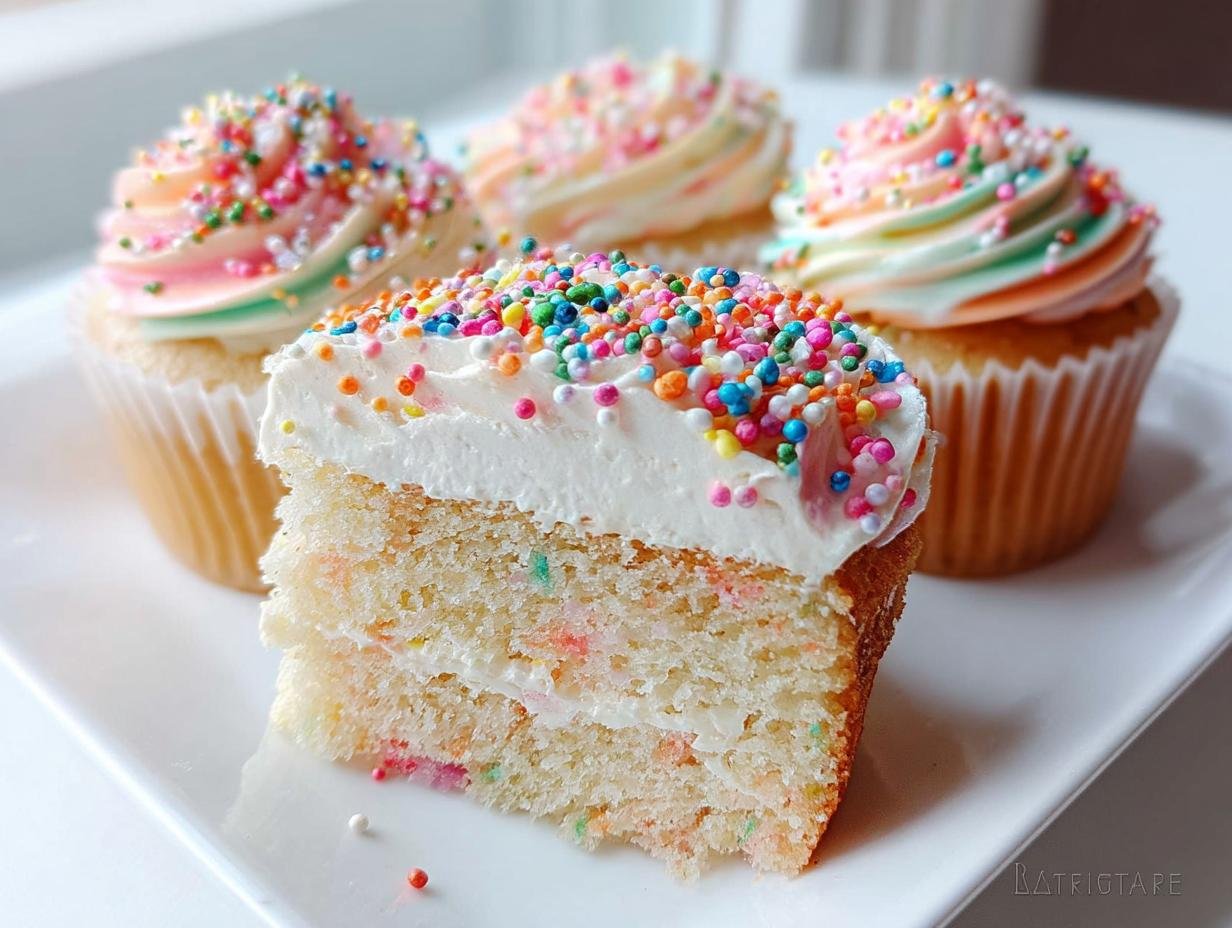
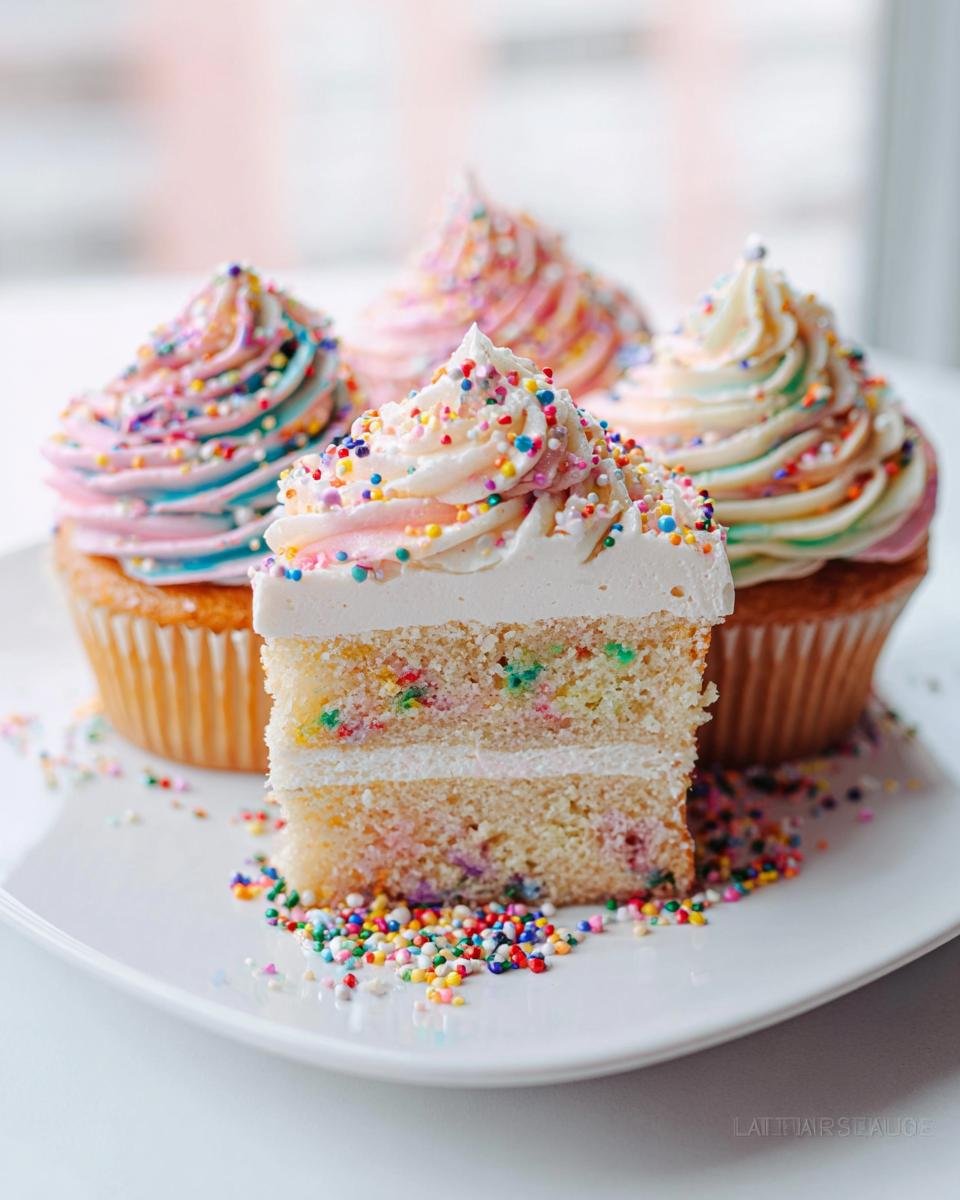
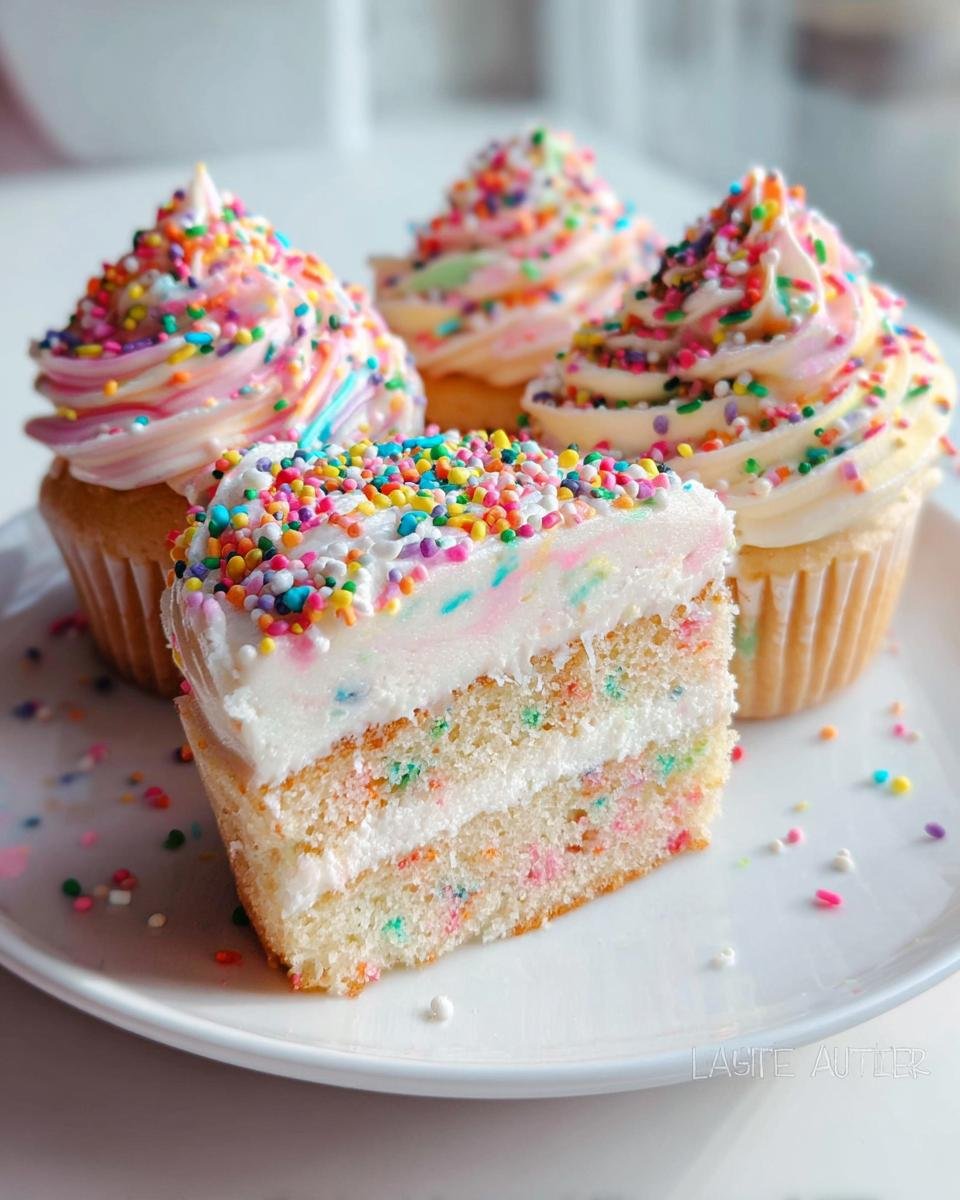
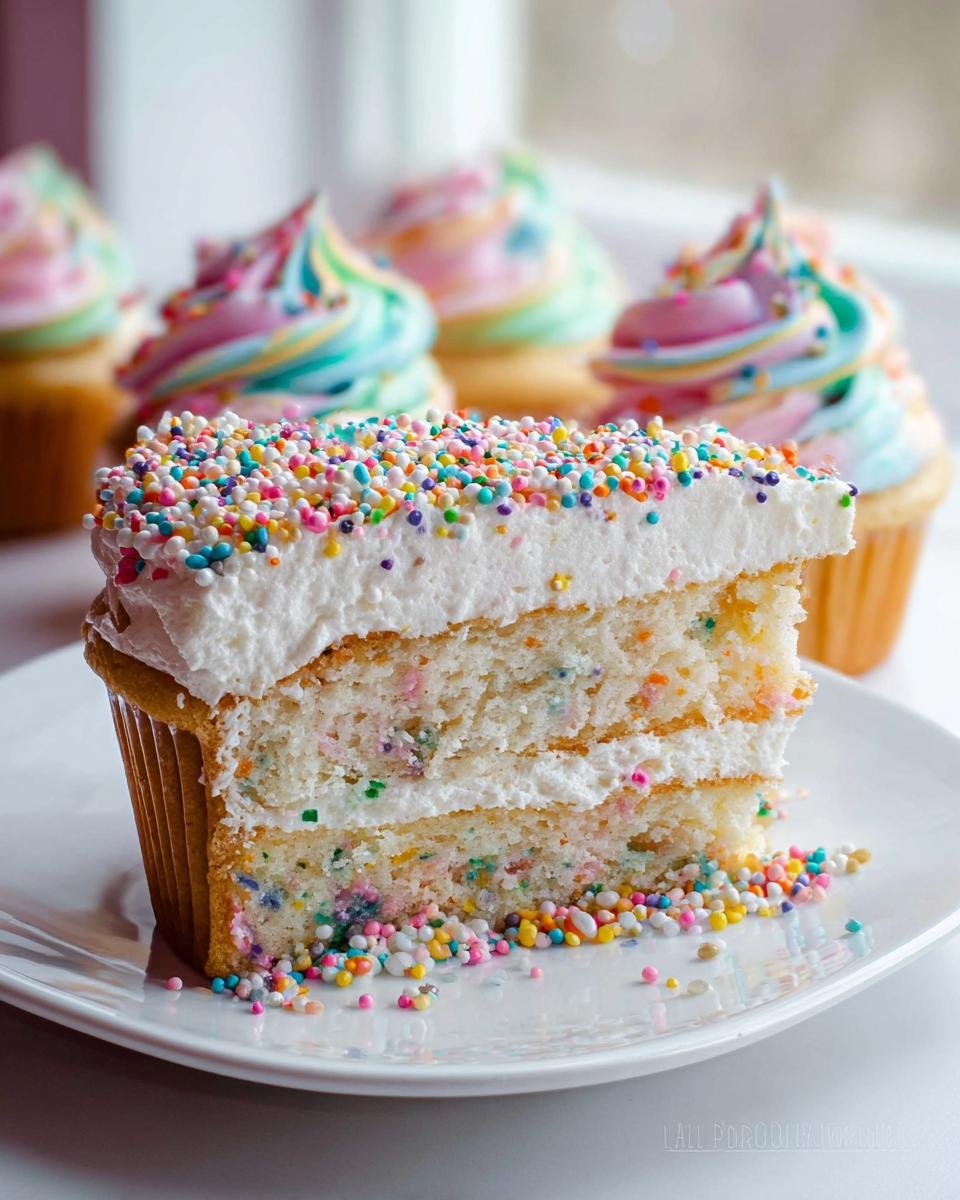
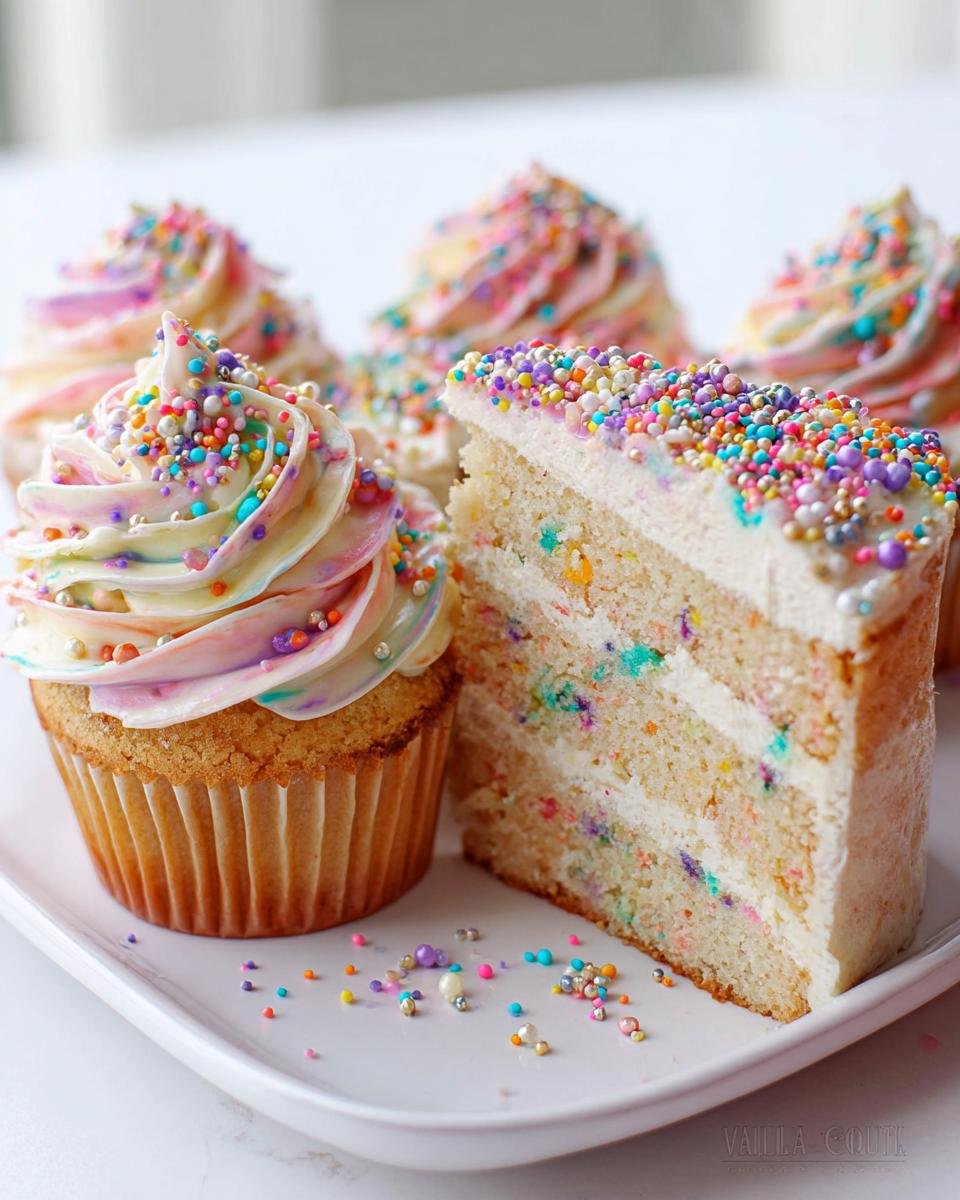
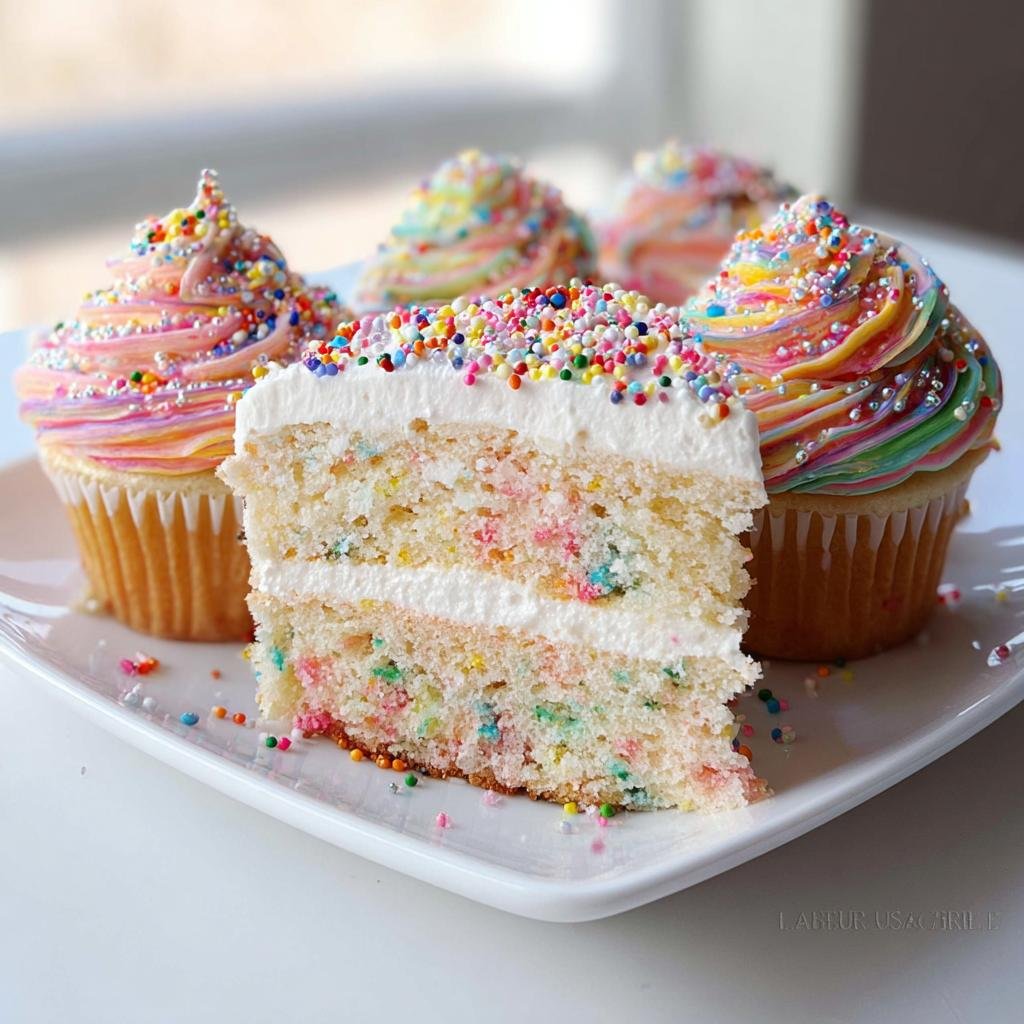
- Color Explosion!: This is where the real whimsy happens! Divide your frosting into a few smaller bowls. Add a different gel food coloring to each bowl and stir until you get those vibrant, magical colors. Remember, gel colors are super concentrated, so start with a little and add more until you’re happy!
- Layer Up: Once your cakes are totally cool, place one layer on your serving plate. Spread a generous amount of frosting on top – feel free to pick a favorite color here, or even swirl a couple together! Then, carefully place the second cake layer on top.
- Decorate Like Nobody’s Watching!: Now for the grand finale! Frost the entire cake with your colorful frosting. You can swirl the colors in as you go for a marbled effect, or layer them for stripes. Get creative! And before the frosting sets, shower that cake with edible glitter and all those fun assorted sprinkles. Make it sparkle and shine!
Tips for Perfect Cake Baking
Want your cake to be absolutely perfect every single time? A few little tricks really help! Make sure your oven temperature is accurate – an oven thermometer is a lifesaver here. And for those pans, even if you’ve greased and flour, a little parchment paper circle at the bottom of each pan gives extra insurance against sticking. That golden-brown color and when a toothpick comes out clean are your best signs it’s ready. Don’t be afraid to let it cool completely; a warm cake is a crumbly disaster waiting to happen!
Achieving Vibrant Frosting Colors
The secret to those super bright, whimsical colors is definitely gel food coloring. It packs a punch without adding extra liquid to your frosting, which could make it too thin. To get a marbled effect, just spoon dollops of different colored frostings onto the cake and then use an offset spatula to gently swirl them together. For striped patterns, you can pipe bands of color side-by-side around the cake. Don’t be afraid to experiment and mix colors – that’s the fun of it!
Decorating Your Whimsical Birthday Cake
Okay, now for my absolute favorite part – the decorating! This is where your cake really comes alive and says, “Wowza, this is a party!” Remember those beautiful, vibrant frosting colors we made? It’s time to let them dance on your cake! I love to just grab dollops of different colors and slather them on however feels right. Sometimes I swirl them together with a spatula to get this dreamy, marbled effect, and other times I layer them, putting a stripe of pink next to a stripe of blue. It’s all about having fun with it! Once the frosting is on, don’t be shy with the edible glitter and sprinkles! They’re like the fairy dust that makes your cake truly magical. Pile them on the top, let them cascade down the sides – the more sparkle, the better!
Creative Whimsical Birthday Cake Decoration Ideas
Want to take it up another notch? Here are a couple of super fun ideas to really make your whimsical cake sing! You could use some small cookie cutters (think stars, moons, or little hearts) to cut out shapes from a piece of rolled-out fondant and stick those onto the frosted cake for some extra dimension. Or, if you have a piping bag, try piping little stars or swirls of frosting around the edges or in between your colorful frosting blobs. It just adds another layer of texture and visual interest. Honestly, just letting your imagination run wild is the best decoration of all!
Frequently Asked Questions about Whimsical Birthday Cakes
Got questions about whipping up your own bit of birthday magic? I’ve got you covered! Making a whimsical cake should be fun, not stressful, so let’s clear up any brewing doubts.
Can I really make this cake ahead of time?
Oh, absolutely! This is one of my favorite tricks for party day. You can totally bake the cake layers a day or two in advance. Just wrap them up super tight in plastic wrap once they’re completely cool and keep them at room temperature. The frosting can also be made a day ahead and stored in an airtight container in the fridge. Just let it soften up a bit and give it a quick whip before frosting the cake. It saves so much time on the actual party day!
What are good substitutes for gel food coloring?
I love gel coloring for its intensity, but if you can’t find it or don’t have it on hand, try using liquid food coloring. Just be aware that you might need a bit more to get those vibrant shades, and it could make your frosting a little thinner. If you add too much liquid, just mix in a tablespoon or two more of powdered sugar until you get the right consistency. Natural food colorings derived from things like beet powder or spirulina can also give lovely softer hues, though they might not be as bright.
How do I store this whimsical birthday cake?
Once your beautiful cake is all frosted and decorated, it’s best to store it in an airtight container or loosely tented with plastic wrap. If your kitchen is on the cooler side, it can stay at room temperature for a day or two. For longer storage, pop it in the refrigerator. It’ll keep well for about 3-4 days. Just remember to let it warm up a bit on the counter before serving, as refrigerated cake can be a little firm.
My frosting seems too thin, what did I do wrong?
Oops! That happens sometimes. Don’t panic! If your frosting is too thin, it usually means there’s a bit too much liquid (like the milk or cream) or not quite enough powdered sugar. The easiest fix is to just whisk in more powdered sugar, about a tablespoon at a time, until it reaches that perfect fluffy, spreadable consistency. If you’ve added a lot of liquid color, you might need a bit more sugar to compensate. Give it a good whip after each addition!
Making Ahead and Storing Your Magical Creation
Okay, so you’ve got this gorgeous whimsical cake in front of you, and you want it to stay as perfect as possible, right? Or maybe you want to get a head start to make party day a breeze. That’s totally doable! You can bake the cake layers a day or two ahead of time. Just make sure they’re completely cool, then wrap them up super snug in plastic wrap. They’ll be happy chilling at room temperature. The frosting? Yep, you can make that a day in advance too! Just pop it in an airtight container in the fridge. Before you frost, let it sit out for a bit and give it a quick re-whip to get it fluffy and spreadable again. This is my secret weapon for staying calm on party days!
Estimated Nutritional Information
Alright, for those of you who like to keep track, here are some approximate nutritional values per serving of this delightful whimsical birthday cake. Of course, these numbers can change a bit depending on the exact brands you use and how generous you are with the frosting and sprinkles (go ahead, be generous!). Think of these as a fun guideline!
- Calories: Around 450-550 kcal
- Fat: Roughly 25-35g
- Carbohydrates: Approximately 50-65g
- Protein: About 4-6g
Whimsical Birthday Cake
Ingredients
Equipment
Method
- Preheat your oven to 350°F (175°C). Grease and flour two 8-inch cake pans.
- In a large bowl, cream together the butter and sugar until light and fluffy.
- Beat in the eggs one at a time, mixing well after each addition. Stir in the vanilla extract.
- In a separate bowl, whisk together the flour. Gradually add the flour mixture to the wet ingredients, alternating with the milk, beginning and ending with the flour. Mix until just combined.
- Divide the batter evenly between the prepared pans. Bake for 30 to 35 minutes, or until a toothpick inserted into the center comes out clean.
- Let the cakes cool in the pans for 10 minutes before inverting them onto a wire rack to cool completely.
- To make the frosting, beat the butter until smooth. Gradually add the powdered sugar, mixing on low speed until incorporated. Add the vanilla and heavy cream. Beat on medium-high speed until light and fluffy.
- Divide the frosting into several small bowls. Tint each portion with a different gel food coloring to achieve bright, whimsical colors.
- Once the cakes are cool, place one layer on a serving plate. Spread a layer of frosting on top. Place the second layer on top.
- Frost the entire cake with your chosen colors, swirling them together for a marbled or layered whimsical look. Decorate the top and sides generously with edible glitter and assorted sprinkles before the frosting sets.