
Oh, Halloween baking, my absolute favorite chaos! Every year, I just get *so* excited thinking about all the spooky treats we can whip up. Last year, my kitchen looked like a mad scientist’s lab, but the star of the show, hands down, were these incredible Witch Hat Cupcakes. Seriously, they’re just the cutest and surprisingly simple to pull off, even for us busy folks. They have that perfect ‘wow’ factor for any Halloween party, making everyone think you spent hours, when really, you just got smart with a few key tricks!
Why You’ll Love These Witch Hat Cupcakes
Trust me, these Witch Hat Cupcakes are a total win for so many reasons:
- Super Easy to Make: We skip the fancy stuff and focus on foolproof steps. You’ll be amazed at how quickly they come together!
- Total Halloween Showstopper: They look SO impressive with that pointy hat, but they’re actually a breeze to assemble. Perfect for parties and impressing your friends.
- Deliciously Spooky: Beyond the cute look, they taste fantastic! A moist, flavorful cupcake topped with creamy frosting – what’s not to love?
- Kid-Friendly Fun: Get the little ones involved! They’ll have a blast helping with the frosting and decorating – it’s a great activity for Halloween afternoon.
Gather Your Ingredients for Witch Hat Cupcakes
Okay, let’s get our spooky station ready! To whip up these adorable Witch Hat Cupcakes, you’ll need a mix of pantry staples and a few fun decorating bits. Don’t worry, nothing too wild here!
For the Cupcakes
- 1.5 cups all-purpose flour
- 1 cup granulated sugar
- 1 tsp baking soda
- 0.5 tsp salt
- 0.5 cup unsalted butter, softened
- 2 large eggs
- 1 tsp vanilla extract
- 1 cup buttermilk
For the Frosting and Decoration
- 1 cup unsalted butter, softened
- 3 cups powdered sugar
- 2 tbsp milk
- 1 tsp vanilla extract
- 1 drop black food coloring (just a tiny bit for that eerie black!)
- 12 ice cream cones (sugar cones or waffle cones work great!)
- 1 tube black decorating gel (totally optional, but fun for that buckle detail!)
See? Totally manageable! Having everything prepped makes the whole process feel like a breeze, and you’ll be so glad you did when you’re elbow-deep in frosting.
Essential Equipment for Making Witch Hat Cupcakes
Alright, let’s talk tools! To make these awesome Witch Hat Cupcakes, you won’t need a whole fancy bakery setup. Just grab these basics:
- A standard 12-cup muffin tin – you know, the workhorse of baking pans!
- Matching cupcake liners (any spooky colors you like!)
- A couple of good old-fashioned mixing bowls.
- A trusty whisk for dry ingredients and maybe a bit of energetic frosting mixing.
- A flexible spatula for scraping down bowls – that’s where all the flavor is!
- A piping bag and a round piping tip if you’re feeling fancy with your frosting witch hat. A knife or offset spatula works great too if you don’t have piping gear!
That’s pretty much it! Simple, right? Having these on hand makes the whole process so much smoother.
Step-by-Step Guide to Perfect Witch Hat Cupcakes
Alright, let’s get down to the fun part – making these spooky and delicious treats! I’ll walk you through it step-by-step so you get perfect Witch Hat Cupcakes every single time. Don’t worry, it’s easier than you might think!
Preparing the Cupcake Batter
First things first, preheat your oven to 350°F (175°C) and get those cupcake liners ready in your muffin tin. In one bowl, just whisk together your flour, sugar, baking soda, and salt. Easy peasy! Now, in another bowl, cream together that softened butter until it’s nice and fluffy. Beat in your eggs one by one, then stir in that little bit of vanilla extract. Here’s the trick for a tender cupcake: add your dry ingredients to the butter mixture, alternating with the buttermilk, and mix until it’s *just* combined. Seriously, don’t overmix!
Baking and Cooling Your Cupcakes
Spoon your beautiful batter into the prepared cupcake liners, filling each about two-thirds full so they have room to puff up. Pop them into that preheated oven and bake for about 20 to 25 minutes. You’ll know they’re done when a toothpick you stick in the center comes out clean. Let them hang out in the tin for a few minutes before carefully transferring them to a wire rack. They have to be *completely* cool before we even think about frosting, trust me on this!
Crafting the Perfect Frosting
While those cupcakes are doing their cooling thing, let’s make the magic black frosting! Beat your softened butter in a bowl until it’s super creamy. Then, gradually add in the powdered sugar, just a bit at a time, alternating with the milk. Keep beating until it’s smooth and fluffy. Now for the spooky part: stir in your vanilla extract and that single drop of black food coloring. Mix it all up until you get a gorgeous, deep black color. It’ll look so cool!
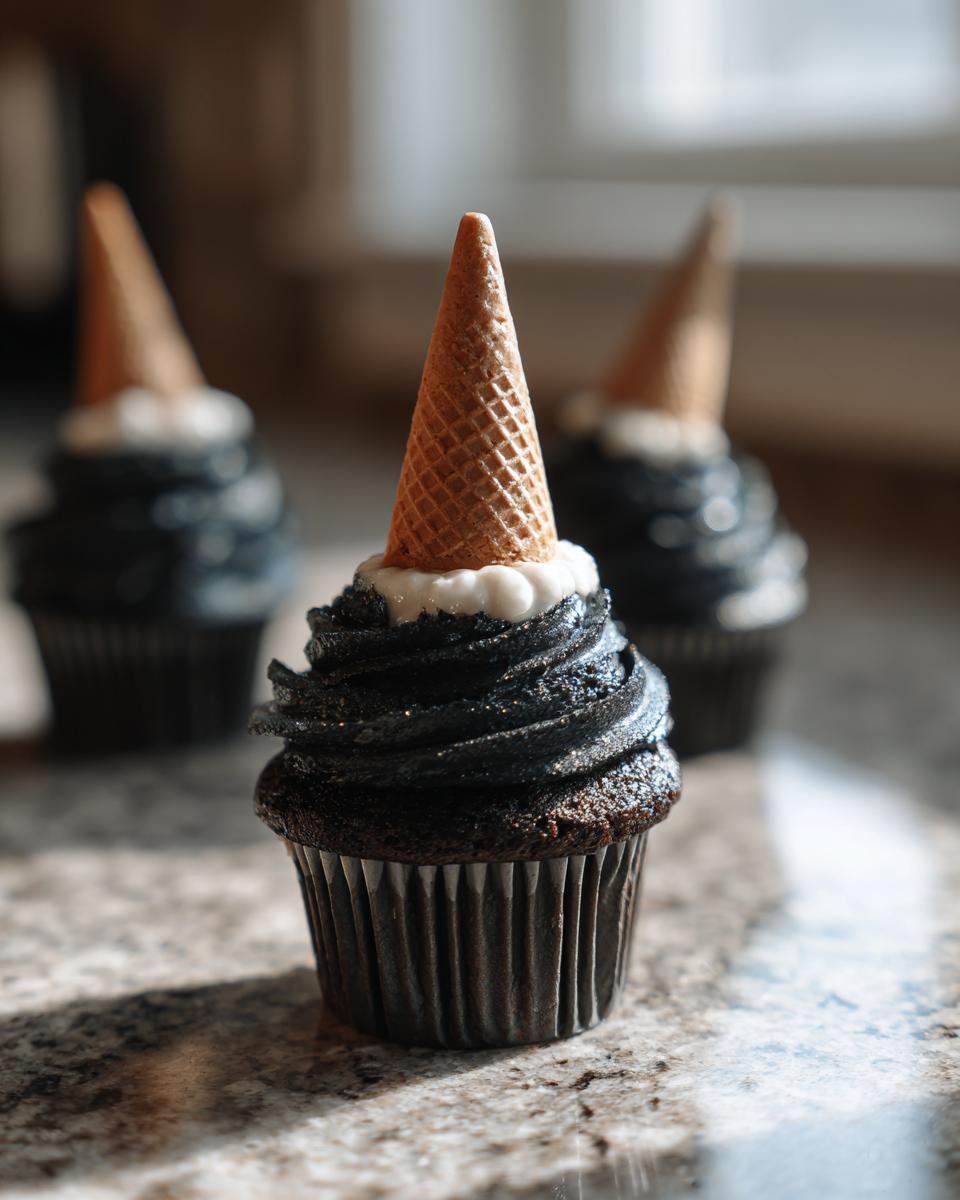
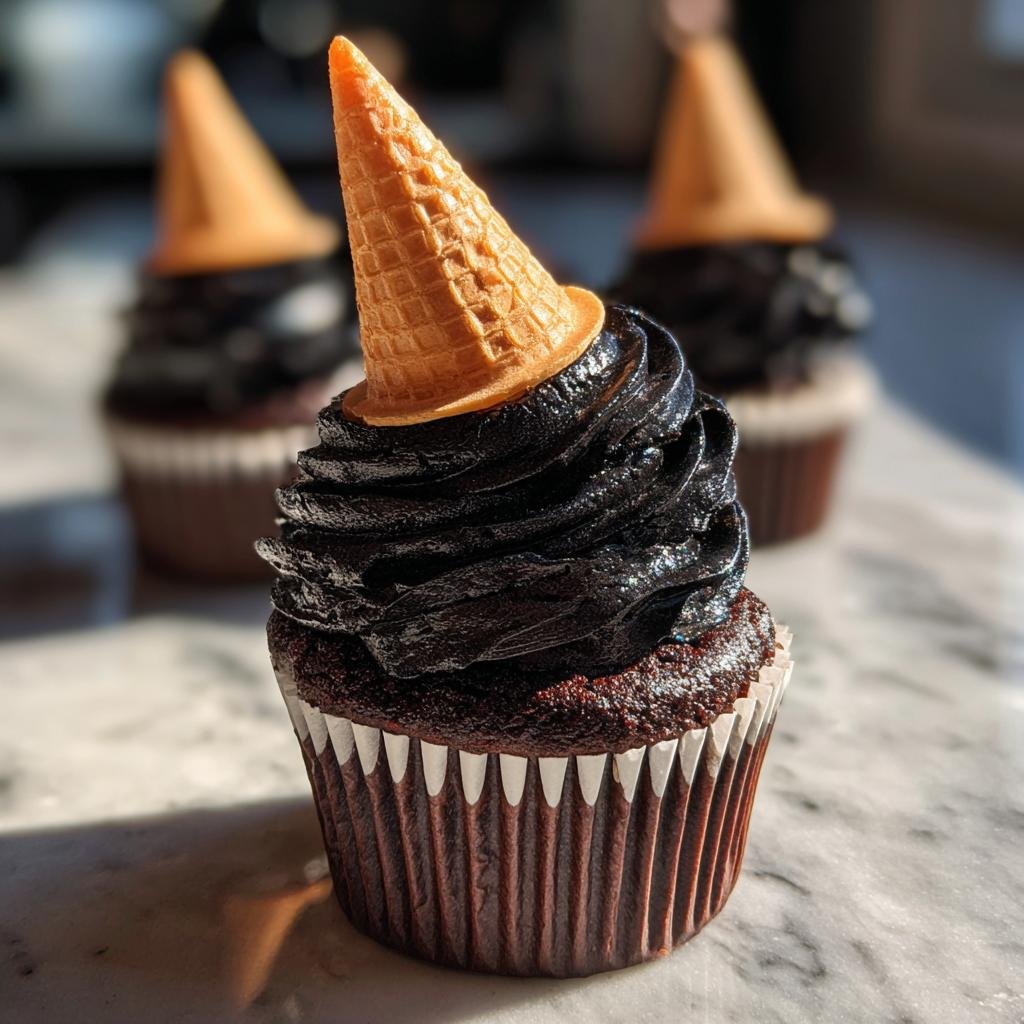
Decorating Your Witch Hat Cupcakes
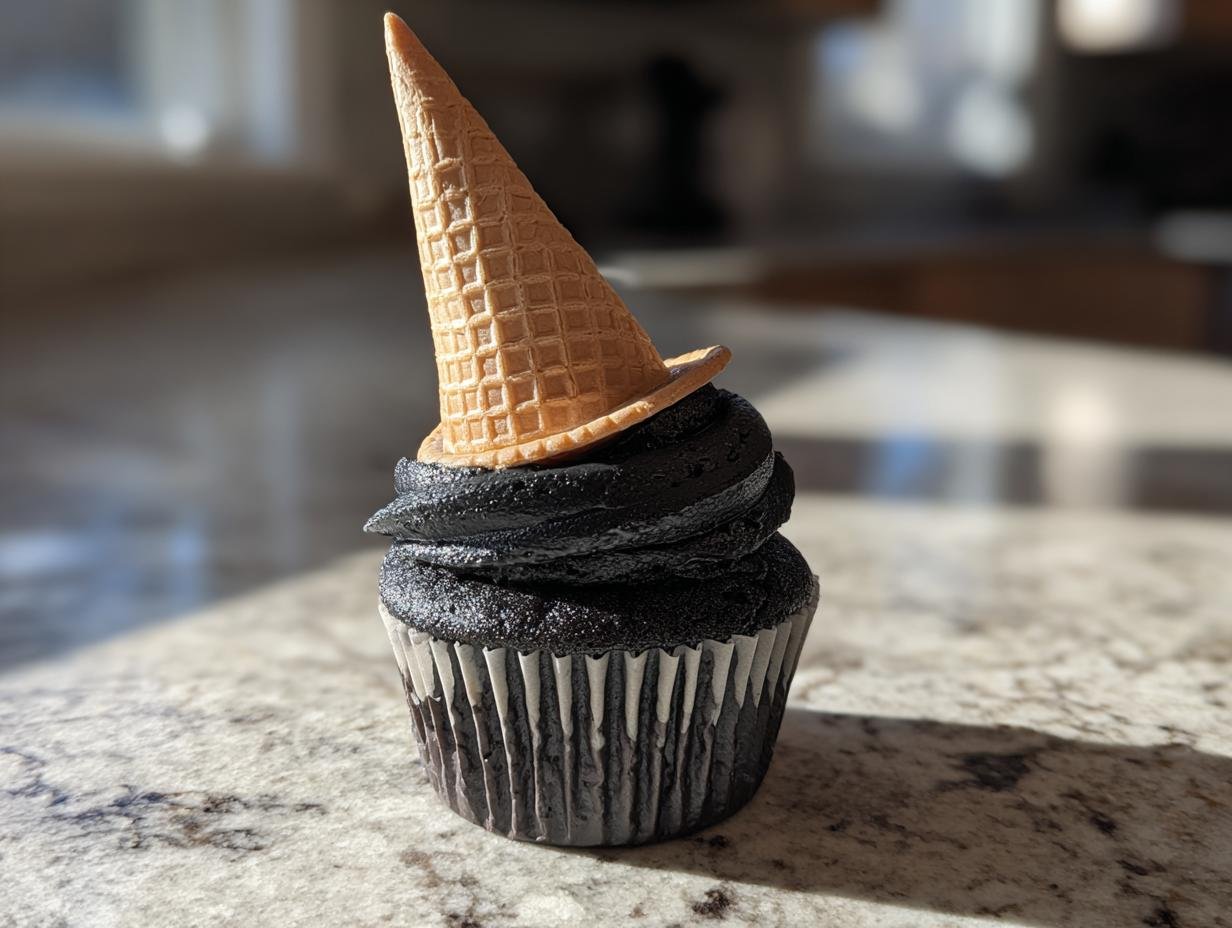
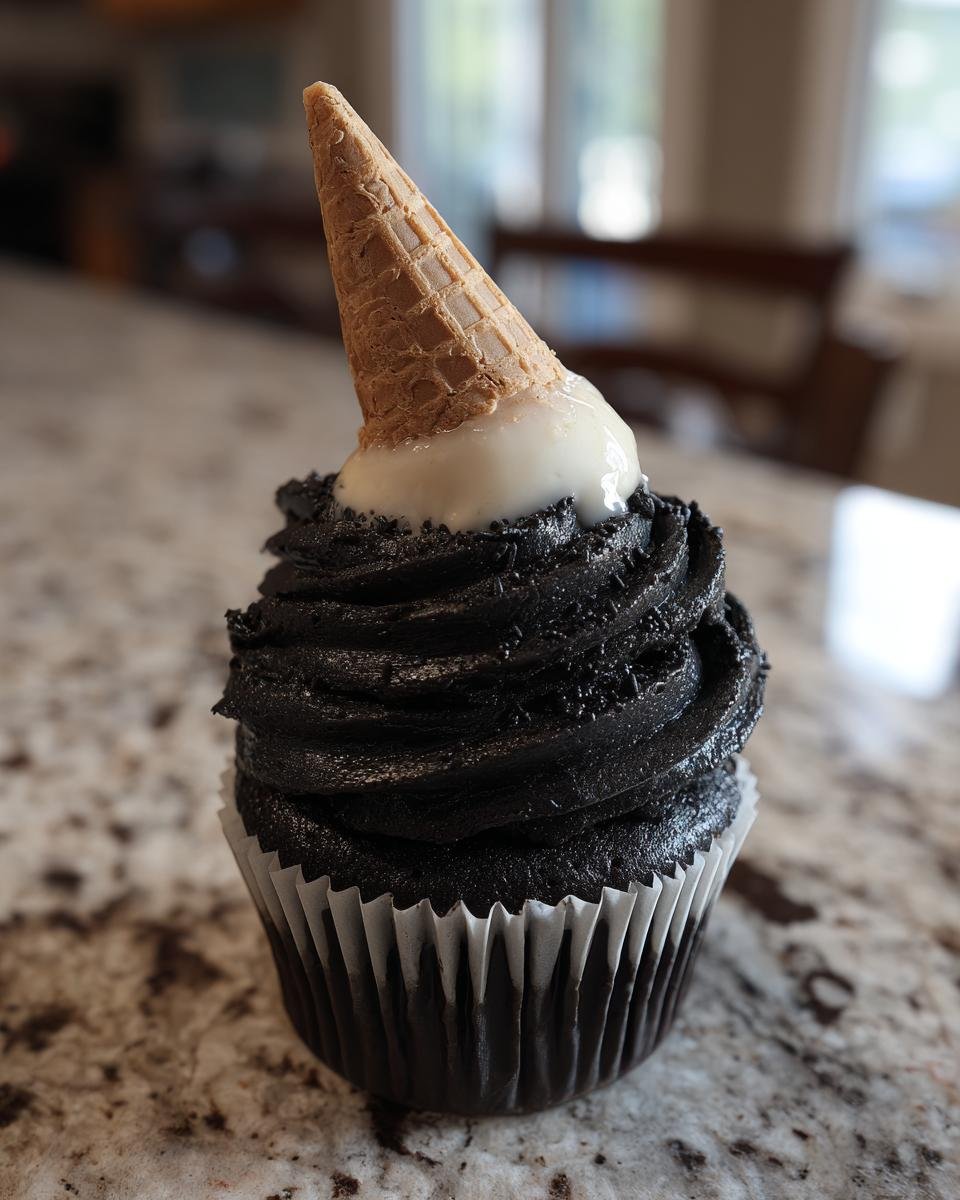
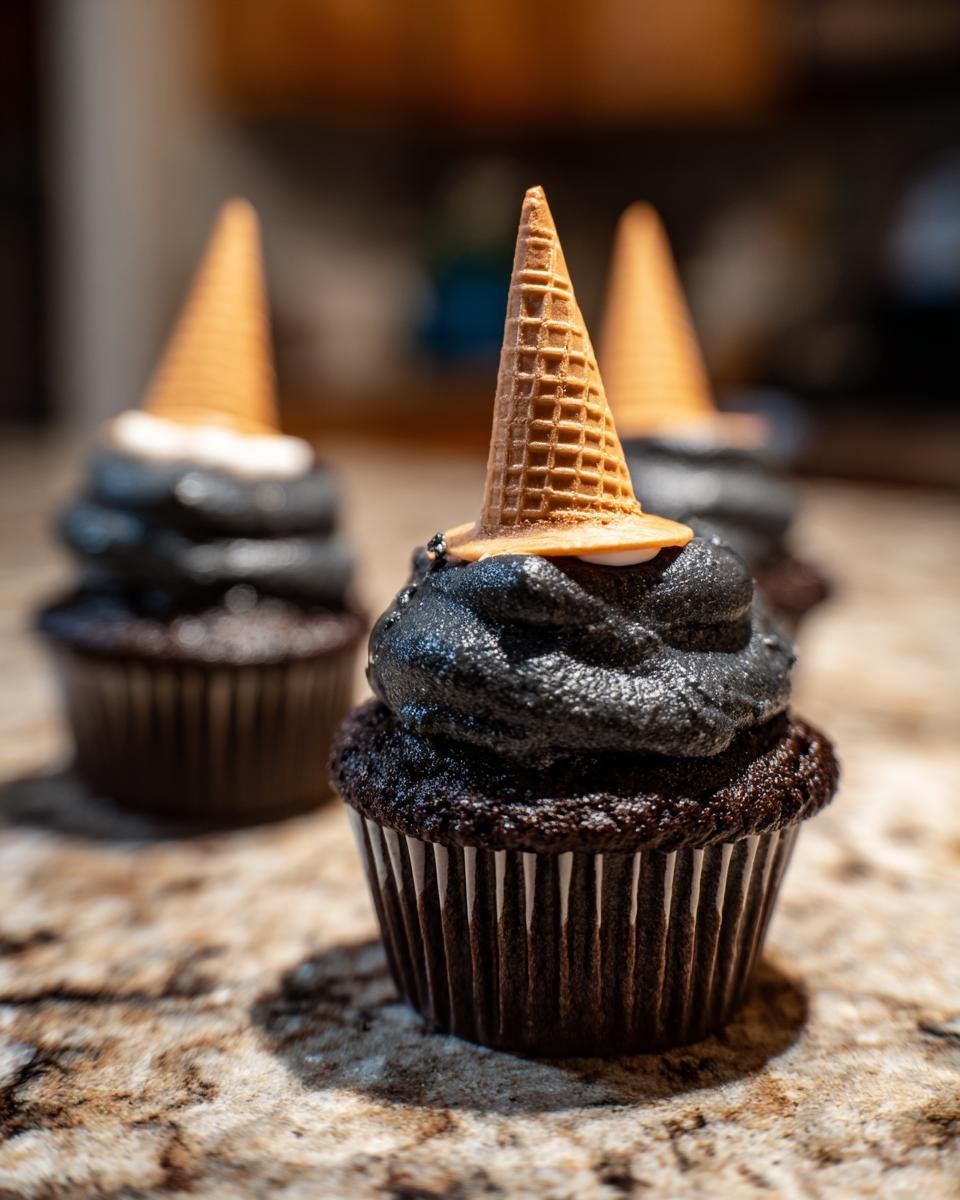
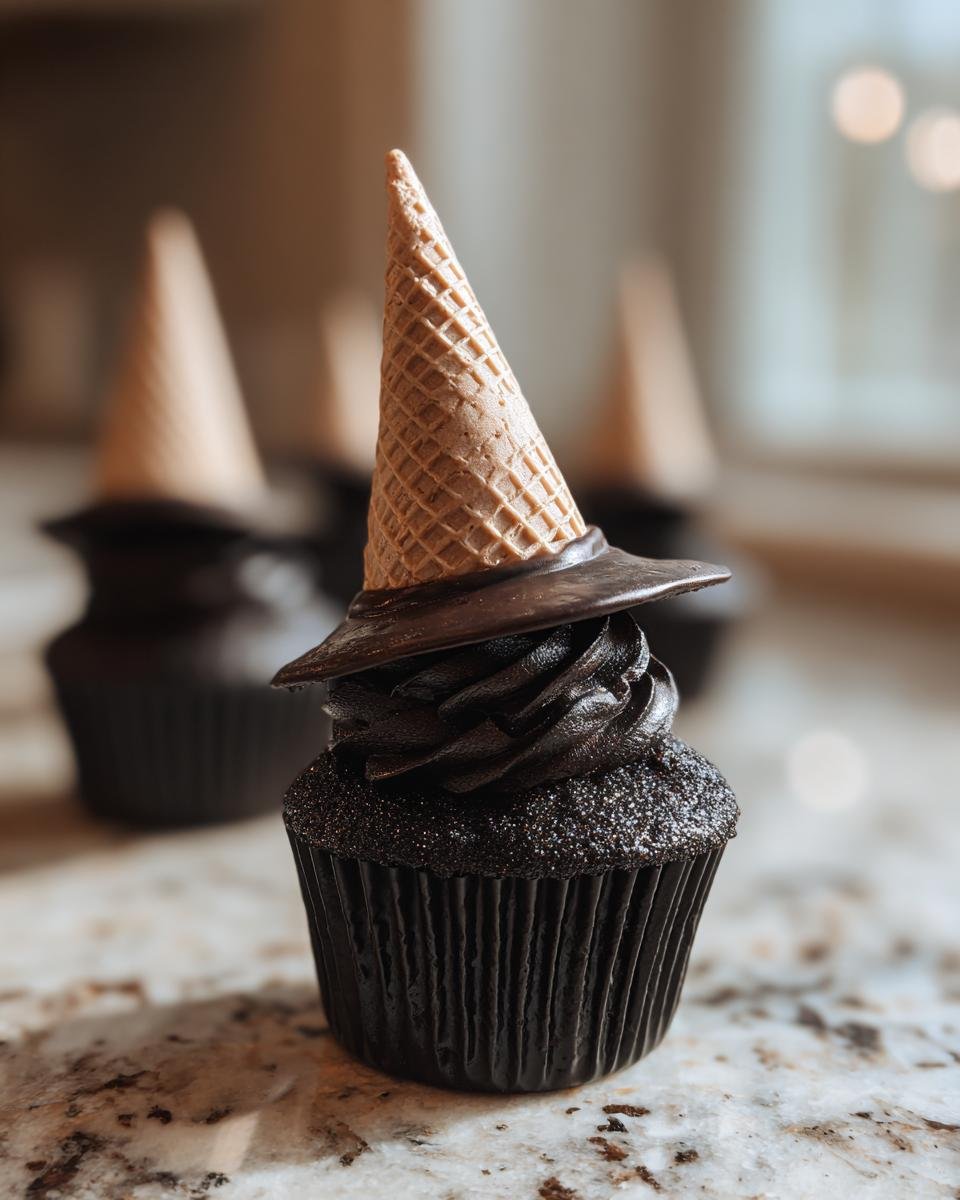
Okay, the moment of truth! Once those cupcakes are totally cool (this is important!), slather on that black frosting. You can use a piping bag with a round tip for a super smooth, professional look, or just spread it on with a spatula – whatever works for you! Now, take your ice cream cones – these are the hats! – and gently press the wide opening down into the frosting on top of each cupcake. The frosting acts like glue! For a little extra flair, use that black decorating gel to draw a tiny buckle on the side of each cone. How cute is that?!
Tips for Perfect Witch Hat Cupcakes Every Time
Alright, so you’ve got your ingredients and your game plan, but let’s chat about a few little secrets that will make your Witch Hat Cupcakes absolutely, positively perfect. These are the little things I’ve learned over the years that really make a difference!
First off, make sure your butter and eggs are at room temperature for the cupcakes. It really helps them incorporate better, giving you a lighter, fluffier cake. Trust me, cold ingredients can make for a denser batter. For the frosting, having that softened butter is key for a super creamy texture. Also, don’t go crazy with the black food coloring – a little goes a long way, and you want it black, not gray!
When you’re frosting those cooled cupcakes, don’t be afraid to pile it on just a bit – it acts like glue for the cone hats! And speaking of hats, if your cones feel a little wobbly, just press them down gently but firmly. For more Halloween treat ideas, check out some spooky Halloween party snacks!
Ingredient Notes and Substitutions for Witch Hat Cupcakes
Sometimes you just don’t have something on hand, right? For these Witch Hat Cupcakes, the buttermilk is really nice for moisture, but if you don’t have it, you can totally make your own! Just put a tablespoon of lemon juice or white vinegar in a measuring cup and fill it up with regular milk to the 1-cup line, then let it sit for about 5 minutes. Another thing – you can totally use a stand mixer to make the frosting if you’re not keen on doing it by hand!
Frequently Asked Questions About Witch Hat Cupcakes
Got questions about these spooky Witch Hat Cupcakes? I’ve got answers! Baking should be fun, not frustrating, so let’s clear up any little worries you might have.
Can I make the frosting ahead of time?
Oh, absolutely! You can totally whip up that black frosting a day or two in advance. Just store it in an airtight container in the fridge. Give it a good stir before you use it, and if it feels a bit stiff, you can always add a tiny splash more milk (like half a teaspoon!) to get it back to a perfect, spreadable consistency. Easy peasy!
What kind of ice cream cones work best for the witch hats?
You can use either sugar cones or plain waffle cones! Sugar cones are usually a bit sturdier on their own because they’re smaller and have a nice point. Waffle cones can be a little bigger and might need a bit more frosting “glue” to keep them attached. Honestly, either works great and they both look super cute!
How do I store leftover Witch Hat Cupcakes?
If you happen to have any of these beauties leftover (which I doubt!), store them in an airtight container at room temperature. They’re usually good for about 2-3 days. Because of the frosting, I wouldn’t refrigerate them for too long because they can get a little firm. Just keep them somewhere cool and dark!
Can I use different colored frosting for my cupcakes?
Of course! While black is classic for witch hats, you can totally get creative! A deep purple or even a dark green would look amazing. You might need a bit more food coloring to get those vibrant shades with frosting. Just remember to mix it well to avoid streaks! You could even add some colorful sprinkles for extra Halloween fun.
Nutritional Information Disclaimer
The nutritional details provided are only an estimate. Actual values can totally fluctuate depending on the specific ingredients, brands you use, and how much you end up serving yourself. Happy baking!
Witch Hat Cupcakes
Ingredients
Equipment
Method
- Preheat your oven to 350°F (175°C). Line a muffin tin with cupcake liners.
- In a large bowl, whisk together the flour, sugar, baking soda, and salt.
- In a separate bowl, cream together the softened butter until light and fluffy. Beat in the eggs one at a time, then stir in the vanilla extract.
- Gradually add the dry ingredients to the wet ingredients, alternating with the buttermilk. Mix until just combined. Do not overmix.
- Divide the batter evenly among the cupcake liners, filling each about two-thirds full.
- Bake for 20-25 minutes, or until a toothpick inserted into the center comes out clean.
- Let the cupcakes cool in the muffin tin for a few minutes before transferring them to a wire rack to cool completely.
- While the cupcakes cool, prepare the frosting. In a large bowl, beat the softened butter until creamy. Gradually add the powdered sugar, alternating with the milk, until smooth and fluffy. Stir in the vanilla extract and black food coloring until evenly combined.
- Once the cupcakes are completely cool, frost them generously with the black frosting. Use a piping bag with a round tip for a smooth finish, or spread with a spatula.
- Place an ice cream cone upside down on top of each frosted cupcake to create the witch’s hat. The frosting will help it stick.
- If desired, use the black decorating gel to draw a small buckle on the side of each ice cream cone for added detail.