
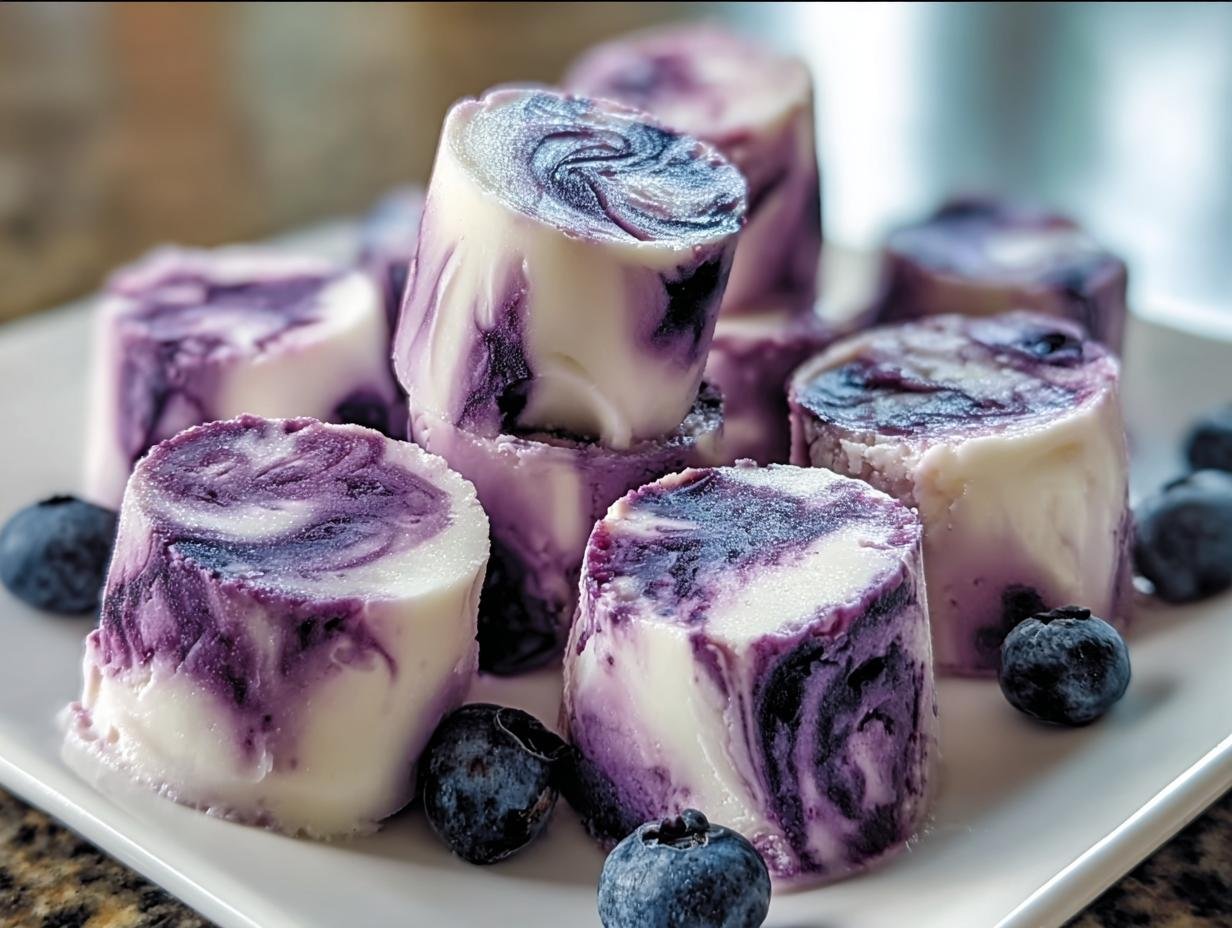
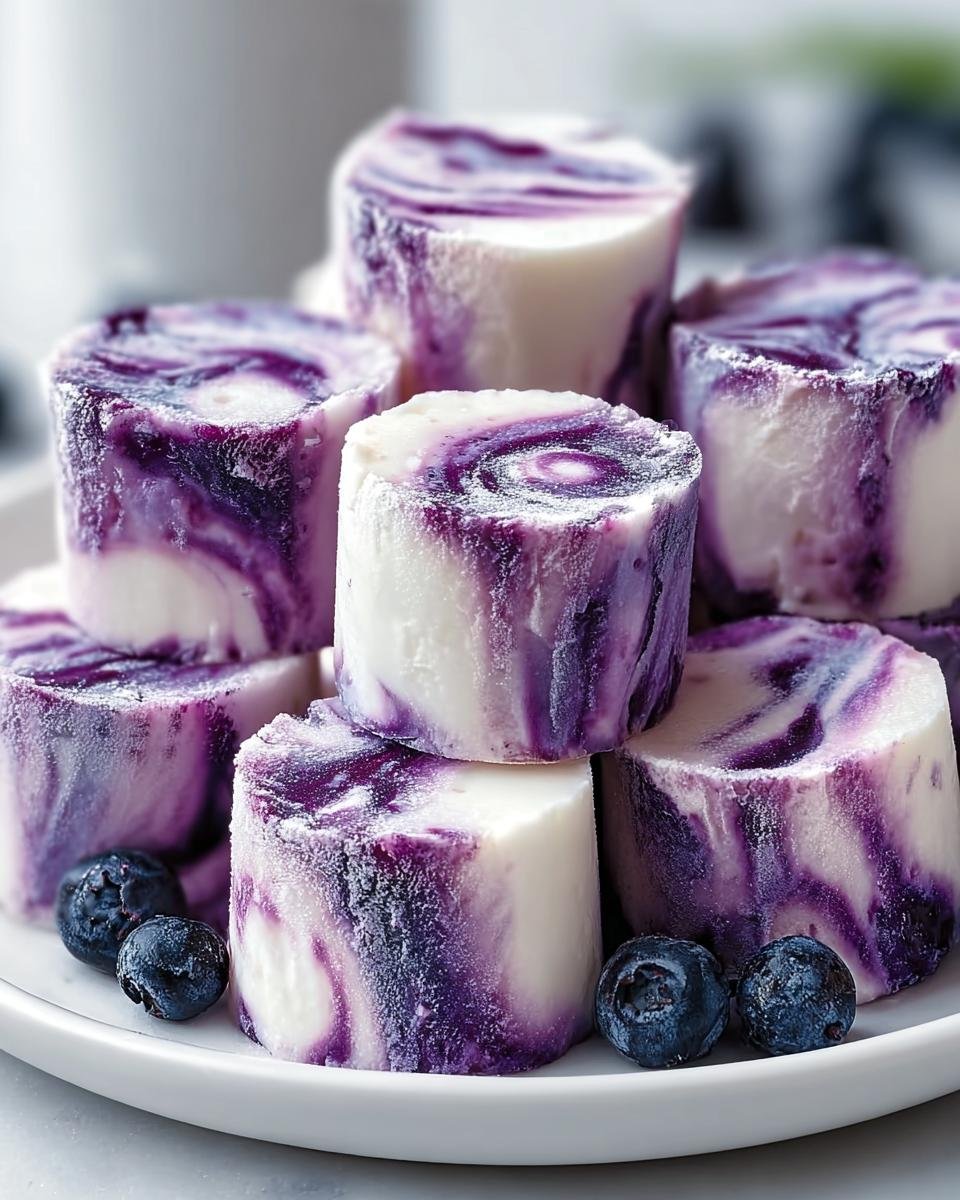
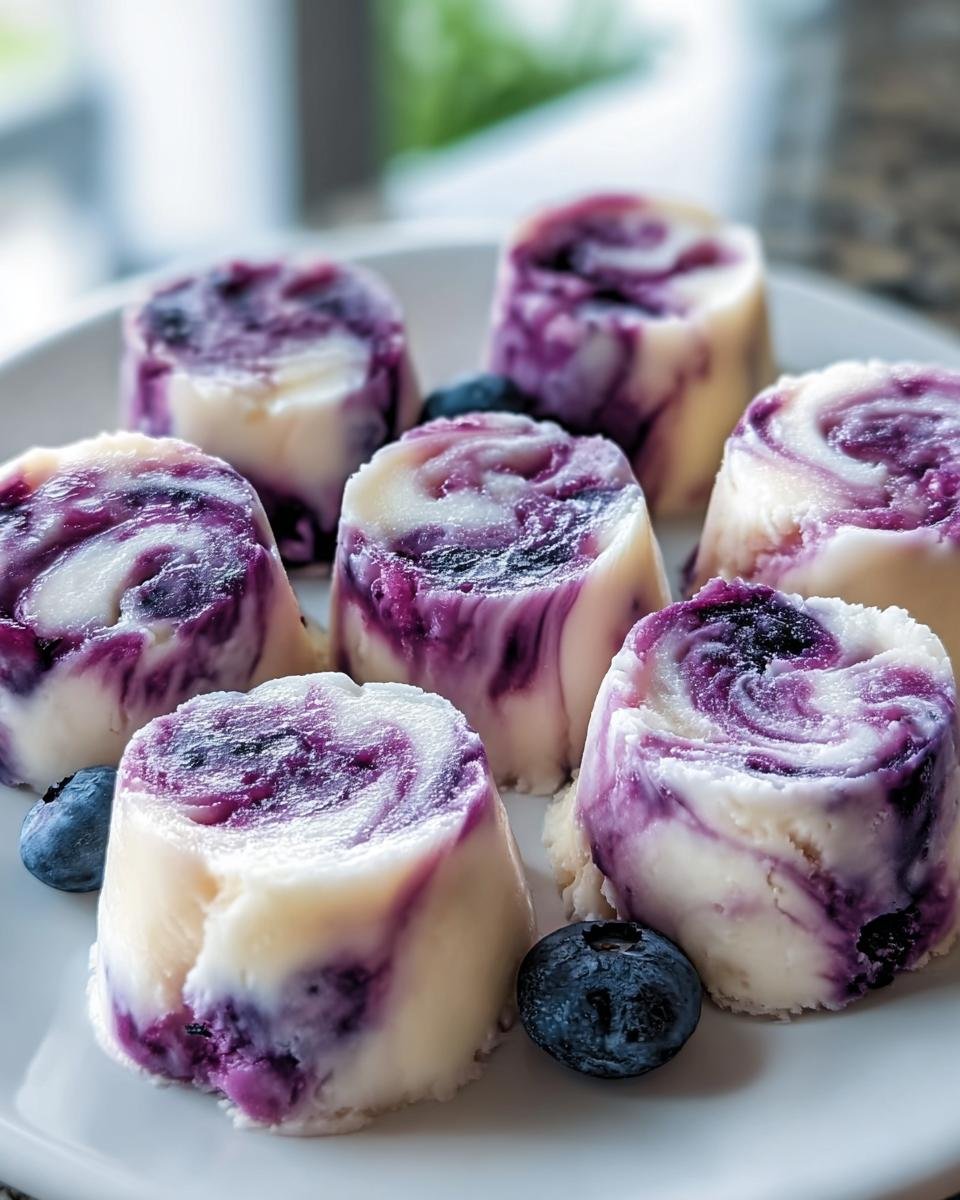
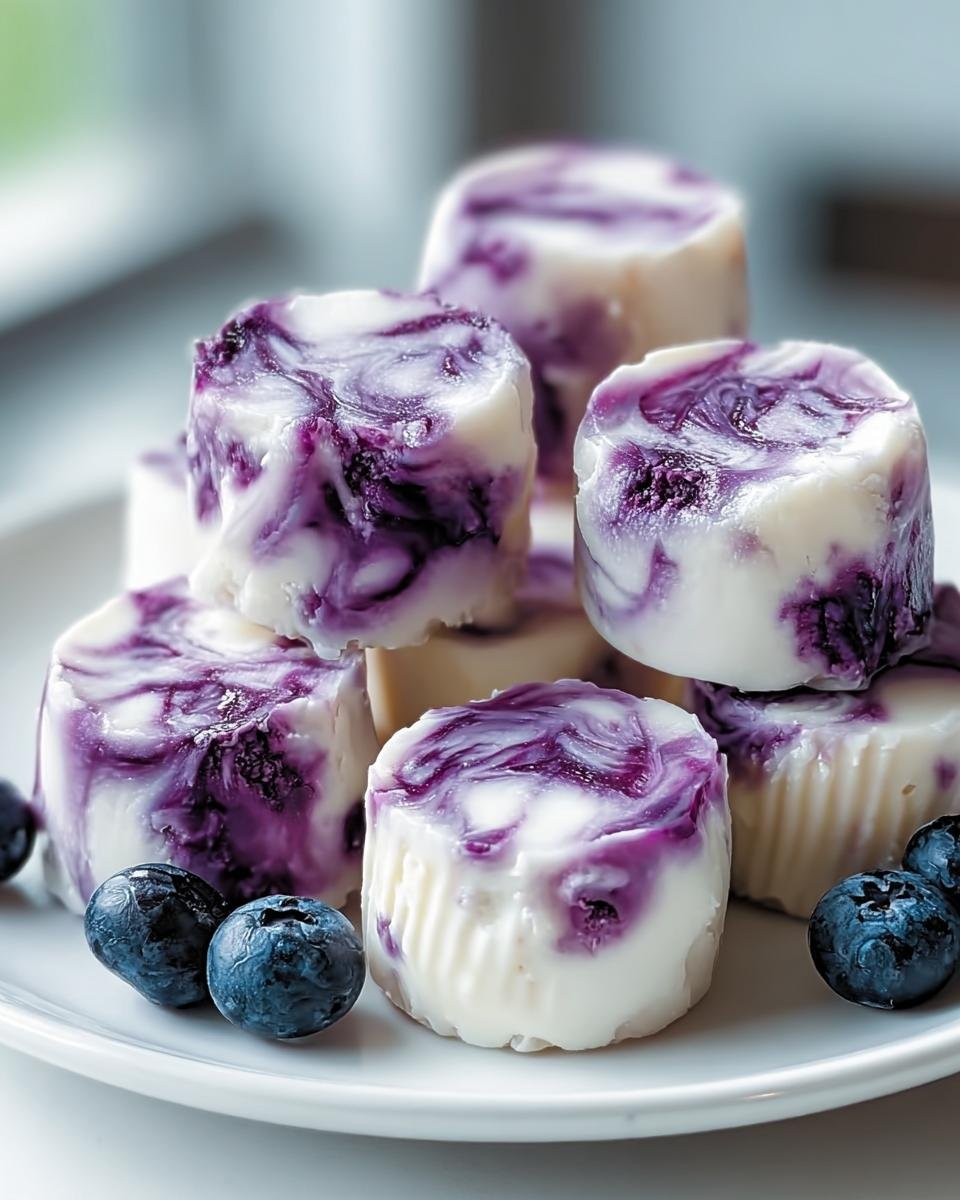
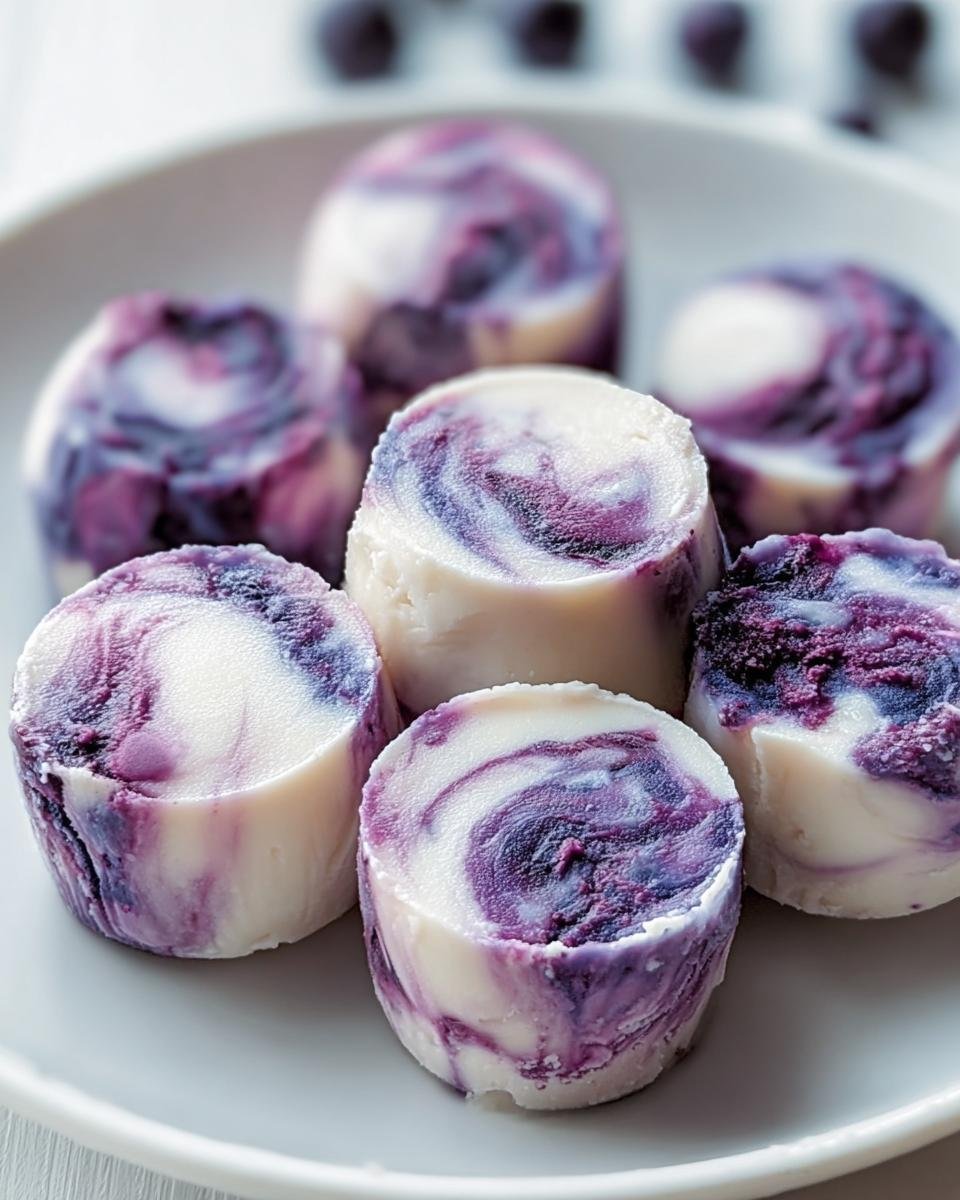
You know, sometimes the simplest things are the most satisfying, right? Especially when it comes to beating the heat with a healthy treat that doesn’t break the bank or take forever to make. That’s exactly why I keep coming back to these BLUEBERRY SWIRL YOGURT BITES. They’re like little pops of frozen sunshine! I first started making yogurt bark years ago, mostly to sneak more goodness into my kids’ snacks, and this blueberry swirl version quickly became a family favorite. They’re just so ridiculously easy and so refreshingly delicious – perfect for an afternoon pick-me-up or a light dessert.
Why You’ll Love These BLUEBERRY SWIRL YOGURT BITES
Seriously, why wouldn’t you love these little bites of heaven? They’re an absolute dream for so many reasons. First off, they are SO easy to whip up – you barely need any fancy skills! Plus, they’re incredibly healthy, packed with protein from the Greek yogurt and antioxidants from those yummy blueberries. They’re perfectly sweet without being *too* sweet. You can have them as a quick snack on a hot day, a light dessert after dinner, or even just a little something to curb that sweet craving. Honestly, they’re also a fantastic way to use up that extra yogurt hanging out in your fridge before it goes bad. Win-win-win!
Ingredients for Your BLUEBERRY SWIRL YOGURT BITES
Okay, so getting these tasty little things made is super straightforward because the ingredient list is pretty darn short. You’re going to need just a few simple things to get started. For the main part, the yogurt filling, we’re using 2 cups of plain Greek yogurt. Trust me, Greek yogurt is the way to go here because it’s nice and thick, which helps these bites hold their shape. Then, for a touch of sweetness that’s way better for you than tons of sugar, we’ve got 2 tablespoons of honey or maple syrup. You can totally adjust that amount if you like things sweeter or not-so-sweet, no judgment here!
Now for that gorgeous purple swirl! You’ll need about 1/2 cup of blueberries – fresh or frozen work perfectly fine. And just a little bit of liquid to help them break down, so we’ll add 1 tablespoon of water. That’s it! So simple, right? These quantities will give you about 12 perfect little yogurt bites, ready in about 10 minutes of prep, plus that crucial freezing time. Using good quality ingredients really does make a difference, so grab the freshest blueberries you can find!
Essential Equipment for Making BLUEBERRY SWIRL YOGURT BITES
You don’t need a whole lot of fancy gadgets for these little bites, which is part of their charm! The most important thing is a baking sheet – it gives you a nice flat surface to work on. Line that baby with parchment paper, and trust me, your life will be so much easier because nothing will stick. I also love using a piping bag fitted with a small round tip. It makes getting those cute little mounds of yogurt super neat and consistent, but hey, you could also just use a spoon if you’re feeling more rustic! It’s all about getting those delicious bites into your freezer!
Step-by-Step Guide to Perfect BLUEBERRY SWIRL YOGURT BITES
Alright, let’s get these amazing little BLUEBERRY SWIRL YOGURT BITES made! It’s honestly so easy, you’ll wonder why you haven’t made them before. We’re going to start with that yummy swirl, then move onto the creamy yogurt, and finally, let the magic of the freezer do its thing. Just follow along, and you’ll have a fantastic healthy treat in no time.
Preparing the Blueberry Swirl
First thing’s first, we gotta get that blueberry swirl ready. Grab a tiny saucepan and toss in your 1/2 cup of blueberries and that 1 tablespoon of water. Pop it on the stove over medium heat. You just want to cook them until those blueberries start to burst and the mixture gets a little thick, like a loose jam. That usually takes about 5 to 7 minutes. The most important part here is letting it cool down COMPLETELY. Seriously, don’t try to swirl warm stuff into cold yogurt, it’ll just melt everything. Patience is key!
Mixing the Yogurt Base
While your blueberry swirl is cooling off, let’s get the yogurt part ready. In a bowl, just combine your 2 cups of plain Greek yogurt with the 2 tablespoons of honey (or maple syrup, if you prefer!). Give it a good stir until it’s all smooth and happy. You want it nice and creamy, with no streaks of honey left. It should look perfectly smooth and ready to go!
Assembling and Freezing the BLUEBERRY SWIRL YOGURT BITES
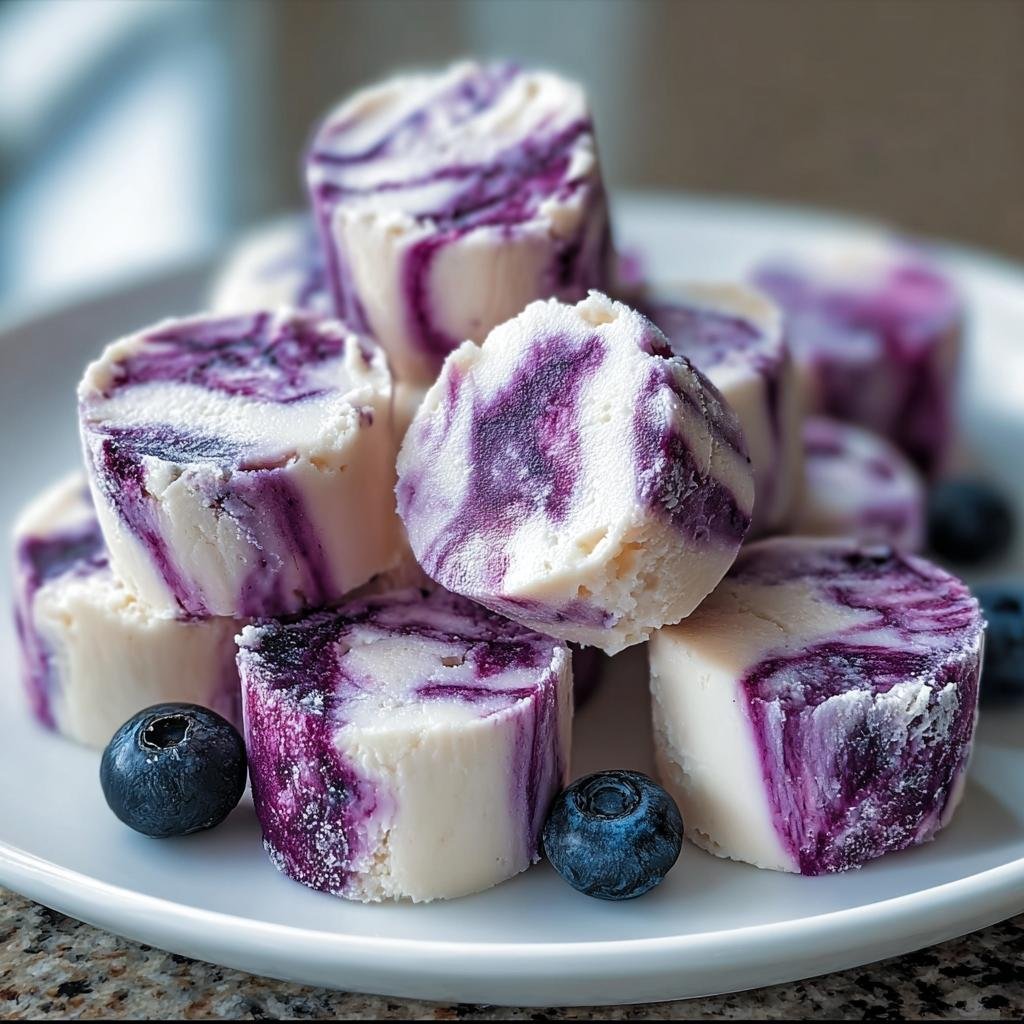
Now for the fun part! Get your baking sheet ready and line it with parchment paper – this just makes sure they don’t stick at all. If you have a piping bag with a small round tip, now’s the time to use it. Fill it up with your sweetened yogurt and pipe little dollops onto the parchment paper. Anywhere from a quarter to a half-dollar size is perfect. If you don’t have a piping bag, don’t sweat it! Just use a spoon to drop little mounds of yogurt onto the sheet. Once they’re all piped, take your cooled blueberry mixture and very gently drizzle or swirl a bit onto each yogurt bite. Then, carefully pop the whole baking sheet into the freezer for at least 2 hours, or until they’re firm to the touch. If you aren’t eating them right away, you can totally transfer them to an airtight container and keep them tucked away in the freezer!
Tips for Success with Your BLUEBERRY SWIRL YOGURT BITES
Okay, so you want these BLUEBERRY SWIRL YOGURT BITES to be absolutely perfect, right? I’ve made enough of these frozen little guys to know a few tricks that really help. First off, yogurt consistency is key. You want that thick, creamy Greek yogurt – none of that watery stuff! Also, make sure your blueberry swirl is totally cool before you swirl it. If it’s even a tad warm, it’ll just melt your yogurt dollops, and you won’t get those pretty swirls, just blue puddles. Oops!
When you’re piping them, don’t make them too big, or they won’t freeze as evenly. Little bites the size of a quarter or half-dollar work best. And for that swirl, don’t go crazy with the blueberry mixture – just a little drizzle or a gentle swirl on top is all you need. It’s more for color and a hint of flavor. Using parchment paper is a lifesaver for preventing sticking, but if you find they’re still a *little* bit stuck when you try to transfer them to a container, just let them sit out for literally 30 seconds. They’ll loosen right up! It’s these little things that make all the difference, kind of like how I learned with my banana muffins or those sneaky zucchini brownies!
Ingredient Notes and Substitutions for BLUEBERRY SWIRL YOGURT BITES
Alright, let’s chat about these ingredients for our BLUEBERRY SWIRL YOGURT BITES. The star of the show is definitely the plain Greek yogurt. I really, truly recommend sticking with Greek yogurt because it’s so much thicker than regular yogurt. It has less water, which means your bites will freeze up nicely without getting icy. If you *really* can’t find Greek yogurt, you could try regular plain yogurt, but you might want to strain it through a cheesecloth for a few hours in the fridge first to get rid of some of that extra liquid. It’s kind of like how I prepare yogurt for other recipes, like my roasted veggie tahini yogurt – getting that thickness is key!
For sweetness, the honey or maple syrup is totally flexible! I use honey because I love its flavor, but maple syrup works like a charm too, giving it a slightly different, cozy taste. You can also adjust the amount – start with the 2 tablespoons and taste. If you want them sweeter, add a little more, or if you’re cutting back on sugar, you can even try a sugar-free sweetener, though the taste might be a little different. For the blueberries, fresh is lovely, but frozen work just fine and are often more budget-friendly! You can even try other berries if you’re feeling adventurous, like raspberries or even a mix!
Frequently Asked Questions about BLUEBERRY SWIRL YOGURT BITES
Got questions about these delightful little treats? I get it! Making frozen goodies can sometimes leave you wondering about the little details, but that’s what I’m here for. Let’s dive into some common queries I get about my BLUEBERRY SWIRL YOGURT BITES.
Can I use a different type of yogurt for these bites?
I really, really recommend sticking with Greek yogurt for these BLUEBERRY SWIRL YOGURT BITES. It’s so much thicker and has less water, which means they freeze up nice and firm without getting all icy. If you use regular yogurt, they might get a bit runny or icy, which isn’t as pleasant.
How long do BLUEBERRY SWIRL YOGURT BITES last in the freezer?
So, for the best texture and flavor, these BLUEBERRY SWIRL YOGURT BITES are best enjoyed within about 1 to 2 weeks. Make sure you store them in an airtight container or a freezer bag with as much air pressed out as possible. They can last longer, but they tend to get a little harder the longer they chill!
Can I add other fruits to the swirl?
Oh, absolutely! Feel free to get creative with your swirls for these BLUEBERRY SWIRL YOGURT BITES. Raspberries, chopped strawberries, or even mango would be delicious. Just cook them down with a tiny bit of water like the blueberries, let them cool completely, and then swirl away! You might need to adjust the sweetness a little depending on the fruit you pick.
Nutritional Information
Alright, let’s talk nutrition for these yummy BLUEBERRY SWIRL YOGURT BITES! Keep in mind these are just estimates, okay? The exact numbers can bounce around a bit depending on the brands you use and how sweet you make them. But generally, each little bite is pretty darn good for you! You’re looking at roughly 40-50 calories, about 2 grams of fat, a solid 4-5 grams of protein from that Greek yogurt, and maybe 5-7 grams of carbs, with a good chunk of that being natural sugar from the fruit and honey. They’re a fantastic, guilt-free way to satisfy a craving! For more on healthy eating, check out my diet and nutrition tips or more healthy recipes!
Share Your BLUEBERRY SWIRL YOGURT BITES Creations!
Okay, now it’s YOUR turn to get in on the fun! I would absolutely LOVE to see pictures of your gorgeous BLUEBERRY SWIRL YOGURT BITES. Did you make them? How did they turn out? Leave a comment below and tell me all about your experience, or even better, share a photo on social media and tag me! You can find me online, or check out my about page to see more of my kitchen adventures. Happy baking, and happy eating!
Blueberry Swirl Yogurt Bites
Ingredients
Equipment
Method
- Prepare the blueberry swirl: Combine blueberries and water in a small saucepan. Cook over medium heat until blueberries burst and mixture thickens, about 5-7 minutes. Let cool completely.
- In a bowl, combine Greek yogurt and honey. Stir until well combined.
- Line a baking sheet with parchment paper.
- Transfer the yogurt mixture to a piping bag fitted with a small round tip.
- Pipe small rounds of yogurt onto the prepared baking sheet.
- Drizzle or swirl the cooled blueberry mixture onto the yogurt bites.
- Freeze for at least 2 hours, or until firm.
- Serve immediately or store in an airtight container in the freezer.