

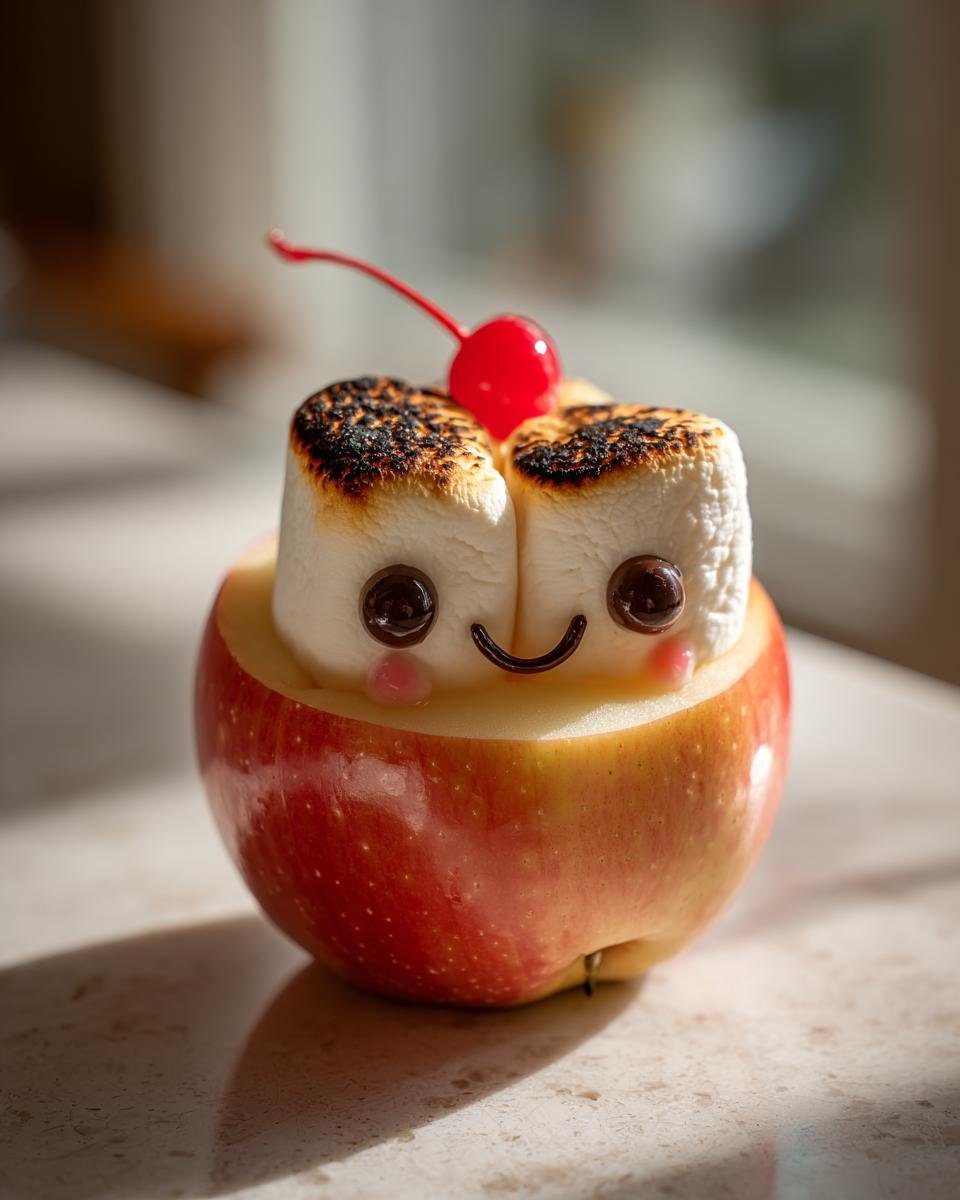
Oh my goodness, you HAVE to try these! My kids go absolutely bananas whenever I whip up a batch of these adorable apple marshmallow smiles. Seriously, they’re the perfect little treat when you need something super simple, fun, and totally delicious for the little ones (or honestly, for yourself!). It’s one of those recipes that always brings a smile to everyone’s face, and the best part is how ridiculously easy they are to put together. Forget fancy desserts, these little apple bites are pure joy in every single bite!
Why You’ll Love These Apple Marshmallow Smiles
These little treats are just the best! Here’s why you’ll totally get hooked:
-
SO easy to make! Seriously, you can whip these up in minutes, making them perfect for after-school snacks or last-minute party ideas.
-
Big on fun, small on effort. The kids absolutely LOVE helping to decorate, and they turn out so cute!
-
Simple ingredients you probably already have. Apples, marshmallows, and a few chocolate chips – that’s pretty much it!
-
A healthier-ish treat. You get some fruit in there, which makes you feel a little bit better about the marshmallow and chocolate part, right?
Gather Your Ingredients for Apple Marshmallow Smiles
Alright, let’s get our supplies ready! For these totally fun apple marshmallow smiles, you don’t need anything too crazy. We’re talking basic kitchen staples most of the time. First up for the apple part, grab three nice, big apples. I find that crisp apples like Fuji, Gala, or Honeycrisp work best because they hold their shape and have a great sweet-tart flavor that little kids (and grown-ups!) adore. If you’re worried about them browning while you’re working, a little splash of lemon juice is your best friend – just toss the slices in it.
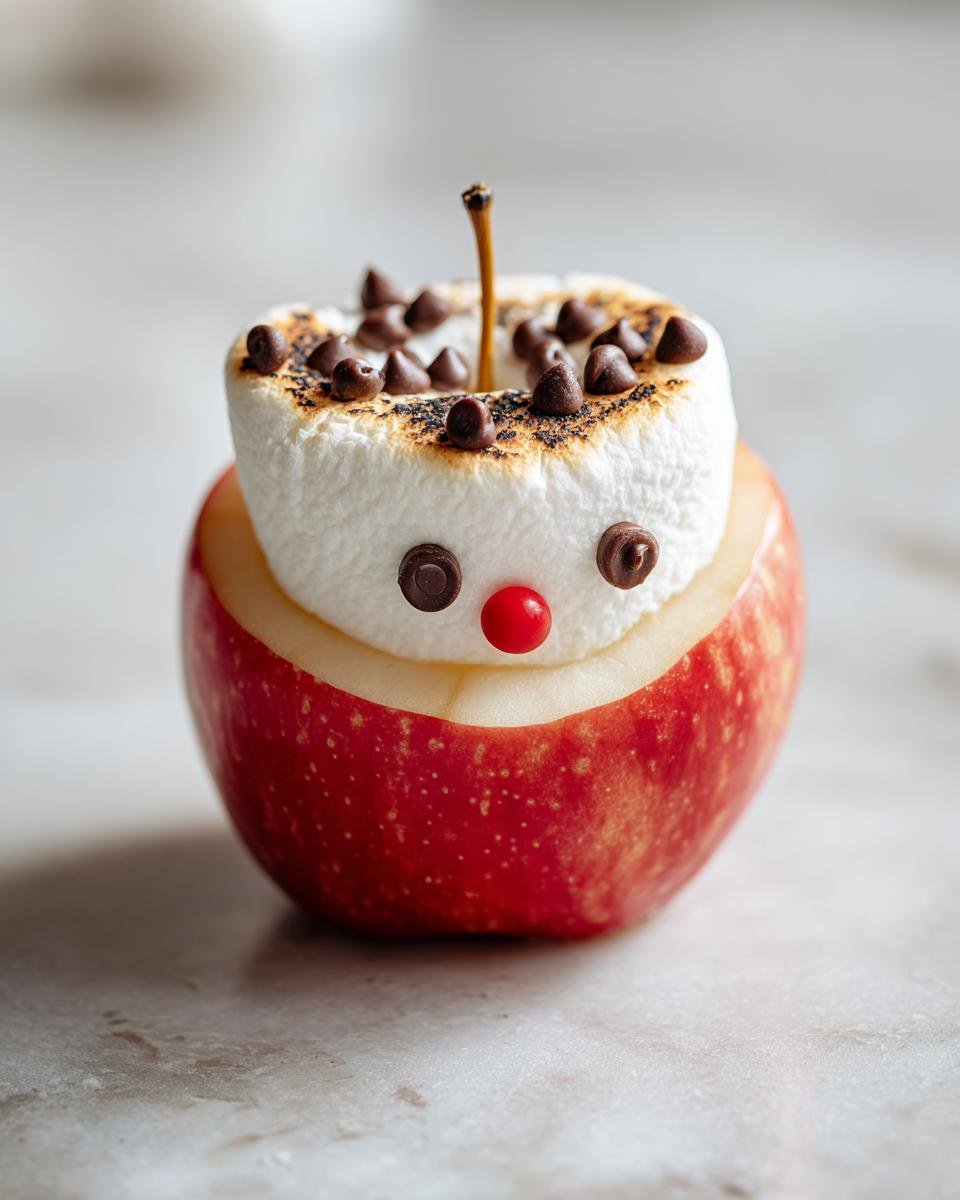
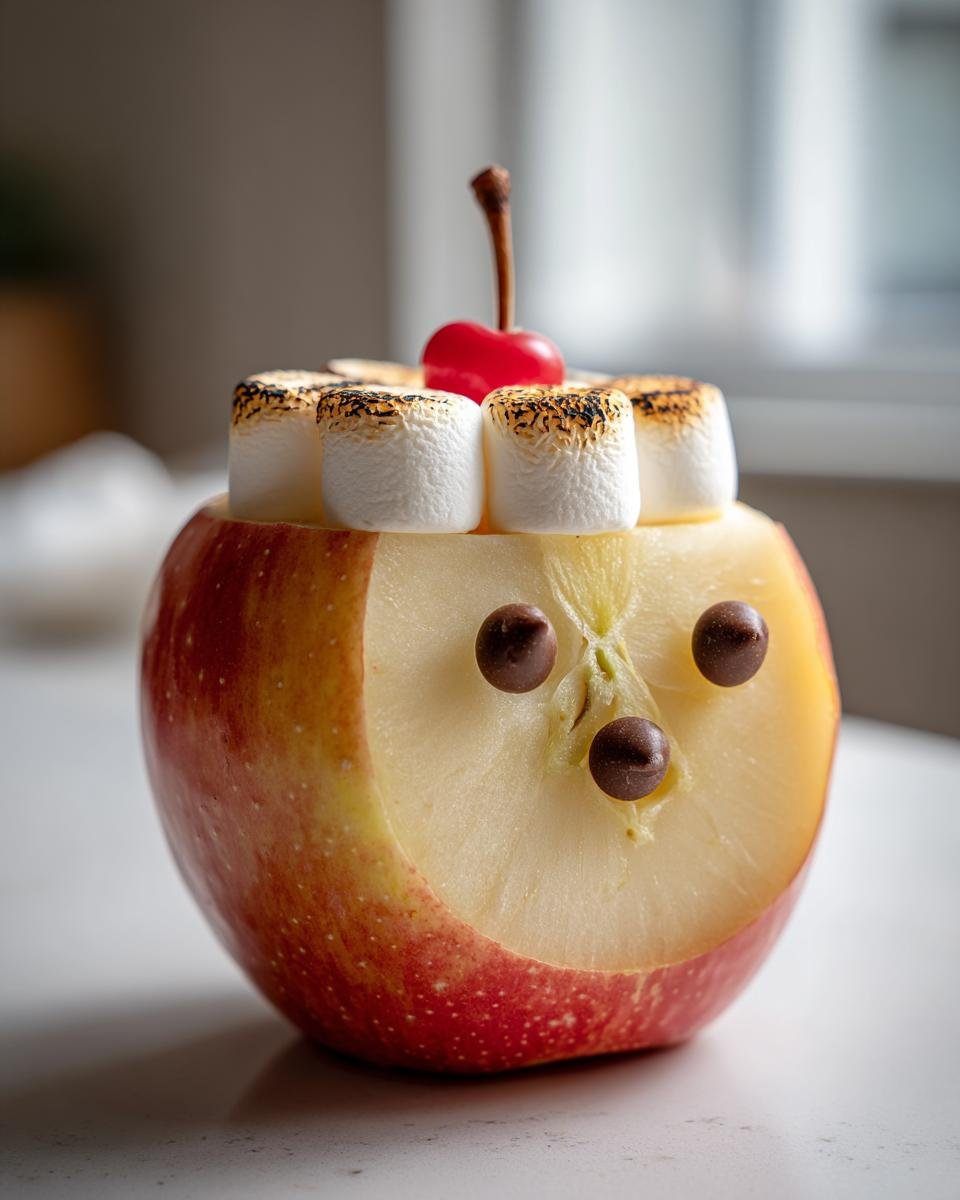
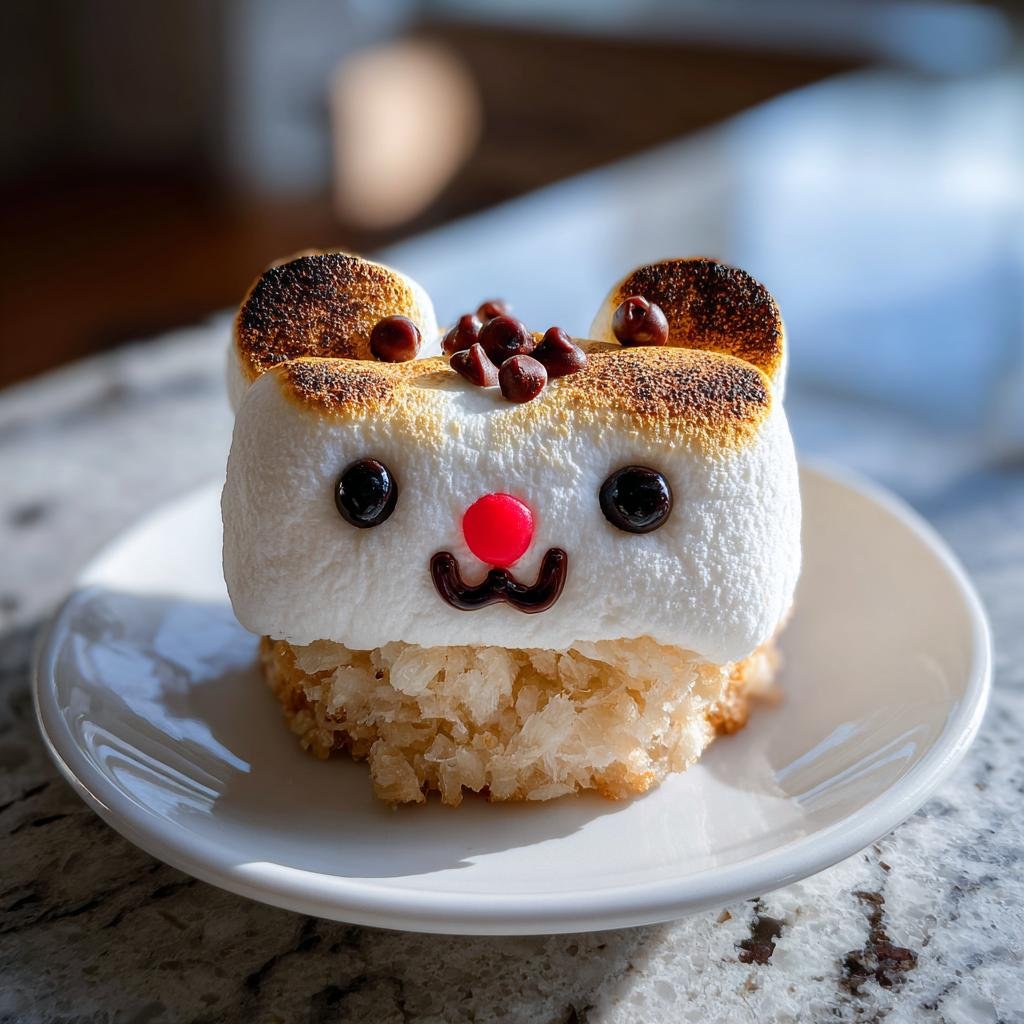
Then for making those happy little faces, you’ll need about 12 large marshmallows, cut in half, and some chocolate chips for melting. You’ll want a handful of those mini chocolate chips for the eyes, and a few red candy-coated chocolate pieces for the cutest little noses. See? Simple stuff!
Essential Equipment for Making Apple Marshmallow Smiles
To whip up these cute little apple treats, you won’t need anything super fancy. Just a good sharp knife and a sturdy cutting board to get those apples prepped. A simple baking sheet lined with parchment paper is essential for easy cleanup and keeping those smiles from sticking. Oh, and for drawing on those adorable faces, a tiny piping bag or even just a little zip-top bag with a corner snipped off works perfectly for your melted chocolate!
Step-by-Step Guide to Creating Apple Marshmallow Smiles
Alright, ready to make some magic? This is where the fun really starts! Making these apple marshmallow smiles is way easier than you think, and it’s a fantastic way to get kids involved in the kitchen. Just follow these simple steps and you’ll have adorable little edible faces in no time! Check out our Apple Monster Bites for another fun apple craft, or our Spider Toast if you want even more quick, kid-friendly ideas!
Preparing the Apple Base
First things first, give your apples a good scrub. Then, cut each apple into quarters and carefully scoop out the core. Next, take each quarter and slice it crosswise into wedges, about an inch thick. You want slices that are thick enough to hold their marshmallow topping but not too chunky. If you’re using apples that tend to brown super fast, now’s the time to give those slices a quick toss in lemon juice to keep ‘em looking fresh and pretty.
Attaching the Marshmallow Smiles
Okay, grab your marshmallow halves – the flat side goes down. Gently press a marshmallow half onto the curved edge of each apple slice. This is going to be the main part of our smile, so position it so it looks natural and happy on the apple wedge. It should stick pretty well on its own!
Decorating Your Apple Marshmallow Smiles
Now for the super fun part – giving them faces! Melt your chocolate chips; I usually pop them in a microwave-safe bowl and heat in 30-second bursts, stirring between each one, until it’s smooth and pourable. Transfer that melted chocolate into a cute little piping bag or just a regular zip-top bag with a tiny corner snipped off. This gives you control for drawing. Use a tiny line of chocolate for the mouth and then carefully place two mini chocolate chips for the eyes. And for the perfect little nose? Pop on one of those red candy-coated chocolate pieces. You can even add a couple of extra chocolate dots around the marshmallow if you want!
Setting and Serving
Once all your little apple marshmallow smiles are fully decorated, lay them out on that parchment-lined baking sheet. They need a little time for the chocolate to set properly. Just let them sit at room temperature for about 10 minutes. If you’re in a hurry or have a hot kitchen, popping them in the fridge for about 5 minutes will speed things up. And that’s it! Serve ‘em up right away and watch those happy faces disappear!

Tips for Perfect Apple Marshmallow Smiles
Okay, so making these apple marshmallow smiles is pretty straightforward, but a few little tricks can make them even better! First off, like I mentioned, picking the right apple is key. Go for firm ones like Gala or Honeycrisp – they hold their shape so much better than softer varieties. If you’re making these with little helpers, let them do the marshmallow-placing and the apple-washing part. They absolutely love it! And for decorating, if melting chocolate feels like too much fuss, don’t sweat it! You can totally use a simple dab of frosting from a tube or even edible markers for the faces. It all adds to the fun of creating your own unique apple marshmallow smiles!
Ingredient Notes and Substitutions for Apple Marshmallow Smiles
When you’re making these cute apple marshmallow smiles, the kind of apple really does make a difference! I usually love a sweet and firm apple like a Fuji or Honeycrisp because they don’t get mushy. But if you only have a Granny Smith, that tartness is super yummy too, especially with the sweet marshmallow. And if melting chocolate feels like too much work, or maybe you’ve got some little ones who are a bit too young to handle it, don’t worry! You can totally use a dab of cream cheese frosting from a tube, or even some edible markers. They still look adorable and taste just as great!
Frequently Asked Questions About Apple Marshmallow Smiles
Got questions about these fun little treats? I’ve totally got you covered! These apple marshmallow smiles are so popular because they’re just straightforward and tasty, but it never hurts to have a little extra info.
Can I make these apple marshmallow smiles ahead of time?
Honestly, these are best enjoyed super fresh. The apples can start to brown and get a little soft after a while, and the marshmallow can get sticky. I’d say make them right before you plan to serve them for the cutest and tastiest results!
How should I store any leftovers?
If, by some miracle, you have any leftovers (unlikely with my kids!), the best way to store them is in an airtight container in the refrigerator for a few hours. Just try to eat them within the same day. They really don’t hold up great for super long storage.
Are there any variations I can try?
Oh, absolutely! You can totally get creative with decorating your apple marshmallow smiles. Instead of mini chocolate chips for eyes, try edible candy eyes or even just tiny dots of piped frosting! And for the noses, a little dot of red decorator’s icing or even a tiny piece of strawberry can work in a pinch if you don’t have candy pieces.
What kind of apples work best?
For the absolute best apple marshmallow smiles, go for firm, crisp apples that hold their shape well. My favorites are Fuji, Gala, or Honeycrisp. They have a nice sweetness and don’t get too mushy when sliced. Avoid anything too soft like Red Delicious, as they can break apart too easily.
Storage and Reheating
Honestly, these yummy treats are way better when they’re fresh! The apples can start to look a little sad and brown if they sit out too long, and the marshmallow can get kinda sticky. If you happen to have extras, the best bet is to pop them into an airtight container and keep them in the fridge for just a few hours. But trust me, they’re best enjoyed the day you make them!
Nutritional Information (Estimated)
Now, let’s chat turkey (or, well, apple!) about the nutrition. Keep in mind these numbers are just a ballpark estimate, okay? They can totally change depending on the exact size of your apples, the type of chocolate chips you use, and even how much of that melted goo you end up eating right off the spoon (no judgment here!).
So, for one of these fun little apple marshmallow smiles, you’re probably looking at roughly:
-
Calories: Around 150-200
-
Fat: 5-8g
-
Protein: 1-2g
-
Carbohydrates: 25-35g
It’s a fun treat, not exactly a health food, but hey, at least there’s an apple in there somewhere, right?
Apple Marshmallow Smiles
Ingredients
Equipment
Method
- Wash the apples. Cut each apple into quarters and remove the core.
- Slice each quarter crosswise into 1-inch thick wedges. You should have about 12 wedges.
- If using, toss the apple slices with lemon juice to prevent browning.
- Line a baking sheet with parchment paper.
- Place a marshmallow half, cut side down, onto the curved edge of each apple slice. This will be the smile.
- Melt the chocolate chips in a microwave-safe bowl in 30-second intervals, stirring in between, until smooth. Transfer to a small piping bag or a zip-top bag with a tiny corner snipped off.
- Use the melted chocolate to draw eyes (two mini chocolate chips) and a nose (one red candy coated piece) onto each marshmallow smile. You can also add a few dots of chocolate for extra detail.
- Place the decorated apple slices on the prepared baking sheet.
- Let the chocolate set at room temperature for about 10 minutes, or place in the refrigerator for 5 minutes to speed up the process.
- Serve immediately.