
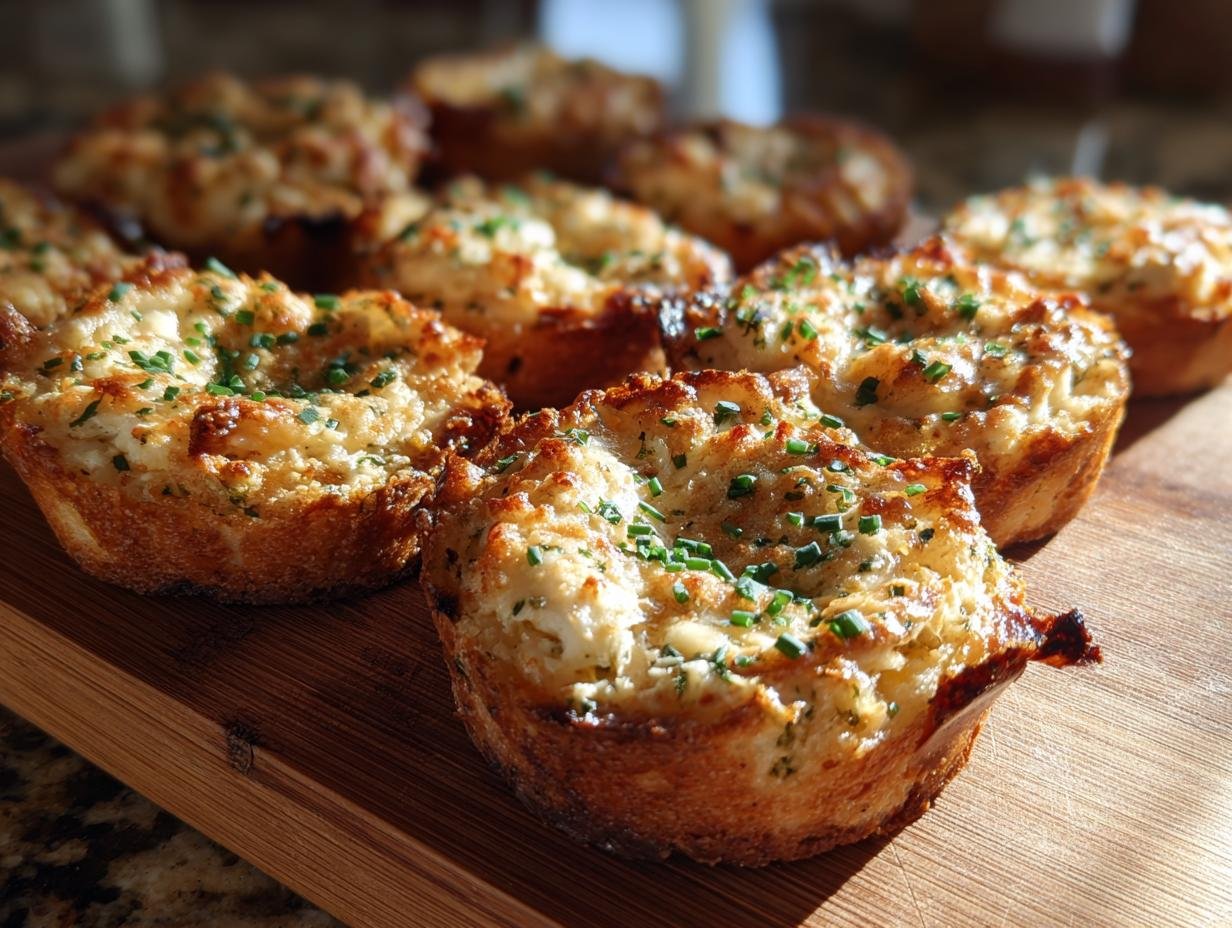
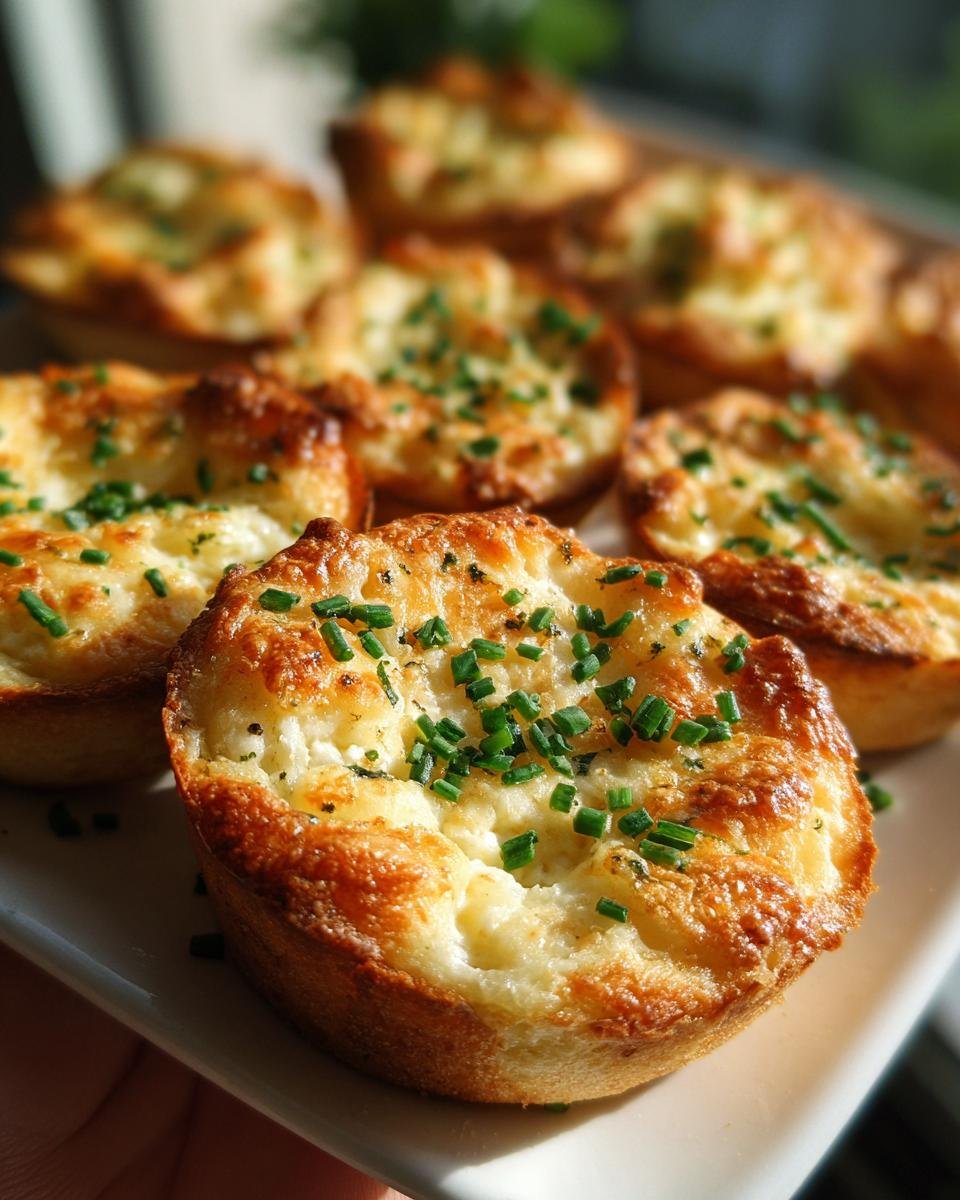
Oh, party planning! It can be so much fun, but let’s be real, sometimes getting those perfect appetizers on the table feels like a serious mission. That’s where my secret weapon comes in: these absolutely delightful Cheesy Thumbprint Appetizers. I’ve been whipping these up for years, and trust me, they’re the easiest, most satisfying little bites you’ll ever make. They look fancy, taste incredible with just a few basic ingredients, and come together in a flash seriously, my go to for last minute get togethers right before people start ringing the doorbell. If you need a crowd-pleaser that’s ridiculously simple, you’ve found it!

Why You’ll Love These Cheesy Thumbprint Appetizers
Seriously, why wouldn’t you adore these little guys? Here’s the lowdown on why they’re my absolute go-to for any kind of gathering:
- Seriously Simple: You won’t believe how easy these are to whip up! Just a few common ingredients from your pantry, and you’re on your way to cheesy bliss.
- Incredible Flavor: That perfect combo of a slightly crisp, cheesy dough with a warm, creamy center? Pure magic in every bite. They’re so darn addictive!
- Ultimate Crowd-Pleaser: Whether it’s game day, holidays, or just a casual hang with friends, these Cheesy Thumbprint Appetizers are always a massive hit. Everyone asks for the recipe!
- So Versatile: They’re perfect little flavor bombs that are fantastic on their own, or you can even change up the filling a bit. They’re a total win for any party spread.
- Quick Prep Time: Honestly, you can have a batch ready to go in under 35 minutes from start to finish. Perfect for when you need something delicious *fast*!
Gather Your Ingredients for Cheesy Thumbprint Appetizers
Alright, let’s talk about what you’ll need to make these little cheesy delights. It’s all super straightforward, stuff you probably already have hanging around the kitchen!
For the Dough
This is where the magic starts, creating that perfect little vessel for all that gooey goodness.
- 1 cup all-purpose flour
- 1/2 cup shredded cheddar cheese (I like sharp for more flavor!)
- 1/4 cup butter, nice and softened
- 1 tablespoon milk
For the Filling
This is the secret creamy, dreamy center that makes these so irresistible.
- 1/4 cup cream cheese, make sure it’s softened so it mixes easily
- 2 tablespoons shredded cheddar cheese (more cheese is always a good idea, right?)
- 1 teaspoon chopped fresh chives (they add such a fresh, oniony bite!)
Step-by-Step Guide to Making Cheesy Thumbprint Appetizers
Okay, it’s time to get down to business and make these little flavor bombs! Don’t worry, it’s super easy, and before you know it, you’ll have a whole plate of these delicious Cheesy Thumbprint Appetizers ready to wow your guests. Just follow these simple steps!
Preparing the Dough for Your Cheesy Thumbprint Appetizers
First things first, let’s get that dough ready. Preheat your oven to 375°F (190°C) and line a baking sheet with parchment paper – this is my secret for no-sticking ever! Grab your flour and that wonderful shredded cheddar cheese and whisk them together in a bowl. Toss in the softened butter and work it in with your fingertips or a pastry blender until it all looks like coarse crumbs. Then, add the milk and mix it all up until a nice dough forms. Roll that dough into 24 little balls – think about the size of a small walnut. Pop them right onto your prepared baking sheet.
Crafting the Creamy Filling
Now for the heart of our thumbprint! In a separate little bowl, mix up that softened cream cheese with the remaining shredded cheddar cheese and the fresh chives. Just stir it all together until it’s smooth and combined. It’s going to be so creamy and delicious!
Assembling and Baking Your Cheesy Thumbprint Appetizers
This is the fun part! Take your thumb (or even the end of a wooden spoon if you prefer!) and gently press an indentation into the center of each little dough ball on the baking sheet. Don’t push all the way through, just make a nice little nest. Then, carefully spoon about half a teaspoon of that delicious cream cheese mixture into each thumbprint. Pop the whole sheet in the oven and bake for about 12 to 15 minutes. You’re looking for them to be lightly golden around the edges. Oh, and a little tip I picked up ages ago: don’t overbake them! They’ll continue to firm up a bit as they cool. For more party food inspiration, check out these spider deviled eggs!

Tips for Perfect Cheesy Thumbprint Appetizers
Want to make sure your Cheesy Thumbprint Appetizers are absolutely perfect every single time? It’s all about a few little tricks I’ve learned over the years that make a big difference! First off, make sure your butter and cream cheese are truly softened, not melted. This is key for that nice dough consistency and a smooth filling. If your dough feels a little too sticky, don’t be tempted to dump in a ton more flour – just pop it in the fridge for about 10 minutes; it makes it so much easier to roll and handle. Thinking about variations? These goat cheese appetizers are also a dream, and you could totally adapt this idea with other cheeses or even a little pinch of garlic powder in the filling if you’re feeling adventurous!
Ingredient Notes and Substitutions for Cheesy Thumbprint Appetizers
Let’s chat about these ingredients for our Cheesy Thumbprint Appetizers for a sec, because a few little details can really make them shine. That 1/2 cup of cheddar in the dough? It’s usually sharp cheddar for me, because it gives a nice tang that balances the richness. But hey, feel free to use a medium or even a mix if that’s what you’ve got! Just make sure it’s shredded so it incorporates beautifully. For the filling, remember that softened cream cheese is your best friend here – it makes the whole filling process so much smoother. If you’re not a fan of chives, you can totally swap them out for a little finely chopped parsley or even a tiny pinch of dried dill. And if you’re looking for something a bit different, check out these bacon goat cheese appetizers for another flavor adventure!

Frequently Asked Questions About Cheesy Thumbprint Appetizers
Got questions about making these little wonders? I’ve got answers! People always ask me about these Cheesy Thumbprint Appetizers, and I’m happy to spill the beans.
Can I make Cheesy Thumbprint Appetizers ahead of time?
You sure can! You can prep the dough and roll ’em into balls, and even make the filling, a day in advance. Just store them separately in airtight containers in the fridge. Keep the dough balls covered too. Then, just assemble and bake them when you’re ready to serve for that fresh-from-the-oven taste!
What other fillings work well for these thumbprint appetizers?
Oh, the possibilities! While the cream cheese and cheddar combo is fantastic, you could also try a dollop of your favorite savory jam, a tiny bit of pesto, or even a small dab of diced pimento cheese. Get creative! Some people even like a tiny bit of crumbled cooked bacon in the cream cheese mix. It all works wonderfully for these versatile appetizers.
How do I store leftovers?
If, by some miracle, you have any leftover Cheesy Thumbprint Appetizers, just let them cool completely. Store them in an airtight container in the refrigerator for up to 2-3 days. They’re still pretty tasty the next day!
How do I reheat them?
To get them nice and warm again, you can pop them back in a 300°F (150°C) oven for about 5-7 minutes. Just keep an eye on them so they don’t get too brown. You don’t want to microwave them; they can get a bit chewy that way. For more fun party food, check out these neat mummy jalapeno poppers!
Nutritional Information (Estimated)
Just a little heads-up, this is an estimate per appetizer, and the actual numbers can bounce around a bit depending on the exact brands you use! Things like fat and calories can vary. For more detailed info on nutrition, you can always check out my nutrition category.
Serving and Storage Tips
These little bites are fantastic served nice and warm right out of the oven, but honestly, they’re just as delicious at room temperature. If you happen to have any extras (which is rare in my house!), just let them cool completely. Store any leftovers in an airtight container in the fridge for up to 2-3 days. They’re still super tasty the next day!
Share Your Cheesy Thumbprint Appetizers Creations!
I truly hope you give these Cheesy Thumbprint Appetizers a whirl! When you make them, I’d absolutely love to hear all about it. Did you add anything special? How did your guests like them? Drop a comment below and tell me everything, or even better, share a pic on social media! You can learn more about my cooking adventures over on my about page. Happy baking!

Cheesy Thumbprint Appetizers
Ingredients
Equipment
Method
- Preheat your oven to 375°F (190°C). Line a baking sheet with parchment paper.
- In a small bowl, combine the flour and 1/2 cup cheddar cheese. Cut in the softened butter until the mixture resembles coarse crumbs.
- Add the milk and mix until a dough forms.
- Roll the dough into 24 small balls.
- Place the dough balls on the prepared baking sheet.
- In another small bowl, mix together the cream cheese, 2 tablespoons cheddar cheese, and chives.
- Press your thumb into the center of each dough ball to create an indentation.
- Fill each indentation with about 1/2 teaspoon of the cream cheese mixture.
- Bake for 12-15 minutes, or until lightly golden brown.
- Let cool slightly before serving.