
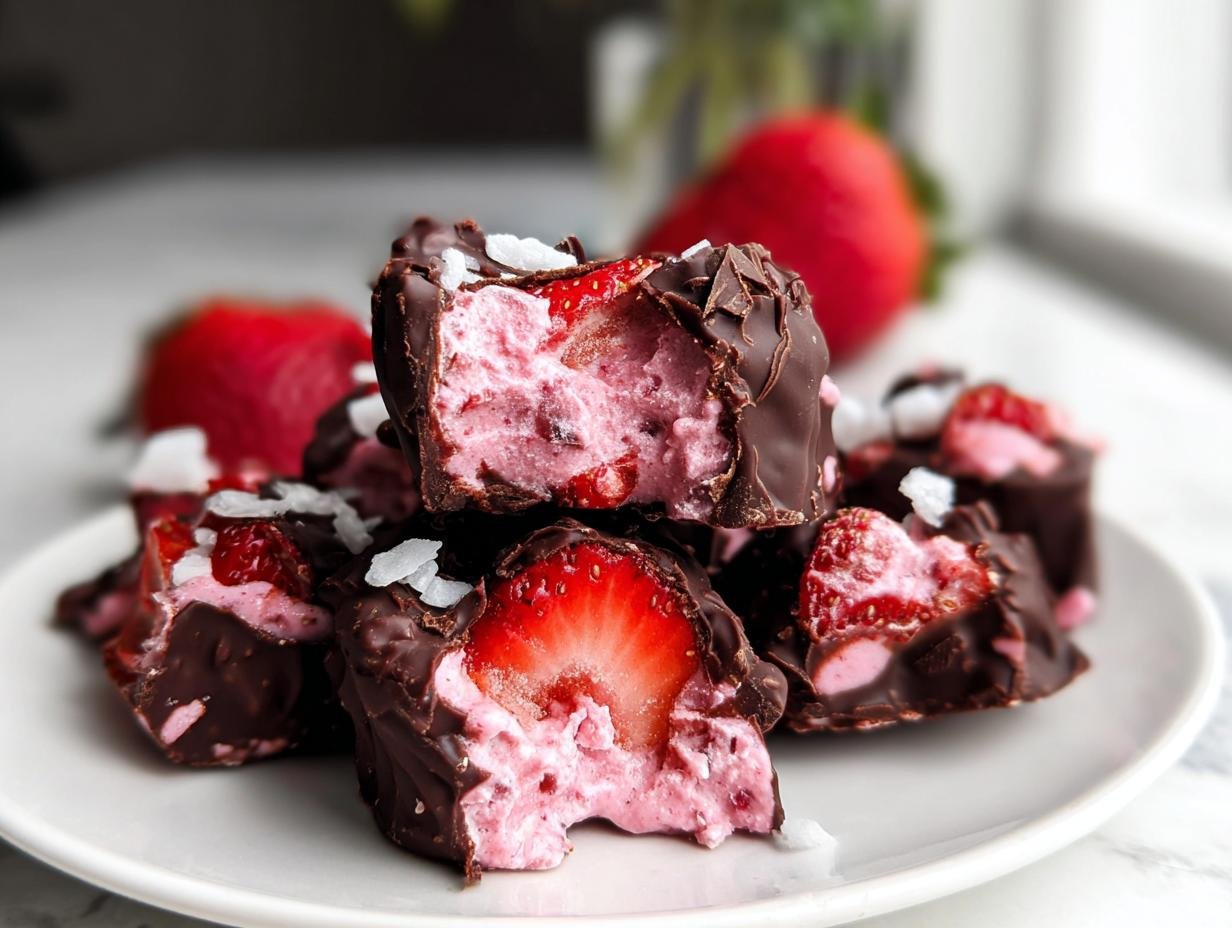
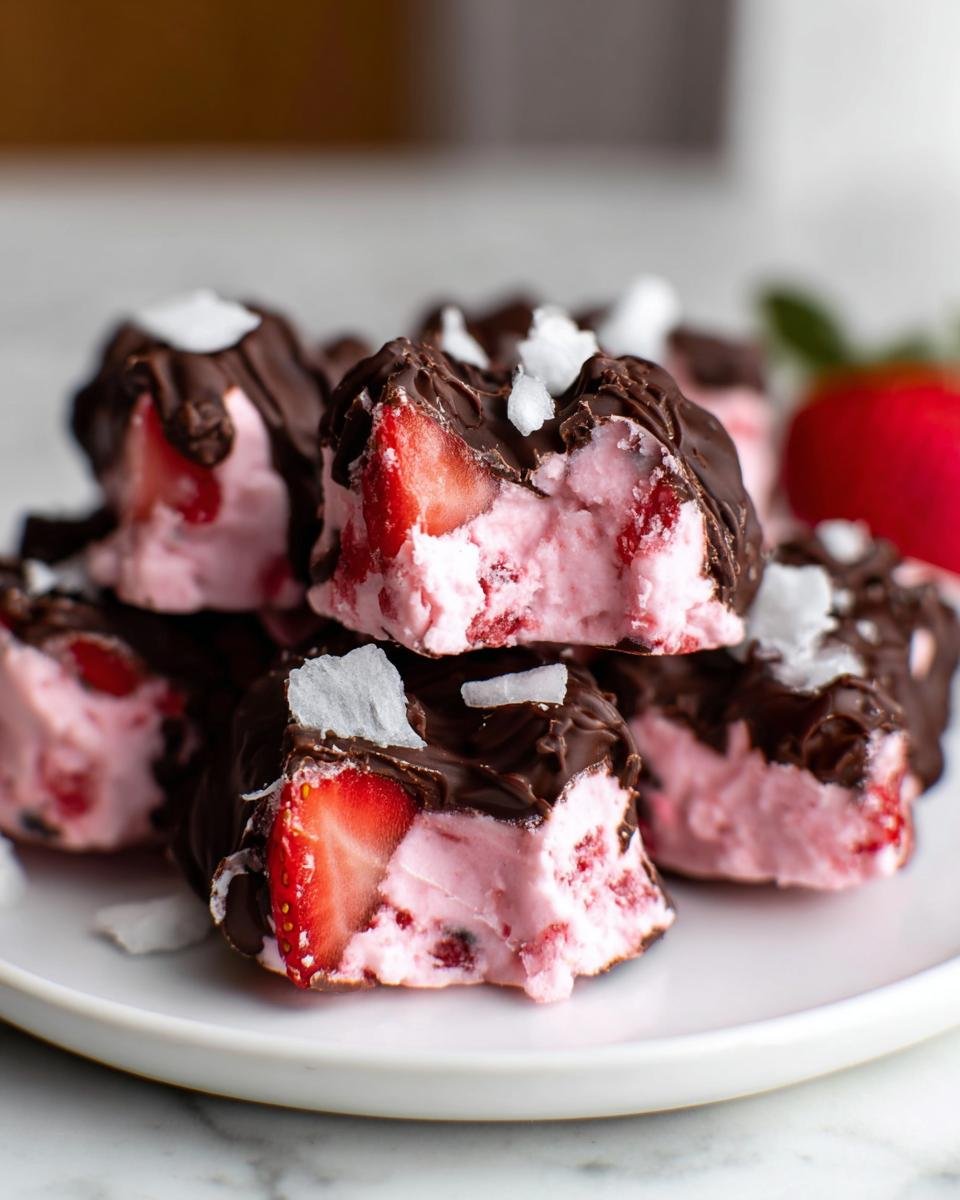
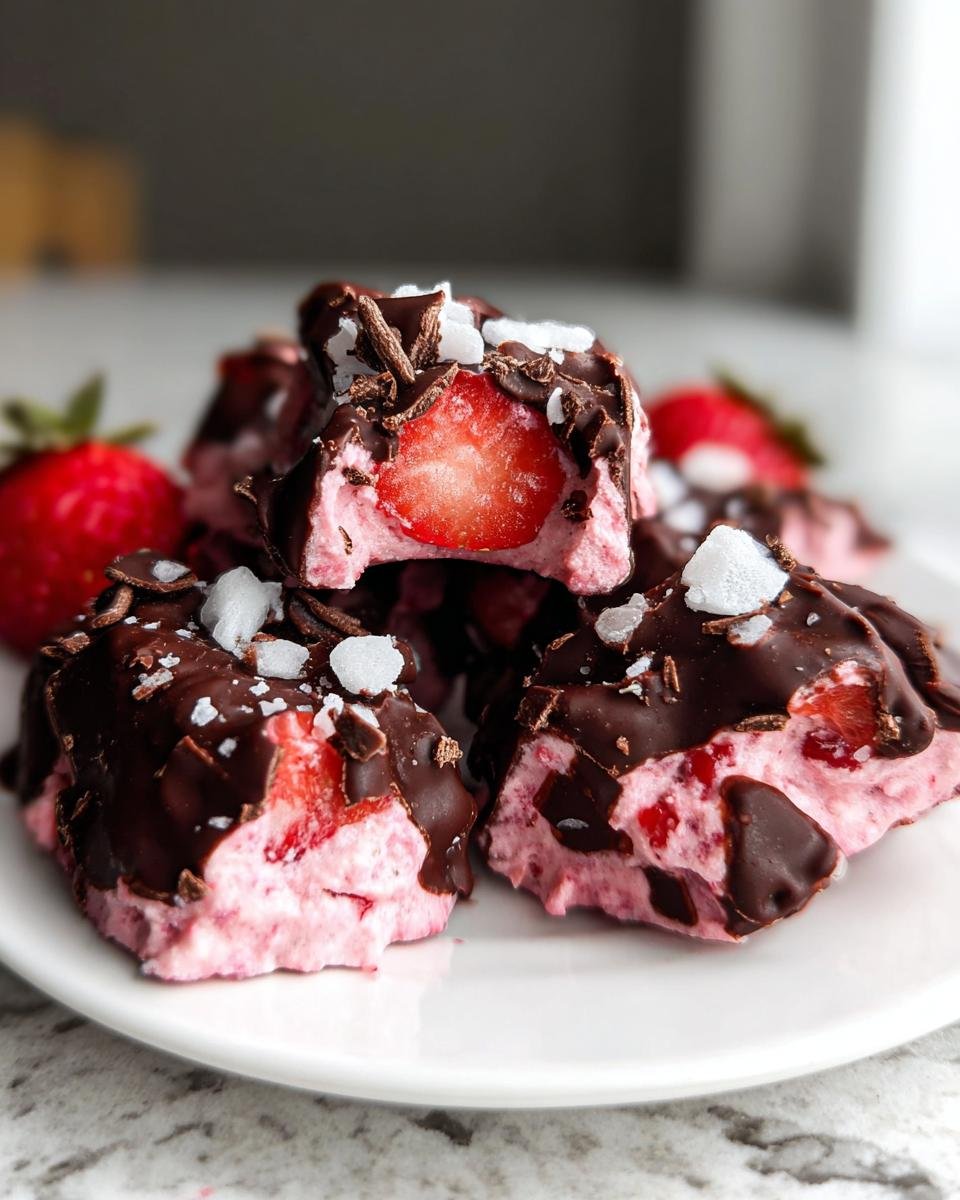
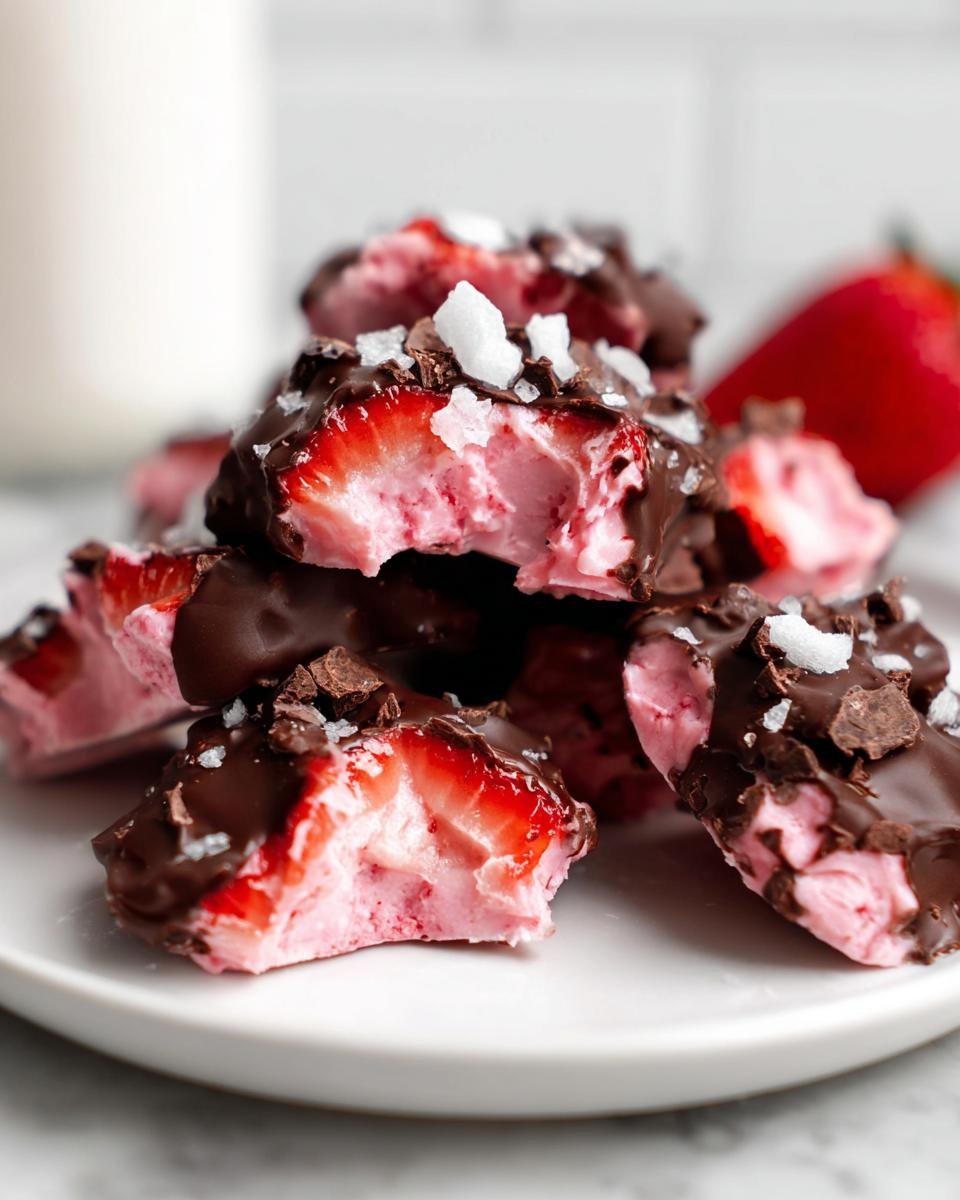
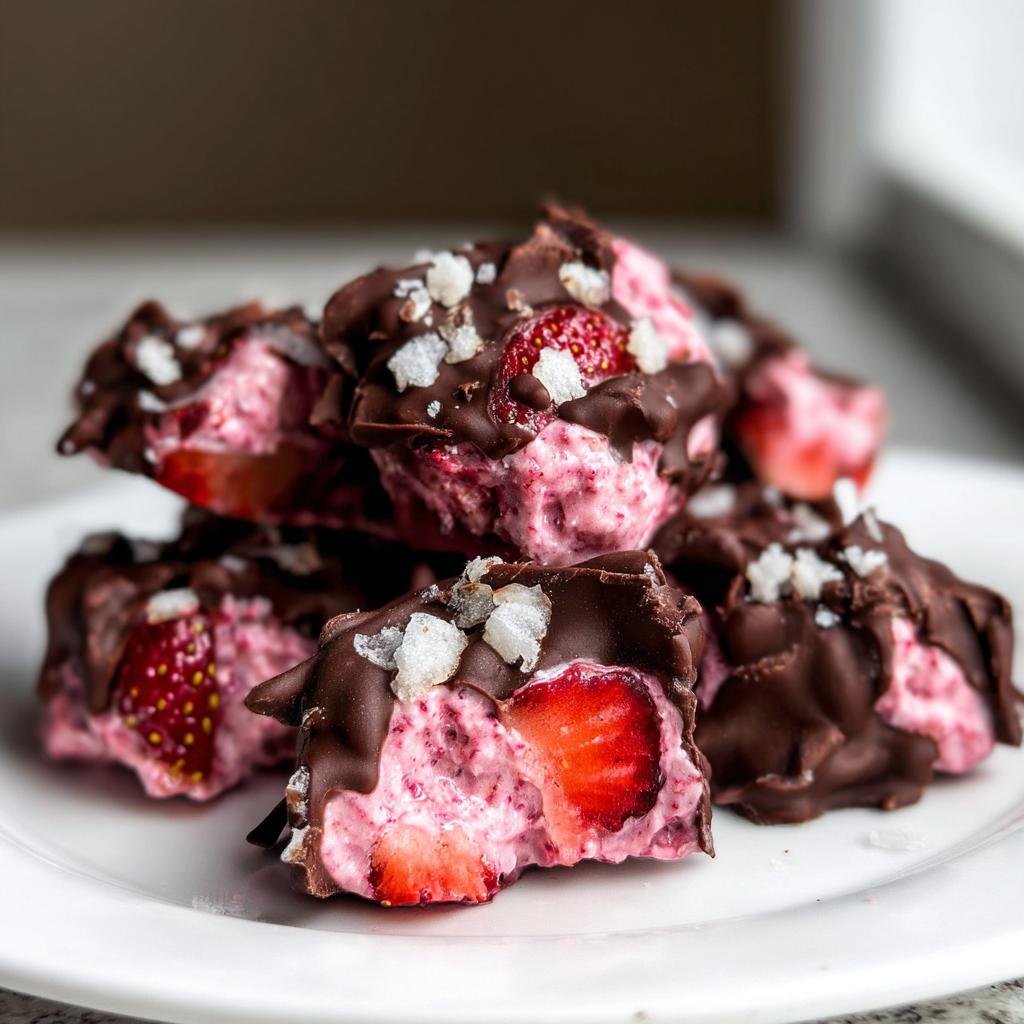
You know those days when the heat is just unbearable, and you need something instantly refreshing but also feels like a little treat? Trust me, I live for those moments because they force me to get creative fast! Forget lengthy baking sessions; these Chocolate-Covered Strawberry Yogurt Bark clusters are my absolute lifesaver when the A/C is struggling. This is honestly the fastest, prettiest snack I’ve ever whipped up. Seriously, the **Chocolate-Covered Strawberry Yogurt Bark** comes together in under 15 minutes of hands-on time, and suddenly you have a freezer full of guilt-free summer goodness ready to go.
Why You Will Love This Chocolate-Covered Strawberry Yogurt Bark
I mean, honestly, who doesn’t want lightning-fast dessert gratification when it’s scorching outside? These little clusters hit all the right notes, and you deserve something easy that tastes this good. You’ll be sharing these with everyone once you see how simple they are!
- Prep is a breeze! We are talking 10 minutes max before they hit the deep freeze, so you aren’t messing around in a hot kitchen.
- It perfectly captures that classic ‘chocolate-covered strawberry’ vibe without any of the messy dipping dramas.
- It’s super customizable, meaning whatever toppings you have hanging around suddenly become gourmet additions.
- The combination of tangy Greek yogurt, sweet strawberries, and rich dark chocolate is just divine—creamy, crunchy, and cool all at once.
- Minimal equipment needed, which means cleanup is ridiculously fast. We love easy cleanup, don’t we?
Essential Equipment for Perfect Chocolate-Covered Strawberry Yogurt Bark
I always say that having the right tools makes the job half done, even when the job is just scooping frozen yogurt! For this bark, you don’t need anything fancy, which is why I love it for busy weeknights. Make sure you have your basic setup ready to go so that the yogurt stays frozen while you work on the melt.
- You absolutely need a sturdy baking sheet or tray—something flat will work best here.
- Parchment paper is non-negotiable; nobody wants yogurt sticking to the metal!
- A medium bowl for mixing up that creamy, fruity base you are about to create.
- A microwave-safe bowl for melting down your beautiful dark chocolate chips.
- Grab a simple fork or even a toothpick; these are going to be your dipping tools!
Ingredients Needed for Chocolate-Covered Strawberry Yogurt Bark
The ingredient list is super short, which is exactly how I like it when I’m craving something fast. We are breaking this down into the yogurt base, the rich chocolate magic, and any little extras you want to throw on top for crunch. I always keep these basics stocked because they make for such a good emergency snack!
For the actual frozen yogurt part, you’ll need 1.5 cups of strawberries that you’ve chopped up—make sure they aren’t soaking wet! Then, 1 cup of unsweetened Greek yogurt does the heavy lifting, and just 1 tablespoon of honey brings the sweetness up just enough. It’s a perfect balance, trust me.
When it comes to coating, we keep it simple but decadent: 1 cup of dark chocolate chips mixed with 2 teaspoons of coconut oil. That oil is what makes the chocolate melt perfectly smooth for dipping! If you want to get fancy, you can sprinkle on whatever you like, maybe some crushed nuts or fun coconut flakes. Check out some other healthy snack ideas while you gather your stuff!
Step-by-Step Instructions for Making Chocolate-Covered Strawberry Yogurt Bark
Okay, this is where the real fun begins! Since the hands-on prep time is only 10 minutes, you can move fast while everything stays cold. We need to move quickly so the yogurt doesn’t melt before it hits the freezer. Remember my pro tip: make sure those chopped strawberries aren’t sitting in any extra juice—dry fruit blends much better and keeps your yogurt perfectly thick! If you’re looking for more ways to eat better quickly, you should check out these quick low-carb recipes.
You’ll need about 50 minutes total in the freezer across two stages, but don’t worry, that’s mostly hands-off time. Let’s get this beautiful, cool treat made!
Preparing the Yogurt Base and Initial Freeze
First things first: get that baking sheet covered with parchment paper. Don’t skip this or you’ll be scraping yogurt off metal later, and trust me, it’s not fun. In your medium bowl, gently mix up the chopped strawberries, the Greek yogurt, and the honey until it’s just combined. We don’t want to over-mix! Next, grab a spoon or maybe a small cookie scoop—this is key for making your clusters uniform—and drop little dollops across the parchment. You need to leave some space between each one because they will spread just a tiny bit. Pop that tray into the freezer for about 30 minutes to let those little yogurt mounds get really firm.
Melting the Chocolate Coating for Your Chocolate-Covered Strawberry Yogurt Bark
While your yogurt is chilling out, it’s chocolate time! Grab your microwave-safe bowl. Toss in your chocolate chips and the coconut oil—the oil is my secret to a super glossy, easy-to-dip shell. Heat this in 30-second bursts, stirring well after every zap, until it’s totally smooth. If you run out of chips or just prefer a richer flavor, you can totally use a 150g chocolate bar broken into pieces instead of chips. See? Easy to adapt! If you want more ideas for delicious chocolate treats, check out these healthy treats.

Coating, Topping, and Final Freeze of the Chocolate-Covered Strawberry Yogurt Bark
Now, pull your now-firm clusters out of the freezer. This is where you dip! Use a fork or toothpick to carefully dunk each frozen cluster into that beautiful melted chocolate, making sure it gets coated nicely. Set it back on the parchment paper right away. This is your chance to go wild: if you are using any optional toppings like nuts or coconut, sprinkle them on *now* while the chocolate is still wet. Back into the freezer they go for a final freeze, about 15 to 20 minutes this time. You want that coating to harden completely before you try to move them. Once they are set hard, transfer them to an airtight container and store them away! You’ll have the best snack waiting for you.
Ingredient Notes and Substitutions for Chocolate-Covered Strawberry Yogurt Bark
I get asked all the time about swapping ingredients, and honestly, this recipe is pretty flexible if you understand what each part is doing! For the yogurt, Greek yogurt is really the only way to go because it’s so thick; it holds its snowy shape way better than regular yogurt, which gets watery fast. If you use non-fat, your cluster might be a little icier, but full-fat Greek yogurt gives you that super creamy texture. I think you should really try whatever you have on hand first!
When it comes to sweetening, honey is my jam because it mixes in beautifully even when cold. If you want to keep it vegan or just avoid honey, maple syrup works great too, but you might use slightly less since it’s often sweeter. You can even look into some of my tips for making things extra creamy, like I talk about in my Greek yogurt banana bread recipe, because texture is everything in these frozen treats!
Tips for Success with Your Chocolate-Covered Strawberry Yogurt Bark
Okay, this is a super easy recipe, but there are a few little things I’ve learned over my batches that make the difference between ‘this is good’ and ‘wow, I need to sneak the rest before my family finds them!’ You really want to pay attention to the temperature and your paper setup, or you’ll spend extra time unsticking things later on. If you’re in a hurry, check out these healthy snack ideas for other quick wins!
Here are my must-know tips to make sure your clusters come out looking professional, even though they are totally homemade:
- Don’t Skimp on the Parchment: This might sound silly, but the quality of your parchment paper matters! If you use thin, flimsy paper, the yogurt clusters might slightly stick or tear when you try to lift them. Use heavy-duty parchment or even a silicone baking mat if you have one; it guarantees a clean release every time once the chocolate sets.
- The Mandatory Firm Freeze: Before you even think about melting that chocolate, those yogurt dollops have got to be rock solid. If they are soft when you dip them—even slightly—the cluster will warp, slide off the fork, or just turn into a weird, melty puddle of yogurt and chocolate goo (which is messy, trust me). Thirty minutes in the freezer is the *minimum* for that initial set.
- Perfect Chocolate Consistency: That little bit of coconut oil does so much work! It lowers the melting point of the chocolate and helps it harden into that satisfying, crisp shell you want. Make sure you stir it really well after melting so there are no pockets of un-melted chip or just oil. A smooth dip means a smooth final look for your Chocolate-Covered Strawberry Yogurt Bark.
- Work Quickly During the Dip: Once the clusters are out for dipping, you need to be methodical and fast. The cold yogurt immediately starts chilling the warm chocolate, which is great, but if you leave them sitting out for too long, the chocolate will seize up on the fork, and you’ll end up with messy strings rather than clean dips. Keep the tray close by so you can immediately place the coated cluster back down.
Storage and Keeping Your Chocolate-Covered Strawberry Yogurt Bark Fresh
One of the best things about making these chocolate-covered clusters is that they are practically designed for long-term snacking happiness! Seriously, they are perfect make-ahead treats. Once the chocolate has hardened completely after that final freeze, you need to get them off that parchment paper right away.
Move all those pretty, shiny clusters into an airtight container. If you don’t have one, heavy-duty freezer bags work fine too, but make sure you press out as much air as you possibly can. These need to live in the freezer until you are ready to eat them. Because they are yogurt-based, they won’t last long in the fridge—we are aiming for solid, cold snack status here!
Now, here’s the crucial serving advice: you can’t just grab them straight from the freezer and bite in, unless you love biting down on something that’s rock hard! When you want one—or three—just pull the container out and let them sit on the counter for about five minutes. That short break is essential! It takes the edge off the deep freeze so the yogurt is slightly creamy and yielding, and the chocolate coating has that wonderful, crisp snap when you bite into it. It really makes all the difference. If you’re prepping snacks for the kids, you might want to check out some of my healthy snacks for kids recipes while you wait for yours to temper slightly!
Frequently Asked Questions About Chocolate-Covered Strawberry Yogurt Bark
I always get questions about this recipe because it’s so simple people think they must be missing a trick! Trust me, the trick is just keeping everything frozen! But here are a few things people ask me most often about making perfect **Chocolate-Covered Strawberry Yogurt Bark**.
Can I use different fruit instead of strawberries?
Yes, absolutely! While strawberries pair perfectly for that classic coated look, this recipe is great with almost any fruit that you chop up small. Blueberries work wonderfully because they are naturally sturdy, or you can try raspberries, just be gentle when mixing them in. Remember, whatever fruit you choose, make sure it isn’t overly wet, or you’ll end up with runny yogurt clusters! If you need more ideas for easy, kid-approved things, check out these healthy snacks for kids.
How long does the Chocolate-Covered Strawberry Yogurt Bark last in the freezer?
Because we use Greek yogurt and dip them in chocolate, they hold up incredibly well! I always store mine in a truly airtight container, and they stay perfect for a solid two months in the freezer. Honestly, they rarely last that long in my house—they get eaten up within the first week! Just make sure the container is fully sealed if you plan on keeping them long-term to avoid freezer burn.
Can I make this dairy-free?
You certainly can swing this recipe dairy-free, which is great for avoiding milk products! For the yogurt base, you’ll want to swap the Greek yogurt for a very thick, unsweetened coconut or almond yogurt—check the labels to make sure it’s high in protein so it freezes nicely. And for the chocolate coating, just use dairy-free dark chocolate chips. Most high-quality dark chips are already dairy-free, but always double-check that label!
Why do I need coconut oil in the chocolate coating?
This is a tiny detail that changes everything! The coconut oil helps thin the melted chocolate just enough so it becomes super smooth and easy to work with for dipping. More importantly, once it hits that cold yogurt cluster, the oil helps the chocolate set quickly into a nice, crisp shell rather than that thick, clumpy coating you sometimes get when melting chips alone. It gives you that satisfying crack when you bite down!
Estimated Nutritional Snapshot for Chocolate-Covered Strawberry Yogurt Bark
Look, this is a snack, not a science experiment, but it’s always good to have a general idea of what you’re putting into your body! These numbers are based on using 1.5 cups of chopped strawberries, unsweetened yogurt, dark chocolate chips, and the honey listed. Because we are making clusters and this is based on one serving size estimation, your mileage might vary!
For about one perfect cluster, you are looking at roughly 142 calories. That breaks down to about 7g of fat, 16g of carbs, and a decent 4g of protein to keep you satisfied. Sugar content is naturally around 13g, mostly coming from the honey and the fruit itself. You can definitely explore some other nutrition focused snack articles if you want to dive deeper into macros!
Share Your Experience Making Chocolate-Covered Strawberry Yogurt Bark
Whew! That’s it—you’ve made the easiest, most beautiful chilled snack ever. I just know you’re going to love pulling these out of the freezer on a hot afternoon. Now, it’s your turn to tell me everything!
I always get so excited when readers tell me how they personalized their batches. Did you decide to be daring with the toppings? Did the crunch of pistachios win out over flaky coconut? I want to hear all about it!
I’d be so grateful if you could take a second to rate this recipe right below this section—five stars if you can’t stop sneaking them, of course! And please, leave a big, friendly comment telling me exactly which topping variation you used on your **Chocolate-Covered Strawberry Yogurt Bark**. Did you keep it classic, or did you jazz it up?
If you want to know a little more about the messy but happy kitchen where these ideas come from, you can always check out my About Me page! Happy snacking, friends!
Chocolate-Covered Strawberry Yogurt Bark
Ingredients
Equipment
Method
- Line a baking sheet or tray with parchment paper.
- Combine chopped strawberries, greek yogurt, and honey in a medium bowl.
- Use a spoon or small cookie scoop to place the mixture onto the prepared baking sheet, spacing the clusters evenly.
- Place the tray in the freezer for about 30 minutes to firm up the yogurt clusters.
- Melt the chocolate chips and coconut oil in a microwave-safe bowl using 30-second intervals until the mixture is smooth.
- Remove the tray from the freezer. Dip each frozen yogurt cluster into the melted chocolate using a fork or toothpick to coat it completely.
- Place the coated clusters back onto the parchment paper.
- If you wish, sprinkle crushed nuts, dried fruit, or coconut flakes on top of the chocolate-covered clusters.
- Return the tray to the freezer for another 15 to 20 minutes until the chocolate hardens.
- Transfer the set chocolate strawberry yogurt clusters to an airtight container and store them in the refrigerator.