
Oh, Halloween! It’s my absolute favorite time of year for getting a little spooky in the kitchen. Honestly, I just love how creative everyone gets with treats. And when it comes to fun, you really can’t beat these Spiderweb Crepes. They look SO cool, right? I remember the first time I made them for my nephew’s birthday bash right around Halloween his eyes just lit up! They’re elegant enough for a grown up party but totally whimsical enough for the kids. They really are a showstopper, and trust me, they taste way better than they look (which is saying something!).
Why You’ll Love These Spiderweb Crepes
Okay, so here’s why these are going to be your new go-to spooky treat:
- Seriously Easy: You’d think they’d be complicated, but nope! The crepe part is super simple, and the spiderweb? A total breeze.
- Halloween Magic: They just *look* amazing. That creepy-cool spiderweb design is guaranteed to wow your guests.
- Fill ‘Em Up!: Totally customizable! Load ’em with sweet or even savory fillings – the possibilities are endless.
- Fun for Everyone: Kids go nuts for decorating them, and grown-ups love eating them. They’re a guaranteed hit!
Gather Your Ingredients for Spiderweb Crepes
Alright, let’s get down to business! To whip up these eerie-yet-delicious Spiderweb Crepes, you’re going to need a few things. Don’t worry, most of them are probably already in your pantry. We’ll break it down into two parts: the crepes themselves and the spooky spiderweb topping.
For the Crepes:
- 1 cup all-purpose flour
- 2 large eggs
- 1 1/2 cups milk (whole milk gives the best flavor, but any kind works!)
- 2 tablespoons melted butter, plus a little extra for greasing the pan
- 1 tablespoon sugar
- 1/4 teaspoon salt
For the Spiderweb Decoration:
- 1/4 cup chocolate chips (these are important for a good flavor! I like using semi-sweet, but dark or milk chocolate works too)
- 1 tablespoon vegetable oil
Now, about that chocolate for the spiderweb – try to use a decent quality chocolate chip. It really makes a difference in both taste and how smoothly it melts. If you have some fancy baking chocolate, go for it! Once you have all your bits and bobs ready, we can move on to the fun part – making them!
Essential Equipment for Making Spiderweb Crepes
Okay, so before we dive into the actual making, let’s chat about what you’ll need. Having the right tools makes all the difference, trust me! You don’t need anything too fancy, just the basics. You’ll want a good old-fashioned whisk for getting your batter nice and smooth, and a sturdy bowl to mix everything in. A ladle is perfect for scooping out just the right amount of batter, and a non-stick skillet is your best friend for making sure those crepes don’t stick. And don’t forget a trusty spatula for flipping and a small squeeze bottle for our spooky spiderweb design!
Step-by-Step Guide to Perfect Spiderweb Crepes
Alright, time to put on our chef hats and get creative! Making these Spiderweb Crepes isn’t complicated at all, it’s just about following a few simple steps. Honestly, the hardest part is waiting for them to cool down before you gobble them up. You can totally make these ahead of guests too, just wrap them well. Let’s get started, and we’ll have these spooky-good crepes ready in no time! If you love spooky treats, you should also check out these Spider Deviled Eggs; they always disappear fast!
Preparing the Crepe Batter
First things first, grab your big bowl and whisk together the flour, sugar, and salt. Give it a good little mix. Now, in a separate bowl, crack your eggs and whisk them up with the milk. Pour this wet mixture into your dry ingredients, and whisk EVERYTHING until it’s nice and smooth. Seriously, whisk it till there are no more lumps – that’s the secret to silky crepes! Then, stir in that melted butter. Easy peasy!
Cooking the Crepes
Now for the fun part: cooking! Get your non-stick skillet over medium heat. You don’t need a lot of oil, just a tiny bit to get things started. Pour about a quarter cup of batter into the hot skillet, and then immediately swirl the pan. You want the batter to spread out really thin, coating the bottom evenly. Let it cook for about 2 minutes, or until the edges start to look a little golden and maybe even lift slightly. Carefully flip it over with your spatula – just another minute on the other side, and then slide that perfect crepe onto a plate. Repeat this dance with the rest of the batter, stacking them up as you go! If you’re making a Halloween spread, you might also like this Spiderweb Taco Dip.
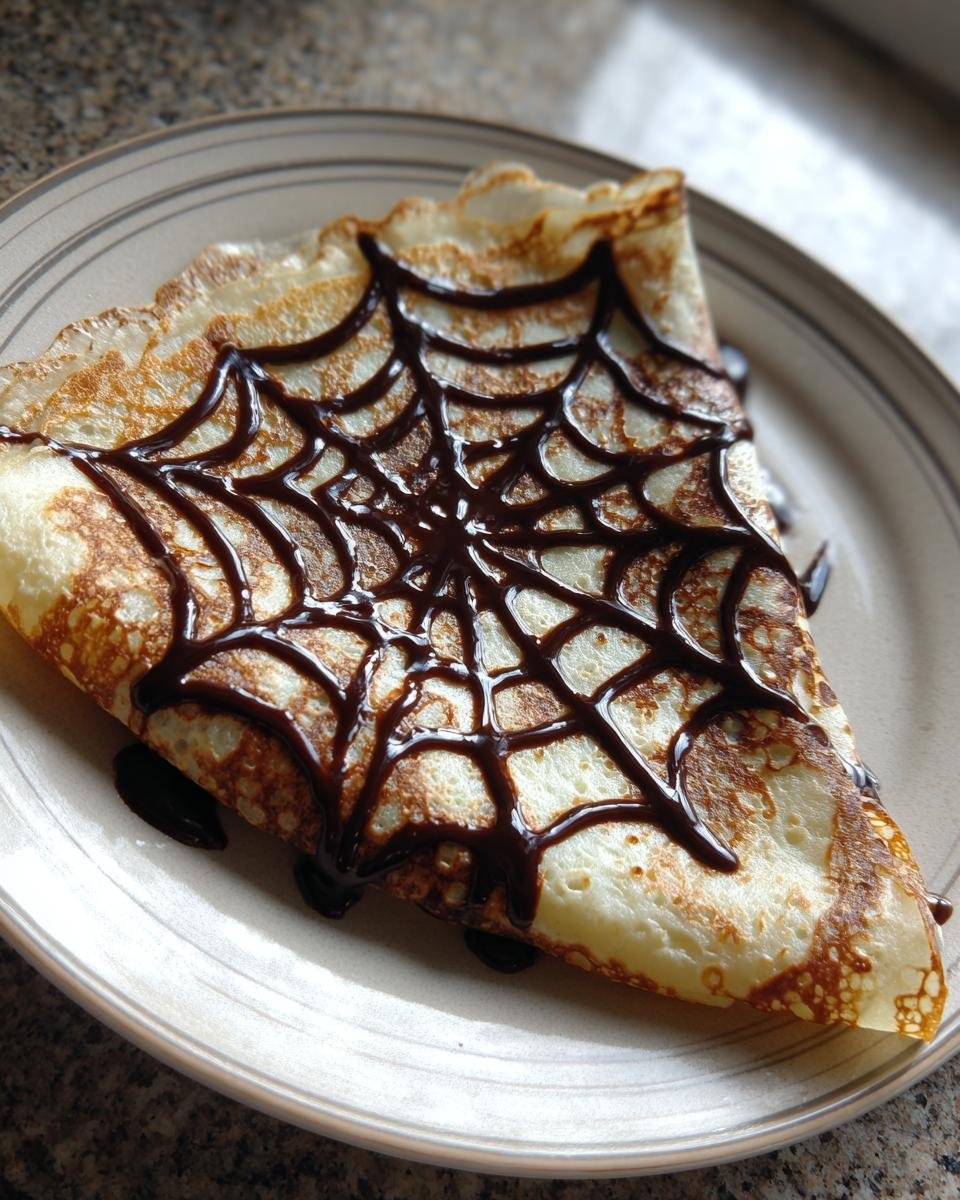
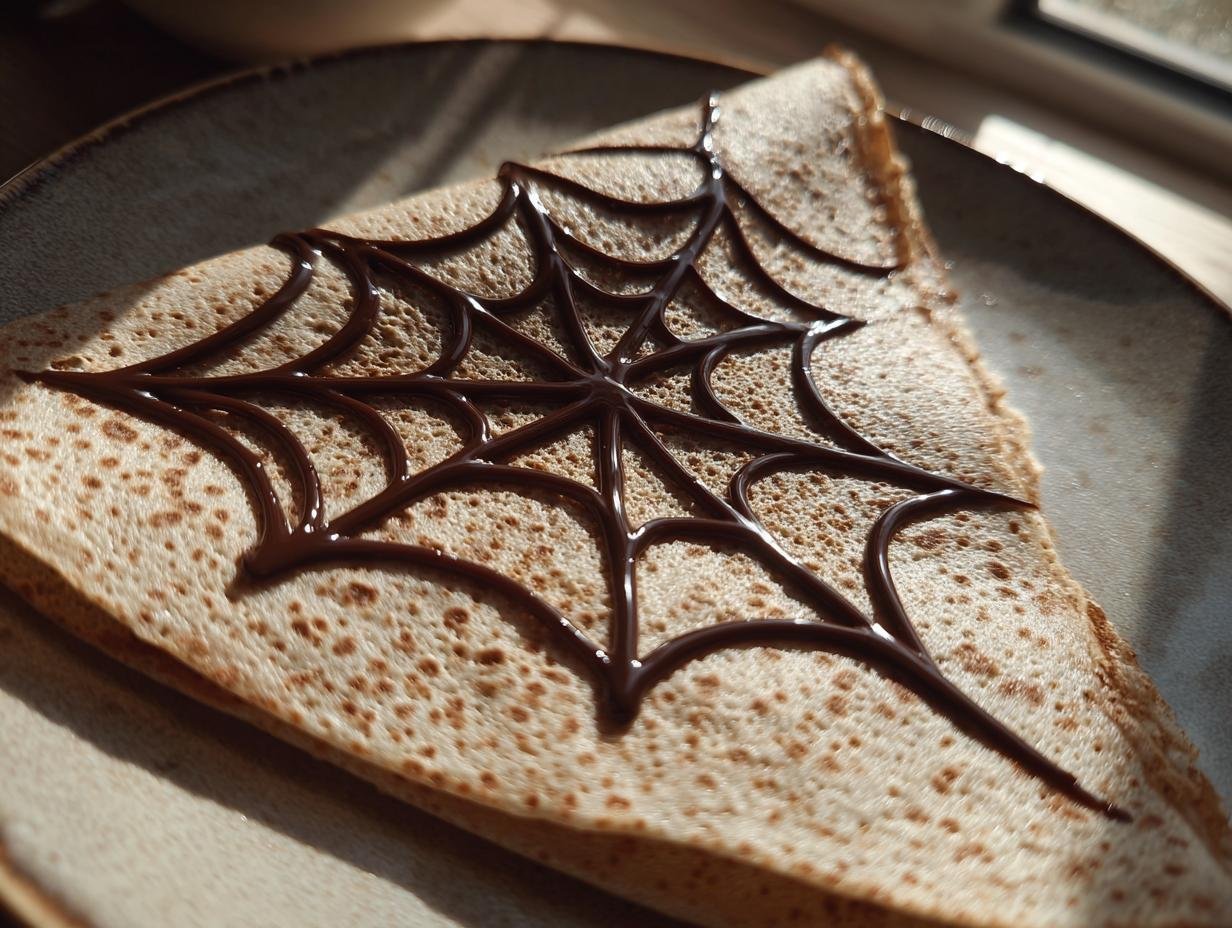
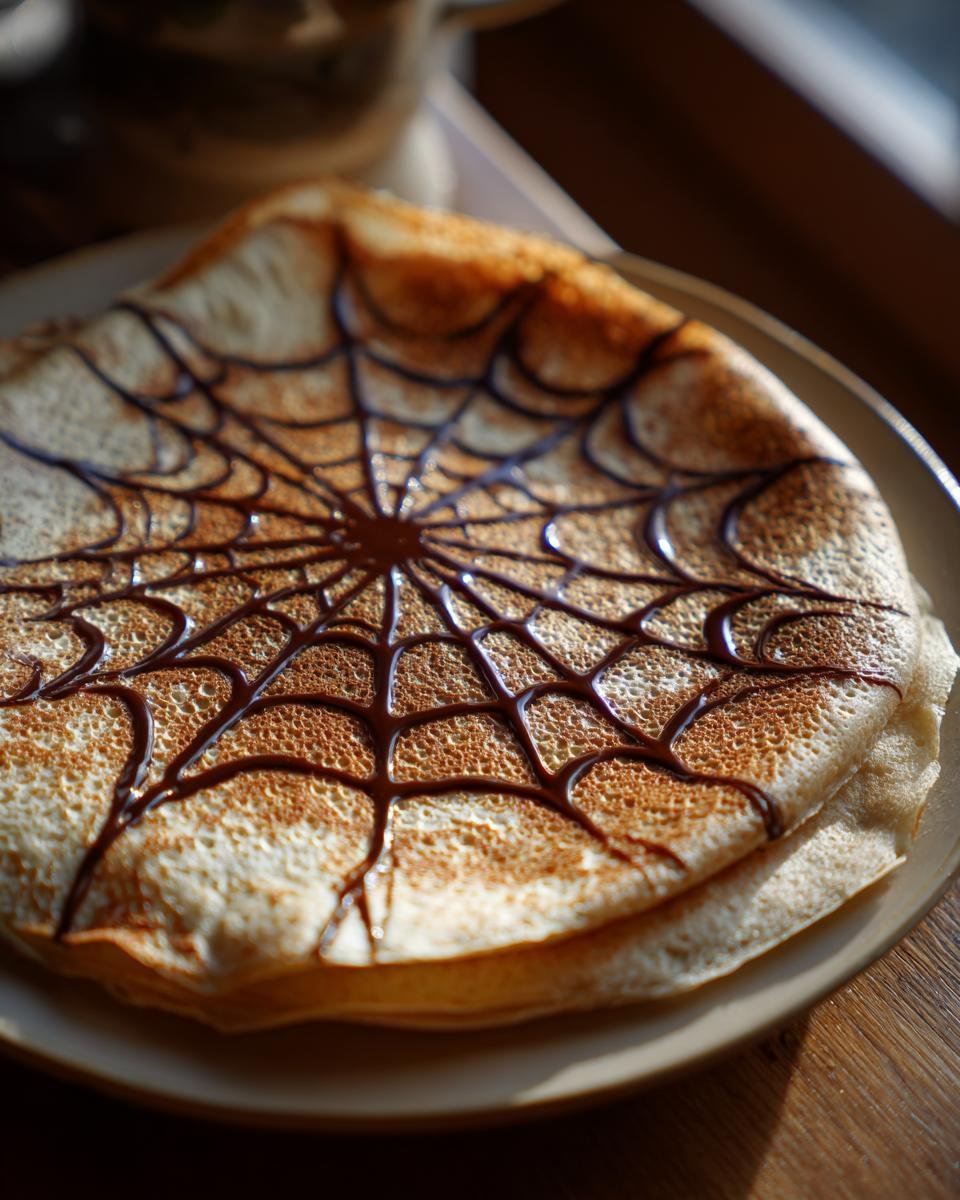
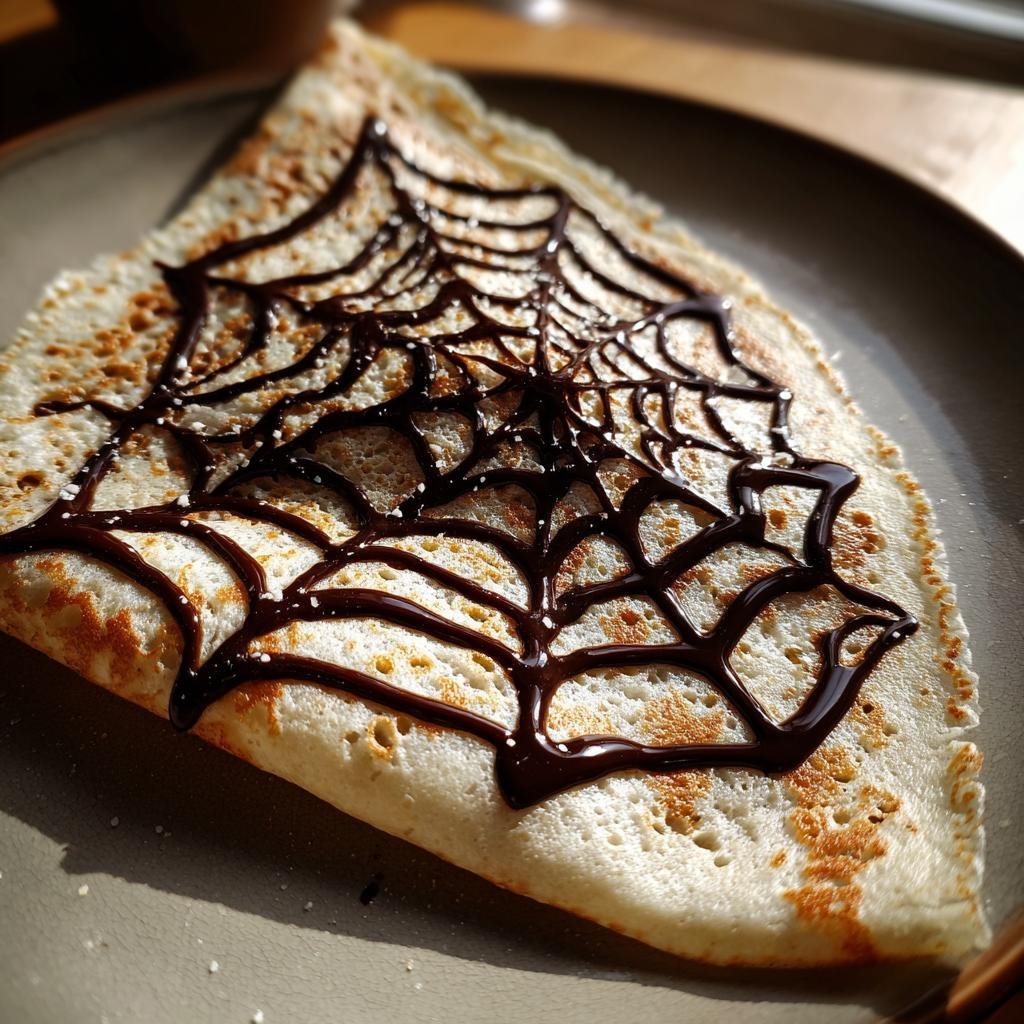
Creating the Spiderweb Design
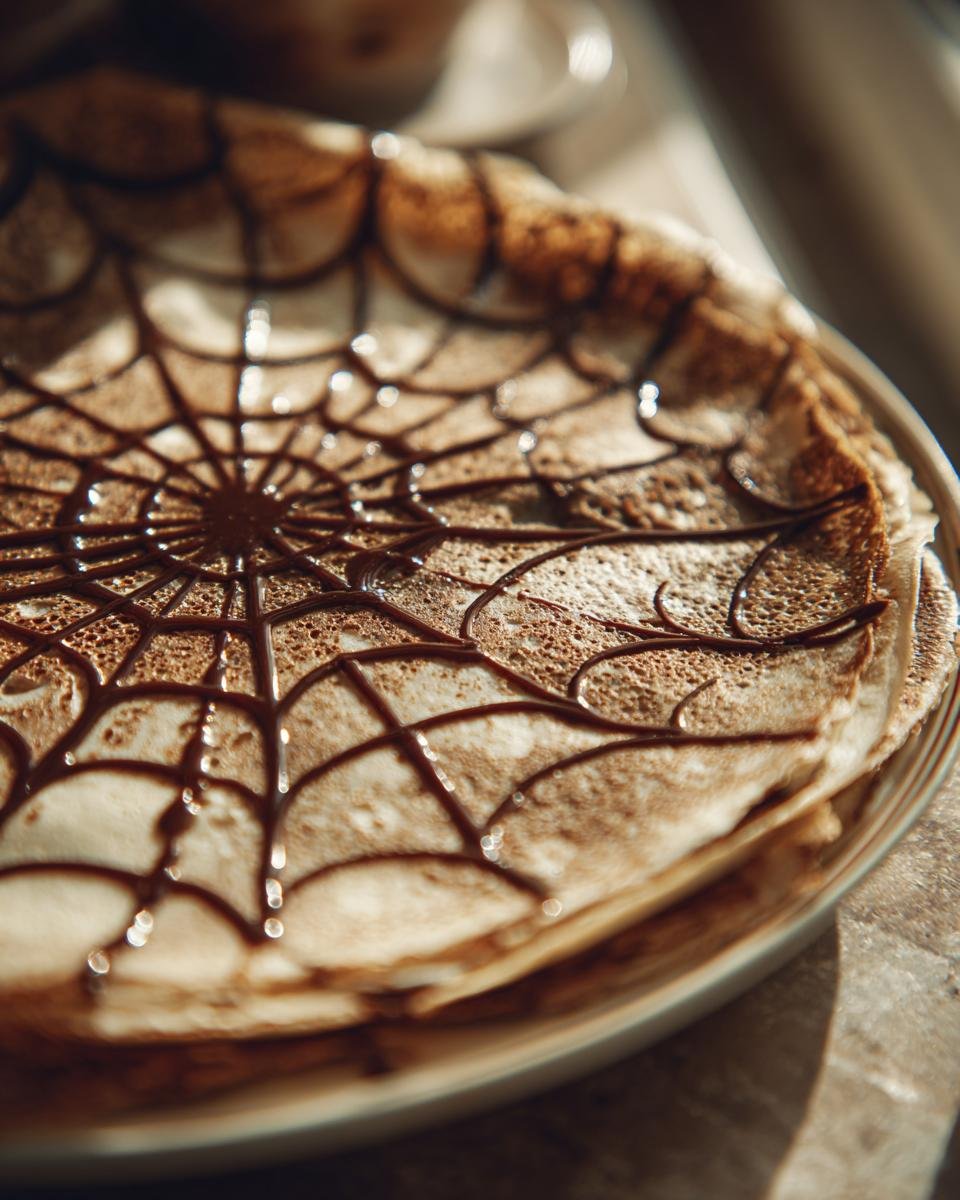
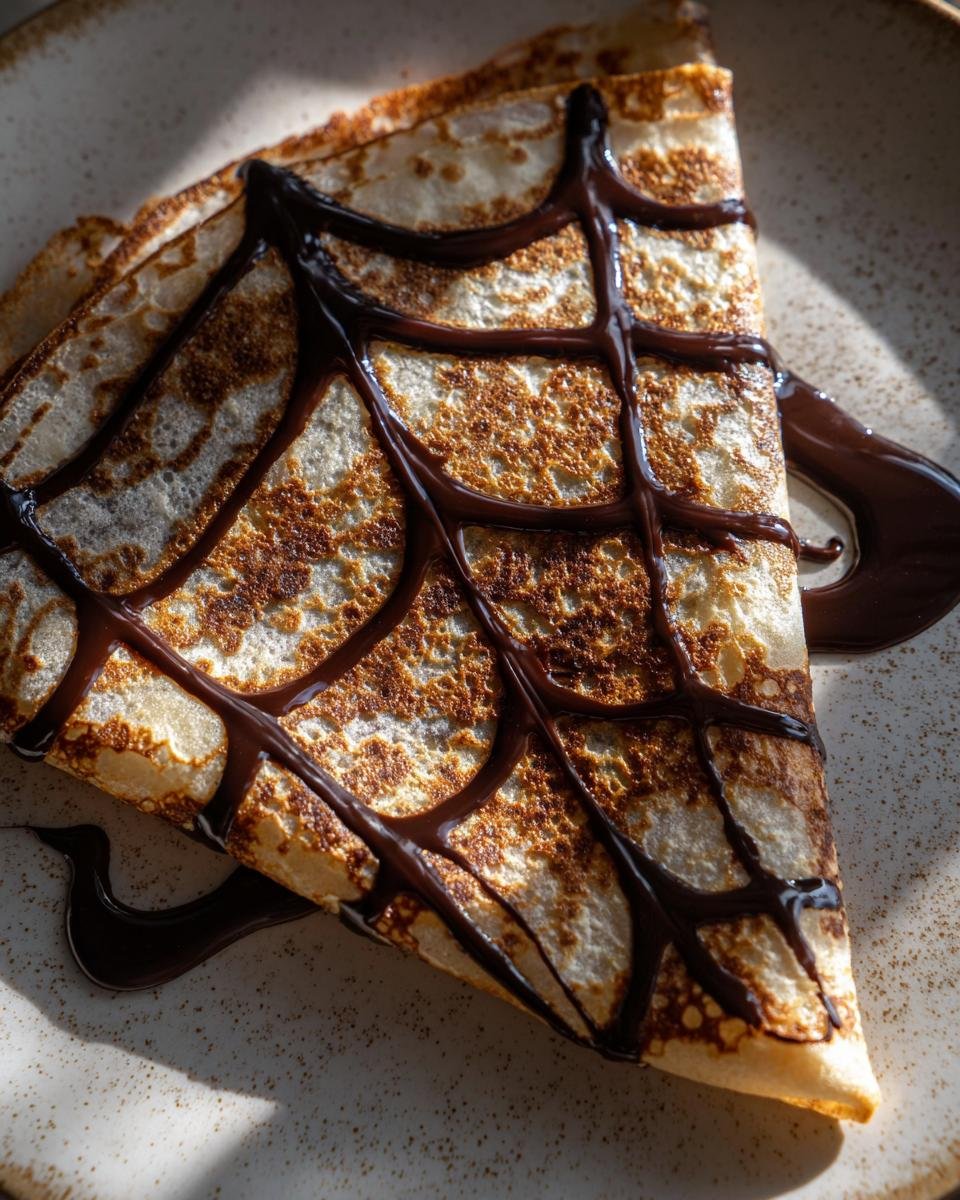
This is where the magic really happens! In a little bowl, toss your chocolate chips with the tablespoon of vegetable oil. Pop that in the microwave for about 30 seconds, stir, and then another 30 seconds, or until it’s all smooth and melty. Be careful, it’ll be hot! Spoon this luscious chocolate mixture into your squeeze bottle. Now, take a cooked crepe, and starting right in the middle, draw a spiral going outwards. It doesn’t have to be perfect! Then, grab a toothpick, and gently drag lines from the center of the crepe all the way to the edge, fanning outwards. Do this a few times, spacing your lines out, and ta-da! You’ve got a spooky spiderweb! It’s like art, but delicious.
Tips for Perfect Spiderweb Crepes Every Time
You know, even with the best recipe, sometimes things don’t go *exactly* to plan, right? Don’t stress! For these Spiderweb Crepes, sticking is usually the main culprit. Make sure your non-stick skillet is truly non-stick and that it’s nice and hot before you pour the batter. If they *do* start to stick, just add a tiny bit more butter or oil to the pan between crepes. Also, resist the urge to overmix the batter after you add the butter – just stir it in until it’s combined. And if you have time, letting the batter rest for about 15-30 minutes (or even overnight in the fridge!) helps the flour absorb the liquid better, making for even smoother crepes.
Creative Filling and Serving Ideas
Now that you’ve got these amazing Spiderweb Crepes, what do you do with them? Fill ’em up, of course! You can never go wrong with a classic dollop of whipped cream and some fresh berries. Or, if you’re feeling extra decadent, drizzle a little more chocolate sauce over the top – who doesn’t love more chocolate, right? For a fun twist, try mixing a little pumpkin spice into the whipped cream. You could even go savory with some cheese and spinach if you want something different! To really make them pop on your Halloween table, arrange them on a dark platter and maybe scatter a few Halloween smoothie bowls, spooky chocolate-dipped pretzel rods, or ghost popcorn cups around them. They’re so pretty, you almost don’t want to eat them – almost!
Frequently Asked Questions about Spiderweb Crepes
Got questions about these spooky little delights? I’ve got answers! Making these can be a breeze, but sometimes little things pop up. Let me help you out!
Can I make the crepe batter ahead of time?
You totally can! The batter is actually *better* if it rests. You can make it a few hours ahead, pop it in the fridge, and give it a good whisk before you start cooking. It helps the flour really absorb everything, giving you super smooth crepes. Just make sure it’s completely mixed again before you ladle it into the pan.
What can I use if I don’t have a squeeze bottle for the chocolate?
No squeeze bottle? No problem! You can still get that awesome spiderweb effect. Just use a fork! Melt your chocolate and oil as usual, then dip the tines of a fork into the chocolate. Let the excess drip off, then carefully freehand a spiral on your crepe. Then, just use the back of the fork or a toothpick to drag lines from the center out. It works just as beautifully!
How do I store leftover crepes?
If you happen to have any leftover plain crepes (which I doubt!), you can store them by placing parchment paper between each one and wrapping the stack tightly in plastic wrap or putting them in an airtight container. They’ll keep in the fridge for about 2-3 days. Just gently reheat them in a skillet or microwave before adding your spiderweb and fillings.
Can I freeze Spiderweb Crepes?
Honestly, I wouldn’t recommend freezing them *after* you’ve added the chocolate spiderweb. The chocolate can get a bit weird and might crack or seize up when thawing. However, you can totally freeze the plain crepes! Just stack them with parchment paper in between, wrap them super well, and pop them in the freezer. Thaw them overnight in the fridge, and then you can decorate them fresh before serving!
Nutritional Information
Here’s a little peek at the estimated nutrition for these spooky delights. Keep in mind that these numbers are just a general guideline, and they can totally change depending on exactly what you use for your fillings and how big you make your crepes. For more info on nutrition, you can check out my nutrition category.
Spiderweb Crepes
Ingredients
Equipment
Method
- In a large bowl, whisk together the flour, sugar, and salt.
- In a separate bowl, whisk the eggs and milk. Gradually add the wet ingredients to the dry ingredients, whisking until smooth.
- Stir in the melted butter.
- Heat a lightly oiled non-stick skillet over medium heat. Pour about 1/4 cup of batter into the skillet and swirl to coat the bottom evenly.
- Cook for about 2 minutes, or until the edges are golden brown. Flip and cook for another minute.
- Transfer the crepe to a plate. Repeat with the remaining batter.
- In a small bowl, combine the melted chocolate chips and vegetable oil. Place the mixture in a squeeze bottle.
- On each crepe, draw a spiral starting from the center and working your way out.
- Using a toothpick, drag lines from the center to the edge of the crepe to create the spiderweb effect.
- Fill with your favorite fillings and serve.