
You know, I’m always looking for those wow-factor appetizers that don’t require me to be slaving away in the kitchen when guests arrive. That’s exactly why I fell head over heels for the concept of butter boards! It sounds so simple, and honestly, it is, but the impact it has is just incredible. Seriously, the first time I saw one, I thought it was too pretty to eat! But trust me, the magic of The Art of Butter Boarding lies in its sheer versatility and how it turns a humble spread into a stunning centerpiece. It’s become my go-to for parties and even just a casual get-together with friends.
What is The Art of Butter Boarding?
So, what exactly is this butter board craze all about? Basically, it’s taking softened butter and spreading it onto a board as your base – think of it like a canvas! Then, you decorate it with all sorts of delicious toppings. It’s not a new concept in the sense of just serving butter with bread, but the modern butter board trend has elevated it into a visually stunning appetizer. People love it because it’s incredibly easy to put together, looks super fancy, and it’s a fantastic way to get everyone mingling and scooping up goodness. That’s The Art of Butter Boarding – making simple ingredients look like a million bucks!
Gathering Your Ingredients for The Art of Butter Boarding
Alright, let’s talk about what goes into making a butter board that people will rave about! The beauty of The Art of Butter Boarding is that you can really play around, but starting with the right base and some stellar toppings is key. Seriously, the quality of your butter makes a difference here – grab the good stuff if you can! Think of it as the foundation for your edible masterpiece.
For the Butter Base
You’ll need about a cup of unsalted butter, and here’s the absolute must-do: make sure it’s properly softened! You want it spreadable but not melty. And for a little something extra, a teaspoon of honey drizzled over the top before you add your other goodies is totally optional but oh-so-good.
Creative Topping Ideas
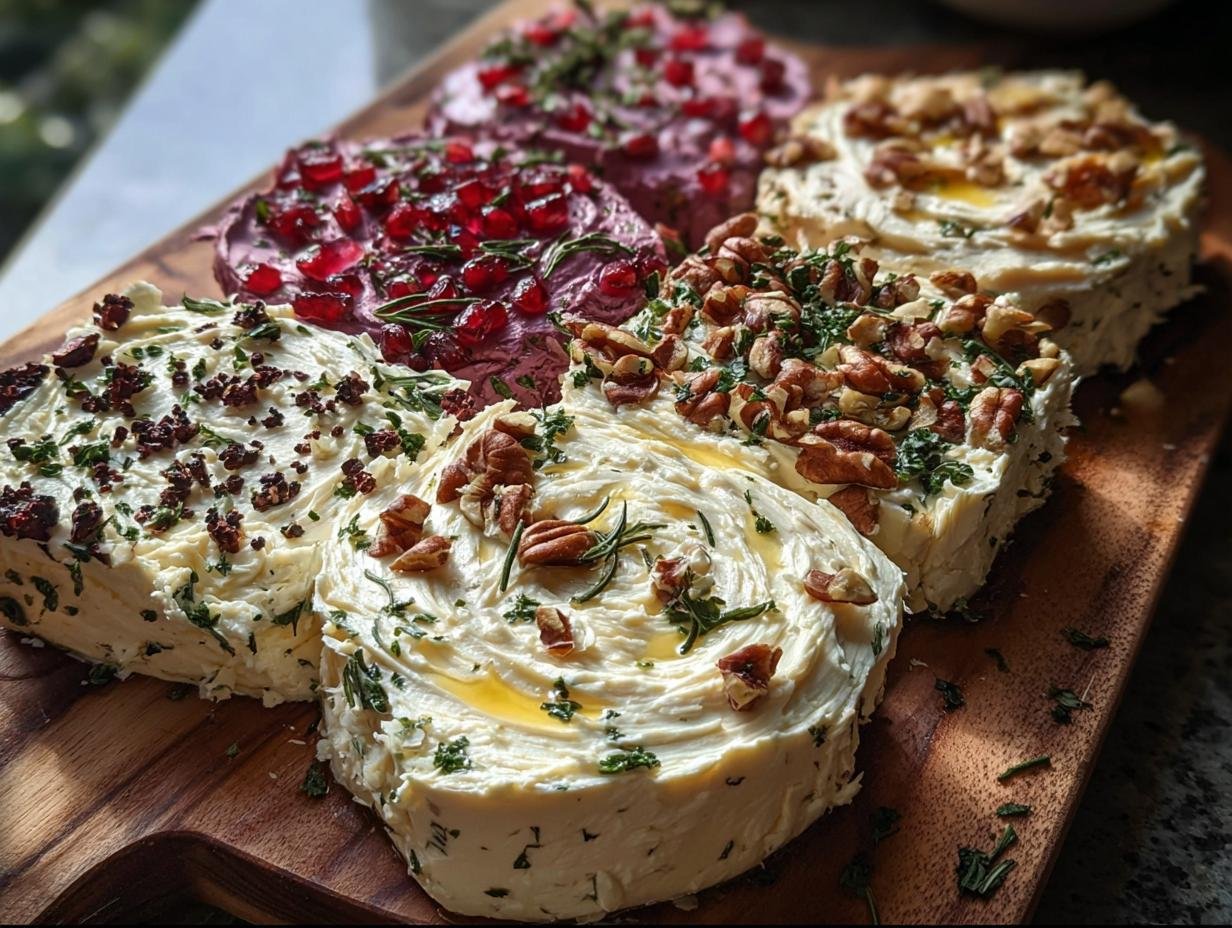
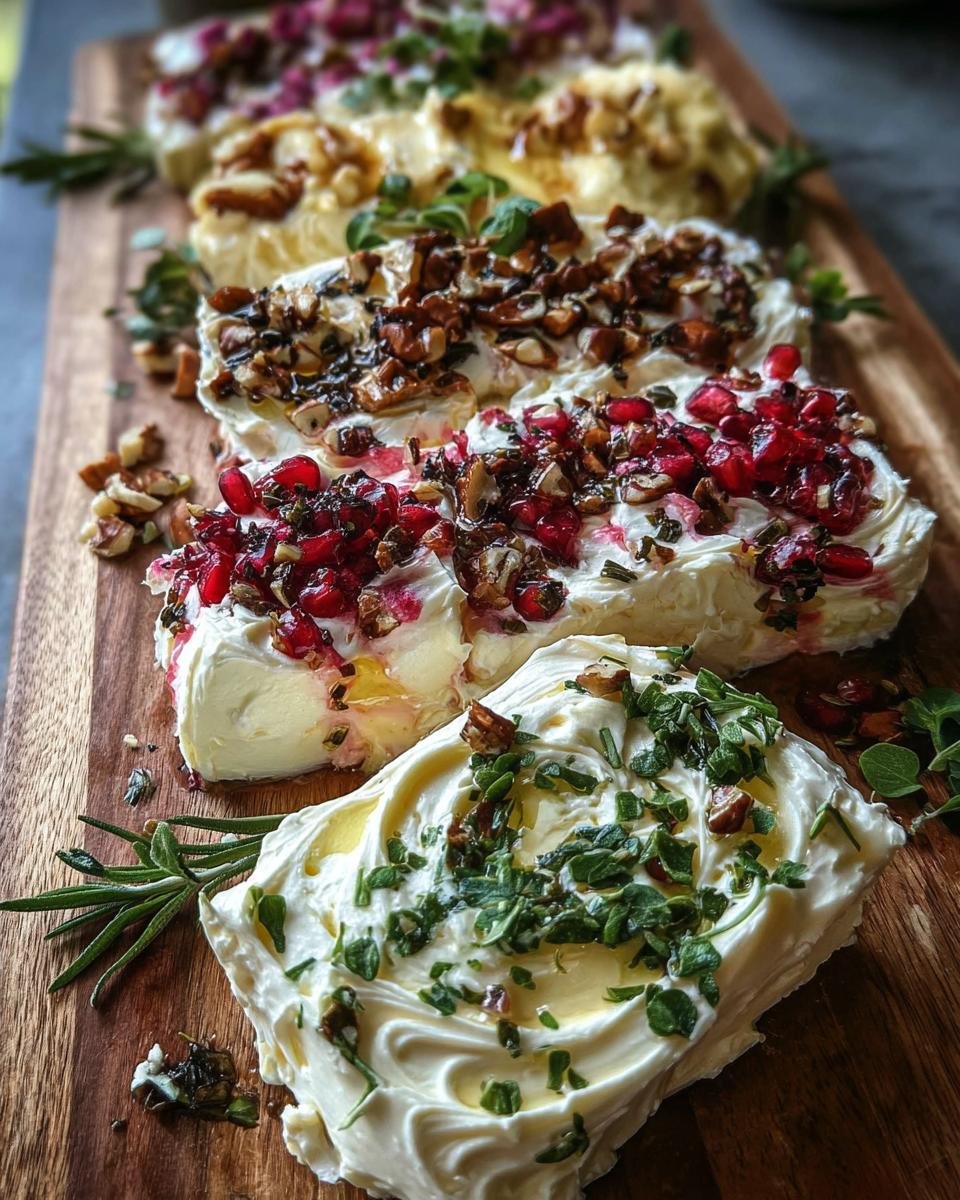
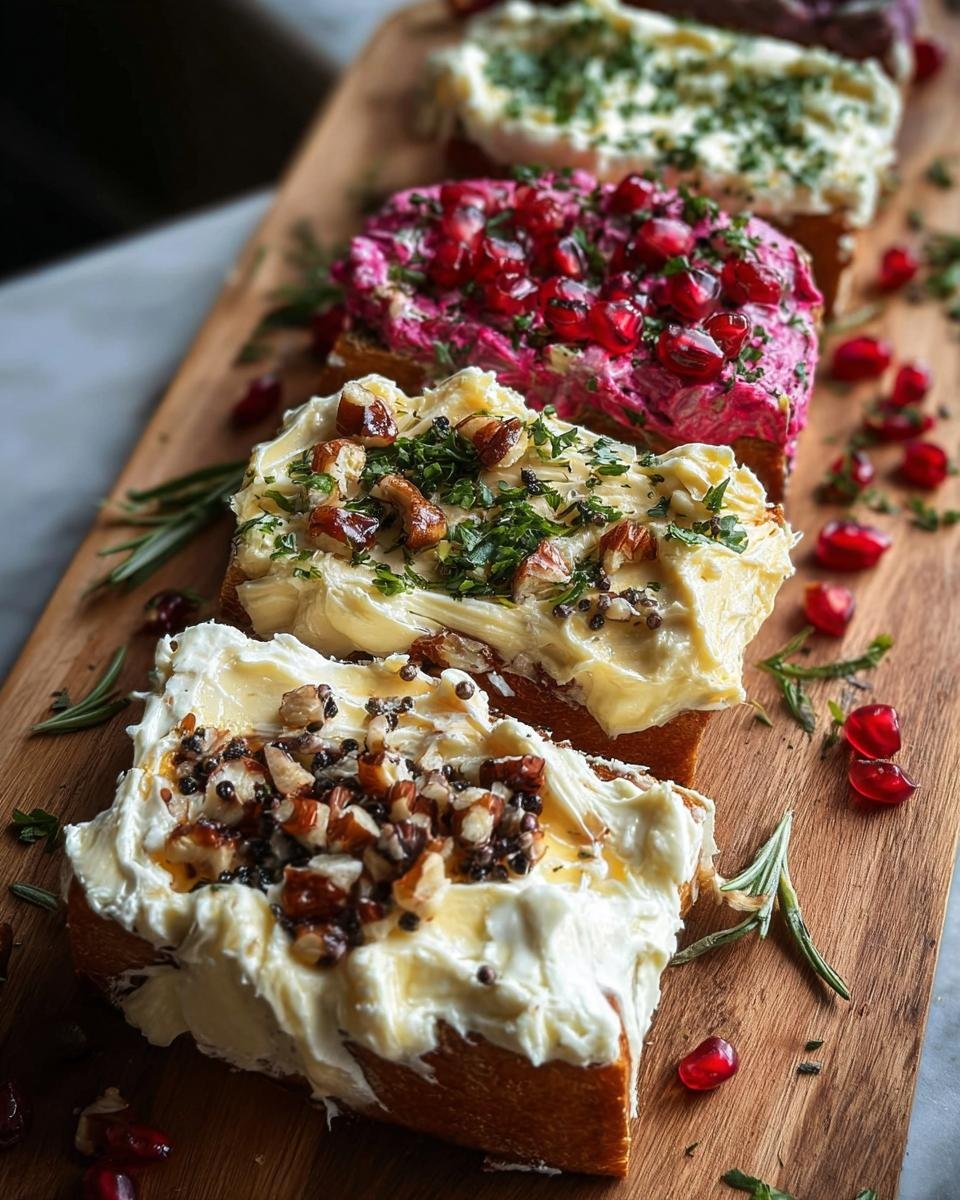
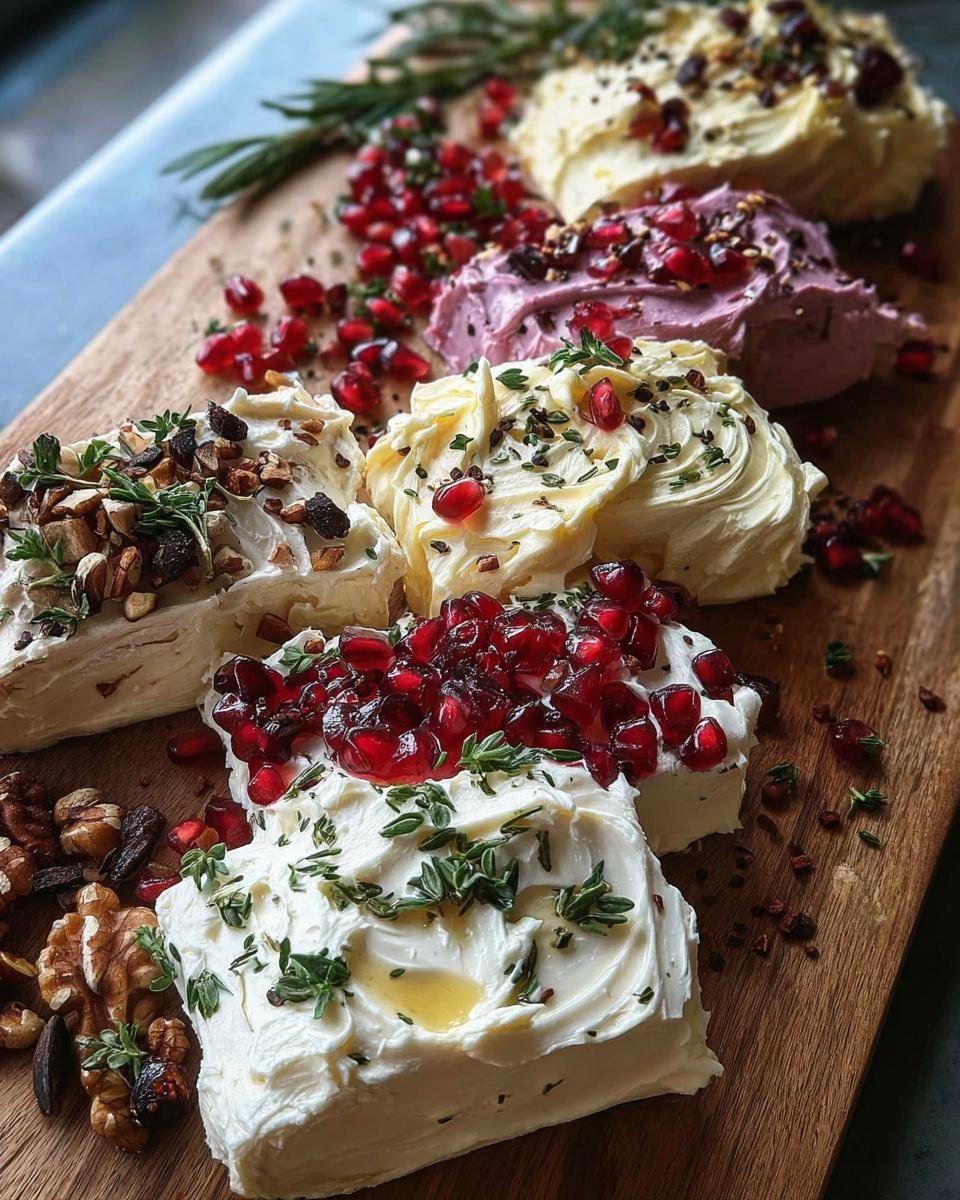
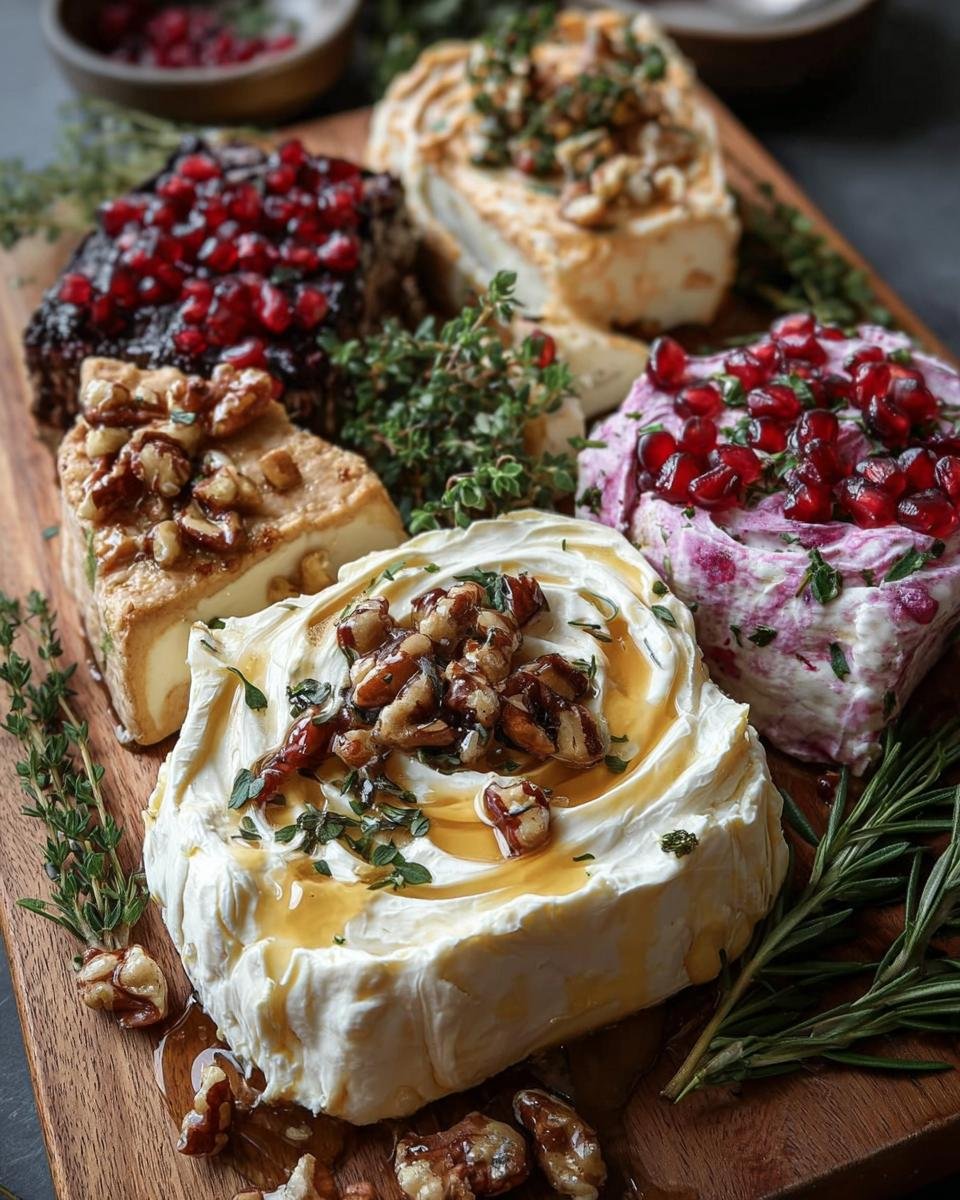
This is where the fun really happens! For your fresh herbs, think chives, parsley, or even a bit of rosemary, all finely chopped – you’ll need about 2 tablespoons. A sprinkle of flaky sea salt and some cracked black pepper is a must for that savory punch. Then get adventurous! I love adding about a quarter cup of toasted nuts, like almonds or walnuts, for crunch. A couple of tablespoons of dried fruit, like cranberries or chopped apricots, add a lovely chewy-sweet contrast. And if you’re feeling it, a little bit of minced garlic sprinkled over the top can be amazing!
Essential Equipment for The Art of Butter Boarding
To really ace The Art of Butter Boarding, you don’t need much, which is part of its charm! You’ll definitely want a nice, large, flat serving board or platter – wood, marble, slate, whatever you have! Then, you’ll need a butter knife or an offset spatula for spreading; it makes getting that pretty swirl so much easier. Small bowls for your toppings are handy too, so everything is ready to go.
Step-by-Step Guide to The Art of Butter Boarding
Okay, friends, let’s get down to business and make this beautiful butter board! It’s seriously so easy, I promise. Mastering The Art of Butter Boarding is all about a few simple steps that come together super fast. Just follow along, and you’ll have a showstopper appetizer in no time.
-
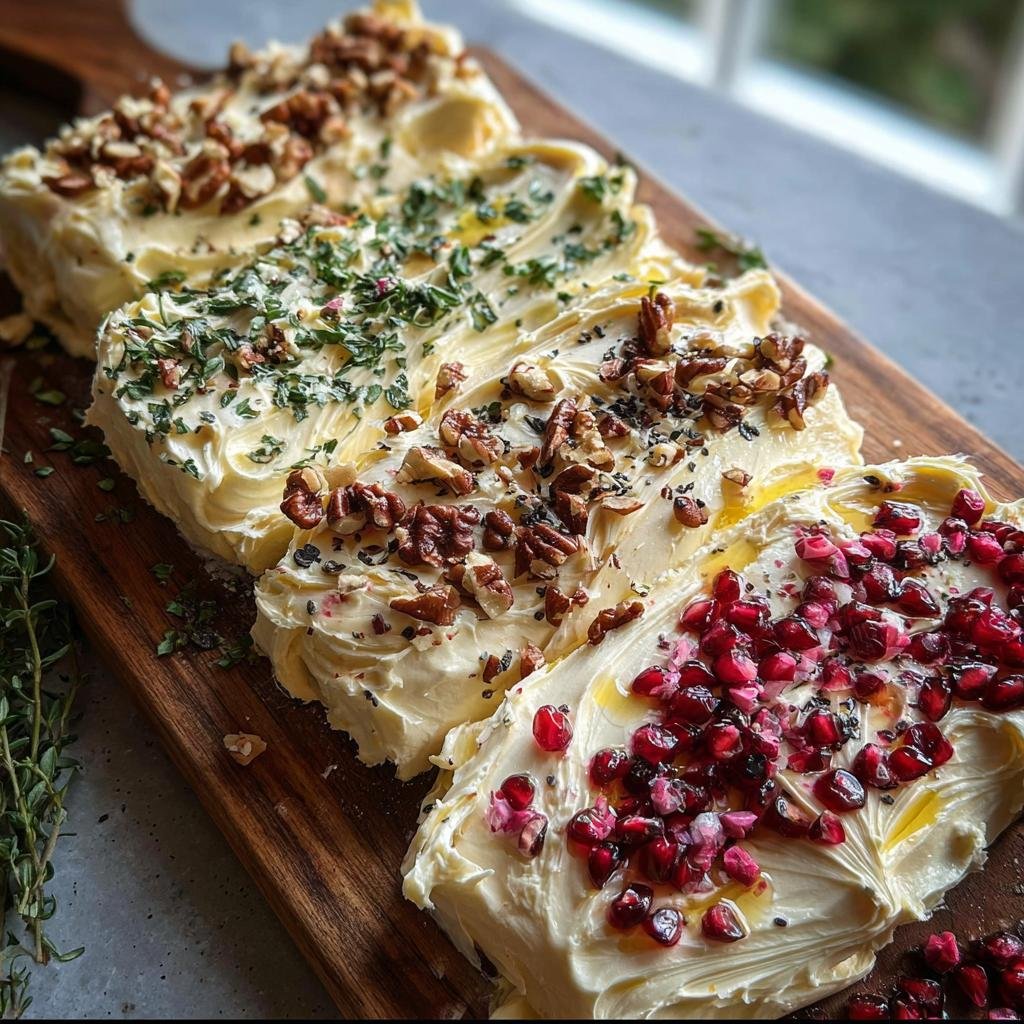
First things first, grab your softened butter and your favorite serving board or platter. Using a butter knife or an offset spatula, spread that lovely butter all over the board. Don’t be shy! Swirl it around to create little peaks and valleys – it looks so much prettier and gives people different spots to scoop from.
-
If you’re using honey, this is where it goes! Just a gentle drizzle over the butter. It adds a touch of sweetness that plays really nicely with the salt and other toppings.
This grilled chicken marinade recipe uses honey too, if you love that sweet element!
-
Now for the best part – the toppings! Sprinkle your fresh herbs, flaky sea salt, and cracked black pepper all over the butter. Then, artfully arrange your nuts, dried fruit, and minced garlic (if you’re using it). Try to distribute them evenly so every bite gets a little bit of everything.
-
This next step is a little secret for the perfect consistency. Pop the whole board into the fridge for just about 5 minutes. This lets the butter firm up just a tiny bit, making it easier to scoop without it all sliding off, but it’s still perfectly spreadable.
-
And that’s it! Serve your gorgeous creation straight away with some crusty bread, your favorite crackers, or even some crunchy veggie sticks for dipping. Enjoy watching your guests dig in!
Tips for Mastering The Art of Butter Boarding
You know, after making a few of these, I’ve picked up a couple of little tricks for making The Art of Butter Boarding truly shine. It’s all about those little details that make a big difference. First off, butter temperature is key – you want it soft enough to spread easily, but not so warm that it just melts into a puddle. Leaving it on the counter for about an hour usually does the trick for me, depending on how warm your kitchen is. Don’t be afraid to get creative with your toppings! Think about contrasts: something crunchy like nuts with something chewy like dried fruit, or savory herbs with a hint of sweetness. I actually love pairing this with a side of something fresh, like this Korean spinach dish or even some zesty spicy peanut cucumbers for a balanced spread.
Serving and Enjoying Your Butter Board
Alright, the masterpiece is ready! Now for the best part: serving it up. Make sure you have plenty of something dippable on hand – think crusty baguette slices, toasty crackers, or even some crunchy crudités like carrot sticks or cucumber slices. Let your guests know they can grab a knife and spread the buttery goodness themselves. It’s meant to be interactive and fun!
Variations and Customization for The Art of Butter Boarding
One of the things I absolutely adore about The Art of Butter Boarding is how endlessly customizable it is! Forget sticking to one set of toppings; this is your chance to really let your personality shine. Want something sweet and warming? Try drizzling some honey-curry roasted cauliflower pieces over the top – so good! Or maybe a sweet and tangy vibe, like my peach salad with honey-lime dressing, could inspire a fruity topping. For a savory kick, think pesto, sun-dried tomatoes, or even some Calabrian chili paste for a little heat!
Frequently Asked Questions About Butter Boards
Got questions about whipping up your own butter board masterpiece? You’re in the right place! Making these is a total breeze, and most of your initial curiosities are probably super simple to answer!
Can I make a butter board ahead of time?
You can absolutely prep your butter board a little ahead of time! Just spread the butter and add your toppings, then cover it tightly with plastic wrap. Pop it in the fridge, but take it out about 30 minutes before serving so the butter softens up again. Don’t let the toppings get too soggy, though!
What kind of butter is best for a butter board?
Seriously, just grab good quality unsalted butter. You want it softened, of course, so it’s spreadable. The better the butter, the more delicious your base will be. Avoid anything that’s too salty, as you’ll be adding salt as a topping anyway – trust me on this!
How do I store leftover butter board?
If you happen to have any leftovers (which is rare!), just scrape any loose toppings off. Cover the remaining butter tightly with plastic wrap or pop it into an airtight container and keep it in the fridge. It’s usually best used within a couple of days. If the toppings have gotten a bit messy, you can always just scrape off the plain butter and add fresh toppings later!
Nutritional Information Disclaimer
Just a heads-up, while we love sharing our recipes, the nutritional information provided here is just an estimate. It can vary quite a bit depending on the exact ingredients you use, like the specific type of butter or brand of crackers, and how big a portion you end up scooping onto your plate. So, think of it as a general guide rather than a hard-and-fast rule!
The Art of Butter Boarding
Ingredients
Equipment
Method
- Spread the softened butter evenly onto your serving board or platter using a butter knife or offset spatula. Create swirls or patterns for visual appeal.
- If using honey, drizzle it over the butter.
- Sprinkle your chosen toppings over the butter. Arrange them artfully, combining different textures and flavors.
- Chill the butter board in the refrigerator for about 5 minutes to allow the butter to firm up slightly, making it easier to serve.
- Serve the butter board with crackers, bread, or vegetable sticks for dipping.